-
Notifications
You must be signed in to change notification settings - Fork 27
Display Issue Fix
It's a known issue with the pcDuino that some DVI displays have difficulty with the board. So far, this problem manifests itself as either no image at all (sometimes without displaying a "no signal" message) or as a reasonable image which has color issues.
We will work with the manufacturer to ensure that future shipments don't have this problem; however, in the meantime, there is a simple fix.
Download these files to the root directory of a USB flash drive or microSD card:
If you can see the image on your display, follow these instructions:
- Insert the USB drive or microSD card into the pcDuino.
- Launch LXTerminal from the link on the pcDuino desktop.
- Enter the following commands:
$ cd /media/*
$ sudo bash ./update_for_dvi
The patch will be applied automatically; it takes a few seconds. You should get a message stating that the pcDuino will restart in 10 seconds; after the restart, the problem should be solved.
If you cannot see the image on your display, the process is slightly more complicated. You'll need some kind of USB logic level serial port bridge device, such as an FTDI cable, or an FTDI Basic. In a pinch, an Arduino-compatible board can serve this role as well, so long as the code uploaded to the Arduino doesn't use the serial port to send any data.
You'll be using the serial debugging port to connect to the pcDuino. See the image below for the location and pinout.
If you're using an Arduino-compatible board, upload a sketch which is does nothing but set pins 0 and 1 to inputs, so there's no other traffic on the serial pins.
Here are some pictures showing how to connect the various adapters (FTDI cable, FTDI Basic, and Arduino-compatible):


Once you've connected your serial adapter to the pcDuino, open up a serial terminal to the appropriate port for the adapter. You'll want to set it up as 115200-8-N-1, no handshaking.
Now go ahead and connect the power to the pcDuino. You should see the light next to the reset button (between the HDMI and Ethernet ports) come on, and text should start scrolling by in the console. If that doesn't happen, you may need to check the connection between your pcDuino and the serial bridge to make sure the wires are in right. Remember to cross the TX and RX lines, so RX on the pcDuino goes to the TX pin on the serial bridge!

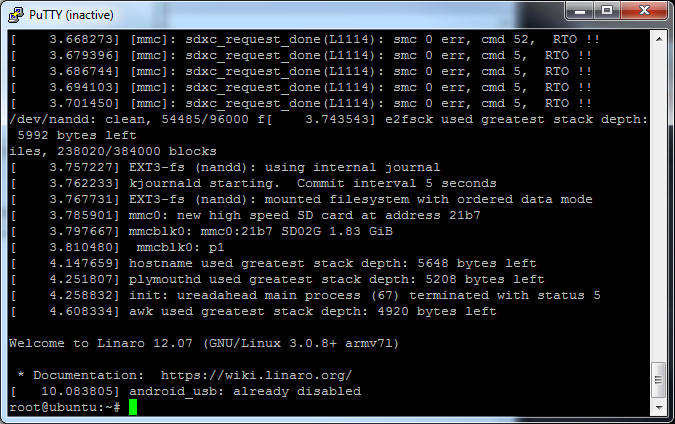
This is what you'll see when the boot process is completed. Now, follow these steps:
- Insert the USB drive or microSD card into the pcDuino.
- Enter the following commands in the terminal window:
$ cd /media/*
$ sudo bash ./update_for_dvi
The patch will be applied automatically; it takes a few seconds. You should get a message stating that the pcDuino will restart in 10 seconds; after the restart, the problem should be solved.
::Added by Mitch:: If the cd /media/* command does not work, try browsing up and down the file directory. "ls" displays the current list of folders/files in a directory, and "cd .." will bring you down a directory, while cd /foldername will bring you up to that directory. Note, it is case sensitive. I had to go to root/media/PENDRIVE to find my files on my USB.
If you have any questions or problems, please contact SparkFun technical support!