Amateur astronomers want to know where their telescope is pointing at. For this reason, many commercial telescopes come equipped with "push to" or "go to" features, often based on high precision optical rotary encoders attached to the telescope mount, and a hand control device with a database of coordinates of thousands of stars and other sky objects.
There are also commercial Digital Setting Circles, which are kits sold for telescope owners to adapt to their existing telescope, in order to give it "push to" features. Commercial DSCs are very accurate, mostly based on optical encoders, and usually cost a few hundred dollars.
This project is an implementation of a simple Digital Setting Circles that achieves the following:
- Easy and inexpensive to build, for a DIY maker or Arduino enthusiast.
- Can be attached to almost any telescope mount, including travel tripods, tabletops and other designs that can't house optical rotary encoders.
- Instead of a wired handheld control, it communicates with the Skysafary 5 (plus or pro) app (iOS or Android) via WiFi.
- Can be powered with a simple 5V USB powerbank.
In order to achieve the above, the following sacrifices had to be made:
- Very Low Accuracy, because of the use of accelerometer and magnetometer sensors instead of optical encoders, the high resolution of optical encoders is lost, along with their high precision and repeatability.
- Because of the above, it's best used with a low magnification eyepiece that provides a True Field Of View of at least 1º.
- It's more of an aiding device for exploring the sky via star hopping, than a "push to" feature to zero in on difficult sky objects.
- Star alignment with SkySafari is critical, so some basic knowledge of a sky object to align with is necessary (moon, Orion's belt, Sirius, etc).
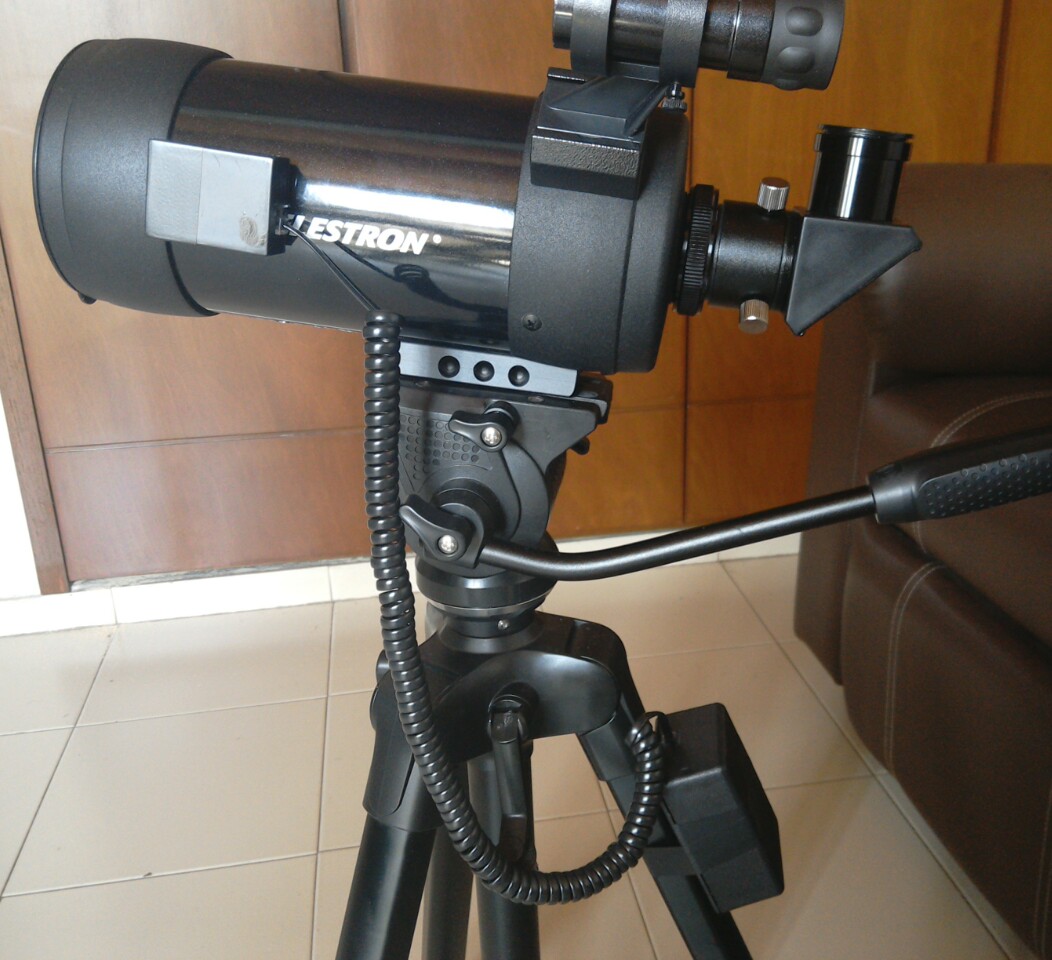
This is what the device looks like when attached to a lightweight 90mm telescope:
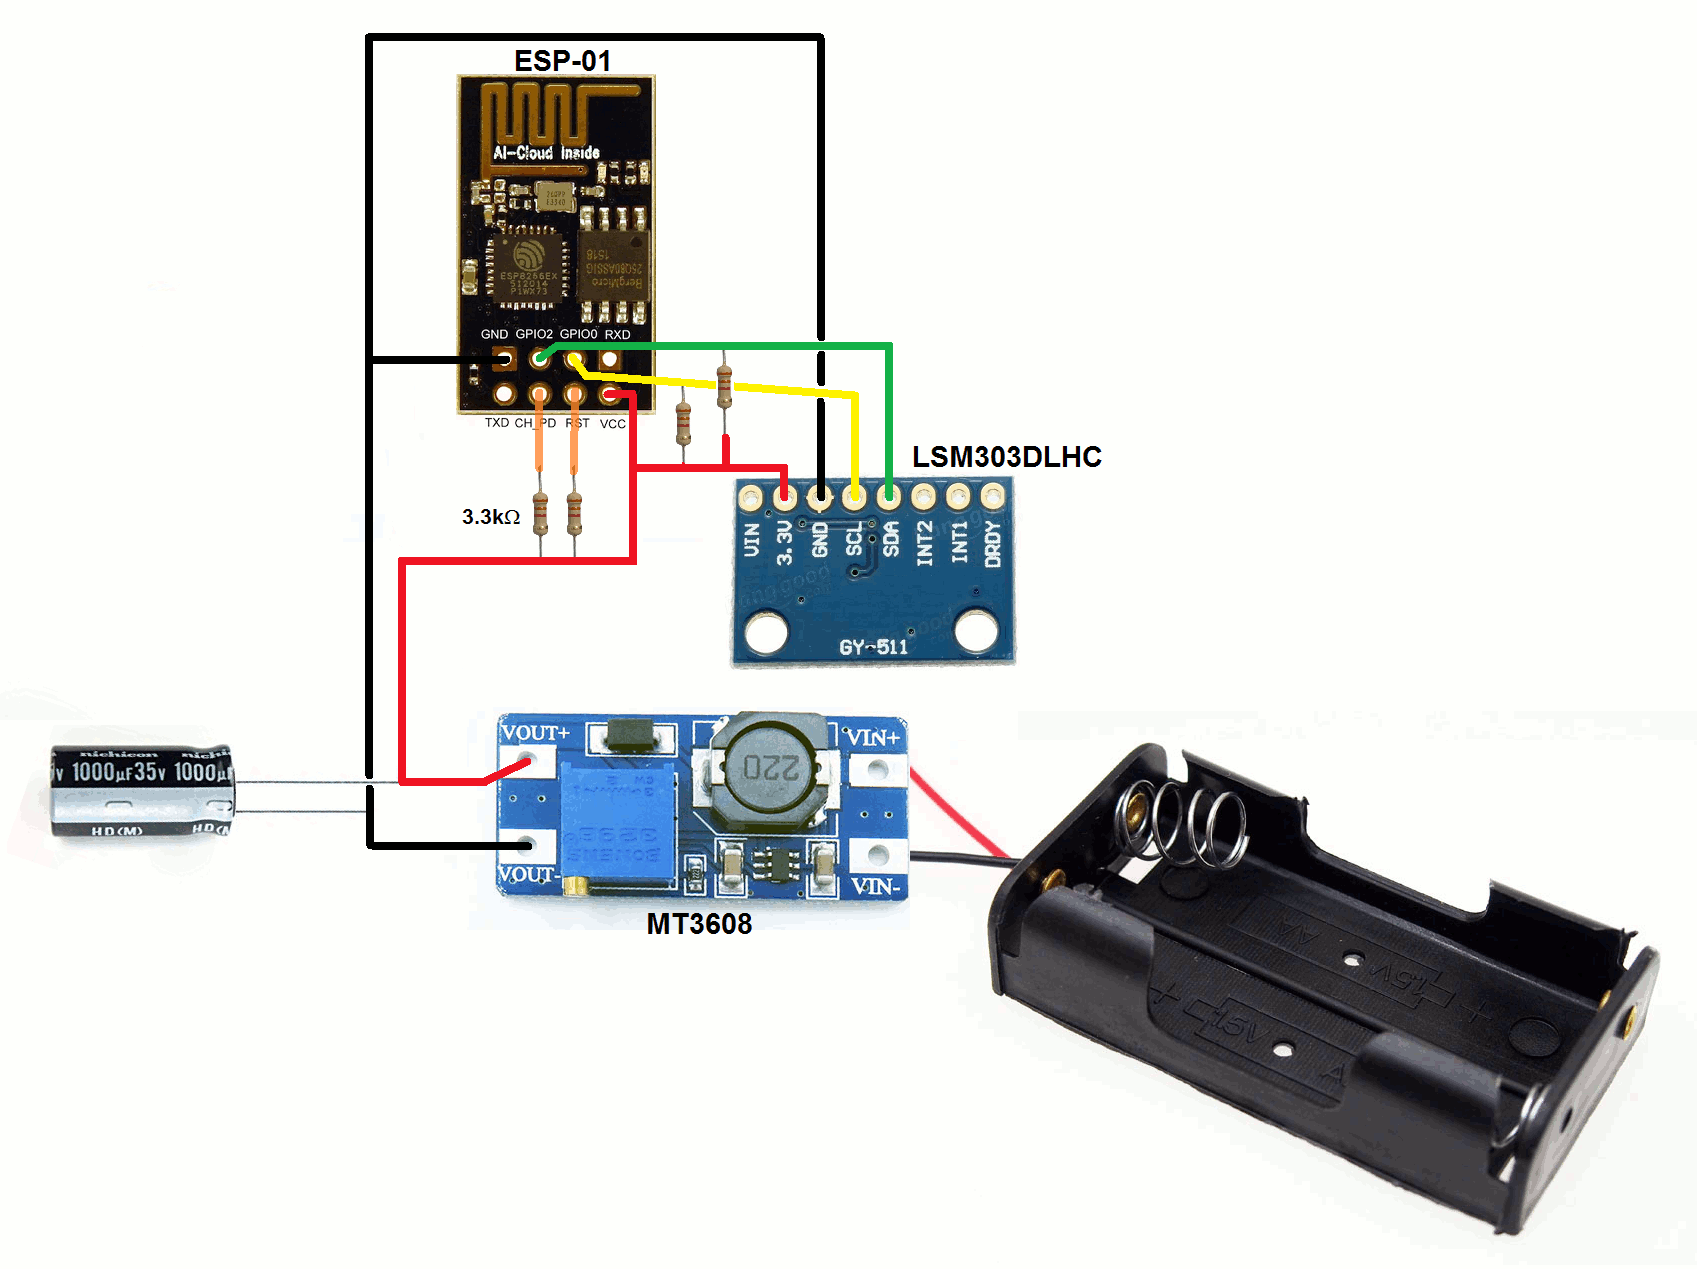
The Circuit is very simple, and looks like this:
These are the components to build it:
- Microcontroller: ESP8266 development board (a.k.a. "NodeMCU", or "12E" like the HiLetgo version), or ESP-01 for the final "miniaturized" build.
- Accelerometer+Magnetometer: LSM303DLHC sensor module, like this one.
- Two resistors, to pull-up the I2C bus, tested with 3.3k Ohm.
- USB Power bank for the NodeMCU version, or a voltage buck/boost + AAA batteries + 1000uF capacitor for the ESP-01).
- Electronic dupont cables, or UTP/Phone cables, long enough to connect the microcontroller to the sensor.
- Arduino programming environment (PC or Mac, Arduino IDE, data micro USB cable, etc).
- Android or iOS Tablet with the SkySafari 5 Plus or Pro app installed.
The sensor should be attached sideways (Z axis horizontal) to the telescope optical tube, so that its X and Y readings change with telescope movement, but Z reading remans at or near to zero. It should be aligned so that the Y axis points upwards when the telescope is aimed at Zenith.
Wiring is simple:
 SDA = GPIO2 = PIN_D4   (use 3.3K pullup to VCC)
 SCL = GPIO0 = PIN_D3   (use 3.3K pullup to VCC)
 SDA, SCL and GND: matching the ESP8266
 VCC = 3V3 pin on the ESP8266
 MT3608 voltage booster, to raise 2xAA (or 2xAAA) battery voltage to 3.3V
 1000 uF capacitor to deal with the power consumption spikes of the ESP-01
 Optional: 0.1 uF capacitor between VCC and GND pins of the ESP-01
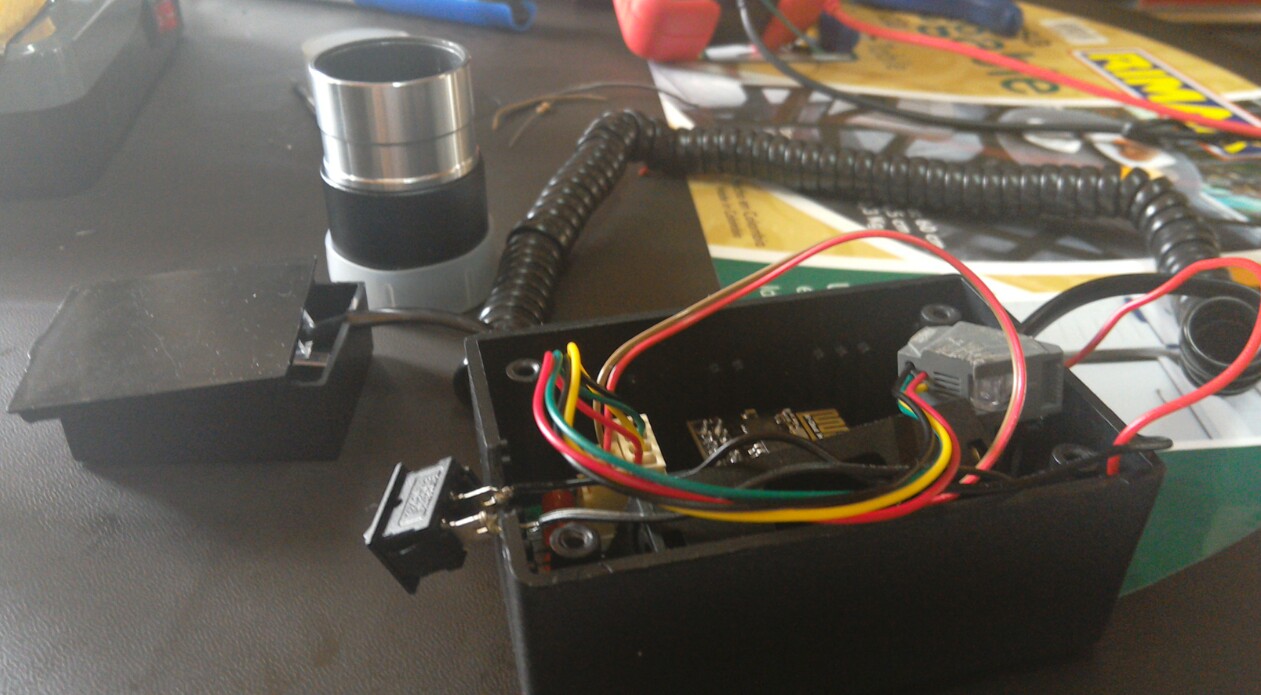
Please notice in the pictures, that the microcontroller (ESP-01) and the batteries are inside one small box, and the sensor (LSM303) is on a separate tiny box. This is required, because the electromagnetic fields from the batteries and from the WiFi antenna would produce too much interference in the magnetometer if they were in the same box.
I connected both boxes using RJ9 terminals and black coiled phone cable, just because it looks good (like the hand controller typical of commercial GoTo telescopes). You can use UTP cable, or dupont rainbow cable just the same.
The ESP-01 is power hungry (I measured 147mA @3.3V), this makes battery life to be rather short on 2xAAA batteries (some 4 to 6 hours) mainly because alkaline 2xAAA will be unable to keep providing that current halfway before they are truly, completely discharged. My advise is to use rechargeable batteries for their flatter discharge curve, and also AA size if possible.


