Exporting Objects from Sketchup
SketchUp's 3D Warehouse has over 4 million 3d models. The models are really great, usually to the correct scale, and not too high poly. You can export the models from SketchUp and import them into Shot Generator. If you don't want to model new assets, it's a great way to find and import objects.
Please Note: This is not a super simple process. STILL, it's not super hard. It's just a little work! And after you do it once, it's really easy.
https://www.youtube.com/watch?v=unF94Vyxc70
- Download SketchUp Make 2017 and Download the GLTF Exporter
- Install SketchUp and install the GLTF Plugin
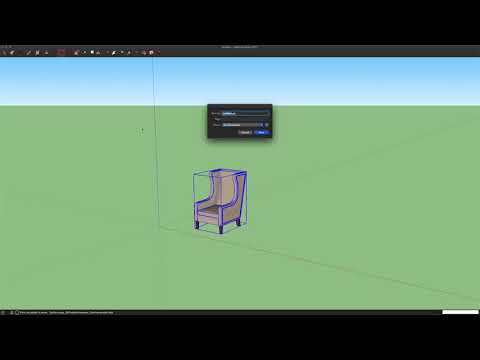
- In SketchUp, click on menu: Window > 3D Warehouse and find a model you want and insert it
- Click on menu: Extensions > Khronos glTF > Export .glb and export it.
- Open Blender, Import the glb.
- Join all the geometry together to one mesh
- Reorient the model to the middle of the scene
- Apply all transformations, and set orientation
- Export GLB from Blender.
- Import into Shot Generator
Downloaded SketchUp Make 2017. At the bottom.
SketchUp will make you create an account to download the plugin. It's no big deal. Just create an account and download it.
First, install SketchUp.
Once installed, open SketchUp and click menu: Window > Extension Manager
Click "Install Extension" and find the GLTF Exporter extension you downloaded.
In SketchUp, click on menu: Window > 3D Warehouse and find a model you want.
Important note: Polygon count is very important. Some 3D Warehouse models are incredibly detailed and have millions of polygons. When you are searching for a model, make sure you find one that has low polygon count.
For example, I searched for a tank. There are many tanks. I found one with just enough detail I needed for my scene.
Open Blender.
Delete any existing objects in your scene (default cube or camera or any of that junk)
Click menu: File > Import > glTF 2.0 and select your glb file
Press "A" to select all.
Press "Command or Control + J" to join the objects together into one mesh
Select the object.
Using the item side window, change the rotation and position to get the rotation to face forward and positioned at the origin.
You can press "1" and "3" on the numpad to change the view. You can press "g" to move the object to position.
Make sure that the object is facing forward sitting right on top of the origin.
Select the object.
In Object Mode, click the "Object" menu: Apply > All Transformations
In Object Mode, click the "Object" menu: Set Origin > Set Origin to 3D Cursor
Select the object.
Click menu: File > Export > glTF 2.0
In the settings:
Format: glTF Binary (.glb)
General > Check selected Objects
General > Remember Export Settings
Animations > Uncheck everything
Name your file
Click Export glTF 2.0
Open Storyboarder
Open Shot Generator
Add object
Click on the new Box
On the side panel, click "Select File" to import custom object
Select your .glb file
Hooray!
Special thanks to Colin Holgate who works at SketchUp for bringing this to my attention!!!!