OnlineHelp: Attitude
These steps are used to help calibrate your system. I typically perform them via USB since they get a lot of data, but they can be performed via radio link too.
This method is not critical or needed for simply hovering LOS or FPV. It is important though for navigation.
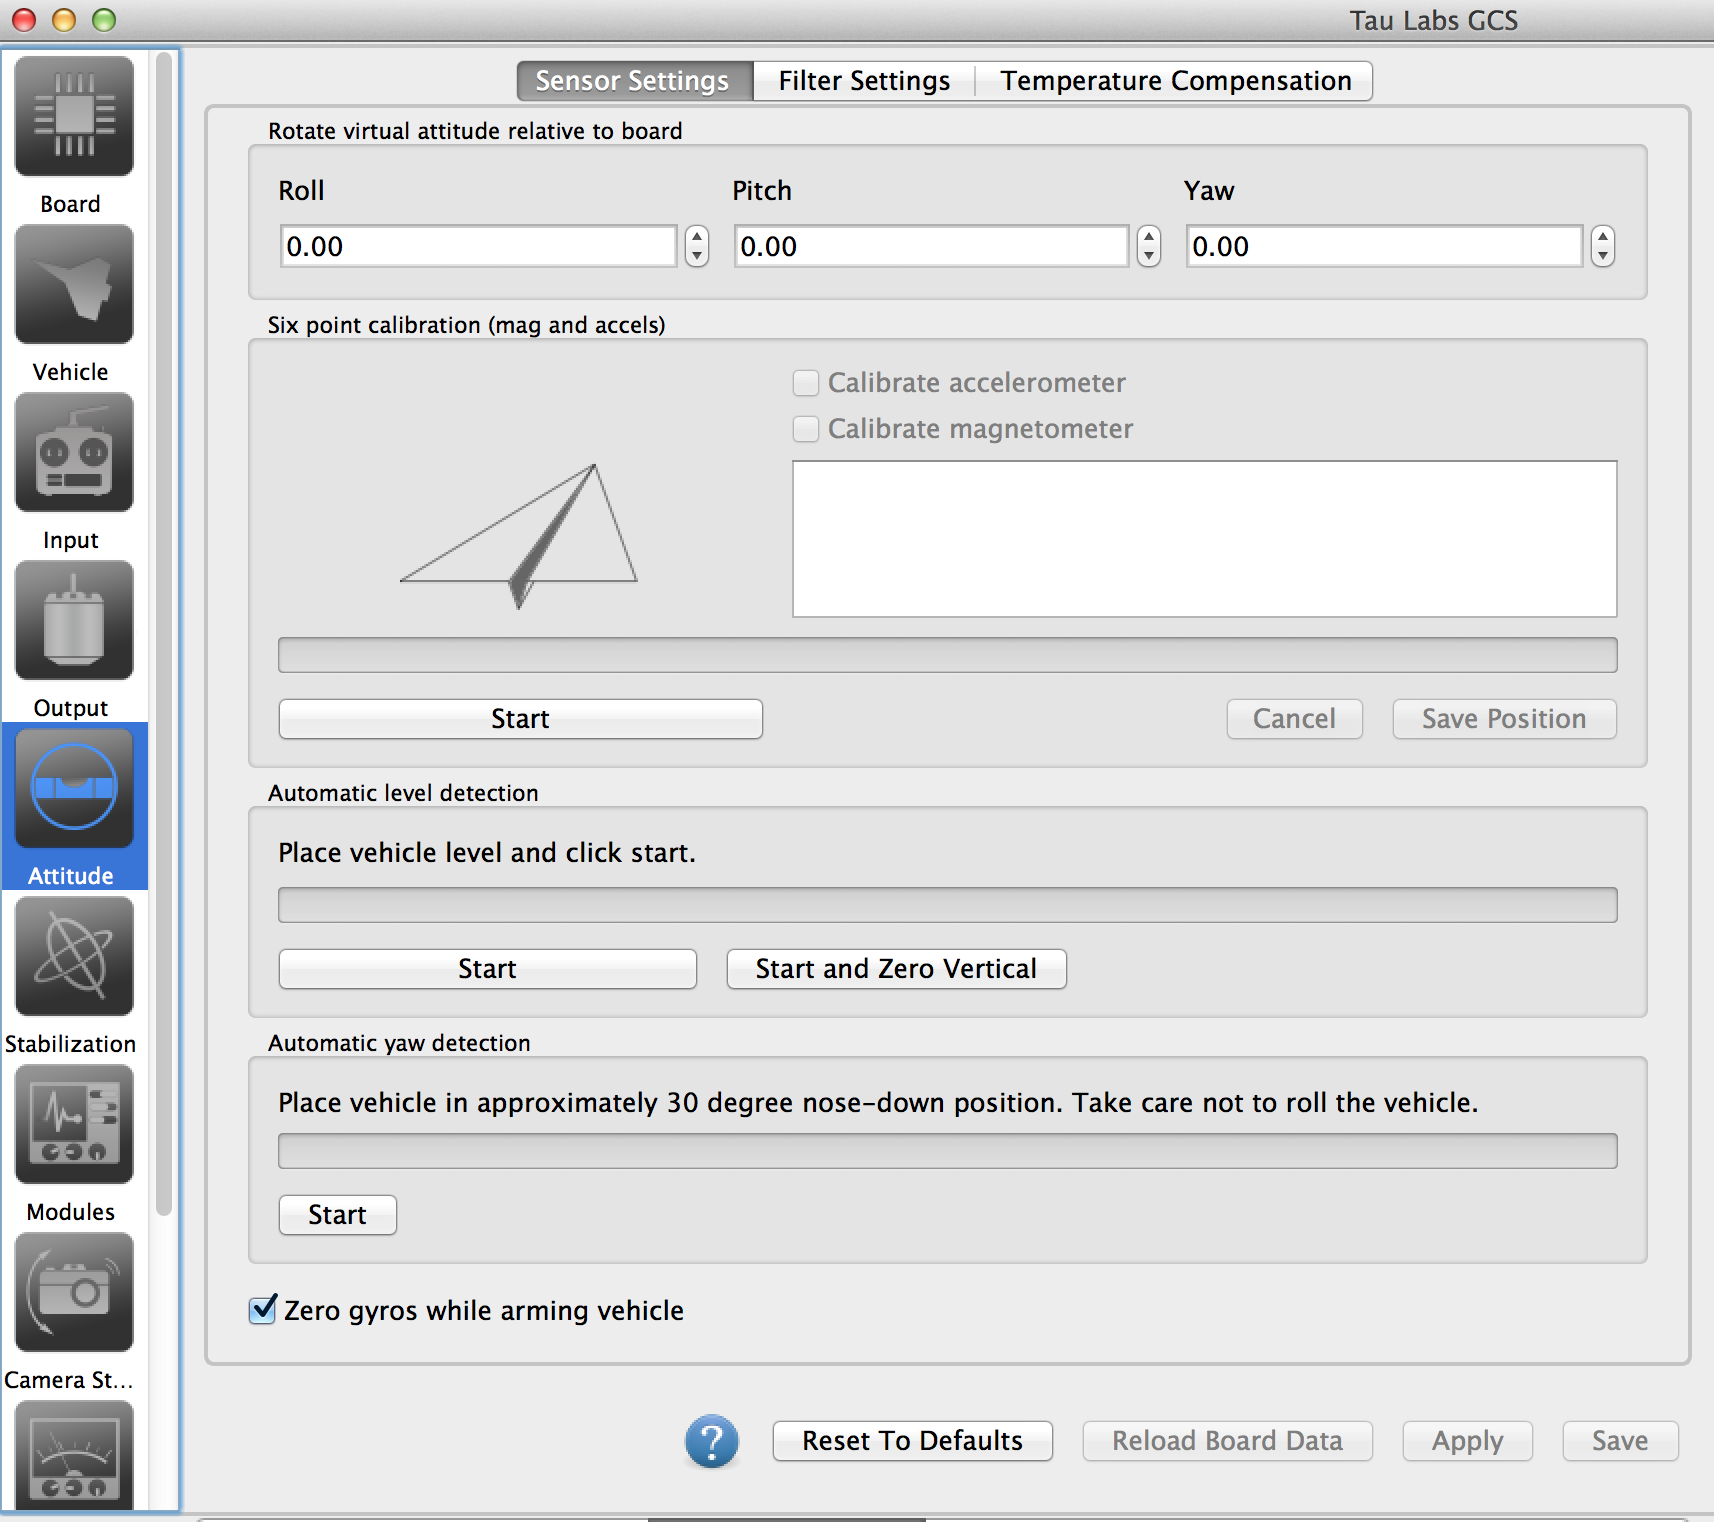
This procedure is used to calculate the scale and bias for both the accelerometer and magnetometer. For the magnetometer in particular, you should have the board assembled in the final configuration on your airframe and the calibration should be performed away from any metal or magnetic sources.
To perform six point calibration:
- Click start in the "Six point calibration" group
- Position the airframe as instructed by the diagram
- Click save position. Hold it as still as possible while it collects the data (progress bar scrolls).
- Repeat for each of the six positions of the airframe (as if placing it on the sides of a cube)
- Click the save button at the bottom of the window.
After performing the six point calibration, you also want to accurately set the level angle. This is very important for even just LOS flight if you want it to hover level.
- Get the airframe as level as possible. But honestly, don't worry about the last degree - you'll never get it perfect.
- Click Start in the "Automatic level detection" window
- Wait until all the data is collected.
- Click the save button at the bottom of the window.
This is predominantly used for planes where the mechanical mounting of the board in the frame might not be as precise. If you have a multirotor frame with mounting holes you might prefer to type the exact angle in the top bar with the board rotation settings. If you do, please make sure you get it the right way round and check things on the PFD. However, this mechanism will work for multirotors too.
- Place the airframe with the nose tilted forward, ensuring there is no roll at all.
- Click Start in the "Automatic yaw detection" box.
- Click the save button at the bottom of the window.