This is a Pytorch implementation of the ResNet model proposed in "Deep Residual Learning for Image Recognition".
The paper is available here.
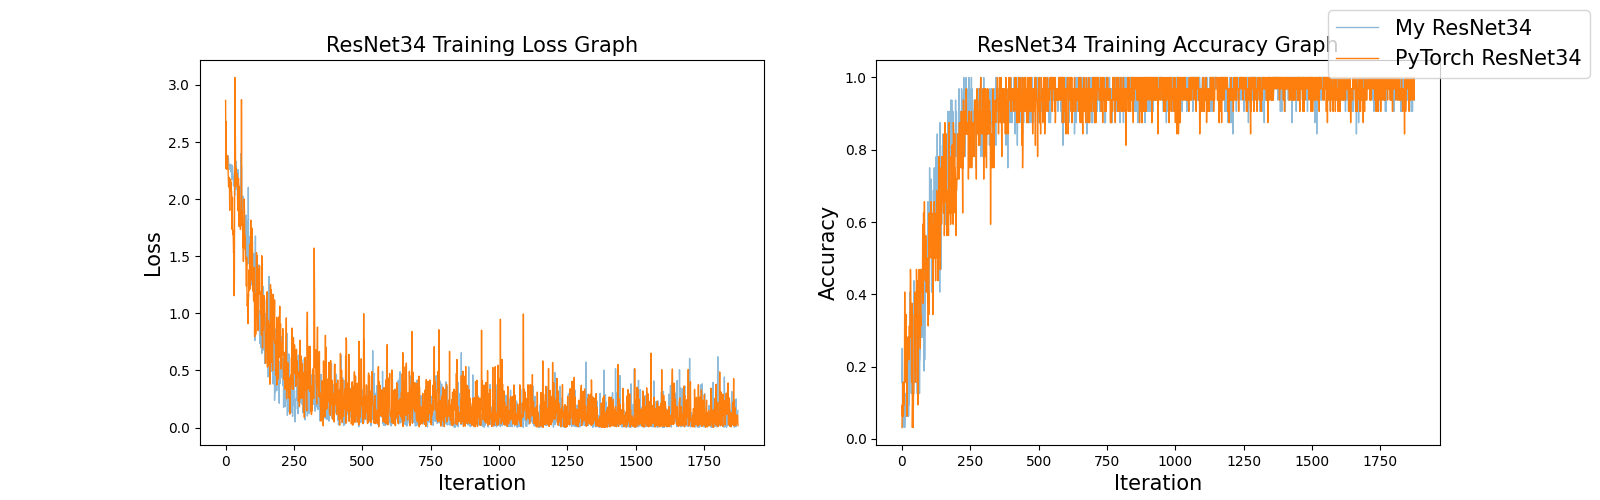
The model architecture and number of params is exactly same as pretrained model from torchvision.
Check the figure below.
The MNIST dataset (1 x 28 x 28) was used, and it was expanded (3 x 28 x 28) to fit the channel (Grayscale to RGB).

When you run train.py, the MNIST dataset is automatically downloaded and the training log is also automatically saved.
PyTorch_MNIST_ResNet
├─data
│  └─MNIST
├─log
├─model
│  └─ResNet18
│  └─ResNet34
│  └─ResNet50
│  └─ResNet101
│  └─ResNet152
└─utils
   └─log_visualization
All experiments were performed in CUDA 11.8, cudnn 8.5.0 environment.
I provide the versions of the python package in 'requirements.txt'.
The list is below.
matplotlib==3.6.1
numpy==1.23.1
pandas==1.5.0
torch==1.12.1
torchsummary==1.5.1
torchvision==0.13.1
Run the following command in the terminal.
pip install -r requirements.txt
If you run the file in the model folder, you can directly check the model architecture and number of parameters of the model that I implemented and pretrained model from torchvision.
This is made for MNIST only, but you can use it wherever you want by editing the dataset, dataloader and last fc layer.
Code for inference is not provided.
If you want to check training process or model architecture & numberof parameter, run the following command in the terminal.
It must be executed in the same location as the train.py file.
# for check the model architecture and number of parameter
python model/ResNet18.py
# for model training
python train.py
You can select the model by editing line 36 of train.py
res18 = ResNet18(3, 10)
res34 = ResNet34(3, 10)
res50 = ResNet50(3, 10)
res101 = ResNet101(3, 10)
res152 = ResNet152(3, 10)

model = # Choose the target model
and can adjust batch size and epochs by editing line 15~16 of train.py
EPOCH = # num of epoch
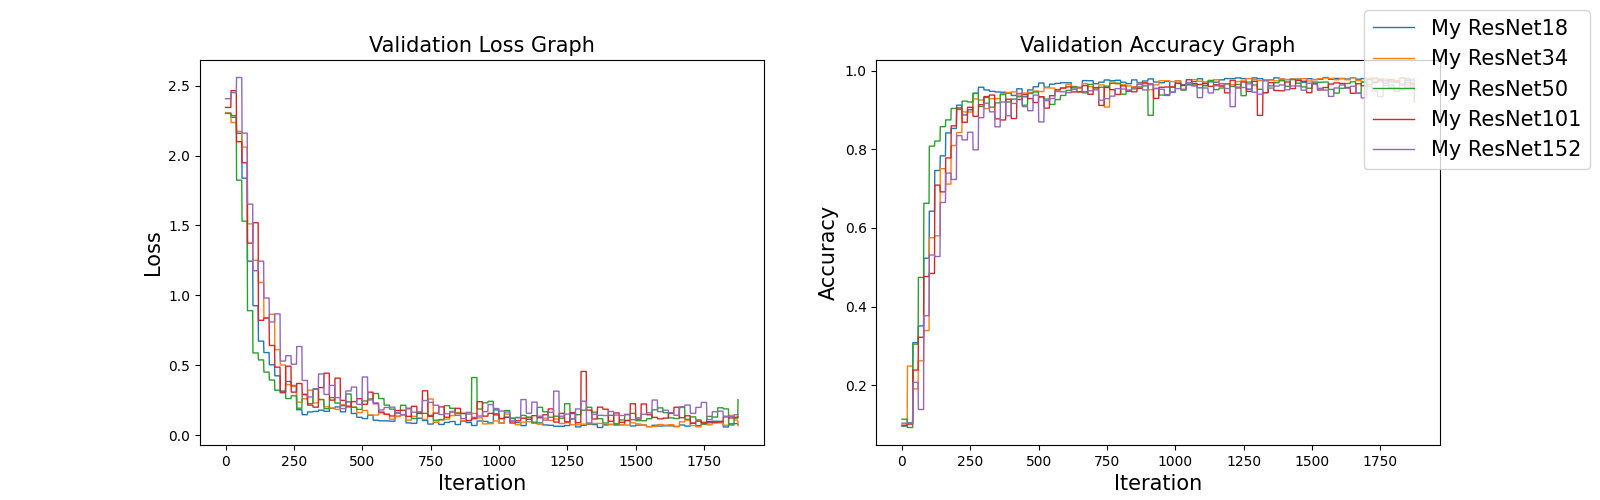
BATCH_SIZE = # size of batchIn order to understand the performance and loss of each model in the training process, the training process is recorded in the log folder.
If you run the log_visualize.py in the 'utils' directory, you can get the following result.
python utils/log_visualize.py
If there is an any problem or question, please contact me or leave it in the Issues tab.
Welcome!
In all experiments, Adam optimizer and CrossEntropyLoss were used, and lr scheduler was not used. The model was trained on a GTX 1060 GPU environment.
EPOCH = 1
BATCH_SIZE = 32
LEARNING_RATE = 1e-3