Expeditions How To Guide (Team Leads)
On an expedition, a class or citizen scientist conducts five protocols at their Oyster Restoration Station and enters their data into the BOP Digital Platform. This page will show you how to launch an expedition and record data on the Platform.
Before you can launch an expedition, you'll need to have finished the steps on the Get Started for Team Leads page.
To display any of these screenshots in a larger size, right click and select "Open Image in New Tab."
- In the left side menu, click on "Restoration" and then "My Expeditions."

- On the Expeditions page, click on "Create an expedition."

- Fill out the expedition launch form. Look under the screenshot for some explanatory notes about each field.
NOTE! You now have the option to submit fewer than five protocols! Check the box next to each protocol you'd like to include in your expedition.
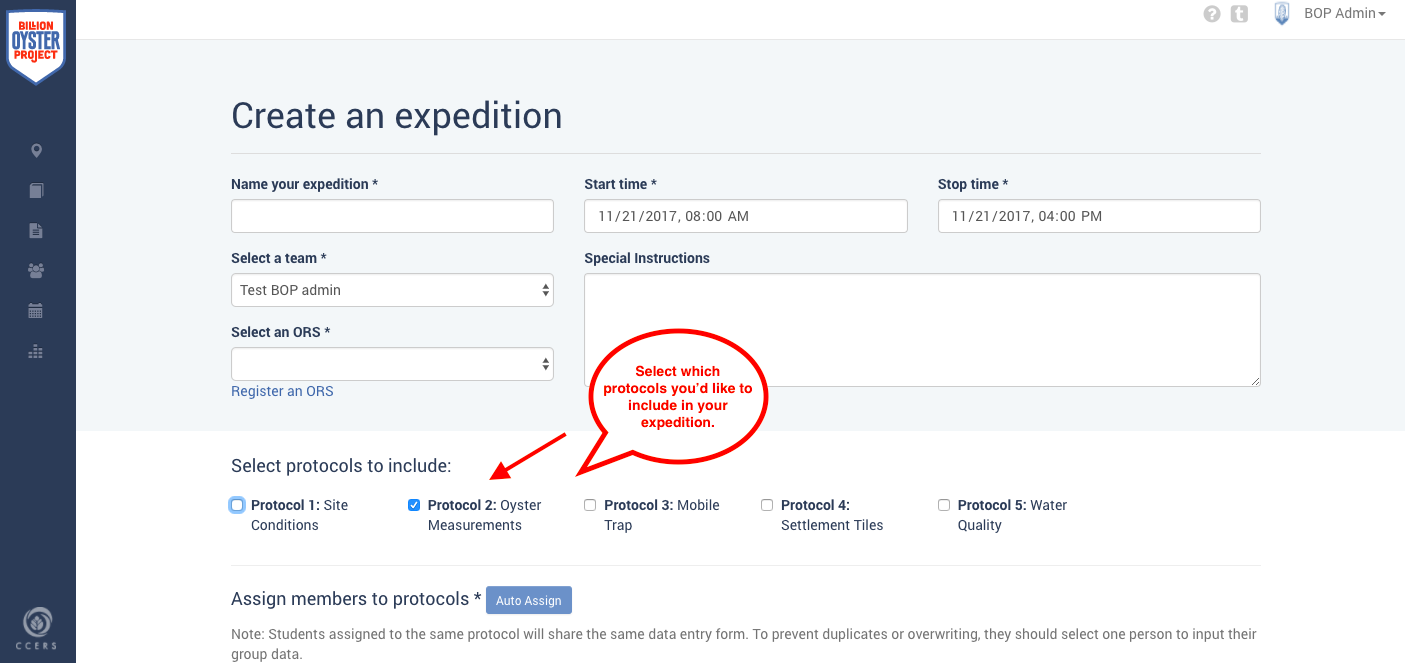
- Expedition name. Give your expedition a unique name – create a name that will allow you to recognize when and with whom the expedition was conducted.
- Team. Select a team. Note: an expedition can only be assigned to one team. In order to add team members from more than one team on a single expedition you need to create a new team with that combined membership. To add team members or create a new team go People>Teams.
- ORS. Select an ORS. Note: an expedition can only be launched to one specific ORS. If you own more than one ORS or if there are multiple ORS at your site, it is extremely important to keep an accurate record of which is which!
- Special instructions. Enter any special instructions that you want your team members or volunteers to read when they get the expedition invite.
- Start time/Stop time. Enter the date/time that your field expedition will actually take place (start and stop). It is very important that the date/times are accurate as these will be used to create events for your expedition. If for some reason the date/times change before your expedition, you must go back to the expedition’s page and edit the date.
- Assign team members to one or more protocols by dragging their names into the appropriate columns. Or click “auto assign” and the system will assign all team members randomly to one protocol.

Note: team members cannot be assigned on a mobile device so expeditions cannot be launched from the field! If two or more team members are assigned to the same protocol and enter data at the same time, they will overwrite each other. To avoid this team leads may consider inviting only one team member per protocol to function as the “scribe.”
-
After you have assigned at least one team member to each protocol, click "Launch." This will automatically send email invitations to the selected team members with a link to their assigned protocol.
-
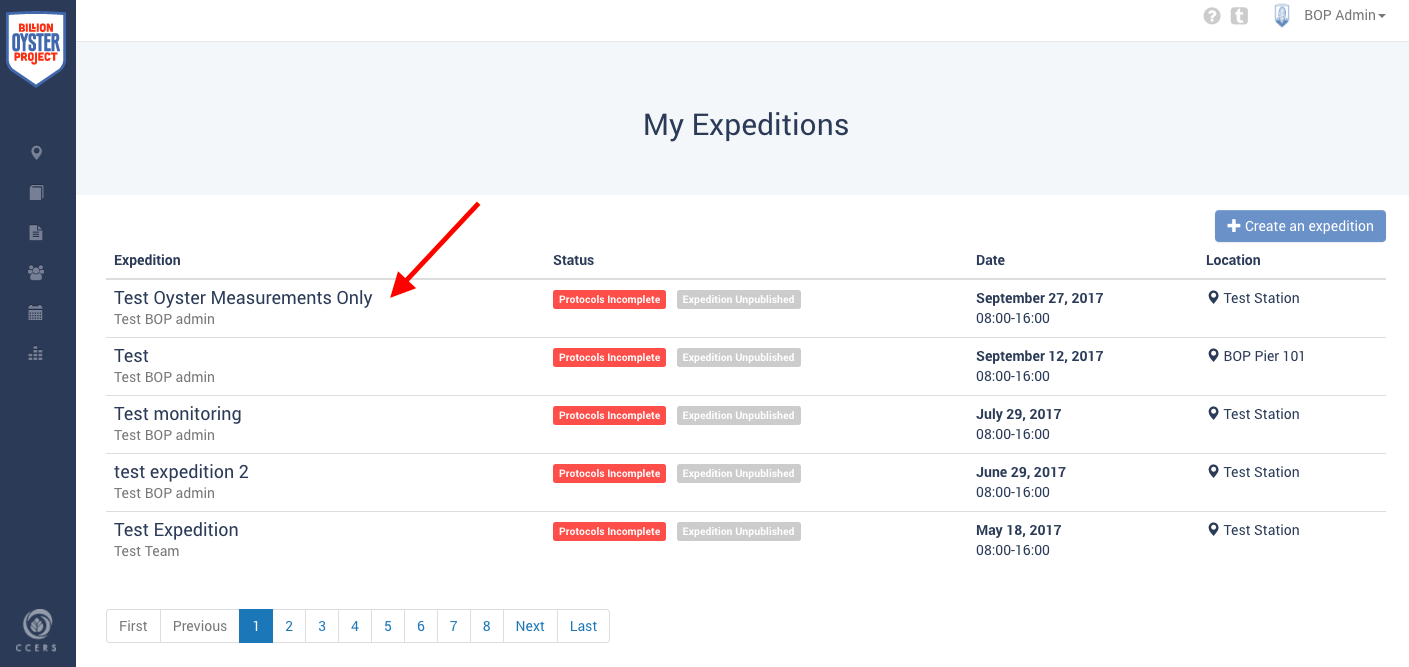
Once you've created your expedition, you can view any expedition you've ever created on the "My Expeditions" page. To start entering data in an expedition, click on that expedition's name:
Important: The Platform does not have an autosave feature, so you must hit "Save" manually or you'll risk losing your work!
-
To start entering monitoring data for your expedition, go to the "My Expeditions" page (under Restoration > My Expeditions in the sidebar) and click on an expedition's name to open it:
-
From there, you can click on any of the protocol names to go to the data entry forms for each protocol. Here's what an expedition's page will look like for an expedition with all five protocols:

...and here's what the page will look like for an expedition with just one protocol:

-
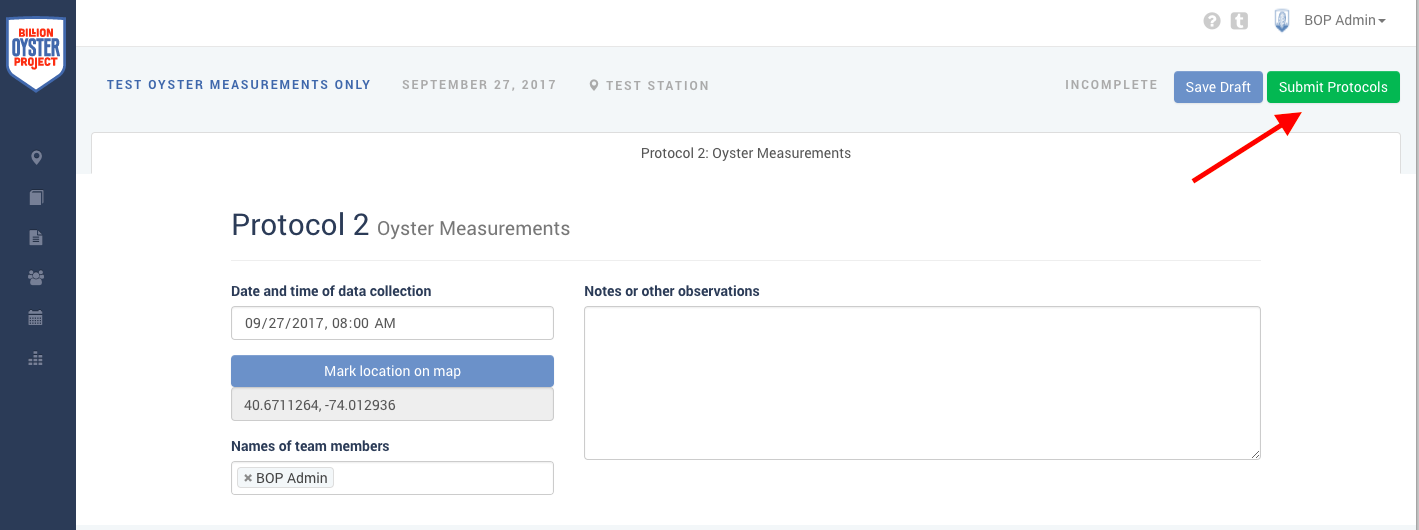
The screenshot below shows the data entry page for the Oyster Measurements protocol. You can click on the tabs at the top of the page to switch between protocols. Follow the instructions on the screen to complete each field:

-
When you finish entering in data for ALL of your assigned protocols, click "Submit protocols" at the top of the page to send them to your team lead for review.
-
Their team lead receives an email notification that their data has been submitted.
-
The team lead reviews their team's data for accuracy, and either approves and publishes the data, or returns the protocols (if there are errors).
-
If the team lead returns the protocols, they should include a note indicating what needs review. The team member is then expected to make changes and resubmit. This process can continue indefinitely until the team lead approves and publishes the data.
-
You now can publish an expedition with fewer than five protocols!
-
Expeditions are broken into up to five protocols of data collection- each protocol has its own data entry form.
-
The system is designed for team members to do the work of entering field data into their assigned protocol forms. Team leads can also assign themselves to one or more protocols in order to supervise data entry in real time.
-
If two or more team members are assigned to the same protocol and enter data at the same time, they will overwrite each other. (To avoid this team leads may consider inviting only one team member per protocol to function as the “scribe.”)
-
Instructions for entering data into each protocol are found in the Field Science Manual and/or next to each field in the protocol.
-
Team members can submit data in the field at the end of the expedition, or return to the classroom to check data and submit at a later time.