Coinremitter is crypto payments service for magento. Accept Bitcoin, Tron, Binance (BEP20), BitcoinCash, Ethereum, Litecoin, Dogecoin, Tether, Dash, Monero etc.
What Is Crypto Payment Processor?
Crypto Payment Processor acts as a bridge between the merchant’s website and the cryptocurrency network, allowing the merchant to receive payments in the form of cryptocurrency.
- For the Integration process with Coinremitter, users must require to have Magento version 2.x
- If you don’t have an account on Coinremitter, then make sure to make it one
-
Download coinremitter magento plugin (zip file).
-
Login to your server and unzip the file and rename it to ‘Checkout’.
-
Navigate to Magento installation root directory. There You’ll find a folder named ‘code’ situated in the ‘app’ folder. In case of the absence of the folder, create a folder in the ‘app’ folder with the name 'code'. Now Create a 'coinremitter' folder into the 'code' folder, Then move the ‘Checkout’ folder into the 'coinremitter' folder.
-
Run following commands in terminal to install Coinremitter Plugin
- php bin/magento setup:upgrade
- php bin/magento setup:di:compile
- php bin/magento setup:static-content:deploy -f
- php bin/magento cache:flush
-
Plugin installed in your magento store, Follow below instructions to fully activate it.
- On the dashboard, you will see the menu on the left side, where you can see the Store option, click on it. Sidebar will open and click on configuration, afterwards a new page will appear, click on sales and then click on Payment methods.
- On that page, Scroll down and you will find Configuration option of Coinremitter CryptoPayment.
- On the box of service you will see multiple options to fill in.
- You will find the first option Enable. Select it to Yes.
- In the second option you can create your own Title if you need. It will display to user on checkout page
- In the Description tab you can add some notes to tell your customer some meaningful things before the customer makes any step during checkout.
- Set Invoice Expiry Time. It is in minutes. So if you set value 30 then the created invoice will expire after 30 minutes.
- In the last tab of Order status you can select one of your own status about what you want to show to customers when they successfully made out payment. (select appropriately because it will appear once payment gets done)
Go to the menu on your left side and you’ll see the Coinremitter Checkout option. Another sidebar will open as soon as you click on it. Wallet option will appear there and click on it also.
- Now you are on the Wallet - coinremitter page.
- You’ll find the Add Wallet button on the top of the page. Click on it.
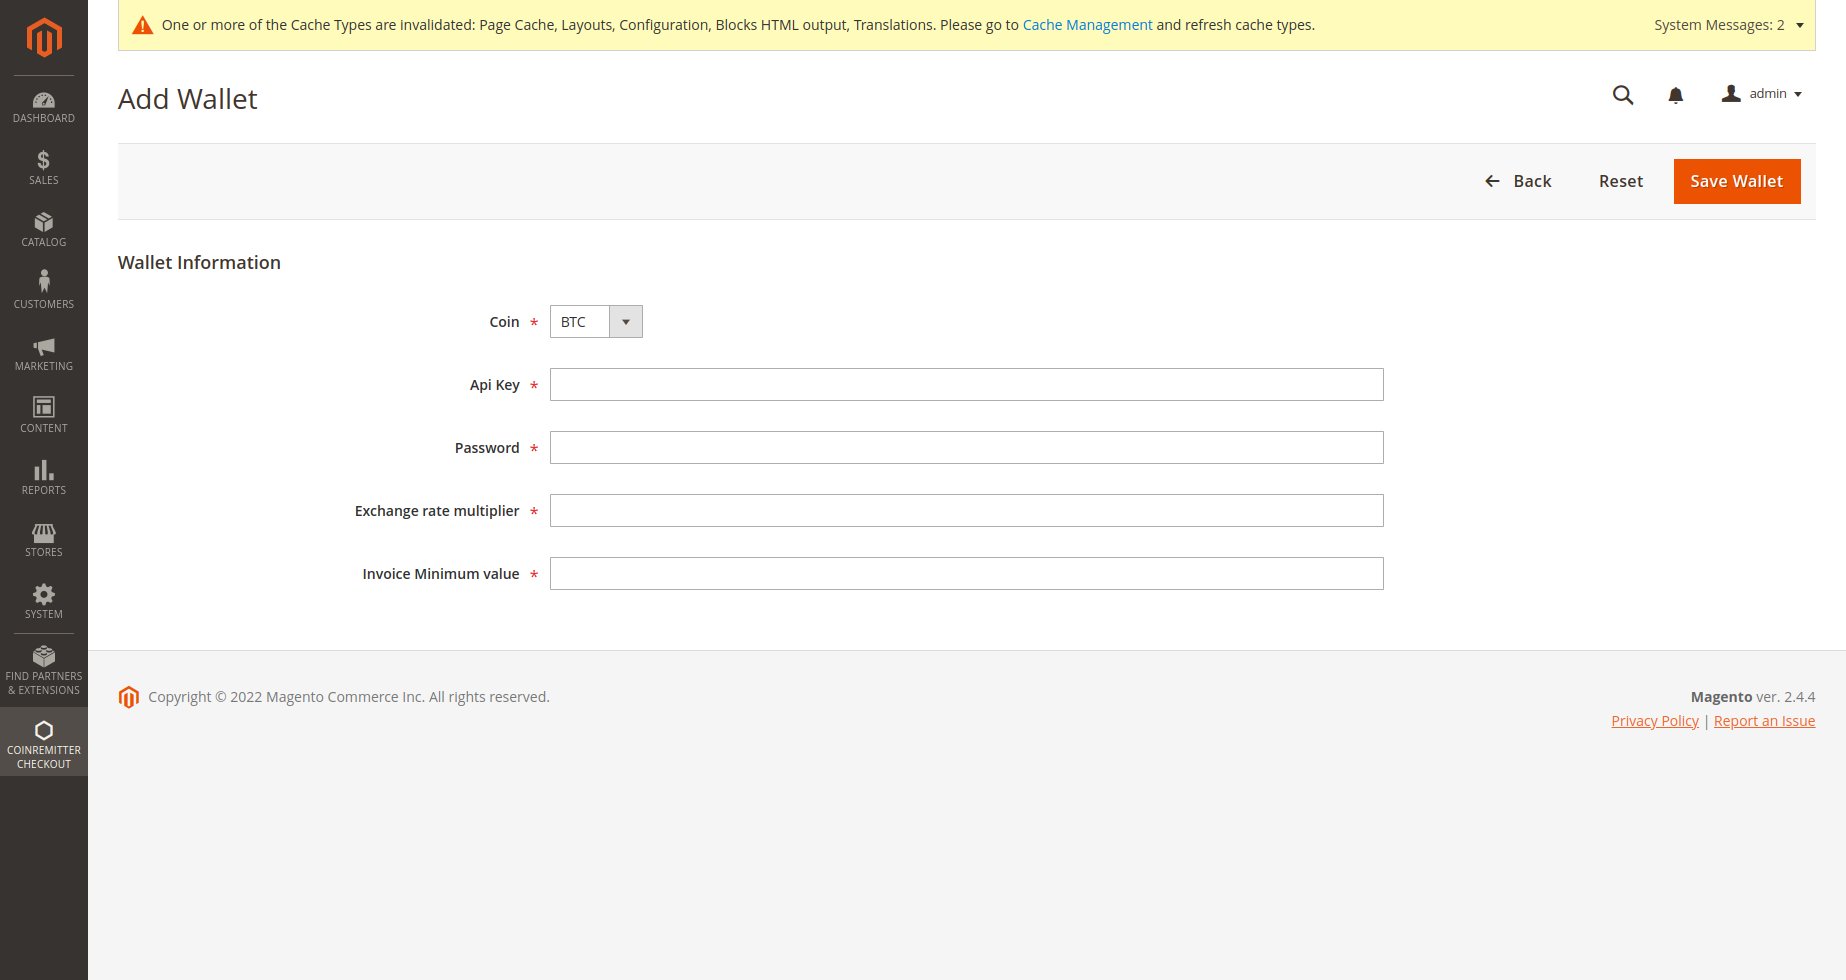
- After clicking on the add wallet a new page will appear where you’ll see multiple options like Coin, API key, Password.
- In the first option of Coin select your coin from which you want to create your crypto wallet.
- Now go to coinremitter website and login to your account and get your API key from there. If you find any trouble to get your api then click here to get the idea.
- Get back to the Magento coinremitter page and select one of your coins. Paste API key in the box and fill your Password in the box.
- Don’t forget to add the exchange rate multiplier.
- The default price multiplier is set to 1. For instance, if you set it to 1.10, then prices for cryptocurrencies will be increased by 10%, and you can set it to 0.95 in this text box for a 5% discount.
- Setting the minimum invoice limit is necessary, The generated invoice won’t be less than the minimum invoice limit.
- Click on the Save wallet on top of the page.
- Congratulations! You have now successfully created your wallet.
Note:
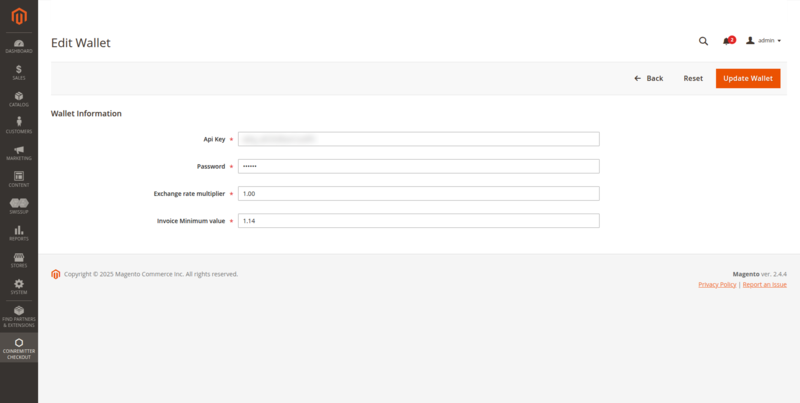
- You can also see your other wallet list and can Edit/Delete your wallet by clicking on the select option which you can find in the Action column in wallet list table. And you also have to add the URL in the Webhook URL field of your Coinremitter wallet's General Settings. URL can be Seen below in the image.

You have successfully activated coinremitter plugin.
- Once a customer creates an order and fills all the mandatory details, the system will take them on the payment page.
- You will see Pay Using Cryptocurrency option. Click on it.
- Select one of your coin wallets from you want to pay for your product and click on place order.
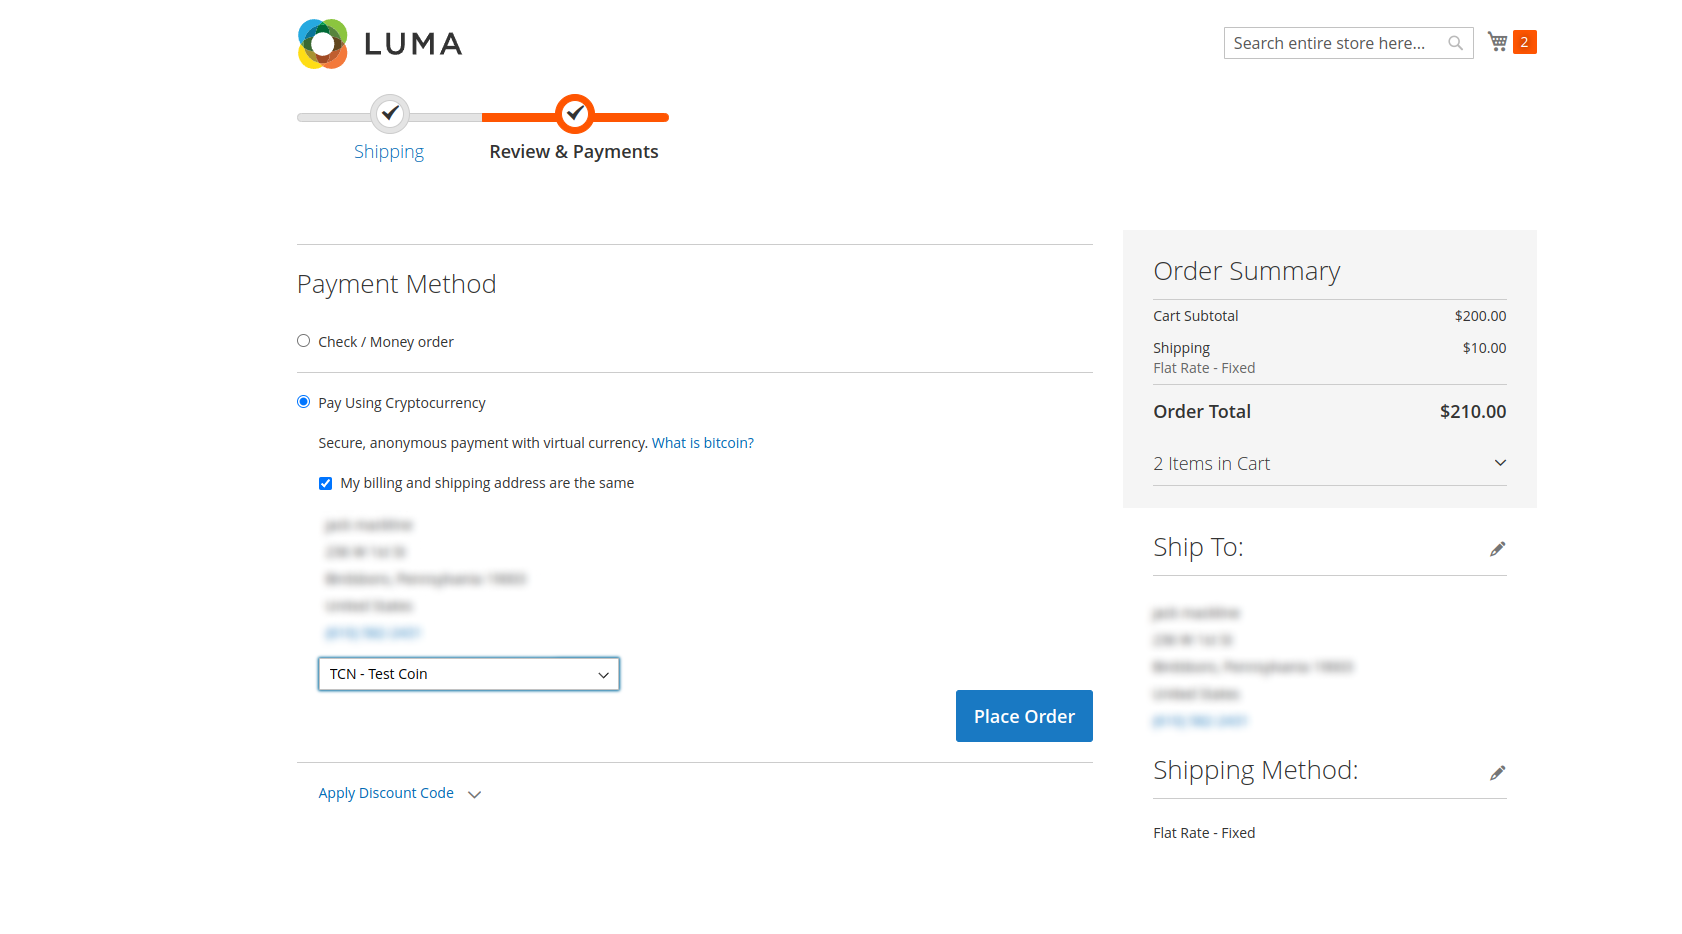
- On the very next moment the system will automatically generate an Invoice which will appear on your screen.
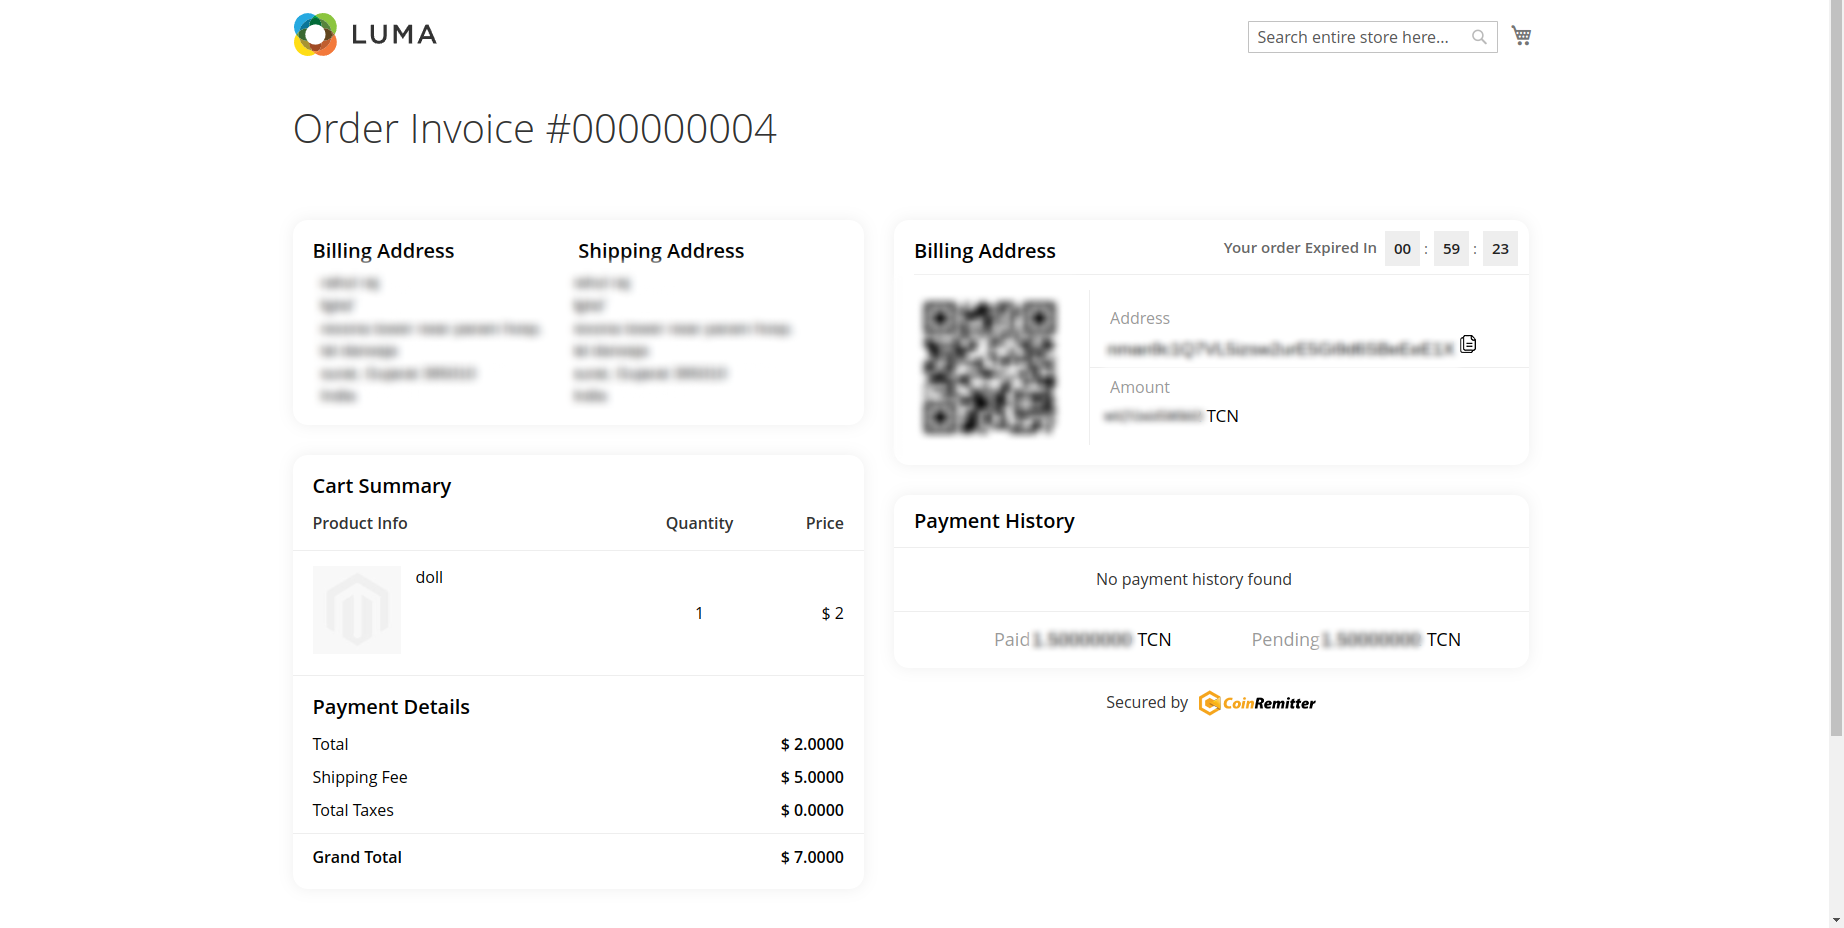
- Copy Payment address from generated invoice and pay exact amount from your personal wallet. Once you transfer to this address, it requires 3 confirmations to mark order as paid. Then it will automatically redirect to the success page once payment is confirmed on blockchain.
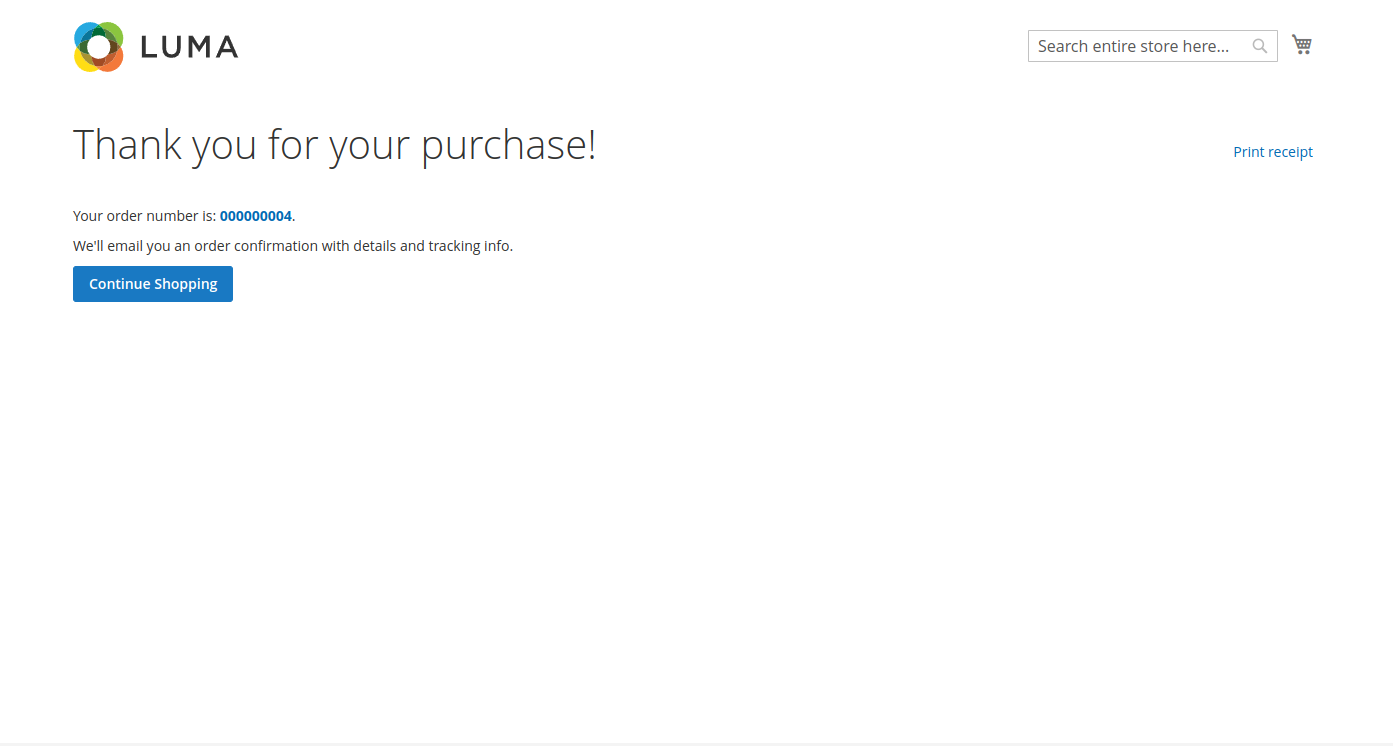
- Congratulations! You have now successfully paid for your product.
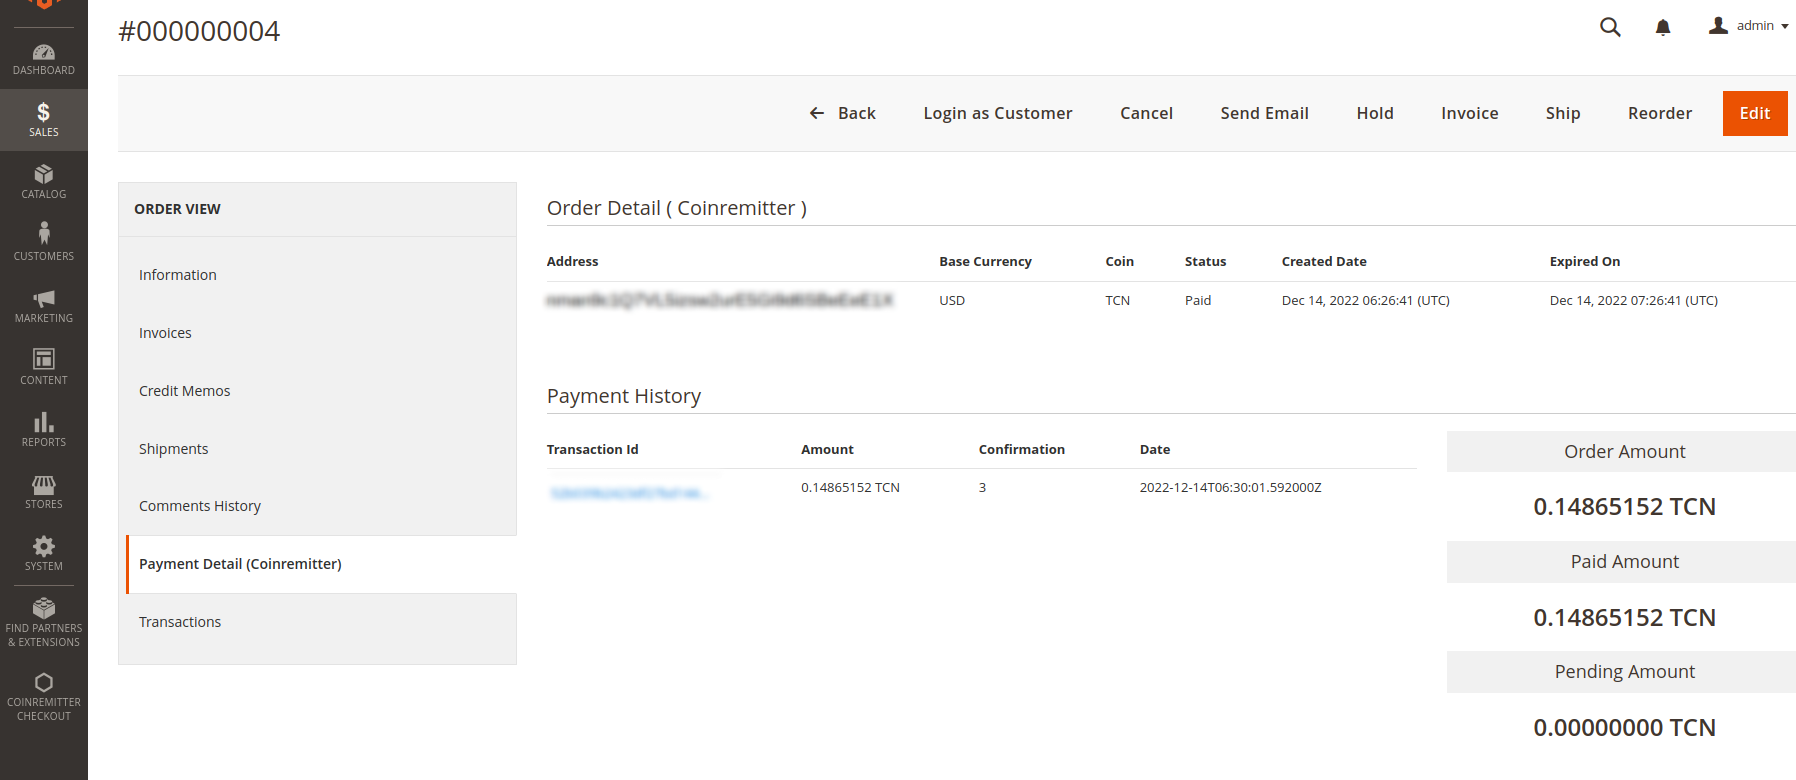
- Go to your admin panel menu and click on Sales, sidebar opens and click on order.
- Once you reach the order page you will see your multiple orders list. Select one of these orders. Make sure that order is paid using coinremitter payment option.
- Click on the view from one order and the new tab will open.
- On the left side menu you will see the Payment Details (coinremitter) tab. Click on it.
- You will see the details about payment details.