Coinremitter is a crypto payment processor. Accept Bitcoin, Bitcoin Cash, Litecoin, Dogecoin, Dash, Tron, Binance ,Tether USD ERC20,Tether USD TRC20 etc.View all supported currency here.
What Is Crypto Payment Gateway?
There are ample of Crypto Coins available on crypto payment gateways. You can pick one of them and create a wallet of that coins and purchase things from individual’s websites who are accepting payment in crypto coins though. Regardless, All these websites have their own API in order to accept payment from buyers.
Apart from centralized currencies this option creates a traffic for sellers who are willing to do payments in crypto coins. In contrast, doing a payment in crypto coins offer buyers a great market reputation and has left a foremost impact on sellers and it will also benefit to buyers & sellers if they choose Coinremitter: Crypto Payment Gateway as their payment method in doing a business in crypto coins.
- For the integration process with coinremitter, users must need to have Prestashop version 1.7+
- If you don't have a Coinremitter account then please consider making it one. Create Account
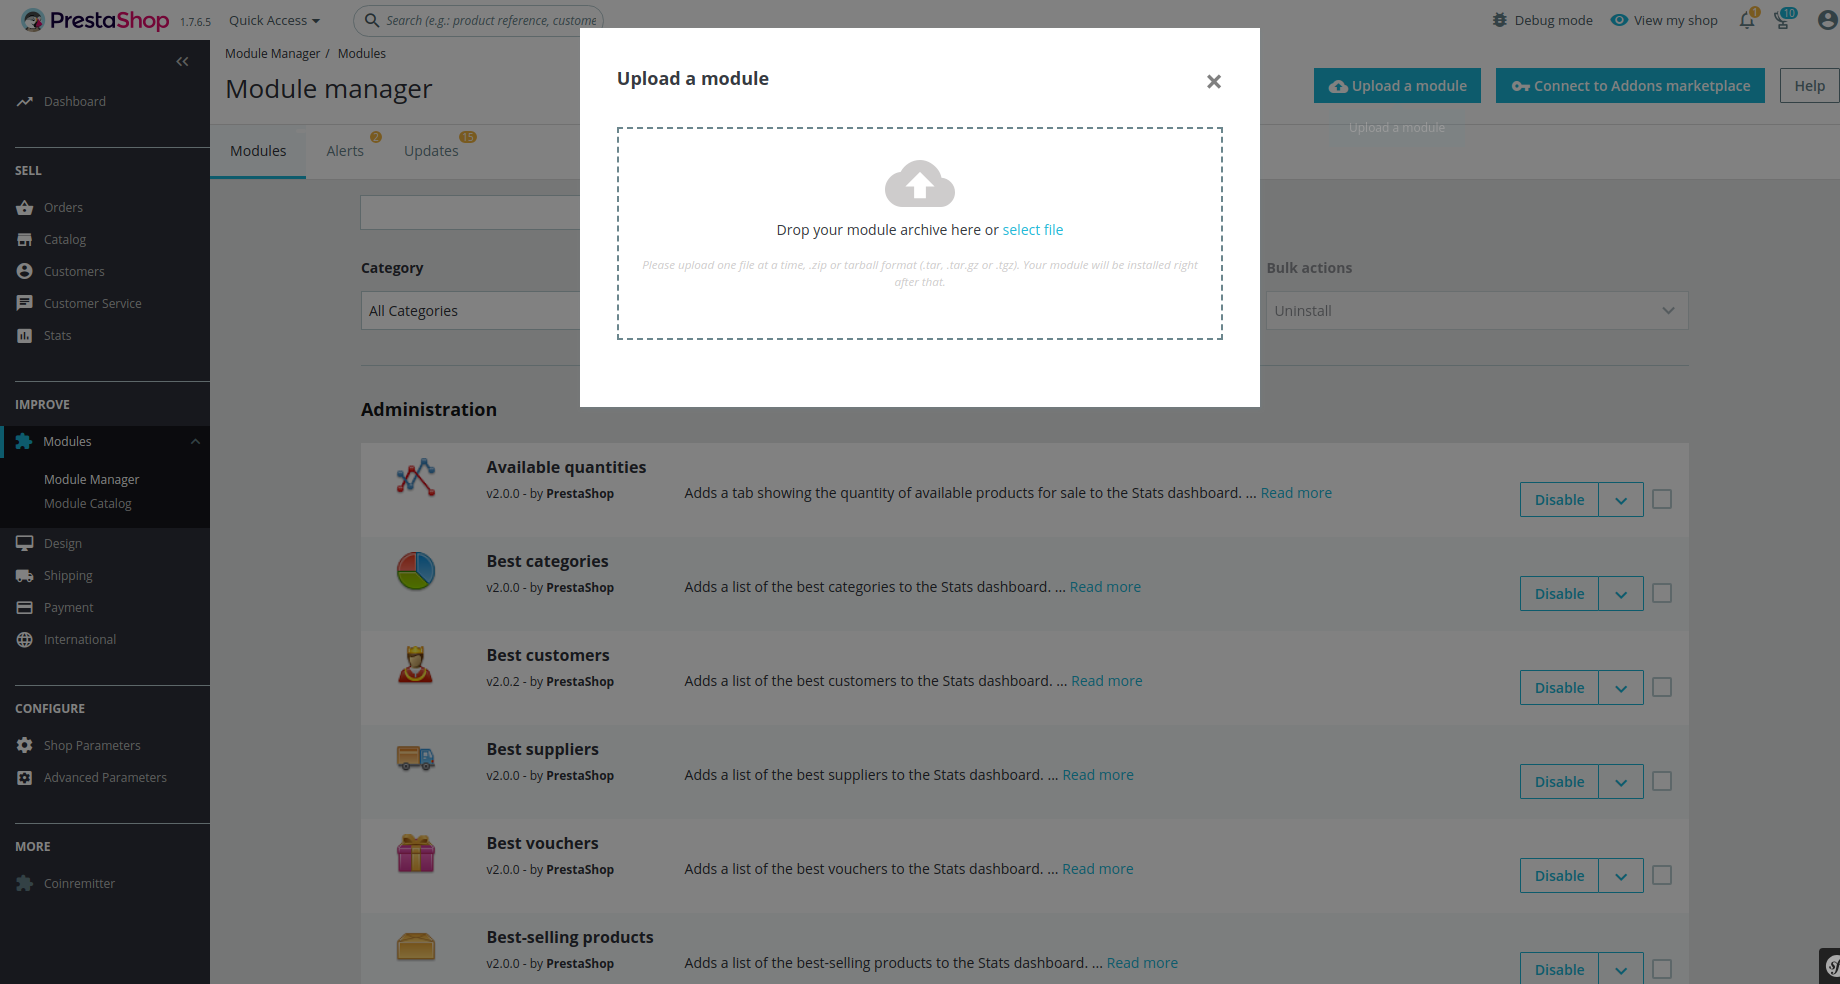
PATH: Sidebar > Modules > Module manager > Upload a module > Select File
-
Download the zip file from this github repo extract it.
-
Then open the extracted folder and find a folder named prestashop-master. Then rename it to coinremitter and compress it.
-
Log into your admin panel.
-
Click on Modules at the sidebar section.
-
There are two options “Module manager” and “Module Catalog” under Modules.
-
Click on “Module Manager”
-
Then click on "Upload a Module" button. it will open popup where you have to upload the zip file
-
Now select the coinremitter.zip file and upload it.
-
There you go! You’ve successfully installed the plugin.
To activate it completely follow the instructions below:
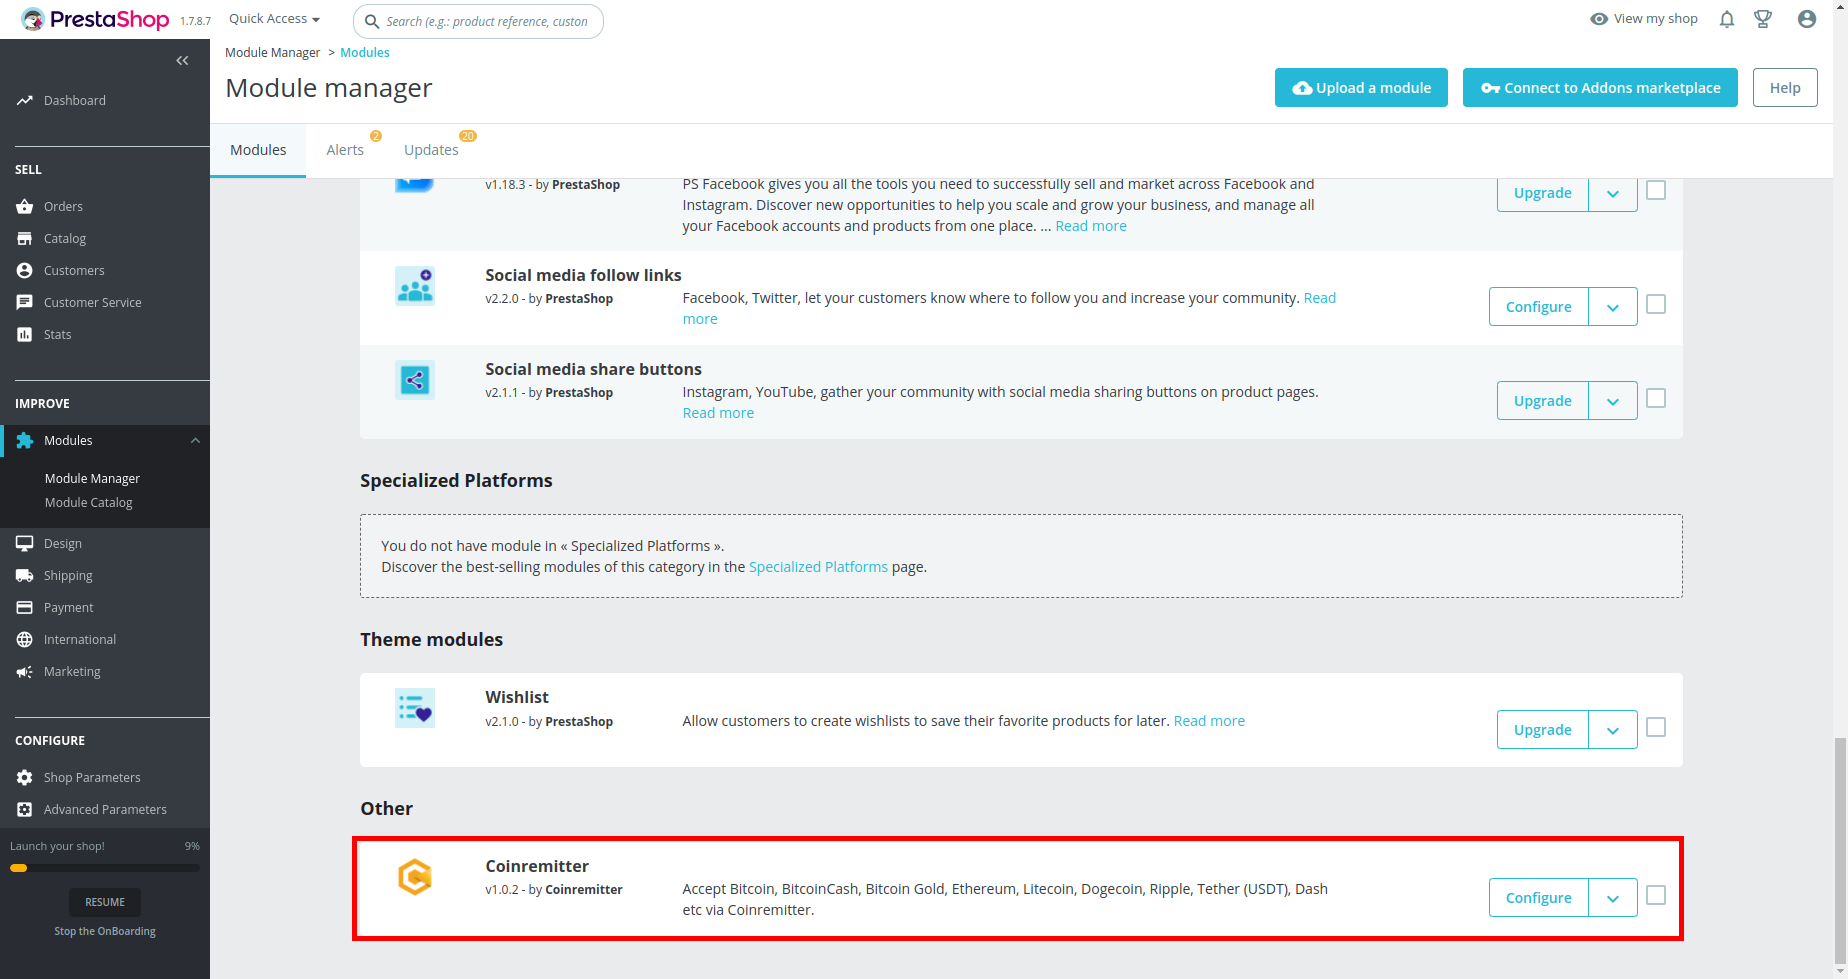
PATH: Sidebar > Modules > Module manager > Other section > Coinremitter plugin > Configure > SAVE
-
Head to the sidebar on the Prestashop admin panel.
-
Click on Modules and then select Module Manager.
-
In the module manager page, you have to find the “Other” section.
-
You’ll find the “Coinremitter” plugin there.
-
Now, click on “Configure” at the end of the same line.
-
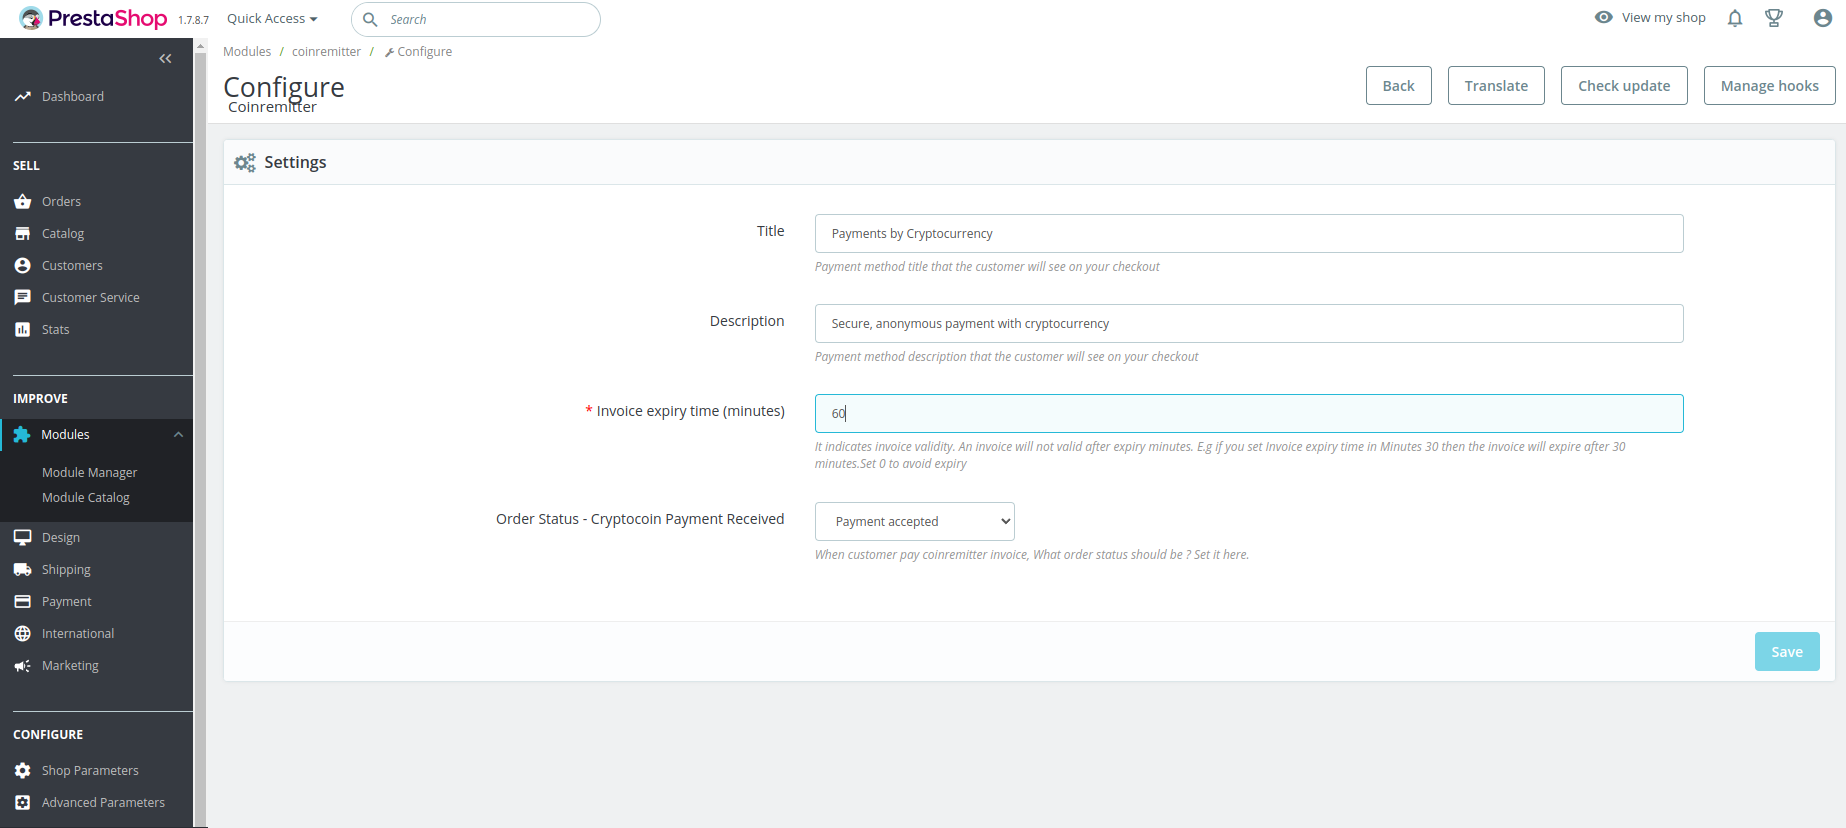
The configure settings page will open.
There you will need to fill up some details according to your preferences:
TITLE: The title you write, which will appear to the customers on the checkout page.
DESCRIPTION: You can add a few details to tell the customer something important before the customer takes any step during checkout.
INVOICE EXPIRY TIME IN MINUTES: If you set the value 30 then the invoice created will expire after 30 minutes.
ORDER STATUS: Set the order status, when customers successfully make payment using cryptocurrency. You’re all SET, save the setting.
PATH: More > Coinremitter > Add wallet
-
Go to the sidebar on the Prestashop’s admin panel.
-
Look all the way down and click on the “Coinremitter” which is right under the “MORE” option.
-
The wallet list page will open.
-
To add a new wallet, click on the plus button located on the top right corner of the page.
-
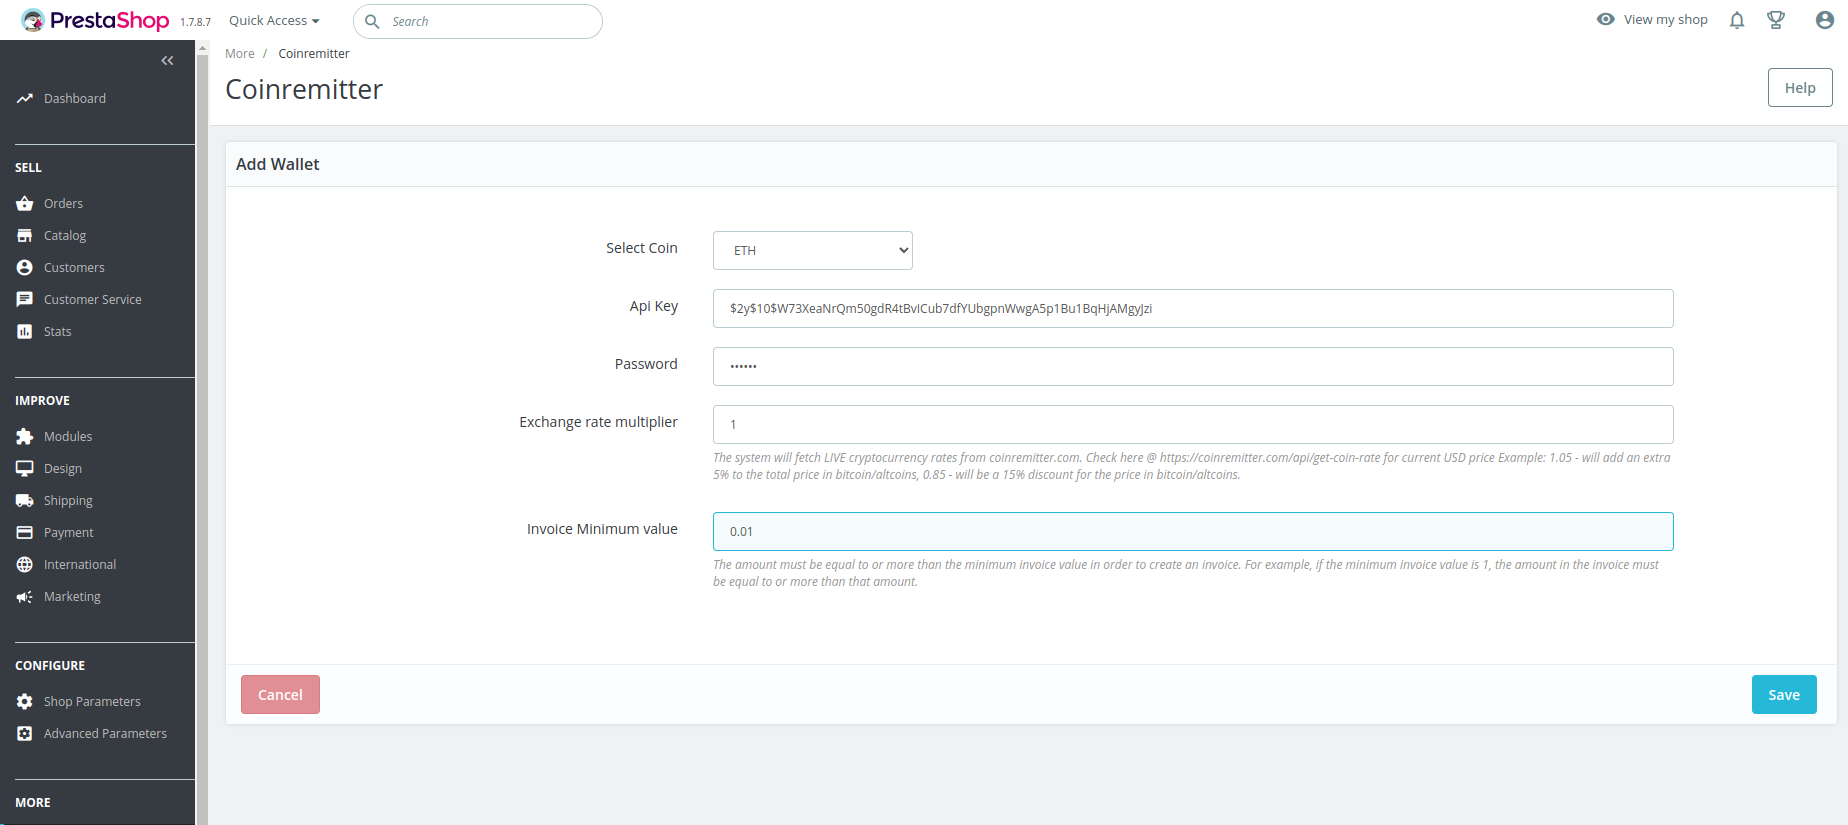
A new page will appear, where you'll see multiple options such as API key, Password and Exchange Rate Multiplier and Minimum Invoice Value.
-
API KEY : Go to the website of Coinremitter and login to your account and get your API key from there. If you have any trouble getting your password and API key then click here to get the understanding.
-
PASSWORD : Type the password that you have set while creating a new wallet in your merchant panel.
-
EXCHANGE RATE MULTIPLIER: The initial setting is 1. It is a multiplier of prices. For example, if you set it to 1.10, then cryptocurrency prices would grow by 10%, and for a 5% discount, you can set it to 0.95 in this text box.
-
Minimum Invoice Value: Setting the minimum invoice limit is necessary, The generated invoice won’t be less than the minimum invoice limit. Click on Save and you’re good to go!
NOTE: You can test your first order using the Test Coin.
-
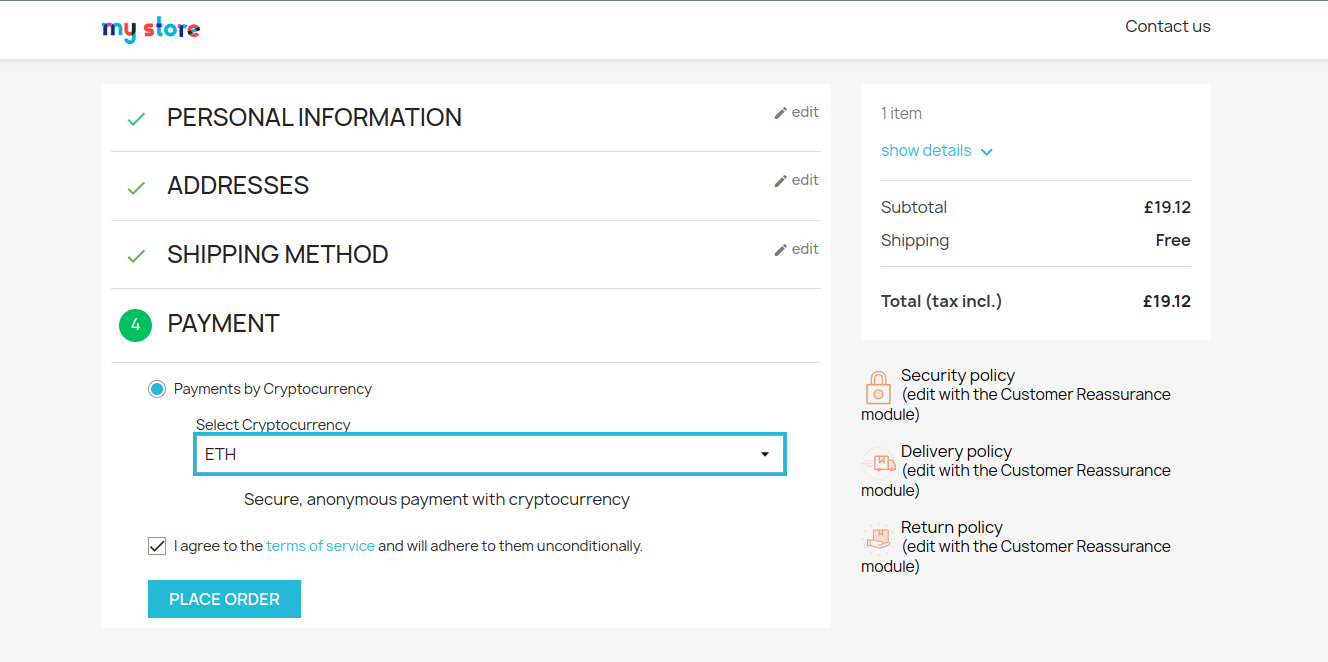
Now add some products to your cart and proceed to the checkout page. Choose the "Payment with Cryptocurrency" payment form. If you changed the title text on the configuration page of the coinremitter then it will be shown as an option here. Click on the button to continue.
-
Customers will select the coin that they like to pay for. Make sure you've added a wallet to your Prestashop admin panel.
-
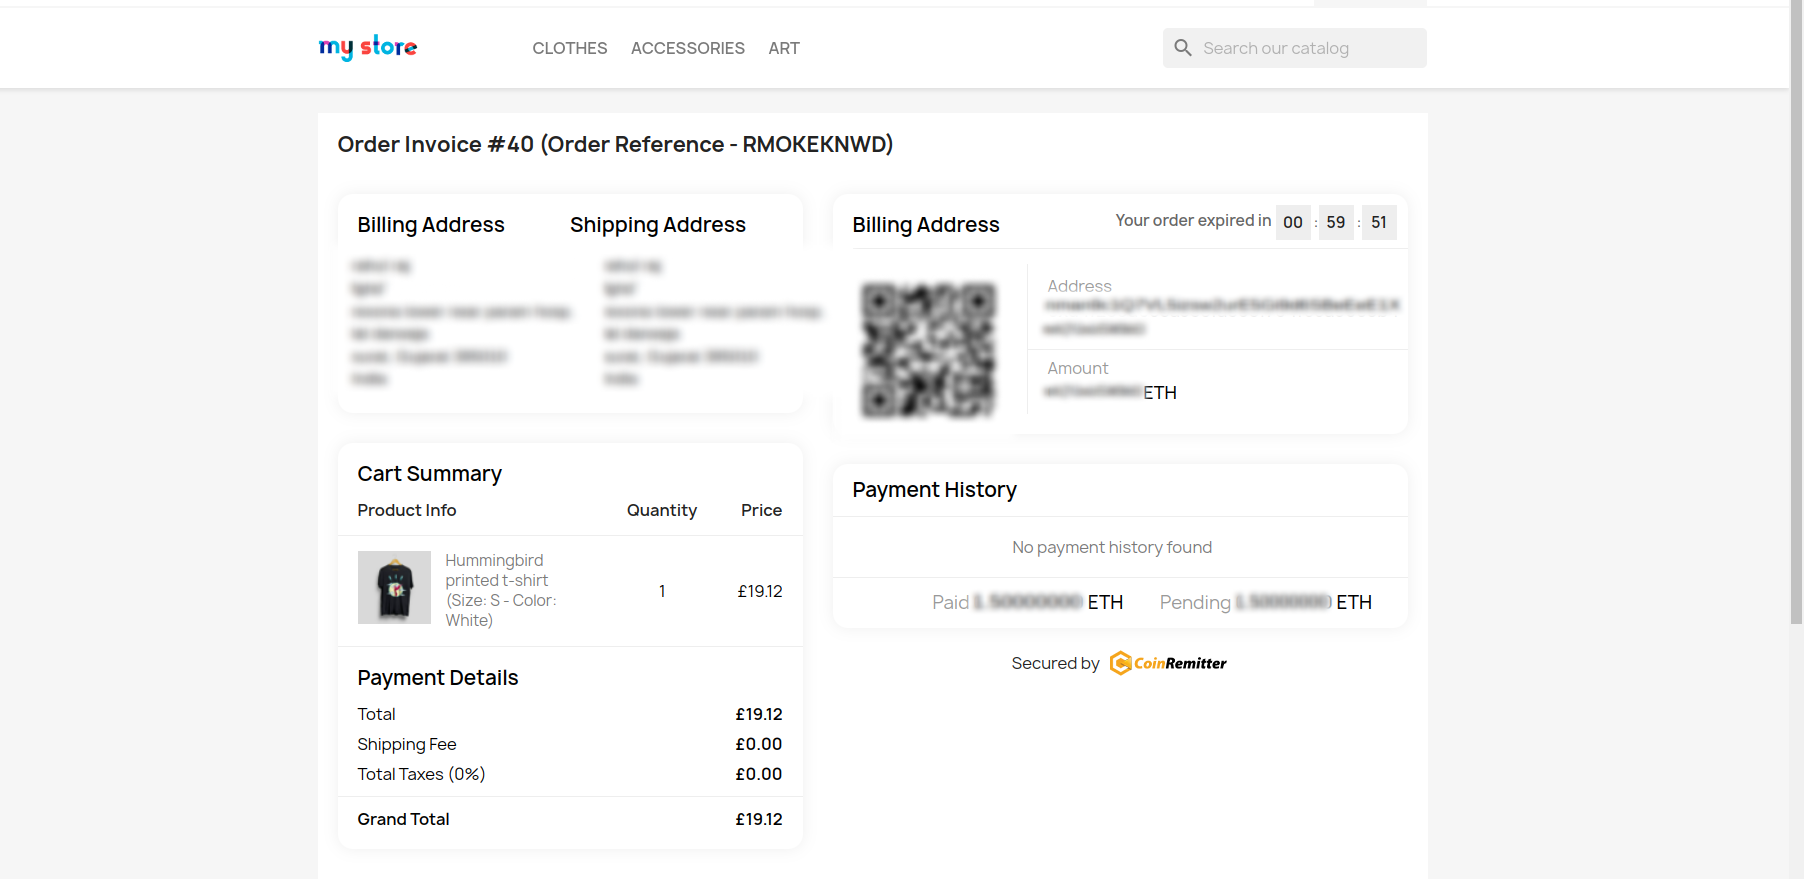
Now customers will click on “Order with an obligation to pay”, The system will then automatically create an invoice that will appear on the screen.
-
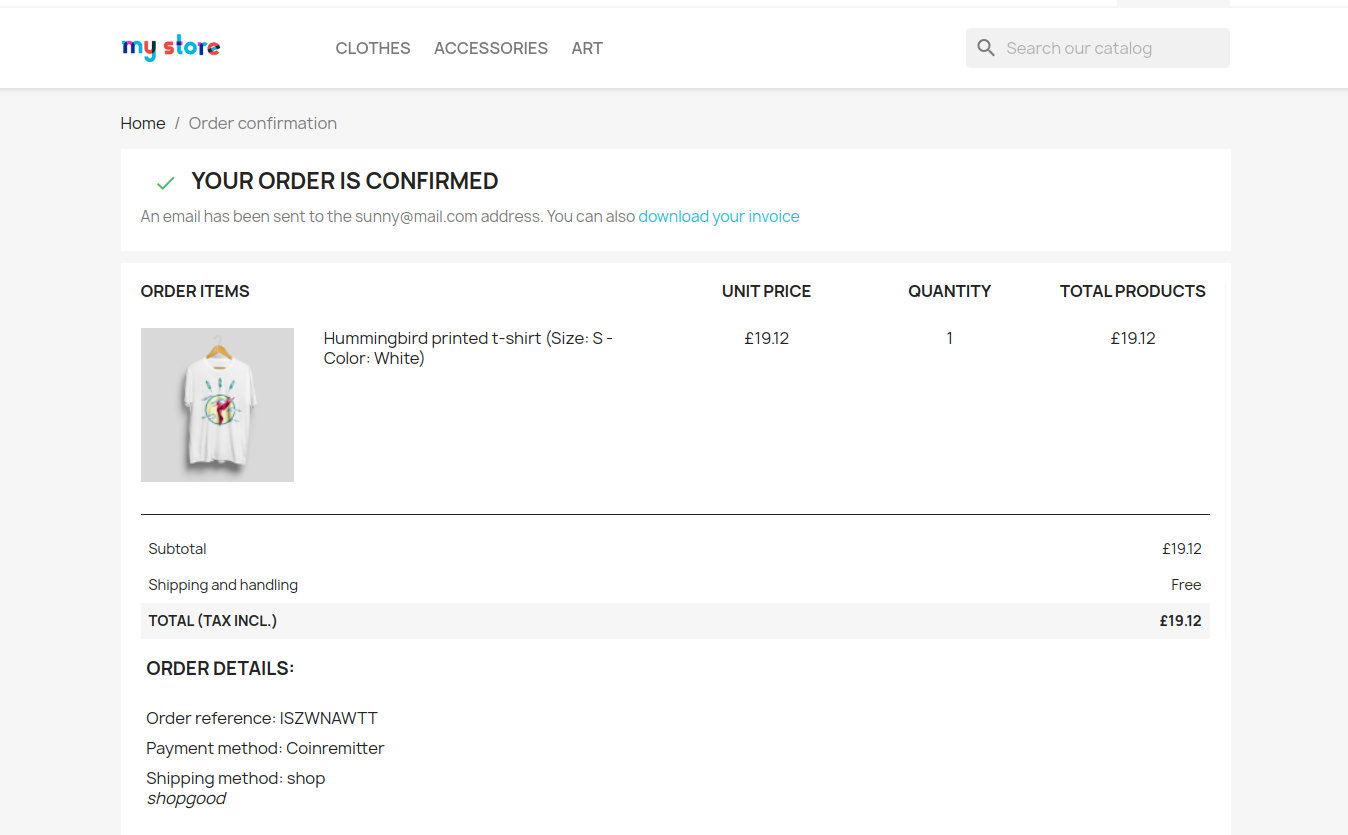
It will instantly redirect to the success page once the payment has been confirmed on the blockchain.
-
That’s all, Your order has been successfully placed.
-
To check your order, go to the sidebar on the Admin panel of Prestashop.
-
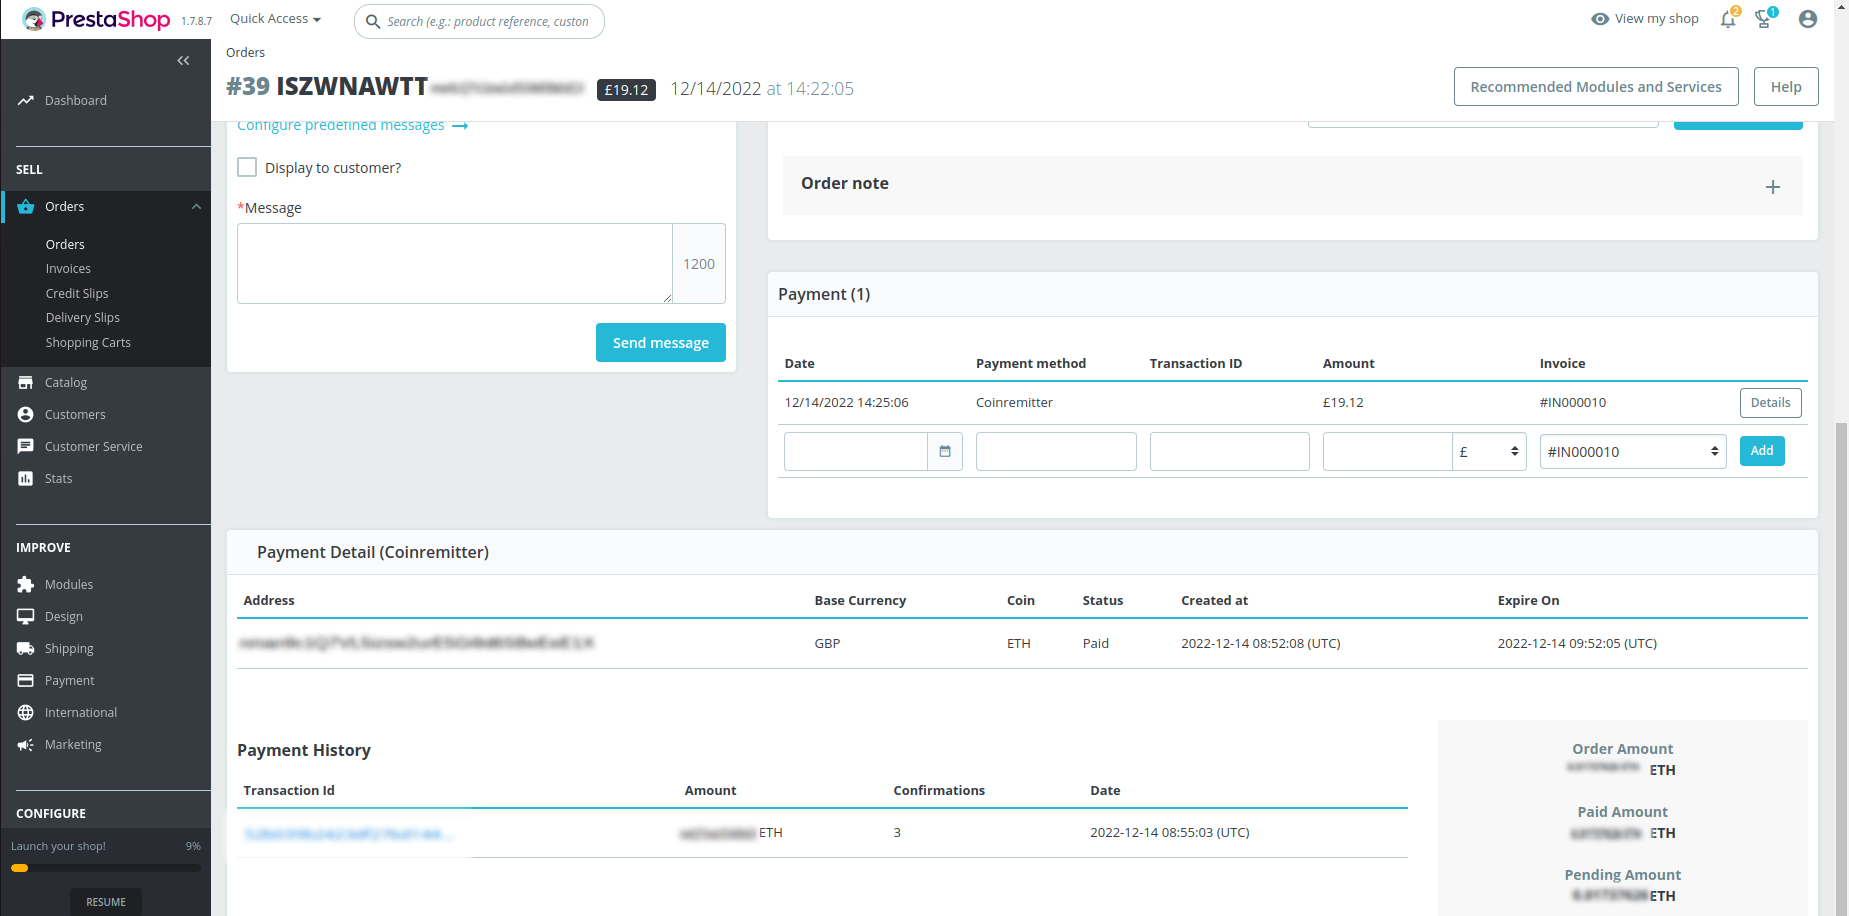
From the order menu select “orders”, after a click on it, you will see your multiple orders list. Select one of these orders that have been paid using the coinremitter payment option.
-
Click on the order and you will be redirected to the order view page.
-
There you’ll see the complete order detail, conversion rate, and payment history.
Now you are ready to accept cryptocurrency payments into your Prestashop website.
NOTE: Don't forget to remove Test Coin wallet from your admin panel and add other coin wallets other than test coin


