-
-
Notifications
You must be signed in to change notification settings - Fork 7
How to Use
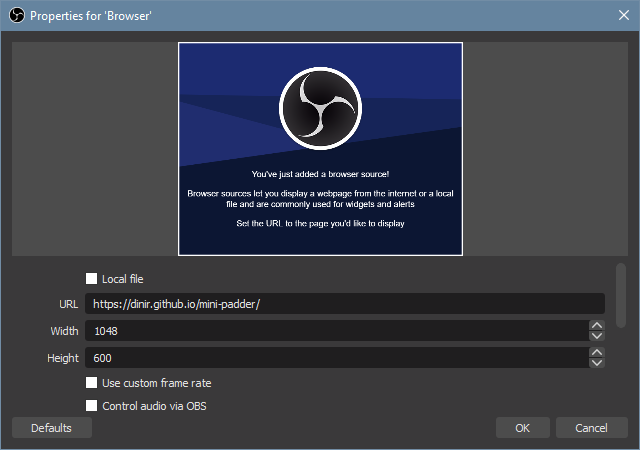
Make a browser source, put the address of the hosted webpage (you can put your own if it's hosted in local), and the size. Recommended Width and Height is 1048 × 600.
Personally I enable Shutdown source when not visible so the browser source won't be taking the computer resource when it's not shown on the video.
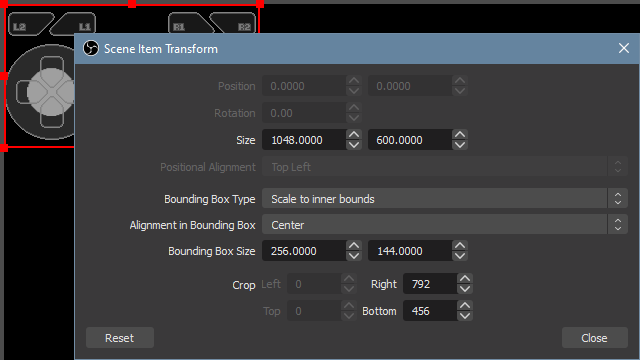
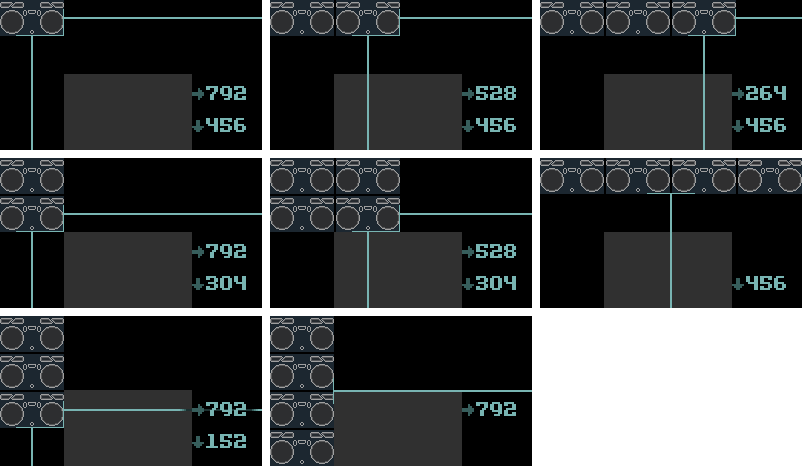
Right click the source, select Transform -> Edit Transform... and crop off outside of the intended display area. Control Panel will show you the crop values for single gamepad or all gamepads. Refer to the next section for all possible crop values.
After cropping, change the size of the bounding box to your preference. Aspect ratio of one gamepad is 16:9.
Do NOT alter the Size of a browser capture in its Transform window unless you know what change you're making.
Make any input from your connected gamepad to see the display working. If your gamepad has a standard mapping and shown as the type of the gamepad it is on the screen, you're all set!
To change the mapping or the skin of the gamepad, take a time to look at the control panel.
To make a change using the control panel, right click the source and select Interact.
You can remap the buttons of your controller, change deadzone thresholds, skins for connected gamepads, display width of gamepads, and fade-out effect duration.
When remapping the buttons, press the button that looks similar to the button shown on the screen, and press the button you set as 'A' to skip when it's not there. Press 'B' button or click the button with the gamepad name to abort.
When assigning a joystick, check which type of input the stick is set to. It's either Left Stick, Right Stick, or D-pad. While assigning, you can move the stick for only the corresponding type, and skip the others.
A skin is assigned by the ID of gamepads. Therefore you can't set different skins to multiple gamepads of the same kind.
I am using Discussions as a place to share custom skins. Browse the uploaded skins, and download 'Single File' upload of a skin you want to try.
You can feed the custom skin to Mini Padder in two ways:
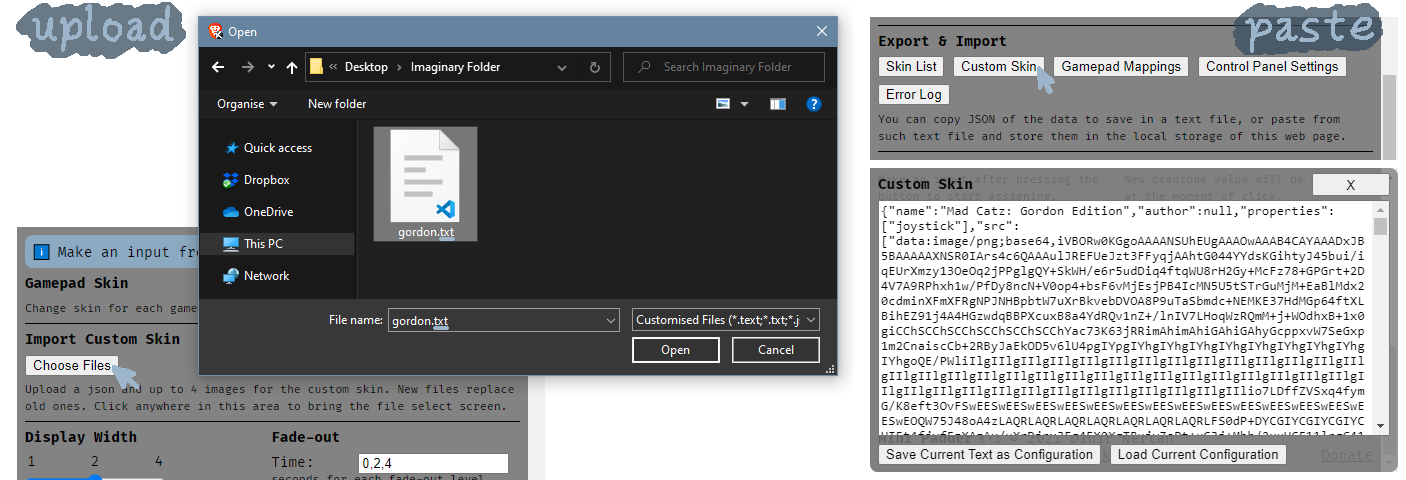
- Upload the file on Import Custom Skin. You can keep other single files of custom skins and load one of them to change the currently loaded custom skin.
- Copy the entire content of the file, and paste it into Export & Import -> Custom Skin.
If you make a custom skin, feel free to share it here. Read this pinned discussion to learn more.
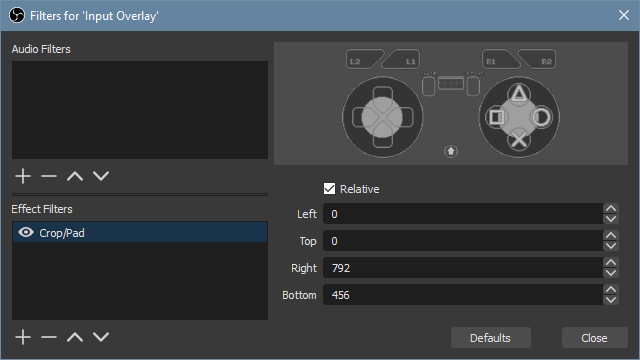
Alternatively you can crop using the crop filter instead, which has a pro and a con:
- The crop setting will be carried over when you copy the source via reference. Transform properties of a source don't carry over to its reference copy, unless you copied a group the source is included.
- You can't access the control panel while the crop filter is active. You have to turn it off when making changes, and it will be shown on the video.
And you know... it's very easy to forget making a change that reverts a temporary change you made, while streaming. How many times did you realize too late that the mic was still muted, or the scene was not changed?
Crop value numbers in the drawing: Expression by Eeve Somepx.
GamepadWatcher
MappingManager
GamepadRenderer


