V0.4 Troubleshooting Printer Profile Issues
Octolapse needs to know a lot about your printer, slicer, and firmware in order to operate properly. If any of these are not correctly configured, you may have mysterious and seemingly intractable problems.
I've listed some of the common problems below. See Creating And Configuring Your Printer Profile for additional information.
Before digging too deep into these issues, check your printer profile and see if your make/model exists in the drop-down box:
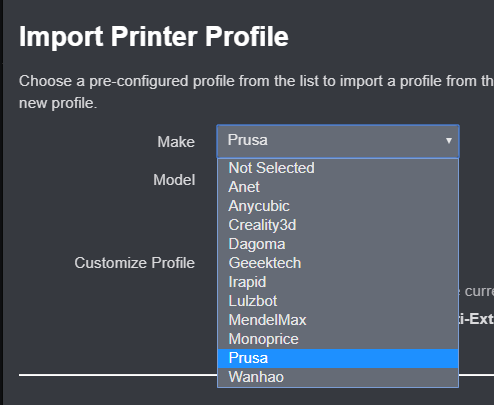
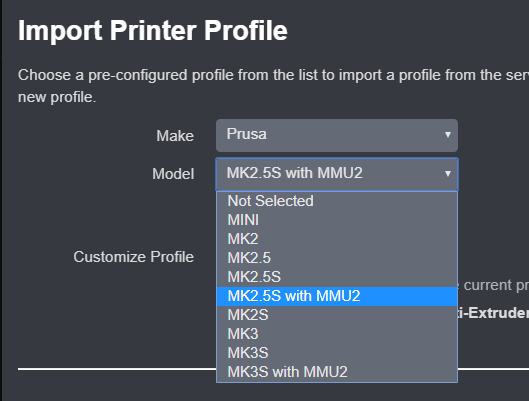
If your printer is in the list, select it. This will download a profile from the Octolapse profile repository that has been pre-configured. This should eliminate most of the setup issues. However, if you have installed or upgraded your firmware (like switching from Marlin 1 to Marlin 2), these pre-configured profiles might need some minor adjustments. All of the printer profiles within the Octolapse profile repository assume you are running the stock firmware.
If your printer is NOT in the list, see this guide for creating a new profile from scratch. When you are finished, consider sending me the new profile so I can add it to the repository!
I always recommend using the Smart - Compatibility trigger for debugging most printer profile issues. When using any of the Smart trigger profiles, Octolapse will generate a snapshot plan, which allows you to see all of the snapshots Octolapse plans to take without actually starting a print. This will save you a lot of time and effort debugging various profile problems problems.
If you upgraded from a previous version of Octolapse, see the Before You Begin section above.
If you are using one of the High Quality triggers, it could be that there is no retraction (are you printing with vase mode???). All of the high quality profiles will simply refuse to take a snapshot if they decide there would be a major impact on print quality.
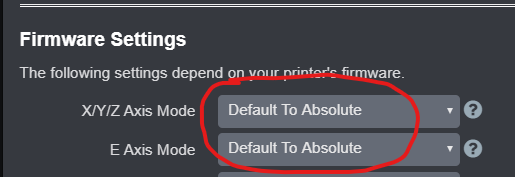
There are a few settings that can cause this issue, including the following:
- XYZ Axis Mode and E Axis Mode - Set these both to Default to Absolute. I plan to remove these settings in a later release and always default to absolute.
- Priming Height - If the priming height is set lower than your layer height, Octolapse will not be able to correctly detect layer changes. As a test, you can set the priming height to 0.05mm above your layer height. For example, if you are printing at a 0.2mm layer height, set the priming height to 0.25mm to verify this is your issue.

The last thing to check is your start Gcode to make sure you printer is homing properly. Lots of changes have been made to the latest version of Octolapse so that it no longer requires all three axes to be homed, but it's possible this isn't working in all situations. At a minimum you will need to have a command that homes all 3 axes somewhere in your start Gcode. For example, this command will home all 3 axes:
G28 ; Home all 3 axes
This command will NOT:
G28 X Y; Home all 3 axes
For this particular issue, you might want to try the Classic - Every Layer trigger to debug. Using this trigger you will be able to enable the Printer State Info Panel on the Octolapse tab, which will show up AFTER you start a print with Octolapse enabled. Here is what it might look like if there are issues:
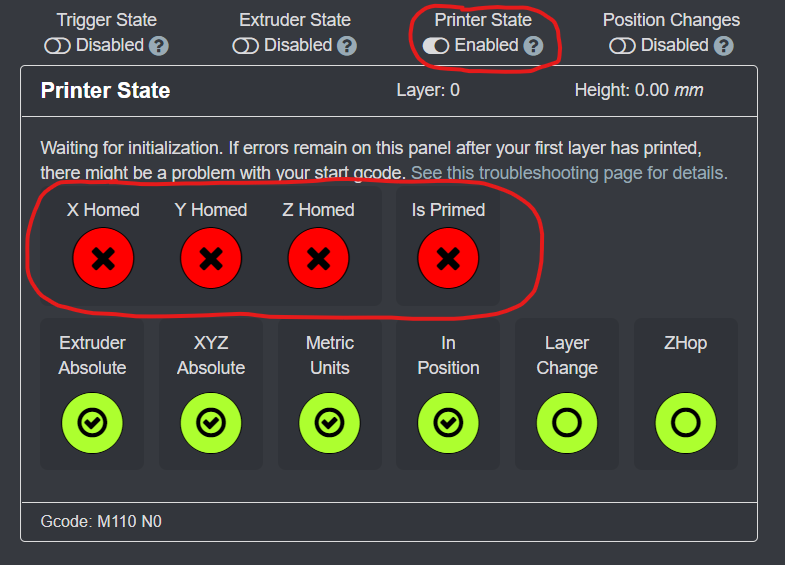
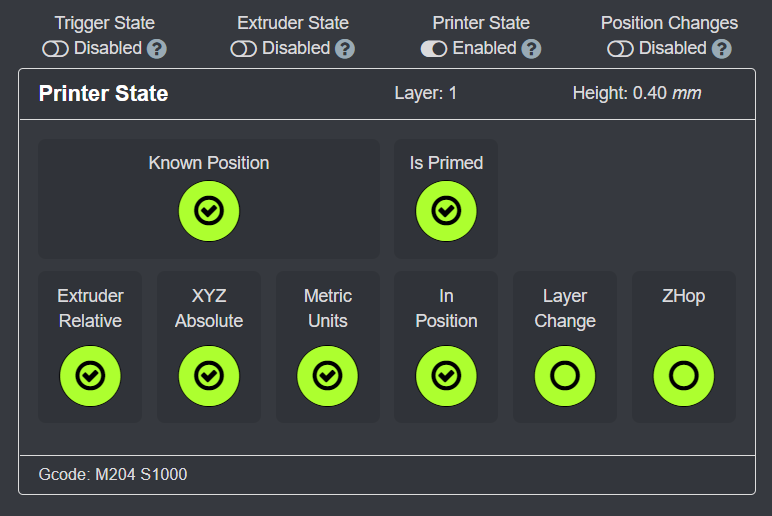
You will always see some red at the start of a print, but as the Gcode is executed, Octolapse will usually figure things out, and red indicators will turn to green (success) or orange (warnings, usually OK):
Before modifying your start Gcode, make sure you understand it! Arbitrarily changing your start Gcode could cause all kinds of issues.
The usual problem here is a printer profile setting called Priming Height:
This is a complicated setting, but it is absolutely necessary in order for Octolapse to properly detect the first layer. Some printers prime above the bed at a specific height. This is configured within your start Gcode in your slicer. Octolapse will start detecting layers AFTER it extrudes plastic BELOW the height in this setting.
For example, if your printer primes at 5mm, you should set this parameter to 5. If it primes directly on the bed, you might be able to get away with setting this to 0, but if the priming line is above the height of your first layer, Octolapse may miss this layer.
If possible, always set the priming height to the actual height at which your printer primes UNLESS the priming height is equal to the first layer height. In that case, you can set this value to 0.
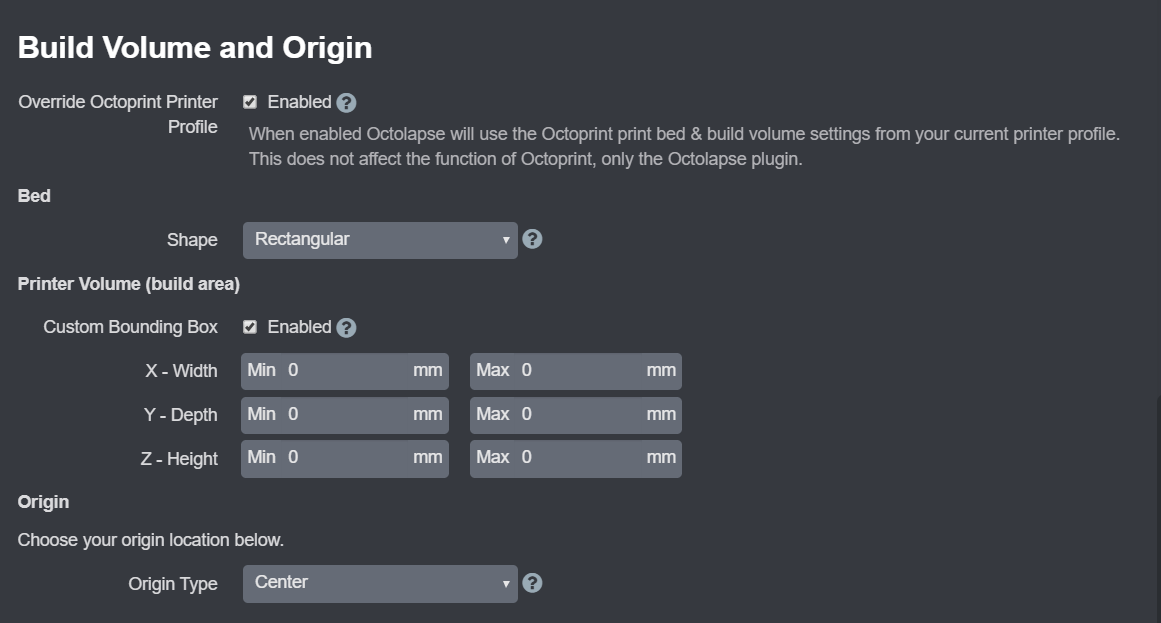
If your extruder is in the wrong position in every snapshot, the likely culprit is the printer Build Volume and Origin settings:
ALL of these settings are critical, and you must get them right.
First, I recommend enabling the Override Octoprint Printer Volume since MANY people fail to set this up correctly in their OctoPrint printer profile.
The next thing to get right is the bed shape. Fortunately, this one is pretty easy. If your bed is circular, select that. If it is a square or a rectangle, select Rectangular. If you have some other bed shape, let me know because I've never heard of any other shape!
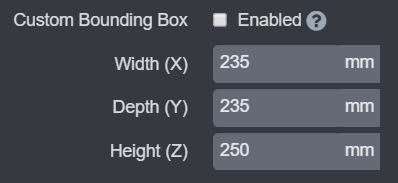
Now it's time to enter the print volume. This is a bit tricky, since some printers have odd coordinate systems that include some negative points. For example, my printer's Y axis goes from -3mm to 210mm. It's a good idea to start with the bed dimensions (Custom Bounding Box setting unchecked) and see if that works before attempting to configure a custom bounding box. Here is an example showing the build volume for the Ender 3:
Here is an example of a custom bounding box for my Prusa Mk2.5:
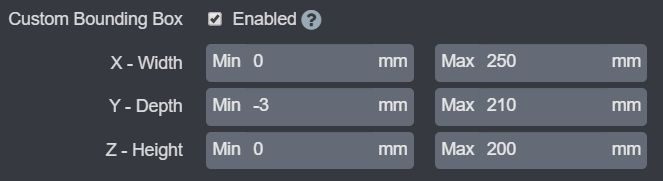
Notice that more options appear if the custom bounding box is checked. However, this means that you need to know the exact absolute min and max coordinates for each axis. Unfortunately, in some cases this cannot be helped.
If you cannot determine your build volume and your printer is NOT in the list, create an issue on the Octolapse Github page, and perhaps we can get your printer added to the profile repository.
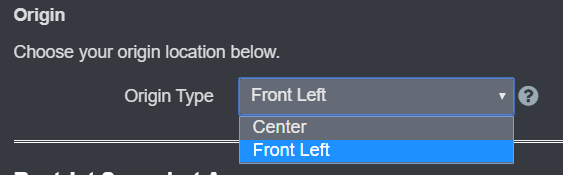
Finally, you need to select the Origin Type:
The origin of your printer is the location on the bed of the coordinates (0,0). Fortunately, there is a quick series of Gcode commands you can send to the printer to figure this out:
G28 X Y; Home X and Y axes
G0 X0 Y0; Move to the origin: 0,0
If your extruder is over the front left position, select Front Left. If it is near the center of the bed, select Center. If it is somewhere else, please let me know!
The first thing to try here is the Automatic slicer type setting:
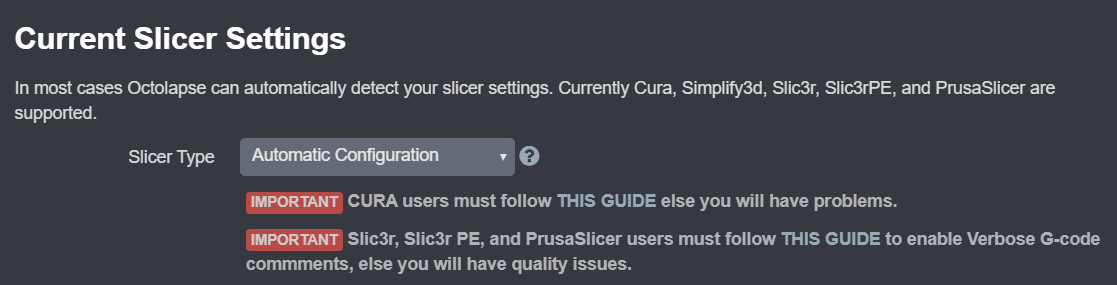
I can't tell you how many times I've tracked print quality issues down to incorrectly entered slicer settings. I've done it myself, even after reviewing every setting individually. Data entry is difficult, especially when there are multiple kinds of units (mm/s vs mm/min) and lots of numbers to get correct. The easiest way to eliminate this possibility is to NOT manually enter the data. See this guide for enabling automatic slicer settings detection, and never worry about entering your slicer settings again!
Lots of things can cause this, but recently I've been seeing this for people who are upgrading to Marlin 2.0 from Marlin 1.0. The issue is due to a design decision within the firmware where the G90/G91 command also affects the extruder's axis mode. This can have HUGE negative effects if the setting is wrong. Unfortunately there is no easy way to know the correct value for this setting (unless you are running straight Marlin 2, in which case it is always true). You may consider changing this setting in your printer profile and seeing if your issue goes away:
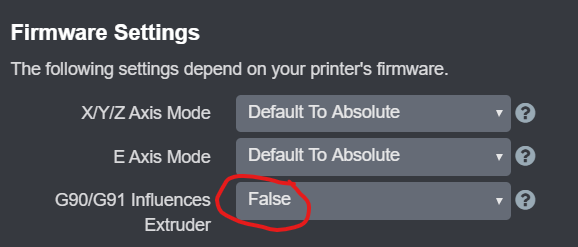
If it is true, try setting it to false. If it is false, try setting it to true. Be prepared to stop your print if things go horribly wrong, else you might have to deal with a clogged extruder. If you hear any grinding noises coming from your extruder, it's likely that this is the wrong setting.
The other thing you could try if you are positive the G90/G91 influences extruder setting is correct is to disable Snapshot Gcode Axis Compatibility Mode:

This prevents Octolapse from sending any commands that switch the axis mode for the extruder (M82/M83) or the X/Y/Z axis (G90/G91). This is a new feature, so there could be some undiscovered bugs here.
If all of that fails, see this print quality troubleshooting guide.