V0.4 Getting Started
If you have not yet installed Octolapse, if you wish to upgrade to a new version, or get early access to pre-release features, see the installation instructions. Once you have finished installing Octolapse, continue to the next section.
Important Note for Upgrading from V0.3.4: I've gone to great lengths to preserve as many settings as possible for users upgrading from previous versions. However, many of the guides assume that you are starting out with the default settings for V0.4, which won't be true if you upgraded. Please be sure to read the [Upgrading from a Previous Version]V0.4---Installing-and-Upgrading-Octolapse#upgrading-from-a-previous-version) setion within the upgrade instructions for details, else you may be confused later on.
You might want to restore the default settings (Octoprint Settings->Octolapse->Restore Defaults) after you install. Your original Octolapse settings for V0.3.4 will be backed up in /home/pi/.octoprint/data/octolapse if you ever want to downgrade.
Once you have it installed, you will want to add (or update) your printer profile. The new version allows you to import printer profiles by selecting your make/model from the drop down list at the top of the printer profile.
If your printer is not in the list, see this guide which will walk you through the steps necessary to create a new profile from scratch.
If you still can't get your printer profile working, consider creating a Feature Request.
Automatic slicer configuration is one of the best features in the current version of Octolapse, so if you are using Slic3r, Prusa Slicer, Cura or Simplify3d, be sure to take a few minutes to get this working. Take a look at this brand new guide for detailed instructions.
I plan to add support for more slicers eventually. If you're using a different slicer, you'll need to select 'other slicer' from the drop down and enter your settings as best as you can. When filling in your speeds, pay close attention to the units! There is a big difference between mm/min and mm/sec!
If you are not using Slic3r, Prusa Slicer, Cura or Simplify 3D, please let me know what slicer you are using, and I'll add it to my To Do list.
Octolapse can now detect what features (infill, perimeters, bridges, prime pillars, etc.) your printer is printing based on gcode comments. Cura and Simplify3d are compatible out-of-the-box, but Slic3r variants require you to enable verbose gcode comments. See this guide for detailed instructions.
I strongly recommend using a webcam and NOT a DSLR camera until you are comfortable using Octolapse. This section only contains information about setting up a webcam.
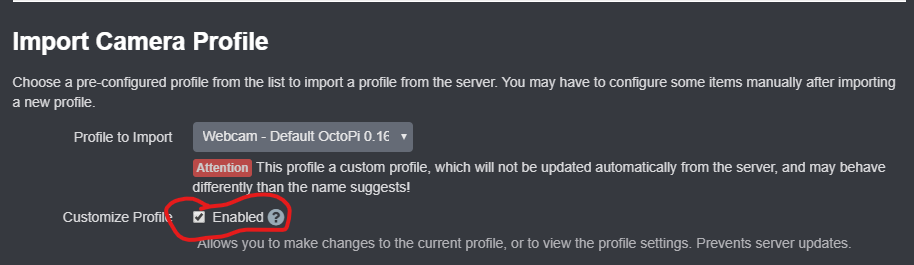
First, edit the default camera profile:

The default settings should work in most cases because Octolapse tries to extract your OctoPrint webcam settings when it is installed. However, there is a built-in test you can use to verify things are working properly.
First, you'll need to make the profile a custom profile like this:
Now try clicking the test button:

If it works, you will see the following:
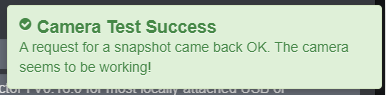
You can close the profile without saving if the test worked.
If you get an error message, see this troubleshooting guide.
This step is optional but highly recommended. I think you will definitely want the ability to change your webcam settings within Octolapse. As long as you are using mjpg-streamer, you should be able to get this working.
If you are using the Raspberry Pi camera, follow this comprehensive beta guide.
If you are using any other USB camera, follow these steps to allow access to control.htm, then enable custom image preferences within your camera profile.
Finally, it's time to make an Octolapse! I recommend sticking mostly to the default settings for your first timelapse, so navigate to the Octolapse tab. It should look something like this:
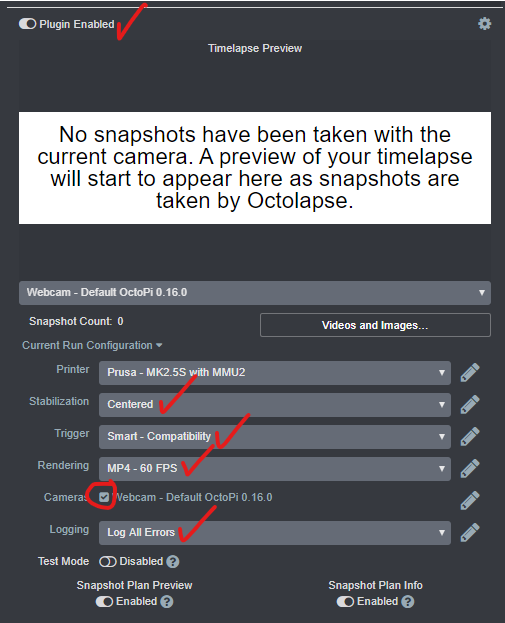
Double check your settings and make sure they look like the image above.
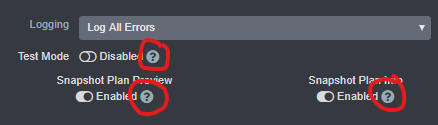
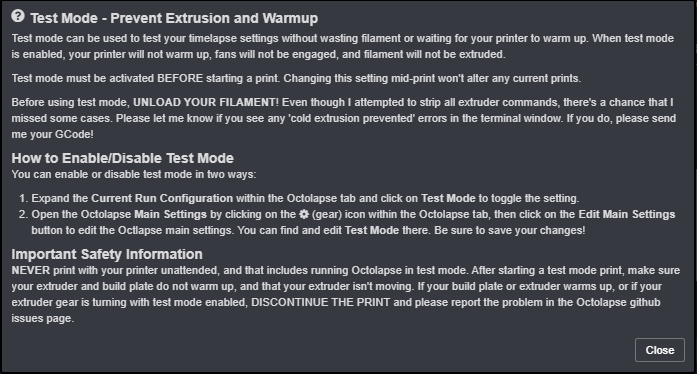
Before running Octolapse with a live print, I recommend enabling the Test Mode feature:

Test mode prevents extrusion and warm-up, allowing you to run a test quickly without wasting any filament.
Important Note: Always remove your filament prior to using test mode. If your hotend or bed warms up during test mode, please create an issue so I can fix it.
Once test mode is enabled, it's time to select a file to print. I recommend something small and fast, like a test cube. Do NOT use a vase mode print (vase mode prints are not recommended, but if you must, take a look at the Smart - Snap to Print trigger profile).
Make sure your gcode file is stored locally and not on your printer's SD card. Octolapse will not work when printing from SD. You can configure OctoPrint to only show files stored locally like this:

Now click Print. At this point Octolapse will run several tests to make sure things are working properly. If anything fails, skip ahead to the Getting Help section.
You should see a progress bar including an estimate of how long pre-processing will take (it could be a few minutes for a large gcode file).
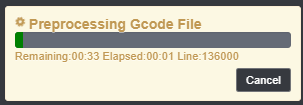
Clicking Cancel will stop processing and end the print.
Once preprocessing is finished, Octolapse will show a Snapshot Plan. This gives you an opportunity to preview all of the snapshots that will be taken. This gives you a chance to confirm that the stabilizations are correct, and you can cancel and try again if anything looks off. You will only see the preview if you are using one of the Smart Triggers.
Here is what the snapshot plan preview popup should look like:
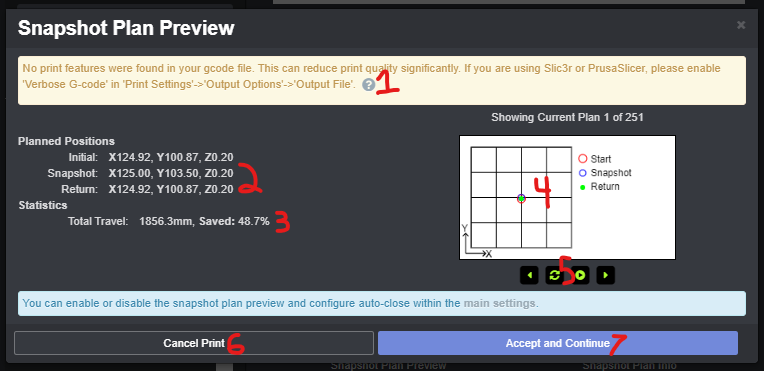
- Print/Timelapse Quality Warnings - If you see an orange box at the top of your snapshot plan, Octolapse has detected a potential problem. These are warnings, not errors, so you can choose to continue if you wish. Click on the help links (blue question marks) for information on how to fix these potential problems. Most are pretty easy to solve, and in some cases it can make a big difference in the quality of your timelapse or print.
- Planned Positions - This is information about the current snapshot plan. Each snapshot has its own plan, and here you can see exactly how the extruder will move for the current plan.
- Travel Statistics - Here you can see how much travel Octolapse will use to take ALL of the snapshots. You can also see an estimate of how much travel time Octolapse managed to remove compared to the classic layer trigger (the legacy triggers from previous versions of Octolapse).
- Snapshot Plan Visualization - Here is a graphical representation of the current snapshot plan. You can see where the extruder starts, where the snapshot is taken, and where the extruder returns to. These positions are not always the same, though sometimes (as in the picture above) they are all in the same spot.
- Snapshot Plan Selection and Animation - These controls allow you to view each snapshot plan or to animate the plans (the play button). This will give you a bird's eye perspective of what your timelapse will look like.
- Cancel Print - If you decide you would like to change some settings or fix any quality warnings, just click on Cancel Print. This will close the popup and allow you to change settings and try again.
- Accept and Continue - If you like what you see, click Accept and Continue, and your print should start immediately.
If you see any Print/Timelapse Quality Warnings (item 1 above), I recommend you try to fix them now. Simply click on the blue question mark next to the warning to see information on how to fix the issue. See the Getting Help section below for more information.
Once you are satisfied with your snapshot plan, click on Accept and Continue to begin your test mode print.
By now, your printer should be going through the motions of printing your gcode file, but no plastic should extrude, and your hotend/bed should not be warming up. Octolapse should capture a snapshot on each layer, exactly as reported in the snapshot plan popup.
Now, open up the Octolapse tab. Since you are using one of the Smart triggers, you should see some additional information on the bottom of the Octolapse tab that will look a lot like the Snapshot Plan Preview popup you saw earlier:

- Enable/Disable Snapshot Plan Info Pane - To see the snapshot plan, you must enable it. You can enable or disable the info pane at any time. The plugin will use less bandwidth if the info pane is disabled.
- Currently Displaying Snapshot Plan - Here you can see which snapshot plan is being shown and how many snapshots there will be in total. Note that the plan showed may not be the one that is currently executing, since you can look at any plan you want (see item 7 for details).
- Next Snapshot Progress - This shows the next snapshot plan that will be executed, including the number of gcodes remaining and a percentage. Note that when the lines remaining is equal to 0, Octolapse will wait for all print moves to finish (i.e., it will wait for the print buffer to be empty), and then it will execute the stabilization and take a snapshot.
- Planned Positions - This shows the coordinates of the next snapshot, including the initial, snapshot, and return positions.
- Statistics - This shows the total mm of travel that Octolapse will add to the print. It also includes an estimation of how much travel distance was saved (as a percentage) versus using the classic (legacy) triggers.
- Snapshot Plan Visualization - This an illustration of the currently selected plan. Note that this might not be the current plan.
- Snapshot Plan Selection and Animation - These controls allow you to view each snapshot plan or to animate the plans (the play button). This will give you a bird's eye perspective of what your timelapse will look like. The controls are, from left to right, Previous, Go to Current Plan, Animate Snapshot Plans, and Next.
After Octolapse captures the first snapshot, your Timelapse Preview within the Octolapse Tab will change from this:
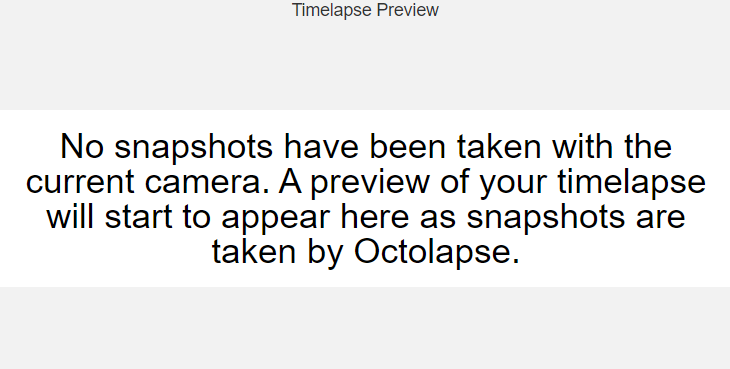
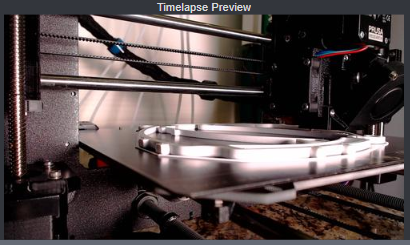
to something like this:
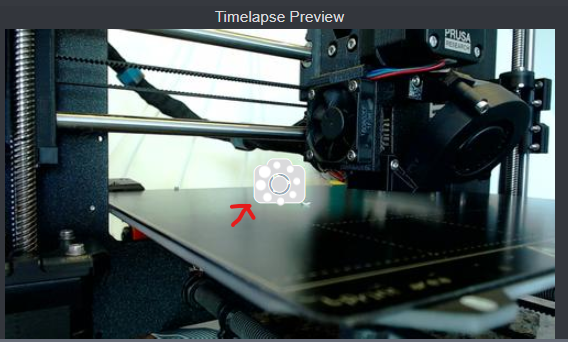
You will notice that while Octolapse is trying to take a snapshot, an animated icon appears in the center of the Timelapse Preview page:
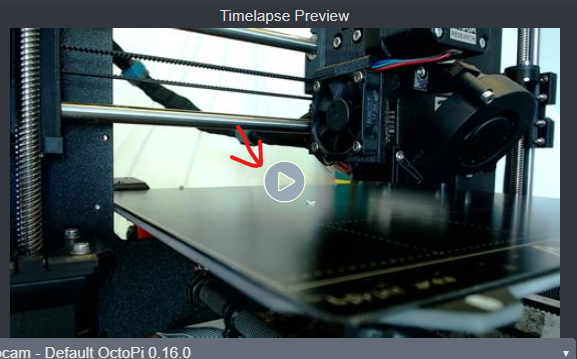
As more and more snapshots are taken, you will be able to see an animation of the timelapse frames taken so far. By default, Octolapse will keep the last 30 snapshots (you can adjust this value) and will automatically start playing the timelapse preview after every snapshot. You can start the preview manually by clicking on the latest snapshot image (a play button will appear once more than one snapshot has been taken). If a timelapse preview is available, you will see this Play icon while hovering over the latest snapshot image:
Important Note - The timelapse preview animation is composed of cached images, so refreshing your browser or opening a new OctoPrint window will remove all of the captured frames. This is done to preserve bandwidth and minimize performance issues.
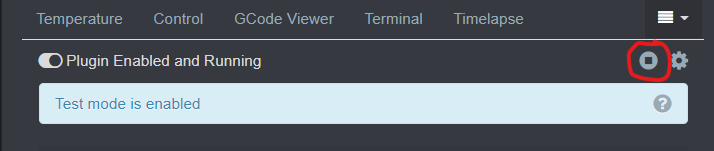
If things go poorly, or if you suspect Octolapse is causing artifacts on an important print, you can stop Octolapse but continue printing. Just click on this button:
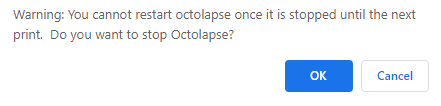
You will have to confirm that you really want to stop the timelapse:
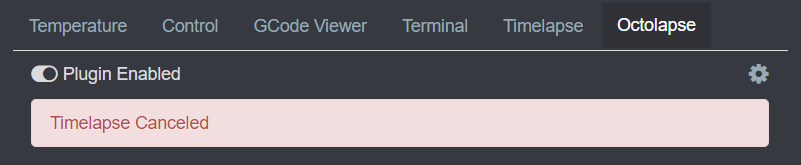
The print should continue normally, but Octolapse will not take any additional snapshots. You will see an indicator showing the timelapse was canceled at the top of the Octolapse Tab:
Once the print has completed, was canceled, or if the printer was disconnected, Octolapse will attempt to render a timelapse. While Octolapse is rendering, you will see a new button on the Octolapse tab:
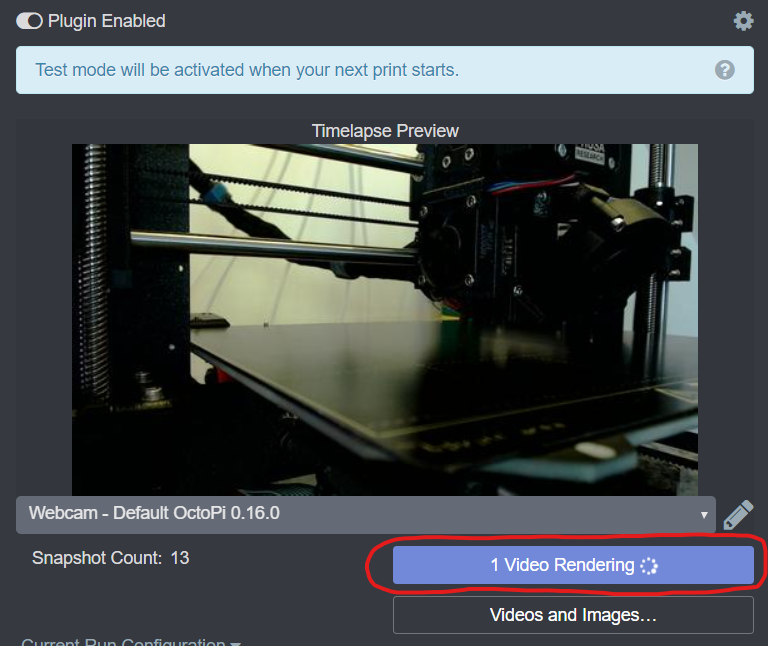
If you click on the button, you will see a popup that contains detailed progress that looks like this:

Note: The rendering popup button is only visible while Octolapse is rendering at least one timelapse.
Here you can see a lot of information about the timelapses that will be rendered, including the name of the print, the final print status, the size of the files to be rendered, the print date, the camera used to take the snapshots, the rendering profile used to generate the video, and the current progress. Octolapse will display the status Pending for any timelapses that have not yet started. Click on the blue question mark in the upper right hand corner of the popup for more information.
Note: Octolapse will only render one video at a time.
If a rendering fails, you can manually retry by opening the Unfinished Timelapse popup. If any unfinished timelapses are found, you will find this Unfinished Rendering... button on the Octolapse tab:
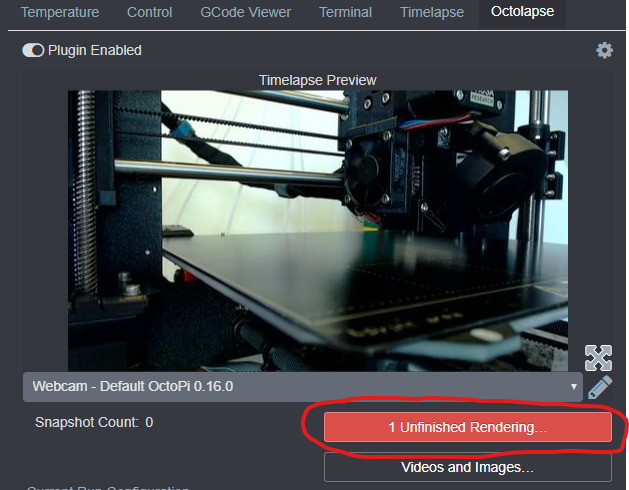
Click on the Unfinished Rendering... button to open the Unfinished Renderings popup:
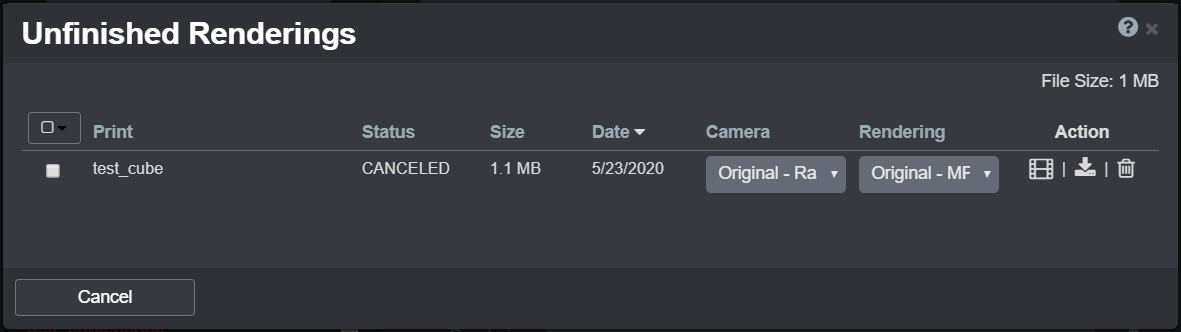
Here you will be able to render, download, or delete images associated with any unfinished renderings. You can also change the rendering or camera profile before attempting to retry the rendering by selecting a different profile in the drop down boxes.
Once Octolapse has completed rendering, you will be able to find your new timelapse in the Videos and Images popup:
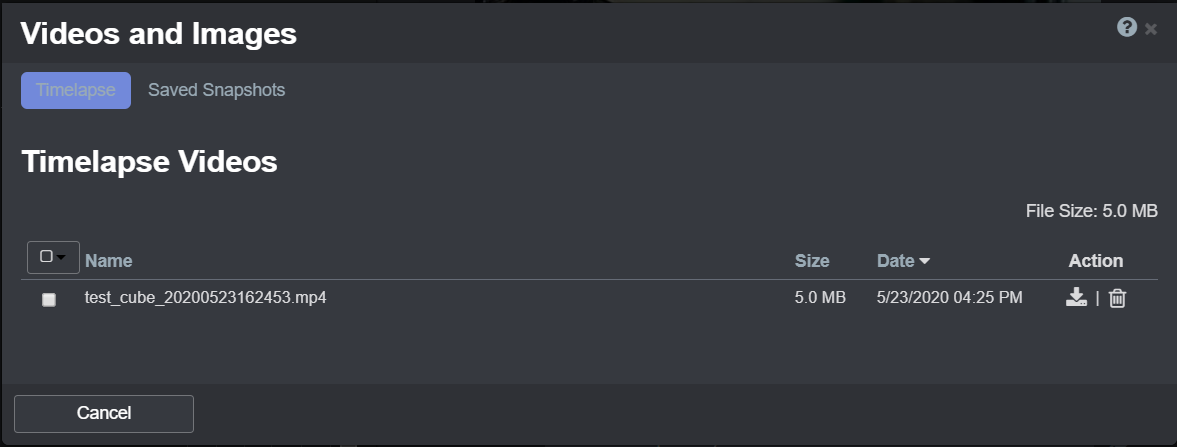
Here you can download or delete any previously rendered timelapses. You can also sort by clicking on the column headings, or select multiple videos to delete (including select all on page or select all).
By default, Octolapse stores its videos in the same folder that OctoPrint uses for the stock timelapse plugin, so you may find lots of timelapses in this popup. You can change the default timelapse folder within the Main Settings (gear icon on Octolapse tab->Edit Main Settings...) if you prefer to have all of your Octolapse videos separated from the stock timelapse plugin.
Now, click on the Download icon under the action column and see how your timelapse looks!
Now that you have gotten your first test timelapse working, I recommend trying out some of the other smart triggers, like Smart - Snap To Print, Smart - Snap To Print - Smooth or 'Smart - Highest Quality'. Note that if you are using the 'Snap To Print' trigger, you may want to turn your camera delay down to 0MS for best print quality. If you are unsure what the trigger profile is supposed to do, edit the profile and read the description.
I would recommend that you continue using test mode until you are comfortable with Octolapse and how your videos are turning out. It's a great way to work on your camera settings too.
There are many different stabilizations that come pre-loaded, and I recommend exploring the various options, including fixed stabilization at various bed positions and animated stabilizations that make your extruder move in interesting ways during the timelapse. You can even disable stabilization for a more chaotic look. Edit these profiles and read the descriptions for more details.
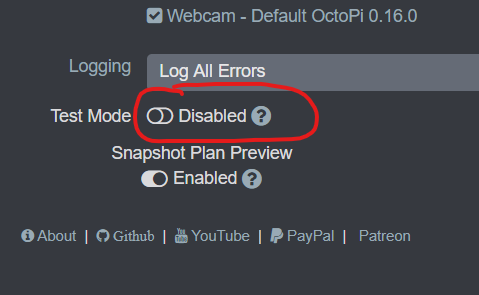
After you are finished experimenting, it's time to try a live print. Again, I recommend something small. Be sure to disable Test Mode within the Octolapse tab:
Be sure to keep an eye on your print, especially at the beginning, to make sure your snapshots are working as expected and that there aren't excessive artifacts. If you notice any print quality issues (stringing/blobs), check out the Troubleshooting Print Quality Issues guide for help with these issues.
Now that Octolapse is fully configured, your camera settings are perfect, and you've got good print quality, it's time to try something bigger! If you post any videos consider tagging Octolapse, or leave a link to the repository at: https://github.com/FormerLurker/Octolapse
Please notice the links at the bottom of the Octolapse tab:
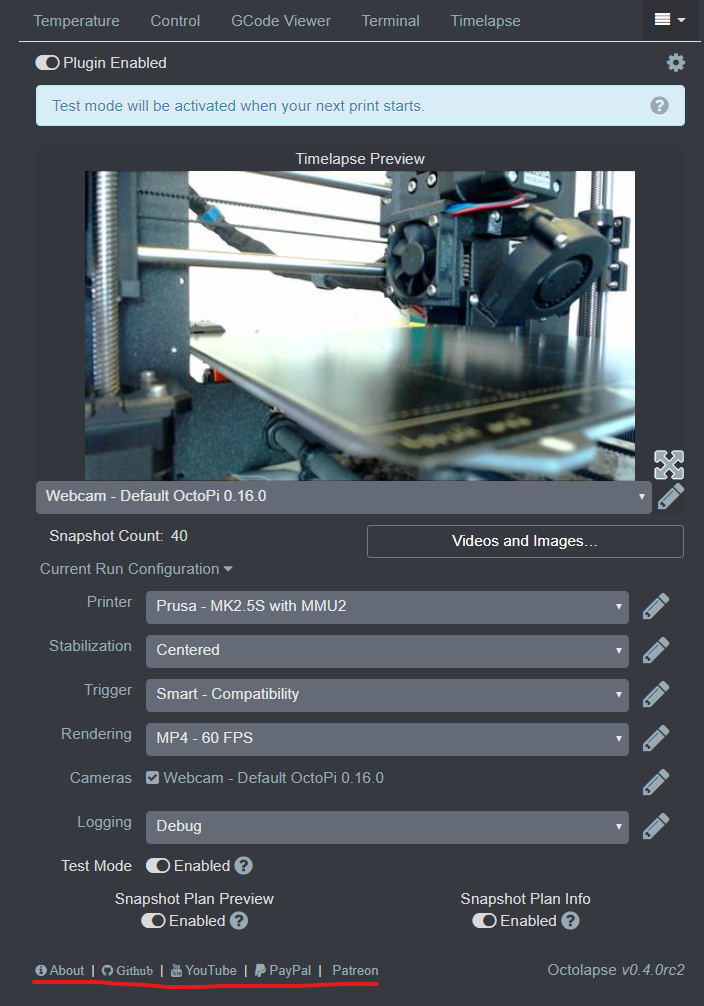
In the lower left hand corner you will find links to the Octolapse About page, my Github profile page, my youtube channel, my PayPal.me page, and my Patreon page. If you would like to become Patron, a Github sponsor, or just send me a beer via PayPal.me, I would REALLY appreciate it. Almost all of the donations go towards offsetting the cost of development, which are substantial. Plus it always makes my day!
If you cannot afford to leave a tip, or just don't want to, that is fine too! Octolapse is free and open source after all. There are other ways you can help to ensure that Octolapse continues to be updated and improved:
- Share your Octolapse videos, and be sure to leave a link and explain that the timelapses were captured with Octolapse and OctoPrint (you will be asked how you made the timelapse, so this will also save you some time answering questions). This is not necessary, but it greatly appreciated.
- Post any bugs you find to the Issues Page. I would like to eliminate as many bugs as possible!
- Participate in the OctoPrint Community Forums, and help all the noobs get OctoPrint and Octolapse working and help to expand the hobby. The more people are using OctoPrint and Octolapse, the better the software will become!
- If you've created a working and tested printer profile for any printers that don't show up in the make/model list, please send it to me! I want to make it as easy as possible for new users to get their printers configured quickly.
- Help me make this documentation better! Octolapse has a LOT of documentation, guides, tips, etc., both here in the Wiki, and integrated within the Octolapse plugin. If you find inaccuracies, typos, gaps, or have ideas for improvement, I'd love to hear about them.
- If you have any special talents that could be applied to Octolapse development, like graphic design, video production (think tutorials), programming, etc., maybe you'd like to participate more directly in Octolapse development/documentation?
In addition to this Wiki, there are many ways you can find help for common Octolapse issues. A few of these will be mentioned here.
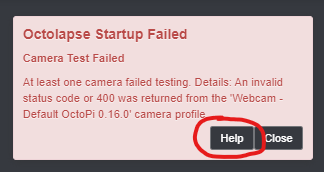
When starting a print with Octolapse enabled, you may see an error notification. This notification should include a help button. Always Read the Provided Help. In general all of the information you need to correct problems is available if you click the help buttons or help links:
Octolapse uses an integrated help system that contains a wealth of information. In addition to the Help buttons shown above, you will find help links all throughout the interface. Here are a few examples:


Clicking on one of the help icons will open a popup that will look similar to this:
Please let me know if the help files need improvements or corrections!
If the integrated help system doesn't solve your problem, there are a few other things to try:
- Check out the Troubleshooting guide. Lots of common issues are discussed there.
- Try posting on the Octoprint Community Forum in the Plugins category. Be sure to include as much information as you can, including logs, your OctoPrint/Octolapse versions, other installed plugins, and anything else you think would be useful. You're more likely to have your problem solved if you include all of the information. I am on this forum a quite a bit, so don't be surprised if I answer you!
- Try the Octoprint subreddit. I'm on there a lot too. However, I have found that the Octoprint forum usually has more experienced users. Still, this is a good resource.
- If all else fails, or if you are certain that you have found a bug in Octolapse (I want to fix these), consider creating an issue in the Octolapse Github repository. I spend a LOT of time researching issues (I've closed over 450 so far), so please try to exhaust all other options first. Technical support issues are better handled in the forums, but if you are desperate and fill out the ticket completely, I'll most likely try to help :)