This repository contains materials prepared by myself and collected over the internet regarding Kubernetes and how to properly use it in case you are a developer, a tech lead or a solution architect
Pluralsight: Kubernetes for developers
Video Course with a good intro about Docker and Docker runtime: Oreilly CKAD: Certified Kubernetes Application Developer
Extra projects from CNCF Cloud-Native Computing Foundation (where Kubernetes and ArgoCD also belong): https://www.cncf.io/projects/
Lots of Service \ NetworkPolicy \ Deployment EXAMPLES
Docker. busybox. Docker commands
busybox - is a minimal linux container to emulate workload. if you type the command without -it it immediately stops because container doesnt know what to do, there is no application inside.
docker run -it busybox
to inspect what's happening within the container:
docker inspect | less
- New devs onboarding.
- You can eliminate Application conflicts. (You can run multiple versions of one application simultaneously)
Kubernetes application instance creation diagram

Cluster, Internal Structure, Building Blocks, State Management


Init Containers
-
Kind of containers which should be started before launching the main application container

-
Init Container Example:

Pay attention on sleep mode. After 20 sec it's done. If you havent declared end status it will run forever and your main application won't start.
Kubernetes Pod. Brief Explanation

What happened when you create a POD. Comprehensive article on medium
Pod Lifecycle diagram and list of steps

- kubectl writes to the API Server.
- API Server validates the request and persists it to etcd.
- etcd notifies back the API Server.
- API Server invokes the Scheduler.
- Scheduler decides where to run the pod on and return that to the API Server.
- API Server persists it to etcd.
- etcd notifies back the API Server.
- API Server invokes the Kubelet in the corresponding node.
- Kubelet talks to the Docker daemon using the API over the Docker socket to create the container.
- Kubelet updates the pod status to the API Server.
- API Server persists the new state in etcd.
Multi-container pod. Good scenarios to run multiple containers in one pod.Sidecar.


Sidecar example:
- One container generates logs (busy box), another one exposes the logs(sidecar).
- Instead of busy box it could be your database. The sidecar in this scenario may limit the amount of logs you want to expose.

Pod resources. Cpu & memory request and limit. How Kubernetes manages them
* kubernetes rely on the following mechanism Kubectl -> docker run (or any other engine you use for containers) -> linux CGroups. * Linux CGroups support resource limitation
Deployments specifications: replicas, strategy, labels


ReplicaSet

Labels. Can be used in a query. How to Query
-
Interesting Fact: Kubectl deployment monitors through the replicaset to ensure that k8s has sufficient amount of pods is available which have assigned label.
-
It means, it uses selectors to track pods. If you delete label from pod but in deployment you declared it - deployment will create another pod in a couple of seconds.

Labels could be assigned automatically. For example in case of using K8s Dashboard to create resource:

-
Show all labels for all resources
kubectl get all --show-labels:

-
Use selector
kubectl get all --selector app=nginx --all-namespaces:
Annotations. Can NOT be used in a query

Deployment History

- When new major changes appear Deployment creates new ReplicaSet. Old ReplicaSet still persists, but the number of replicas set to 0.
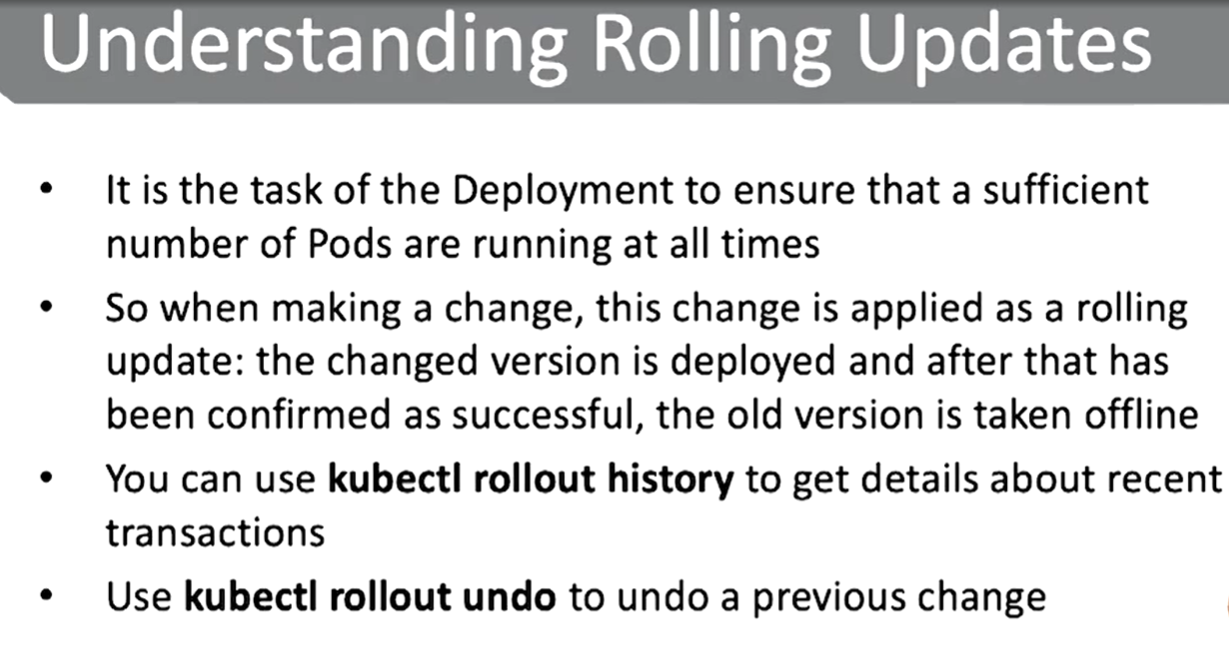
Rollout updates. Update Strategies. Rollback \ undo changes
kubectl rollout history deployment <NAME-OF-DEPLOYMENT> --revision=<NUMBER-OF-REVISION> - to see what changed in this exact revision step (1 -> 2)

kubectl rollout undo deployment <NAME-OF-DEPLOYMENT> --to-revision=<NUMBER-OF-DESIRED\PREVIOUS-REVISION> - to revert changes to selected previous revision

- Recreate - delete all pods and recreate. Leads to temporarly unavailability.
- Useful when you cant run several versions of application.
- Rolling update - updaet one pod at time. Guarantees availability. Preferred approach


- Rollout updates manipulate ReplicaSets. Each rollout Update creates new ReplicaSet, populate it and clean up old ReplicaSet
- Managing rollout updates you can easily revert changes
kubectl rollout undo deployment <NAME-OF-DEPLOYMENT> --to-revision=<NUMBER-OF-DESIRED\PREVIOUS-REVISION> - to revert changes to selected previous revision

Kubernetes Namespace. General info

Kubernetes Jobs. CronJob. Jobs vs CronJobs.

- Simple example of a job


The key difference is that you want to run CronJobs on a regular basis, multiple times, using schedule.

- CronJob creates Job for each run, but has only one CronJob

Options to run Kubernetes locally:
- minikube (little version of K8s, but with full list of abilities from the full version) - but should have only one master node
- docker desktop
- kubernetes in docker (kind) - install kubernetes right in docker desktop application. and you can use all commands from kubectl
- kubeadm - full version of k8s running locally
Kubernetes User and user configuration. kubectl config view
Kubernetes user is just a connection to some certificates
It means Kubectl doesnt need you to log in, just need the certificates to be set in an appropriate way. These certificaets lie among other things in hidden .kube config directory
Authorization. kubectl auth can-i

Security Context


kubectl is just a curl

Managing pods. Kubectl run - runs deployment, not pod itself

Commands with parameters:
kubectl version
kubectl cluster-info
kubectl gel all - retrieve all inf about pods, deployments, etc.
- you also can use
-o wideparameter to see extra information --show-labelslabels attached to pods will be shown. They will help you identify pods
kubectl run [cont-name] --image=[image-name]
kubectl port-forward [pod] [ports] - configure your proxy to expose your POD.
kubectl expose - expose your ports
kubectl create [resource] - create resource in k8s based on yml file
kubectl apply [res] - create or MODIFY EXISTING
kubectl runvskubectl create- in general run is imperative command, kubectl create is declarative way.kubectl runis deprecated.kubectl run- created deployment, not directly a pod. after runningkubectl runrespective deployment will not be saved.
Kubectl describe vs kubectl logs vs kubectl exec
- kubectl describe goes to etcd database and returns configurations
- kubectl logs goes on pods level in order to receive logs coming from containers
kubectl logs [POD_NAME_IN_DEFAULT_NAMESPACE] or kubectl logs [YOUR_POD] -n [YOUR_NAMESPACE]
- kubectl is for executing commands on container level. If you have multiple containers under pod - you also need to specify the container's name

- kubectl exec might also be useful in inspect the container from inside the pod

kubectl exec -it [POD_NAME] -n [NAMESPACE] -- sh- as an example
PS to exit from interactive terminal you cant use exit command, use ctrl-p ctrl-q. in Azure CLI you can exit using exit command.
Services. General Info. Selector to Deployments. Kube-proxy agent
-
Service is a Kubernetes object, which is an abstraction that defines a logical set of Pods and policy by which to access them.
-
Service, simply saying - is a load balancer which provides ip-address (in one way or another) and exposes your Pods.

-
The set of Pods is determined for Service by selector. Controller scans for Pods that match the selector and include these in the Service.
-
To use selector you need to declare a Label in your Deployment.
- Service could provide access to multiple deployments. Kubernetes automatically makes Load Balancing between Deployments.
- The only thing that Services do is watch for a Deployment that has a specific label set based on the Selector that is specified in the Service.
- Using
kubectl expose, it really looks as if you are exposing a specific Deployment, but it's not. This command is only for your convenient and doesnt show several Deployments if you have them behind Service
- kube-proxy agent - is an agent running on the nodes which watches the Kubernetes API for new services and their endpoints. After creation, it opens random ports and listens for traffic to the clusterIP port, and next redirects traffic to the randomly generated service endpoints

- P1, P2, P3 - Pods under 2 different deployments.
- Kube-Proxy is an agent which plays Load Balancer role for 3 Pods
- Service is registered in etcd and gives access to external users to these Pods


Service types: ClusterIP, NodePort, LoadBalancer, External Name, Service without Selector (useful for Databases)
ClusterIP: default type, provides internal access only;NodePort: NodePort, which allocates a specific node port which needs to be opened on the firewall. using these node ports, external users, as long as they can reach out to the nodes' IP addresses, are capable of reaching out to the Service;LoadBalancer: is a load balancer, but currently only implemented in public cloud. So if you're on Kubernetes in Azure or AWS, you will find a load balancer;ExternalName: is a relatively new object that works on DNS names and redirection is happening at the DNS level;Service without selector: which is used for direct connections based onIP + portcombinations without an endpoint. This is useful for connections to a database or between namespaces.
Services and DNS. DNS service
- Exposed Services automatically register with the Kubernetes internal DNS.
- DNS Service is registered in Kubernetes by default. And this DNS service is updated every time a new service is added.
If you want to understand why your Deployment isn't reachable - you need to check the label and selector you use, because label is a connection between Service and Deployment. If service dont see Deployment then DNS also cant point the proper IP-address.
Networking. How Kubernetes Networking works under the hood in minikube (but quite similar to public cloud K8s)

- kube-apiserver - process which runs minikube. You can find it in your list of processes.
- base cidr address pool for minikube - 10.98.0.0/12. It means all addresses until 10.111.255.255 will be in the same network.
- mywebserver and nginx - Services; They are under one network, not different;
- endpoints - how you get to the pods. Load-Balancing role is here.
- 172.17.0.17 and 172.17.0.18 - Pod addresses
- NodePort - port on host level, in our case - on minukube. NodePort is spreaded all over your Nodes.
32000brings us tonginxService,31074brings us tomywebserverService. - ClusterIP - referring the Ip addresses within Services. It's because not Ip-addresses are accessible from the outside. Because there is no routing between 192.168.99.100 and
kube-apiserver - LB on top - is LoadBalancing in Public Clouds (Azure, AWS) which navigates you to the proper
Serviceon differentNodes.
NetworkPolicy. Ingress & Egress. Directions. Connections. Managing Networking. Firewall between pods and namespaces. Web->Database pods Access, Example
- A NetworkPolicy is like a firewall.
- By default, all pods can reach one another.
- Network isolation can be configured to block traffic to pods by running pods in dedicated namespaces.
- Between namespaces by default there is no traffic, unless routing has been configured.
NetworkPolicycan be used to block Egress as well as Ingress traffic, And it works like a firewall.- The use of Network Policy depends on the support from the network provider. Not all are offering support; not all are offering support and in that case your policy wont have any effect!
- Connections in
NetworkPolicyare stateful - allowing one direction is enough, another direction will be allowed automatically Labelsare used to define what policied applied to which resources
- If direction is declared in the manifest, but with no extra specifications - it means no extra limitations, both directions will be allowed by default.
- if direction is listed and contains a specification - that specification will be used.
Pods with applied NetworkPolicy you can find here: PODS WITH NETWORKPOLICY.
Ingress. When users connect indirectly. DNS. Basic slides
- Users can connect services either directly or indirectly. If they wanna do that indirectly there is another component known as Ingress.
- Ingress is about DNS name which is connected to a Service.

- Another slide with Ingress and Service

General information. Ingress vs LoadBalancer. Ingress vs Service. Ingress in Public Cloud K8s
- Ingress exposes HTTP and HTTPS routes from outside the cluster to services within the cluster.
- Traffic routing is controlled by rules that are defined on the Ingress resource
- Ingress can be configured to do multiple things. It gives services externally reachable URLs
- It allows you to load balance traffic.
- It allows you to load balancing traffic between several Services
- It can terminate SSL as well as TLS
- Offers name based virtual hosting
- Ingresses are native objects inside the cluster that can route to multiple services, while load balancers are external to the cluster and only route to a single service.
- On many cloud providers ingress-nginx will also create the corresponding Load Balancer resource. All you have to do is get the external IP and add a DNS A record inside your DNS provider that point myservicea.foo.org and myserviceb.foo.org to the nginx external IP. Get the external IP by running:
- So where services take care of the basic exposure, Ingress really is what brings your application to the internet
- Ingress controller is required before creating your Ingresses.
- The Ingress controller is not available by default in Minikube.
- If you are using a Kubernetes in cloud, then Ingress controller will be available and it's just a drop down list that you will find in a cloud.
Controller. Types of Controllers. Ingress Controller
- The Kubernetes controller manager is a daemon.
- Kubernetes controller - it is a loop that watches the state of your cluster and makes changes as needed, always working to maintain your desired state
- Controllers can track many objects including:
- What workloads are running and where
- Resources available to those workloads
- Policies around how the workloads behave (restart, upgrades, fault-tolerance)
- ReplicaSet
- StatefulSet
- Job
- CronJob
- DaemonSet
- Ingress Controller
- nginx (ingress-nginx): https://github.com/kubernetes/ingress-nginx
- haproxy https://haproxy-ingress.github.io/docs/getting-started/
- traefik https://doc.traefik.io/traefik/providers/kubernetes-ingress/
- kong https://docs.konghq.com/kubernetes-ingress-controller/latest/
- contour (comparison): https://joshrosso.com/docs/2019/2019-04-12-contour-ingress-with-envoy/
How to work with Ingress. Configuring Ingress.
Check Tips and Tricks section and you will find comprehensive example for Ingress: https://github.com/Glareone/Kubernetes-for-developers/edit/main/README.md#exam-tip--tricks
Ingress rules. Inbound Traffic. Regular expression. Simple Fanout. Name based virtual hosting
- Optional host: if host is not specified - then rule applies to all Inbound traffic;
- List of paths like
/testpath. Each path has it's own backend. You can use Regular Expression here. - Backend: consist of ServiceName and ServicePort. It matches K8s API Service Objects. You also may configure default Backend for incoming traffic if the current path doesnt match to anyone.
-
Simple Ingress

-
Simple Fanout: A fanout configuration routes traffic from a single IP address to more than one Service, based on the HTTP URI being requested.


-
Name based virtual hosting: traffic is coming to the specific route (subdomain, as example)


The third path in example - is generic path. You send traffic which does not match to any other path there. -
TLS Ingress: Ensure that TLS termination is happened at the Load Balancer level. You also can secure an Ingress by specifying a Secret that contains a TLS private key and certificate.
Kubernetes Persistent Storages. PV Persistent Volumes. PVC Persistent Volume Claims. Azure Shared Disks
Volume Types. Pod Volumes. ConfigMap. Secrets. azureDisk, hostPath, awsElastickBlockStore, gcePersistentDisk. NFS. ISCSI
The PV is persistent volume and this persistent volume goes to external storage and this external storage as we will see shortly can be anything. And the nice thing is you can have multiple PVs available pointing to different external storage solutions. So they don't even have to be the same external storage, it can be anything. Now, the PVs are independent objects in the Kubernetes environment. And in order to work with the PV, it is the PVC, the persistent volume claim. In a persistent volume claim, the pod can use a persistent volume claim. The persistent volume claim is a request for storage and this requests for storage is only asking for a specific size and a specific type. So that can be like I need two terabytes of ReadWritemany.


- hostPath: PV uses hostPath a storage solution. In opposite to emptyDir, but hostPath is persistent, emptyDir is temporary.
- Created PersistentVolume with hostPath means this storage will still be there when Pods which use it are gone.
- emptyDir: creates a temporary directory on the host
- hostPath: persistently connects to host environment
- azureDisk: Azure Cloud Storage
- awsElasticBlockStore: aws cloud storage
- gcePersistentDisk: GCP cloud storage
- iscsi: ISCSI SAN Storage (disk)
- ngs: Network File System storage

- Files stored in a container will only live as long as the container itself
- Pod Volumes - can be used to allocate storage that outlives the container and stays available during pod lifetime
- PV allows Pod to connect to external storage and can exist outside of Pods.
- to use PV you need to use PVC. They request access to specific PV based on your request and make binding between POD and PV.
- ConfigMap - is a special case of storage. Best way to provide dynamic data within a Pod;
- Secret - do the same as ConfigMap, but they encoding the data they contain. Encoding is not the same as encrypting, but it just scrambles the data so that on first sight it is not readable, but for anyone who knows the basics for utility, it's very easy to dig out the data in a secret
How to decide what Volume to use. Pod Volume Example. PV Example


- hostPath: PV uses hostPath a storage solution. In opposite to emptyDir, but hostPath is persistent, emptyDir is temporary.
- Created PersistentVolume with hostPath means this storage will still be there when Pods which use it are gone.
PV and PVC relation. Binding

- PV
type- nobody cares about declaring pv type, it could be anything. The only important thing is how you configure PVC - PV and PVC both have same
accessMode. And this is really what connects PVC to PV and lead to state ofBOUND. - You may connect PV and PVC which have only identical
accessMode, it's a glue between PV and PVC

- using
claimNamename you creates a binding between POD and PVC.
- And that's how Kubernetes provides decoupling

PVC. Persistent Volume Claims. Connect Pod to PVC.
-
kubectl get pvc- to get all pvcs:

-
kubectl get pv- after applyingkubectl create -f pvc.yamlfrom previous example we see that pv and pvc binding created -
PVC requested 1 GiB. PV has 2GiB in total:

-
we can connect Pod to PVC:

pv-storage- the name of PV. In volume mount we declare only PV volume name. In Pod spec we declare mount and claim for this mount (PVC claim)pv-claim- is the name of attached PVC we created above
PV-PVC Demo using NFS PV
-
PV config

-
to configure NFS storage you need
nfs-utilsin linux and some linux-related + firewall configuration to give readWrite access to nfs server and storage -
PVC config

-
Pod config with 2 containers each of them connects to PV using PVC

Kubernetes Persistent Storages. Volumes. Azure Shared Disks

Article: https://learn.microsoft.com/en-us/azure/aks/concepts-storage
- Nowadays, you may start sharing Azure Shared between nodes and pods (but only for Premium disks):
https://stackoverflow.com/questions/67078009/is-it-possible-to-mount-a-shared-azure-disk-in-azure-kubernetes-to-multiple-pods

Traditional volumes are created as Kubernetes resources backed by Azure Storage. You can manually create data volumes to be assigned to pods directly, or have Kubernetes automatically create them. Data volumes can use: Azure Disks, Azure Files, Azure NetApp Files, or Azure Blobs.
General information. Example

- readiness probe is useful to organize Pod ordering creation. Create App once web-server is running (you may find an example in exam tips)
- Liveness helps you identify whether your app works fine or not

-
this command check in period of 10 seconds that the file is available by this route. After creating pod, Pod will start, but we will see
0\1 READYbecause readinessProbe doesnt see the file. -
changing the file route to excisting file

-
you cannot edit pod directly using
kubectl edit. Kubernetes will not let you do that. Instead you need to usekubectl replace -f


Lots of Service \ NetworkPolicy \ Deployment examples you could find here: HUGE PACK OF REAL EXAMPLES
How to get initial deployment file
You may use kubectl run and then export deployment to yaml file, change it and use kube apply

- You may use
kubectl create deployment --help- this command shows several good examples how to create deployment. together with--dry-run=clientit might be a good fit for declarative deployment creation
kubectl create deployment httpd-test-deployment-2 --image httpd -n new-httpd-test-namespace --replicas=2 --dry-run=client -o yaml > httpd-test-deployment-2.yaml
kubectl create deployment nginx-rollout-deployment --image=nginx:1.19 --dry-run=client -o yaml > nginx-rollout-deployment.yaml
will give you the following:

Apply deployments
kubectl create -f <YOUR_YAML_FILE> or kubectl apply -f <YOUR_YAML_FILE>
Create namespace using declarative way
kubectl create ns production -o yaml - will create a namespace and show yaml structure it uses.
we may copy the output and using vim put it into yaml file, then use it for Namespace creation.
kubectl delete namespaces production - to delete already created namespace
kubectl create ns production -o yaml > ns-file.yaml is also applicable
- to avoid any creation we may use
dry-runlike in the following examplekubectl run --generator=run-pod/v1 nginx-prod --image nginx -o yaml -dry-run=true > file.yaml.
Create namespace cronjob
-
You may use
kubectl create cronjob --help and take example of jobor it suggests the following:
kubectl create cronjob test-job --image=busybox --schedule="*/1 * * * *" -
you may use example from https://kubernetes.io/docs/concepts/workloads/controllers/cron-jobs/
Create your Service with kubectl expose deployment. Get Services
FIRST OF ALL YOU NEED DEPLOYMENT YOU WILL EXPOSE
-
useful command to get Service is to use the following command on exam:
kubectl expose deployment <YOUR-DEPLOYMENT> --port=80 --type=NodePort;
After applying this command you will see that your Service is deployed instantly. So better to use it with--dry-run=clientflag:
kubectl expose deployment <YOUR-DEPLOYMENT> --port=80 --type=NodePort --dry-run=client -o yaml > <YOUR_SERVICE.yaml>- dry run for your service. -
Create service:
kubectl create -f <YOUR_SERVICE.yaml>- to create service from yaml file.
PS Notice, this comman allocates a random portal on all backend nodes, so if you want to be in control of used Port you need to use targetPort to define the port.
kubectl get svc - to get Services.
kubectl get svc nginx -o yaml - will show Service specifics in yaml.
kubectl get svc nginx -o yaml > my-service.yaml - Service specifics in yaml to file


Configure a Service for Deployment. ClusterIP & NodePort
Exercise: Configure a service for the Nginx deployment you've created earlier. I don't really care which Nginx deployment you use, as long as you make it accessible. And ensure that the service makes Nginx accessible through port 80, using the ClusterIP type. And also, verify that it works. After making the service accessible this way, change the type to NodePort and expose the service on port 32000. And verified the service is accessible on this node port.kubectl create deployment nginx-lab-for-service-deployment --image nginx --dry-run=client -o yaml > nginx-lab-for-service-deployment.yaml- deployment in finevim nginx-lab-for-service-deployment.yaml- if you need to tune your deploymentkubectl create -f nginx-lab-for-service-deployment.yaml- apply deploymentkubectl expose deployment nginx-lab-for-service-deployment --type=ClusterIP --port=80 --dry-run=client -o yaml > nginx-lab-for-service-service.yaml- create Service for your deployment. Rename Service if needed (because now its name has -deployment suffixkubectl create -f nginx-lab-for-service-deployment.yaml-- apply Servicekubectl describe svc nginx-lab-for-service-deployment- check that service is working.

- You can verify and endpoints is assigned.
kubectl get endpoints- shows exposed endpoints

kubectl edit svc nginx-lab-for-service-deployment- edit deployed service- replace
targetPortwithnodePortbecause targetPort belongs to ClusterIP type, but we need NodePort Service type now

- changes applied:

PS: It will be reachable from internal network because of Type. In order to make it reachable from outer world you need to use LoadBalancer!!
Ingress. Expose Deployment and Service NodePort outside using Ingress
- get initial Ingress Controller example from documentation: https://kubernetes.io/docs/concepts/services-networking/ingress/
- save in yaml file using
vim test-ingress.yaml kubectl create deployment <YOUR_DEPLOYMENT_NAME>- Create your deployment with replicaSet >= 2kubectl scale deployment <YOUR_DEPLOYMENT_NAME> --replicas=3- scale number of podskubectl expose deployment <YOUR_DEPLOYMENT_NAME> --type=NodePort --port=80- Create Service for deployment. In our case we need NodePort because ClusterIP is useless in this casekubectl get svc- verify we have created Service Keep in mind that we dont care of CLUSTER-IP value, we care only about Port because port addresses the Server to Deployment. It means you can reach the Service (and Deployment) using
 curl http://<KUBERNETES_CLUSTER_IP>:<YOUR_PORT_ASSIGNED_TO_SERVICE: 32618>- fix initial Ingress example. Need to change
service: name: testto ourservice: name: <NAME_OF_SERVICE> - fix initial Ingress example adding host name. Better to start with
kubectl explain ingress.spec.rulesand checkhost- you can find the final file in the current repo - create ingress using
kubectl create -f test-ingress.yaml kubectl get ingress --all-namespaces- check that ingress created.- If you run it in minicube and locally you may reach your service updating
hostsfile and send request from your address to your local ip address curl http://<YOUR_HOSTNAME>.com/testpath- and voila!

- Applying the yaml you may find in my root folder, ingress resources will be created and managed by the ingress-nginx instance. Nginx is configured to automatically discover all ingress with the kubernetes.io/ingress.class: "nginx" annotation or where
ingressClassName: nginxis present. - Please note that the ingress resource should be placed inside the same namespace of the backend resource.
Update Deployment. Change Replica set
You can easily use one of the following commands:
kubectl edit deployment <YOUR_DEPLOYMENT_NAME>- edit and save changeskubectl scale deployment <YOUR_DEPLOYMENT_NAME> --replica=3- scale out your pods number
Configure PV HostPath Storage. Configure accessMode and grant access to multiple Pods. Configure Pod

- A hostPath PersistentVolume uses a file or directory on the Node to emulate network-attached storage.
- goto kubernetes.io (https://kubernetes.io/docs/tasks/configure-pod-container/configure-persistent-volume-storage/) and need to find PV example, you are not able to create it using
kubectl create pv --dry-run=clientcommand:
vim pv-httpd.yaml. we need to update our config to allow access from multiple pods. in order to do that we need to useReadWriteMany:
apiVersion: v1
kind: PersistentVolume
metadata:
name: pv-volume
labels:
  type: local
spec:
storageClassName: manual
capacity:
  storage: 1Gi
accessModes:
  - ReadWriteMany
hostPath:
  path: "/mnt/data"
- We need to create PV:
kubectl create -f pv-httpd.yaml

- We need to get PVC example as well from kubernetes.io (https://kubernetes.io/docs/tasks/configure-pod-container/configure-persistent-volume-storage/) and update it a bit
apiVersion: v1
kind: PersistentVolumeClaim
metadata:
name: pvc-httpd
spec:
storageClassName: manual
accessModes:
  - ReadWriteMany
resources:
  requests:
    storage: 1Gi
-
PVC created and if you get
kubectl get pv -Ayou will see binding as well

-
We need to create a pod. To create a pod you cant use
kubectl create --dry-run=client. Instead, you can usekubectl run:kubectl run pv-pvc-httpd-pod --image=httpd --dry-run=client -o yaml > pv-pvc-httpd-pod.yaml -
go to https://kubernetes.io/docs/tasks/configure-pod-container/configure-persistent-volume-storage/#create-a-pod and find good example how to attach pvc to pod
-
update our pod config

task-pv-storageis only for internal use, so we may use any name
- to verify that everything is fine we need to use
kubectl describe pod task-pv-podand our volume is mounted:
Create a Pod with 2 containers as a sidecar (Start Pods in order), Readiness. app container starts once nginx (web-server) container started

- nginx as a sidecar, app as busybox.