Warning
This library is deprecated and no longer maintained. Please use our XENSIV™ 3D Magnetic Sensor TLx493D Arduino Library instead.
Arduino library for Infineon's wafer level package 3D magnetic sensor TLI493D-W2BW.
The TLI493D-W2BW sensor comes mounted on the TLI493D-W2BW Shield2Go to provide an easy to use evaluation environment. The Shield2Go can directly be stacked on an XMC2Go kit compatible with this library. For a basic board description refer to the TLI493D-W2BW Shield2Go Quick starting guide.
The TLI493D-W2BW is a new wafer level package low power 3D magnetic sensor.
- 3D (X, Y, Z) magnetic flux density sensing of ±160 mT Programmable flux resolution down to typ. 32.5 µT / LSB
- Extremely small form factor: typ. 1.13 mm * 0.93 mm * 0.59 mm
- X-Y angular measurement mode
- Power down mode with 7 nA (typ.) power consumption
- 12-bit data resolution for each measurement direction plus 10-bit temperature sensor
- Variable update frequencies and power modes (configurable during operation)
- Temperature range Tj = -40°C…125°C, supply voltage range = 2.8 V…3.5 V
- Triggering by external microcontroller possible via I2 C protocol
- Interrupt signal to indicate a valid measurement to the microcontroller
- Component reduction due to 3D magnetic measurement principle
- Small sensor form factor allows for very compact system designs
- Wide application range addressable due to high flexibility
- Platform adaptability due to device configurability
- Very low system power consumption due to Wake-Up mode
- Disturbance of smaller stray fields are neglectable compared to the high magnetic flux measurement range
You can specify the sensors operating mode and which sensor type you are using. The default is MASTERCONTROLLEDMODE with type A0:
Tle493d(AccessMode_e mode = MASTERCONTROLLEDMODE, TypeAddress_e productType = TLE493D_A0);
If the VDD of the sensor can be controlled by a GPIO of the microcontroller - as it is the case with the Shield2Go - you can specify this pin and its power-on-state. When you do not specify a pin the default is NO_POWER_PIN, if you don't specify a power level, the default is HIGH:
Tle493d(int powerPin = NO_POWER_PIN, bool powerLevel = HIGH);
When you want to select the accessmode and a power pin, you can use one of the following combined constructors:
Tli493d(int resetPin, bool powerLevel = HIGH, AccessMode_e mode = MASTERCONTROLLEDMODE, TypeAddress_e productType = TLI493D_A0);
Tli493d(AccessMode_e mode = MASTERCONTROLLEDMODE, TypeAddress_e productType = TLI493D_A0, int resetPin = NO_POWER_PIN, bool powerLevel = HIGH);
In order to initially configure the sensor and start the communication, you need to use the function begin(). Without argument or with the argument false the sensor will not be reset at the beginning. This means, if e.g. the temperature measurement was disabled before and you upload a new sketch that does not turn it on explicitly, the temperature measurement will stay inactive. The argument true resets the sensor before configuration, so in the previous scenario, the temperature measurement would be enabled afterwards as it is enabled by factory settings.
begin();
begin( bool reset );
After the communication has been setup successfully by the begin()-command, the sensor can be configured by different functions. Please follow the example sketches in the /examples directory in this library to learn more about the possible configurations. When the configuration was done, the sensor data can be read via updateData(). Afterwards getBx(), getBy(), getBz() and getTemp() calculate the magnetic field and temperature out of the raw sensor values.
See following link for the full documentation of the library: https://infineon.github.io/TLI493D-W2BW/
Please note that base of the Sensors 2GO is the XMC 2Go from Infineon. Therefore, please install (if not already done) also the XMC-for-Arduino implementation and choose afterwards XMC2Go from the Tools>Board menu in the Arduino IDE if working with this evaluation board.
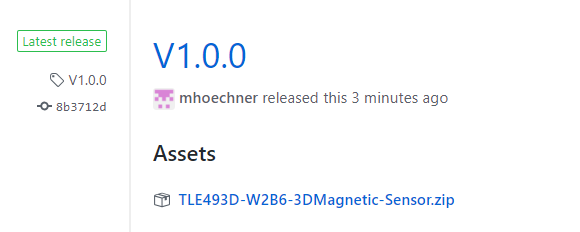
Please download this repository from GitHub by clicking on the following field in the releases of this repository or directly here:
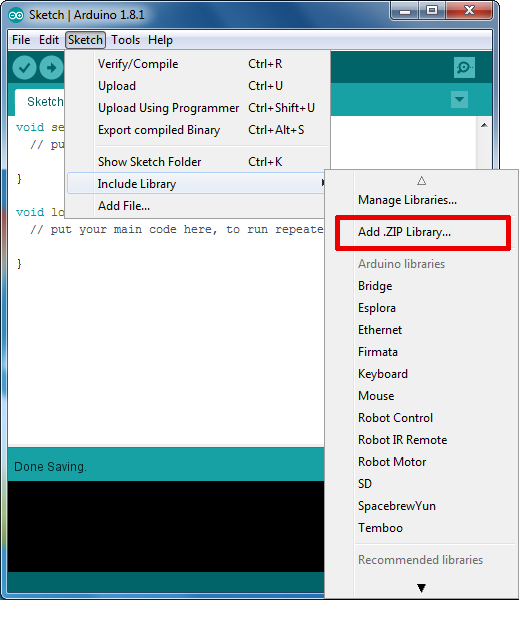
To install the 3D magnetic sensor 2GO library in the Arduino IDE, please go now to Sketch > Include Library > Add .ZIP Library... in the Arduino IDE and navigate to the downloaded .ZIP file of this repository. The library will be installed in your Arduino sketch folder in libraries and you can select as well as include this one to your project under Sketch > Include Library > MagneticSensor3D.
This library supports the open-source software Processing for creating GUIs. It allows you to connect your evaluation board to a PC over serial communication and visualisation of the embedded system. Find out more on the Arduino homepage here. The respective files are stored in the /processing folder of this repository.


