Before we start coding and building this prototype, I will first explain what this prototype does and how it works.
First of all, this prototype is builded in Arduino and a LEDstrip. Other programs that also have been used for this are:Adafruit, Zapier and Slack (later this will be further explained).
Well, what this code exactly does is when you recieve a message on Slack in the chatroom general, you will recieve a notification. The notification is displayed in the LED strip that is connected to your arduino.
First of all you need to create an account on Zapier (https://zapier.com/) and Adafruit (https://io.adafruit.com/). After you made an account we can start with building.
When your account is created, are there a few steps to do:
- Click on
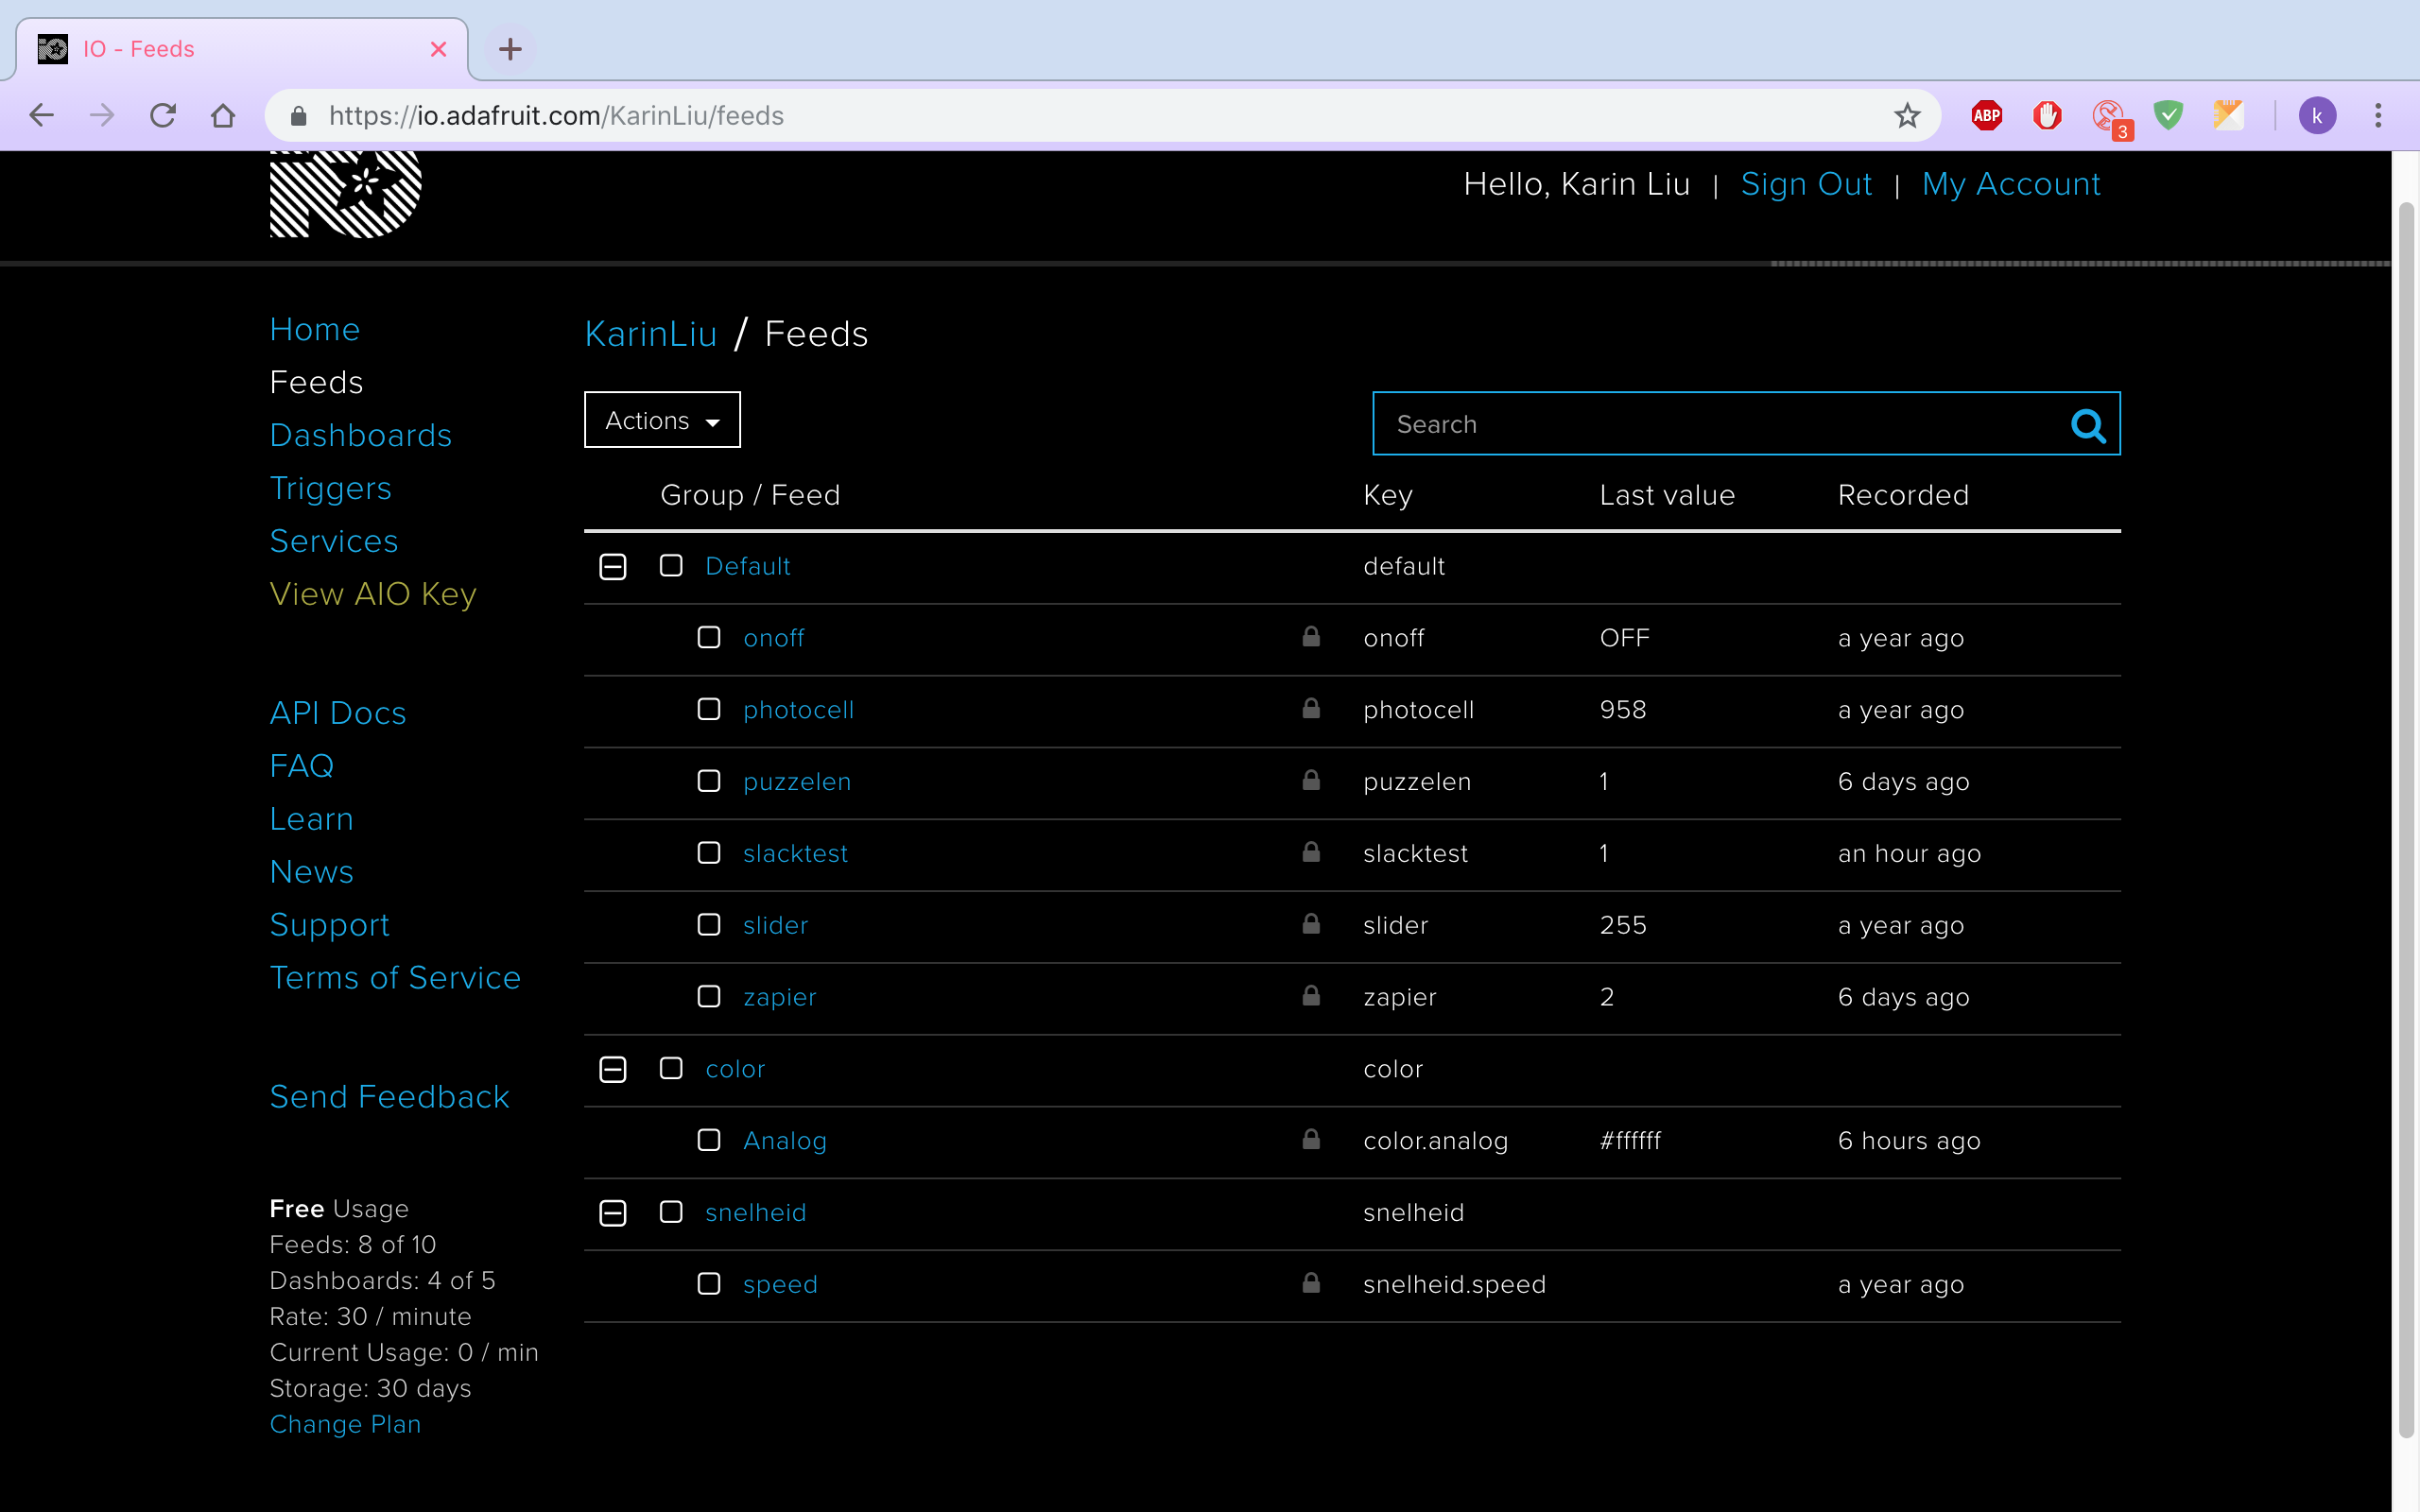
View AIO Keyand copy the Username and Active Key on a place where you can easily find it (you will need it for later). - Go to
Feedsand create a new feed. - Give it a name how you want it.
- When these steps are done, we can move on to
zapier.
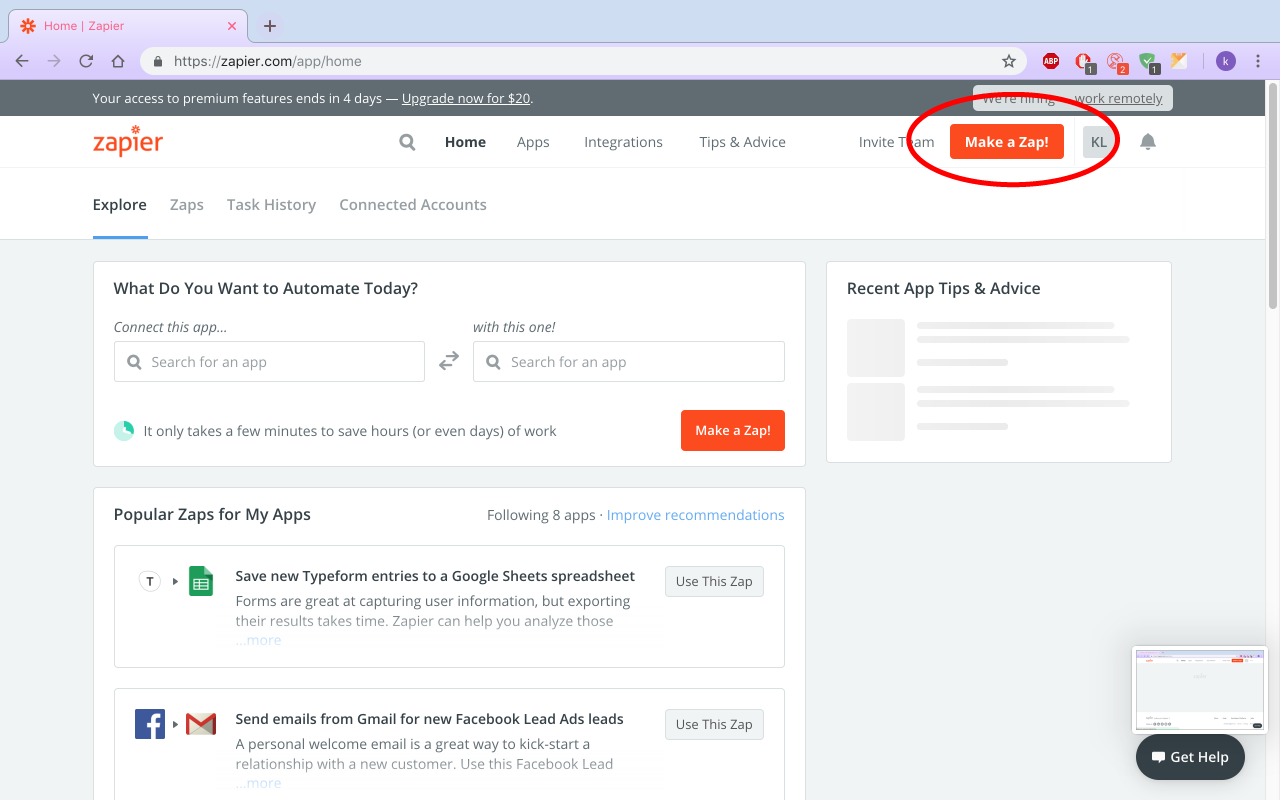
Everything is filled in on Adafruit, so we can start with Zapier. After your Zapier account is created, we can start by clicking on Make a Zap
When you created a Zap we need to do a few steps:
- In the trigger block, we should first start looking for
Slack. - Choose
New Message Posted to Channel. - Choose your Slack account where you want to connect the LED with it.
- Save and continue.
- Choose the channel that you want to connect the led with (I have chosen for #general).
Trigger for Bot Messages?I have kept it the same way.- Click on
Pull in samplesand continue.
Almost done! Now we need to connect Zapier with Adafruit.
- Add a step and click on
Action/Search. - Search for
Adafruit. - Save and continue.
- Connect it with your Adafruit account where your feed was created.
- Save and continue.
- Fill in the value you want to give when a message is sended in Slack (I filled in 1).
- In
feedyou need to fill in the feedname we just created in Adafruit. - Test this step.
If you go to Adafruit and you click on your created feed, you can see that your Zapier just sended the value 1.
Okay, now it works with Zapier and Adafruit! The next step is to download the example_slacktest file from github. When you downloaded the document, we need to do the following steps:
- Open the document.
- Connect your LED strip in your NODE (I have used
pinmode D5). - Go to the next tab
config.h. - Fill in
WIFI_SSIDwith your ownWifi SSID. - Fill in
WIFI_PASSwith your ownWifi Password. - Fill in
WIO_USERNAMEwith your AdafruitUsername. - Fill in
IO_KEYwith your AdafruitActive Key. - Upload your code and open your
serial monitor. - Set your serial on
115200 baud.
Is your Arduino connected? Great! Go to Slack and open the channel where your Arduino is connected with. Type something in the chat.
And? Did it turn on the leds blue?
Nice!
To change the color you can edit the code in the void handleNumber(AdafruitIO_Data *data).
If you can see in the code, I have used an if/else statement.
void handleNumber(AdafruitIO_Data *data) {

    Serial.println("Received Number: ");
    Serial.println(data->value());

    int slacktest = data->toInt();

    if(slacktest == 1){
        for(int i=0; i<18; ++i) {
        strip.setPixelColor(i, 0, 0, 255);
        }

      strip.show();
    } else if (slacktest  == 2) {

        strip.setBrightness(0);
        strip.show();
    }else {
      strip.setBrightness(30);
       strip.show();
    }

}
In the if statement you can see that if the value is 1, the strip have to set the color Blue. If you want to change it to an another color, you can change the RGB-color.