Using Edit pipeline
The MLSToolbox Code Generator tool allows data scientists to define ML pipelines, from templates or using its graph-based editor. Pipelines are represented as graphs, stages and tasks are represented by nodes and the data flowing between different stages and between different tasks are represented by connection lines. The general editor area with a graph representing an ML pipeline is shown in the next figure.
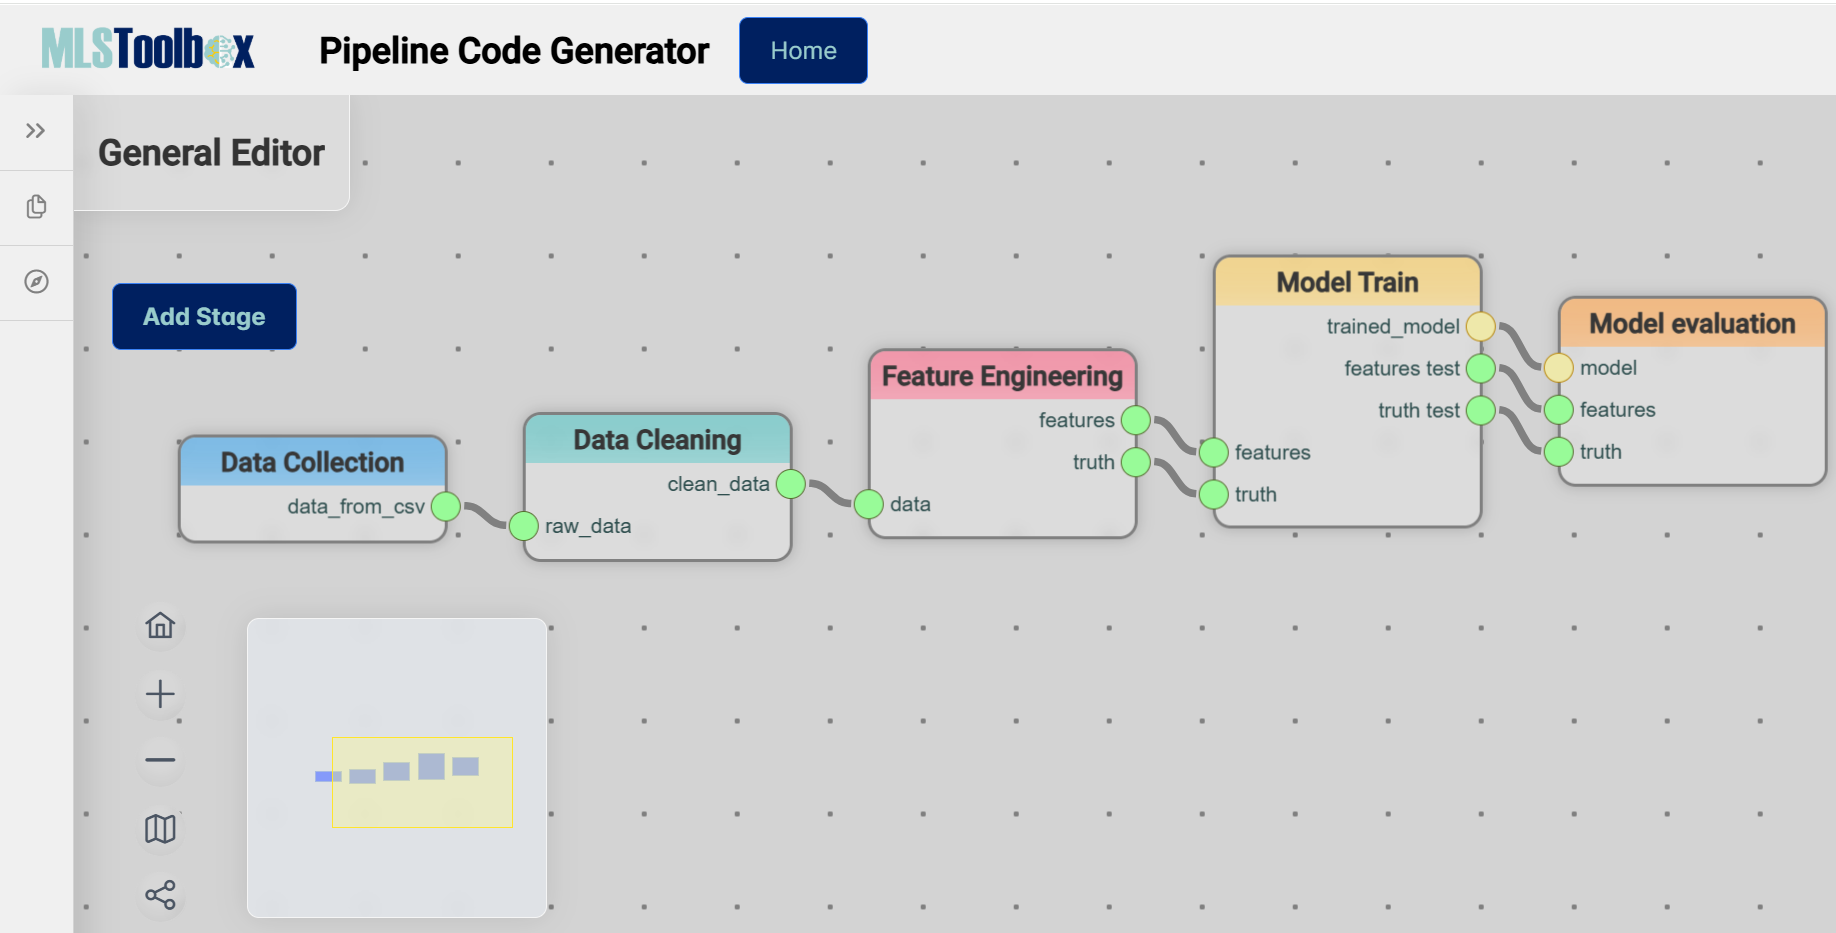
Using the button on the top left corner (Add Stage in the previous figure), stages can be added. All the nodes of the editor can be dragged around, copied (ctrl + c), pasted (ctr+v), and deleted (ctrl+supr). At the bottom left corner, the graphical options for moving around the editor and arranging nodes may be found.
Some nodes (stages and tasks) may have ports of different colors. The color of the ports indicates what type of data is flowing through the pipeline and connections can only be made between ports of the same type or ports of a generic type. Connections between the nodes can be created by dragging from an output port (the ones on the right of one node) to an input port (the ones on the left of another node). Connections can be deleted by dragging from the right part of the connection into the General Editor area (see next figure).
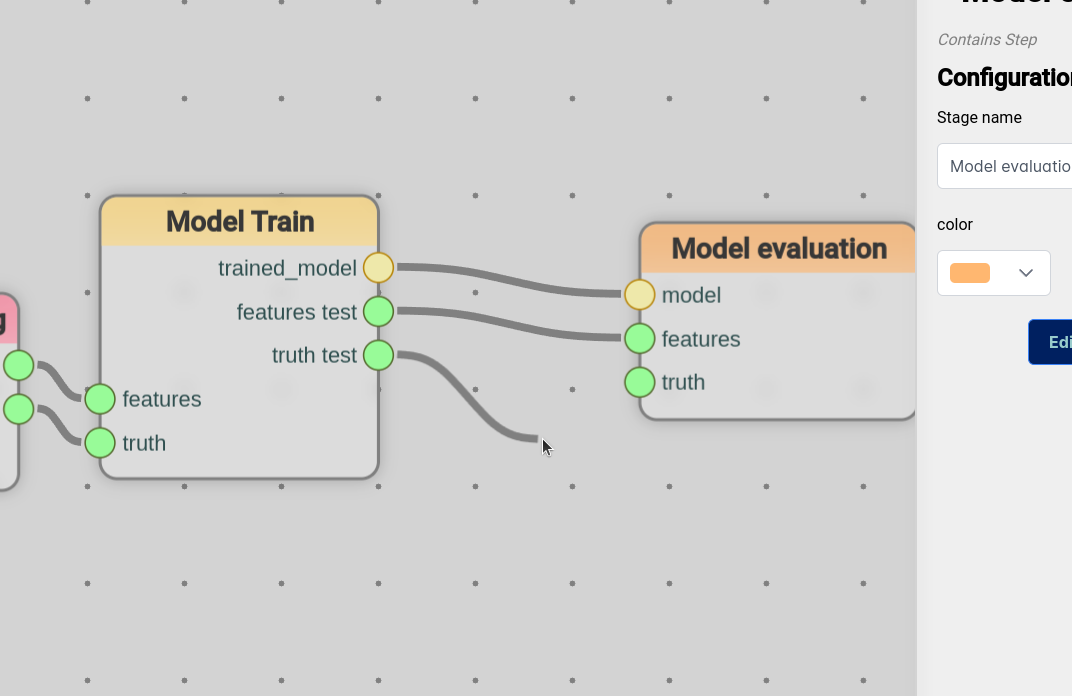
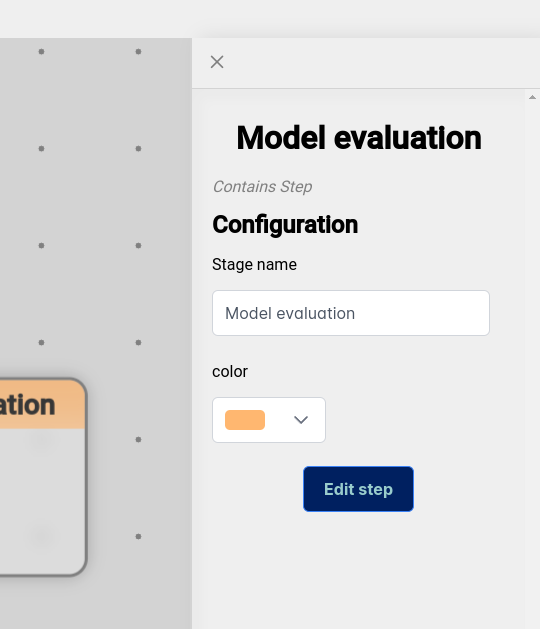
Stages can be edited by clicking on them and modifying the stage information in the right-side panel that emerges (see next figure). The information to be update depends on the specific stage.
In the case of the nodes representing stages, a parameter called link allows the reutilization of stages. When one stage is linked to another one the stage will inherit the ports, color, and name of the stage they are linked to. Once the code is generated, the executed code is reused from the original stage definition.
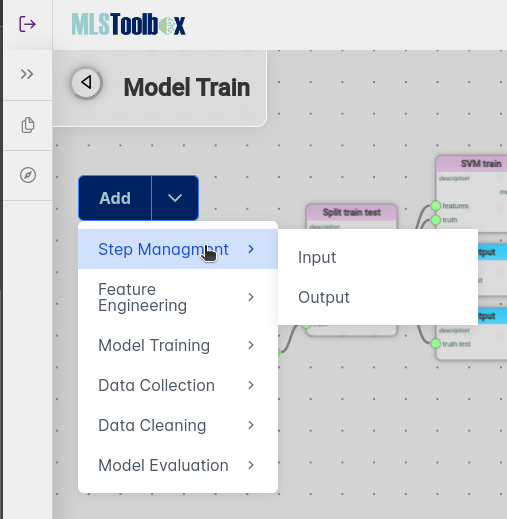
To add tasks inside a stage, click on it and then click on the "Edit Step" button in the right-side panel (see previous figure). Once we are inside the stage, the name appearing on the upper left changed to the name of the stage (see next figure for adding tasks to the Model Train Stage). The button that is next to it allows you to return to the main editor.
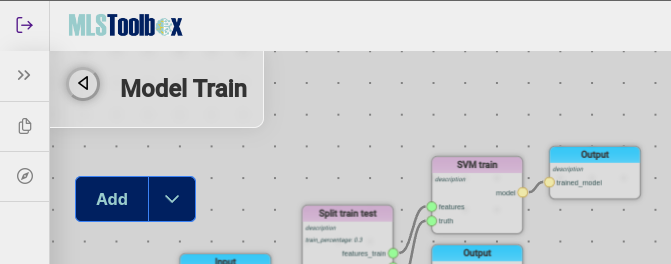
You can also see that the Add stage button has changed into an Add button with an arrow pointing down (see next figure). By clicking on the arrow, a menu with the available tasks for each stage shows, and you can create and configure the tasks for each stage. The Input and Output nodes of the Step Management option allows to define the inputs and outputs of the tasks so it can be connected to other ones.