BrickFlow is specifically designed to enable the development of Databricks workflows using Python, streamlining the process through a command-line interface (CLI) tool.
Thanks to all the contributors who have helped ideate, develop and bring Brickflow to its current state.
We're delighted that you're interested in contributing to our project! To get started, please carefully read and follow the guidelines provided in our contributing document.
Brickflow documentation can be found here.
- Install brickflows
pip install brickflows- Install Databricks CLI
curl -fsSL https://raw.githubusercontent.com/databricks/setup-cli/main/install.sh | sudo sh- Configure Databricks cli with workspace token. This configures your
~/.databrickscfgfile.
databricks configure --token- Create your first workflow using brickflow
mkdir hello-world-brickflow
cd hello-world-brickflow
brickflow projects add- Provide the following inputs
Project name: hello-world-brickflow
Path from repo root to project root (optional) [.]: .
Path from project root to workflows dir: workflows
Git https url: https://github.com/Nike-Inc/brickflow.git
Brickflow version [auto]:<hit enter>
Spark expectations version [0.5.0]: 0.8.0
Skip entrypoint [y/N]: N
Note: You can provide your own github repo url.
- Create a new file hello_world_wf.py in the workflows directory
touch workflows/hello_world_wf.py- Copy the following code in hello_world_wf.py file
from brickflow import (
    ctx,
    Cluster,
    Workflow,
    NotebookTask,
)
from airflow.operators.bash import BashOperator


cluster = Cluster(
    name="job_cluster",
    node_type_id="m6gd.xlarge",
    spark_version="13.3.x-scala2.12",
    min_workers=1,
    max_workers=2,
)

wf = Workflow(
    "hello_world_workflow",
    default_cluster=cluster,
    tags={
        "product_id": "brickflow_demo",
    },
    common_task_parameters={
        "catalog": "<uc-catalog-name>",
        "database": "<uc-schema-name>",
    },
)

@wf.task
# this task does nothing but explains the use of context object
def start():
    print(f"Environment: {ctx.env}")

@wf.notebook_task
# this task runs a databricks notebook
def example_notebook():
    return NotebookTask(
        notebook_path="notebooks/example_notebook.py",
        base_parameters={
            "some_parameter": "some_value",  # in the notebook access these via dbutils.widgets.get("some_parameter")
        },
    )


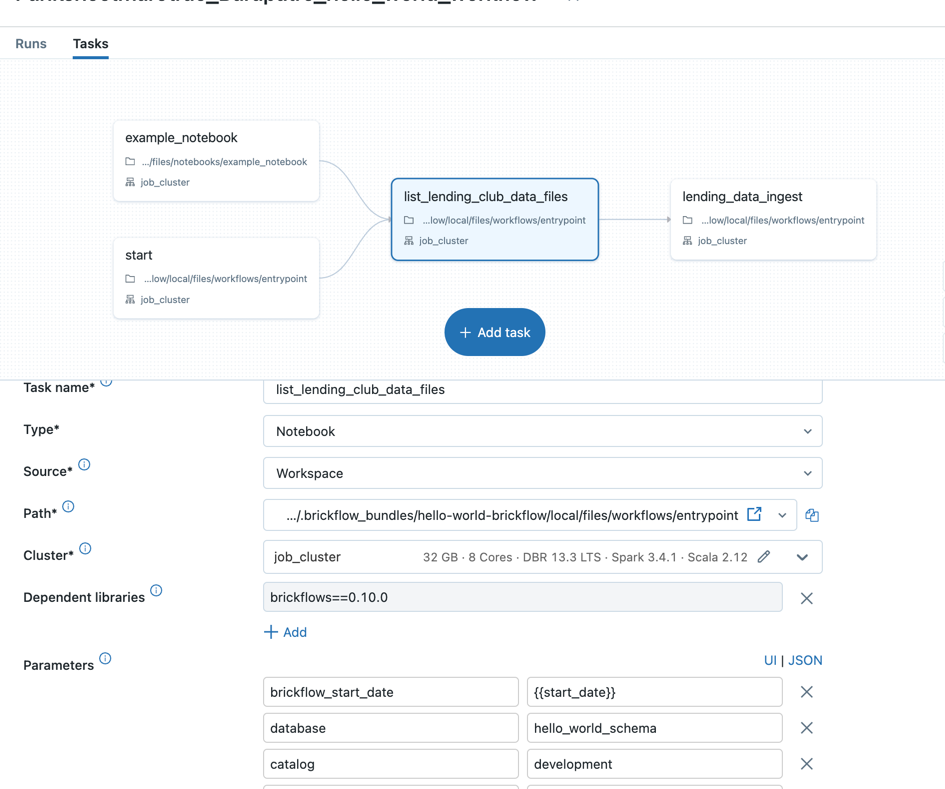
@wf.task(depends_on=[start, example_notebook])
# this task runs a bash command
def list_lending_club_data_files():
    return BashOperator(
        task_id=list_lending_club_data_files.__name__,
        bash_command="ls -lrt /dbfs/databricks-datasets/samples/lending_club/parquet/",
    )

@wf.task(depends_on=list_lending_club_data_files)
# this task runs the pyspark code
def lending_data_ingest():
    ctx.spark.sql(
        f"""
        CREATE TABLE IF NOT EXISTS
        {ctx.dbutils_widget_get_or_else(key="catalog", debug="development")}.\
        {ctx.dbutils_widget_get_or_else(key="database", debug="dummy_database")}.\
        {ctx.dbutils_widget_get_or_else(key="brickflow_env", debug="local")}_lending_data_ingest
        USING DELTA -- this is default just for explicit purpose
        SELECT * FROM parquet.`dbfs:/databricks-datasets/samples/lending_club/parquet/`
    """
    )
Note: Modify the values of catalog/database for common_task_parameters.
- Create a new file example_notebook.py in the notebooks directory
mkdir notebooks
touch notebooks/example_notebook.py- Copy the following code in the example_notebook.py file
# Databricks notebook source

print("hello world")brickflow projects deploy --project hello-world-brickflow -e local- Login to databricks workspace
- Go to the workflows and select the workflow
Refer to the examples for more examples.


