Python version 3.10 and Ubuntu 22.04 were used for this and recomended.
 Simple ETL using Apache Airflow, Kafka and AWS using the randomuser API. Messages are delivered every 5 minutes and data output is randomized from 1 to 150 inputs.
- Apache Kafka
- Apache Airflow
- PostgreSQL Database
- Bash
- AWS EC2
- AWS RDS
As mentioned before make sure you are using Python 3.10, >=3.6 might also work, but not advised. Clone this repo into ~/bin/de_projects/ for this to work out best. Otherwise, you will need to edit some. First install all of the dependencies.
Airflow:
Taken from the airflow quickstart guide.
# Exporting home is optional unless you want it to be in a specific place
export AIRFLOW_HOME=~/airflow
# Set version of Airflow
AIRFLOW_VERSION=2.7.2
# Get Python version, should be 3.10
PYTHON_VERSION="$(python --version | cut -d " " -f 2 | cut -d "." -f 1-2)"
# Constraint URL for installation
CONSTRAINT_URL="https://raw.githubusercontent.com/apache/airflow/constraints-${AIRFLOW_VERSION}/constraints-${PYTHON_VERSION}.txt"
# Installation
pip install "apache-airflow==${AIRFLOW_VERSION}" --constraint "${CONSTRAINT_URL}"
confluent_kafka:
pip install confluent-kafkasqlalchemy:
pip install sqlalchemy
pip install psycopg2-binary-
Create a Confluent Cloud account and make a cluster, you can use default environment.

-
Then create topics inside the cluster, all with the names as shown here:

-
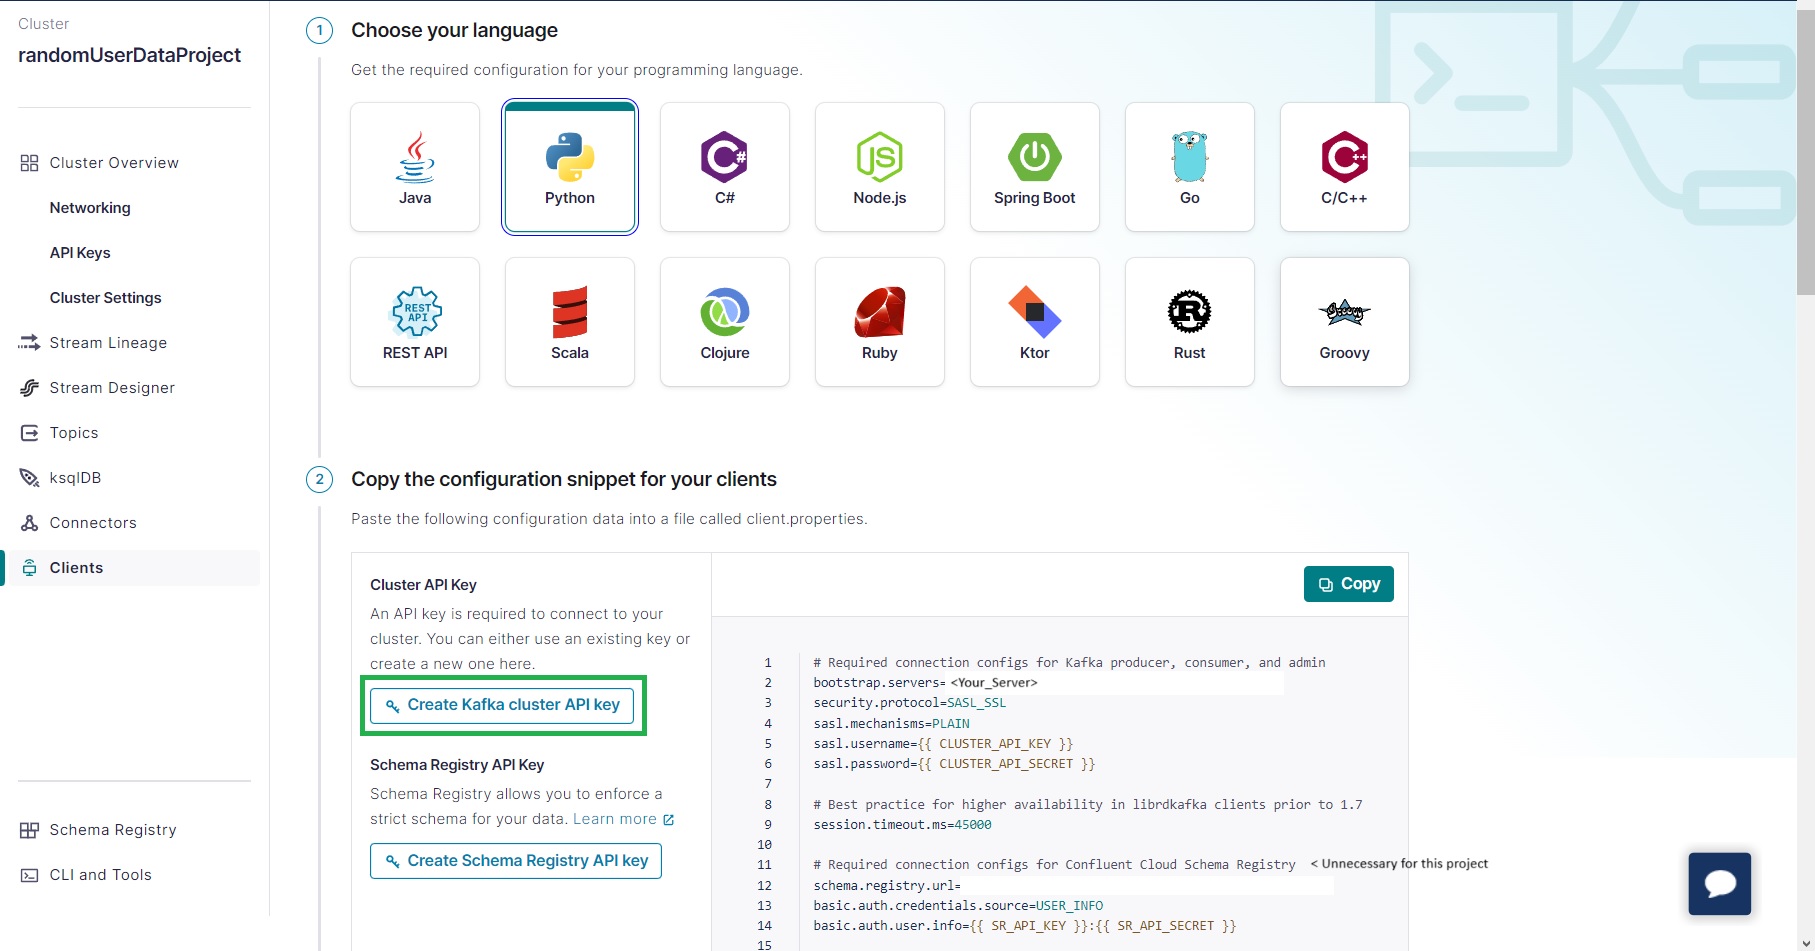
Finally, create a client to commuinicate with your code and the kafka topics. Create and save the SASL username and password.

You can then create a config.py file inside the main project, and store it in a config directory inside of the project folder.
Here's what it might look like:
config = {
  "bootstrap.servers": "<YOUR_BOOTSTRAP_SERVER_NAME>",
  "security_protocol": "SASL_SSL",
  "sasl.mechanisms": "PLAIN",
  "sasl.username": "<YOUR_SASL_USERNAME>",
  "sasl.password": "<YOUR_SASL_PASSWORD>",
}You can run a simple postgres container using docker. If you don't have docker, follow this guide to install Docker CE. If you want to go another route, you could use the sink from confluent cloud and attatch it to a RDS instance. In that case all of this database management stuff is not necessary, and the consumer_node part of userd_dag and the random_data_gen_consumer file is not necessary.
docker run --name <NAME_OF_CONTAINER> -e POSTGRES_PASSWORD=<YOUR_PASSWORD> -p 5432:5432 -d postgres:latestThis will run the latest version of PostgreSQL in a docker container. To access, use the Postgres url syntax: "postgresql://postgres:<YOUR_PASSWORD>@localhost:5432".
Go into the config/ directory in the main project. Then, you can add username.txt, password.txt, and ip_address.txt into it. Ideally, these files would be encrypted and for safety, but since this is a small project, it should be fine.
echo postgres > username.txt
echo localhost > ip_address.txt
echo <YOUR_POSTRGRESQL_PASSWORD> > password.txt
You first need to set up your database and tables, for this run the table_creation.py file located in the assistant_functions directory, if everything was set up correctly, you should get this output:
python table_creation.py
"CONNECTED"
"SUCCESSFULLY CREATED DATABASE"
"SUCCESSFULLY CREATED TABLES"Copy data_collectors/user_data_etl_dag.py and utilizing_airflow/userd_dag.py to your dags folder, in this case I will use ~/airflow.
# DAG with functions in files V               V DAG with all functions inside of it
cp {data_collectors/user_data_etl_dag.py,utilizing_airflow/userd_dag.py} ~/airflow/dags/
Then run airflow db migrate and make sure there are no errors. Then you can run the scheduler and let that baby run.
Scheduler:
airflow scheduler
I learnt a lot about airflow and kafka while creating this project, the overall process was quite fun as well. I also used the sink feature and tested out a private RDS instance using a EC2 instance using security groups and subnets.
If you want to add anything to this project, don't hesitate to make a pull request!
Thanks for checking out my project!