User Manual
The PressForward Plugin aggregates content from the web from within the WordPress dashboard.
PressForward provides an RSS/Atom feed reader within the WordPress dashboard, a tool for collaborative editorial work, and a process for republishing aggregated content.
You may also wish to view the Quick Start Guide
- Installing PressForward
- Installing and Using the “Nominate This” Bookmarklet
- Subscribe to RSS/Atom Feeds
- Using the All Content Page: How to Read, Nominate, and Add Comments to Items
- Using the Nominated Page: How to Review, Select, and Publish Nominations
- Posting Nominated Items to WordPress
- Managing Feeds Using the Subscribed Feeds Page
- Preferences
- Tools
- Folders
View the PressForward Installation Screencast
To install from the WordPress Administrative Dashboard:
- Select the Add New tab from the Plugins menu
- Search for PressForward
- Click Install Now
To install via FTP:
- Go to http://wordpress.org/plugins/pressforward/.
- Download the most recent version.
- Rename the unzipped folder ‘pressforward.’
- Place the ‘pressforward’ folder in your ‘/wp-content/plugins’ directory through your FTP client.
- Activate plugin via the “Installed Plugins” menu in WordPress Dashboard.
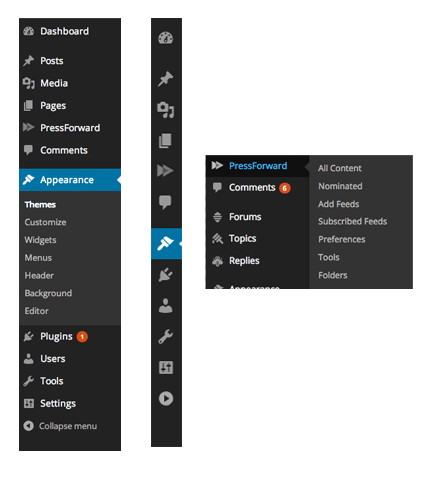
- The installed plugin will now appear in your toolbar on your Wordpress Dashboard. Clicking on the word PressForward, or the double triangle icon, will provide a dropdown menu. (Note: a collapsed toolbar will appear differently on your page. Please see the screenshots below.)
The Nominate This bookmarklet allows you to visit a static page on the web, and nominate the page content, or send the page content to a draft WordPress post. The Nominate This bookmarklet, once placed in your browser's bookmarks bar, can be used to nominate any item, even those not associated with RSS/Atom feeds.
Version 4.3 and Later: If you are experiencing issues with the Nominate This bookmarklet, please make sure that you are using the latest version of PressForward. After updating the PressForward plugin please make sure to uninstall the bookmarklet (delete the bookmarklet from your bookmark bar) and then reinstall the updated bookmarklet from the tools tab in PressForward.
- Make sure you have the bookmark bar visible in your browser. This is where the bookmarklet will go. (Most browsers have a "view" option in their menu bar, and the "bookmarks bar" options can be turned on there.)
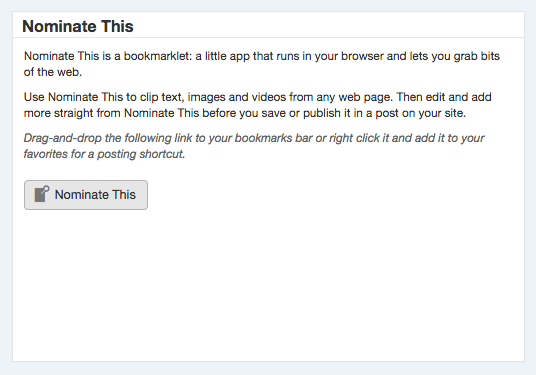
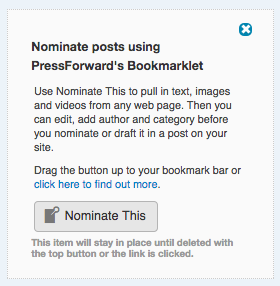
- The Nominate This bookmarklet can be found in two places. You can select Tools from the PressForward menu in the WordPress dashboard or find the bookmarklet as the first item in the All Content section.
- To complete the installation, drag and drop the Nominate This bookmarklet into your browser’s bookmark bar.
- Open a blog post or article you would like to nominate in your browser.
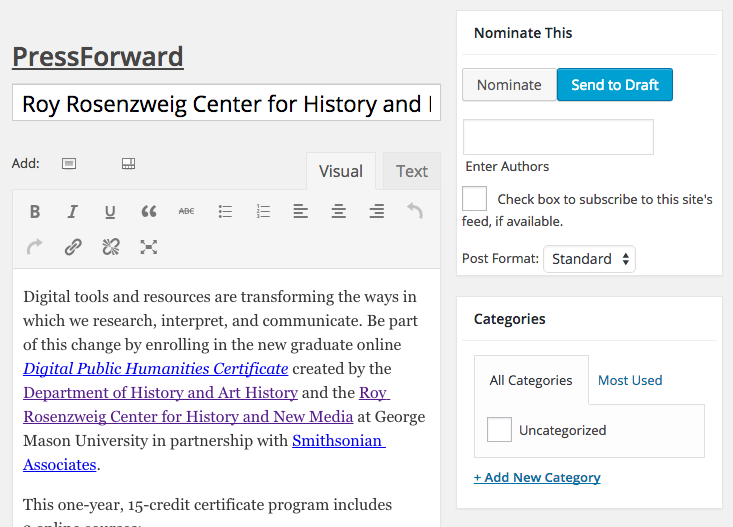
- While you are on the page, click the Nominate This bookmarklet in your bookmark bar. A popup window will appear and the content from the current page will populate the title and content fields. (You will be prompted to log in if you are not already logged in.)
- Check to be sure that the information you would like to display in the nomination is displayed in the Nominate This popup window.
- Enter Author(s) names in the box provided if you wish to include that metadata.
- Add or select any Categories or Tags. If you choose not to at this stage, admins will have a chance to do so when the item is sent to draft.
- If you wish to also subscribe to the feed associated with the post you are nominating, check the subscribe to this sites feed box underneath the author field. Checking this box will prompt the plugin to attempt to add the RSS/Atom feed if one exists. If the plugin was able to successfully find and add a feed, it will appear in Subscribed Feeds.
- Click the Nominate button on the top right of the popup window. After the nomination has been processed, the window will then appear blank. Nominated items will appear in the Nominated tab.
Note: Users with administrative privileges will also see a “send to draft” button. Any items sent to draft will appear in draft status on the Posts page.
Add feeds to PressForward using the Add Feeds page. Items from feeds will populate the “All Content” page. Once added successfully, your feed will appear in the Subscribed Feeds page. More information about feeds can be found here.
Feeds can be added 3 ways: one at a time, in batches using an OPML file, or by subscribing to an OPML file. Either way, you should save a list of your feeds in a backup file outside of the plugin.
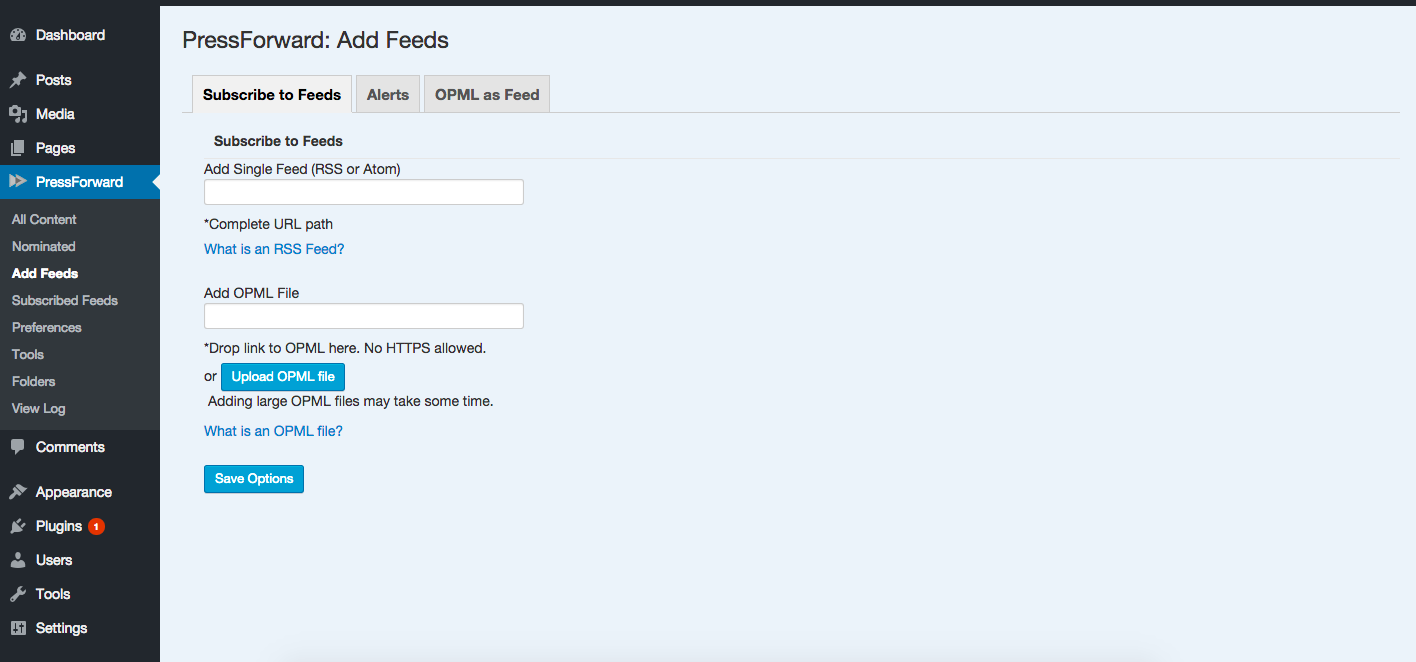
- Select Add Feeds from the PressForward menu.
- On the Subscribe to Feeds tab, paste the complete URL (http://...) or RSS path into the “Add Single Feed” box. (eg. http://www.plosone.org/taxonomy/browse/neuroscience )
- HTTPS feeds can be added individually here.
- Click the "Save Options" button at the bottom of the Subscribe to Feeds panel.
When feeds have been added successfully, the following message will appear at the top of your window: You have submitted a feed. If there are problems with the feed you added, the message will read: You have submitted a feed. The feed was not found. Note: When a feed is added with errors, it will immediately appear in a list of "Feed Problems" at the top of the Add Feeds page.
- OPML files can be added using a live link. Copy and paste the link in the “Add OPML File” field.
- Or drag a file from your desktop into the "Add OPML File" field.
- Or Click the "Upload OPML file" button to open a dialogue box, select a local OPML file from your directory and upload it to PressForward by clicking the "Add to Subscription list" button.
- Click the "Save Options" button at the bottom of the Subscribe to Feeds panel.
When feeds have been added successfully, a message will appear at the top of the window which reads: You have submitted an OPML file. When the OPML file has errors, you will see the following message at the top of your window: You have added an OPML file. The OPML file was not found. Note: When an OPML file with errors is added to your feed, it will also appear in a list of Feed Problems at the top of the Add Feeds page.
In addition to a single OPML import, users can also subscribe to OPML files in the "Add Feeds" panel. An OPML subscription, similarly to an RSS subscription, will import all the feeds associated with the file and check for newly added feeds during the feed retrieval cycle.
- Select the “OPML as Feed” tab in the “Add Feeds” panel.
- OPML subscriptions should be added using a live link. Copy and paste the link in the "Add OPML Subscription" field.
- Click the "Save Options" button.
All of the feeds associated with an OPML subscription will appear in the "Subscribed Feeds" panel within 30 minutes. The OPML file will appear as a feed in the “Subscribed Feeds” panel and each feed included in the file will appear a child of the OPML file. If the OPML includes folders, PressForward will import the folder structure as well. For more information see the Folders section.
Click on Subscribed Feeds to confirm that each feed has been uploaded. The syndicated content will begin to appear on the All Content page in 30 minutes.
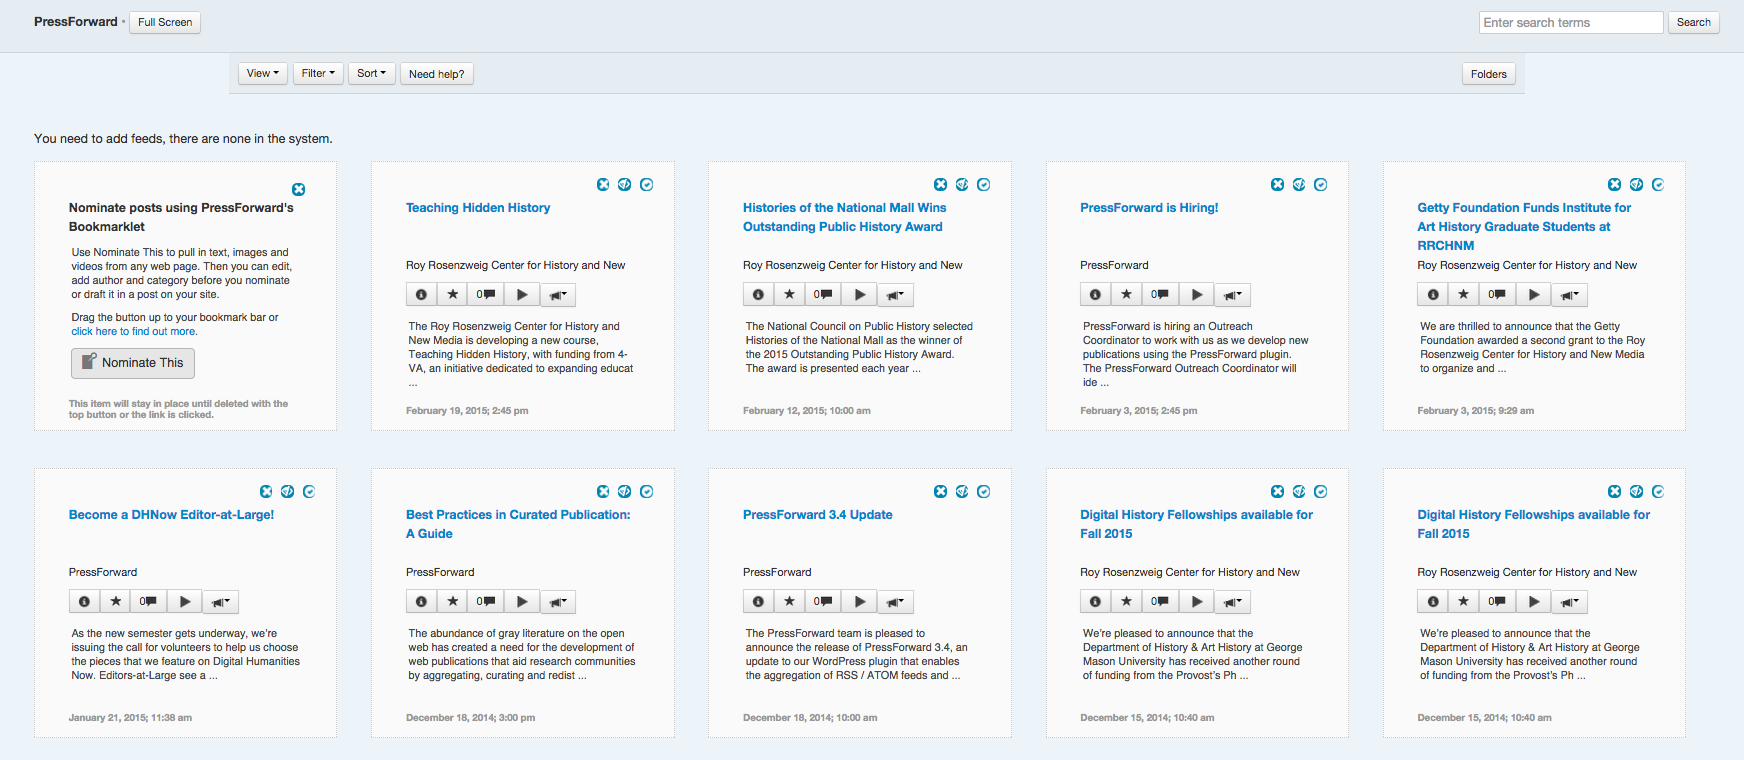
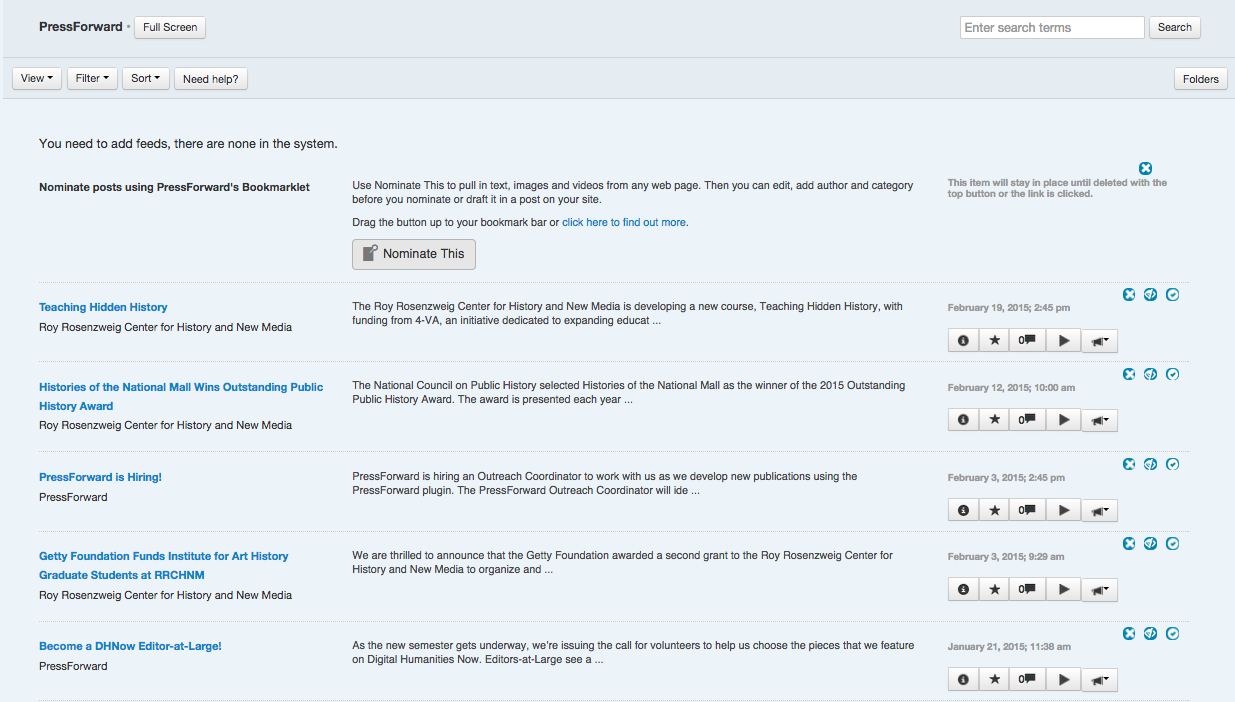
The All Content page is populated with items from the feeds you have added to the reader. (Items from the Nominate This bookmarklet can be found in Nominated.) In both the All Content and Nominated pages users have the option of viewing items in several ways, outlined below. Users may also browse in Full Screen mode by selecting that option on the top of the page.
- Select the All Content tab from the PressForward menu.
- From All Content you can browse items by seeing the title, the first 75 characters of each post, and the name of the source feed.
- The options in the All Content navigation bar allows users to sort and filter items, filter by folder, view items in infinite scroll or grid view, and get help using the plugin. As users scroll through content, the navigation bar will stick at the top of the window.
-
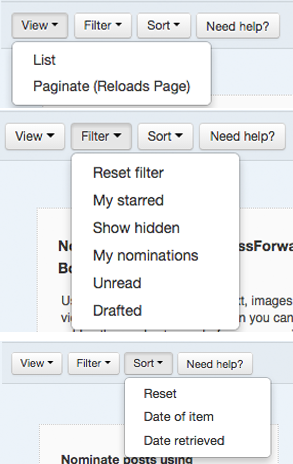
In the View dropdown menu, there are two modes to view items:
-
The default browse view is the Grid “snippet” view. (Default options can be changed in the Preferences menu on the WordPress sidebar.)
-
You can also switch to a List layout.
-
-
In the Filter dropdown, you can filter All Content by starred, hidden, nominated, unread, or drafted items. Choosing to reset the filter will show all items. Filtering items using this dropdown menu will reload the All Content page.
-
The Sort dropdown menu allows you to sort items by the date they were retrieved by the plugin's feed reader, and by the date the item was published. Sorting items does not reload All Content. Sorting and filtering choices can be traced using the breadcrumb trail at the top of the page.
-
The Need Help? button will direct you to this User Guide.
-
On the far right, the Folders button provides you with a list of the folders created within the plugin. (See below to find out how to create and use folders). Clicking this button will allow you to sort feed items by their assigned folder.
-
Below this navigation bar, you will see feed items in either list or grid view. Each list item contains the item title, the source feed, an item toolbar, a snippet view of the item text, and the date the item was retrieved by the plugin. The toolbar that appears with each individual post enables you to interact with each item and to select particular items for publication.
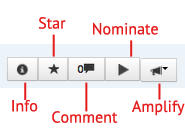
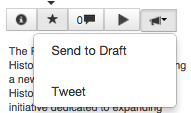
From left to right: * The info button (i) reveals more detailed information about the item, such as the original URL, the date published, the author, and assigned tags. * The star is a user-specific feature that enables you to mark particular items that you would like to return to or find interesting. * The comment box counts the number of comments that have been made on the post. Clicking on this box will allow you to add comments to the item, and to see comments others have made on the item. * Select the single arrow to nominate the item for editorial review. Nominated items will appear under the Nominated section. * Click on the bullhorn icon to see the Amplify options. If you are logged into WordPress with administrator permissions, you can use this button to send an item directly to a WordPress draft post. If you do not, you can use this button to tweet the selected feed item.
- Each item also has three option buttons associated with it. The 'X' option deletes the item, the checkmark marks the item as read, and the eyeball hides the item. These options are user-specific. Deleting an item does not delete it from other users' All Content page.
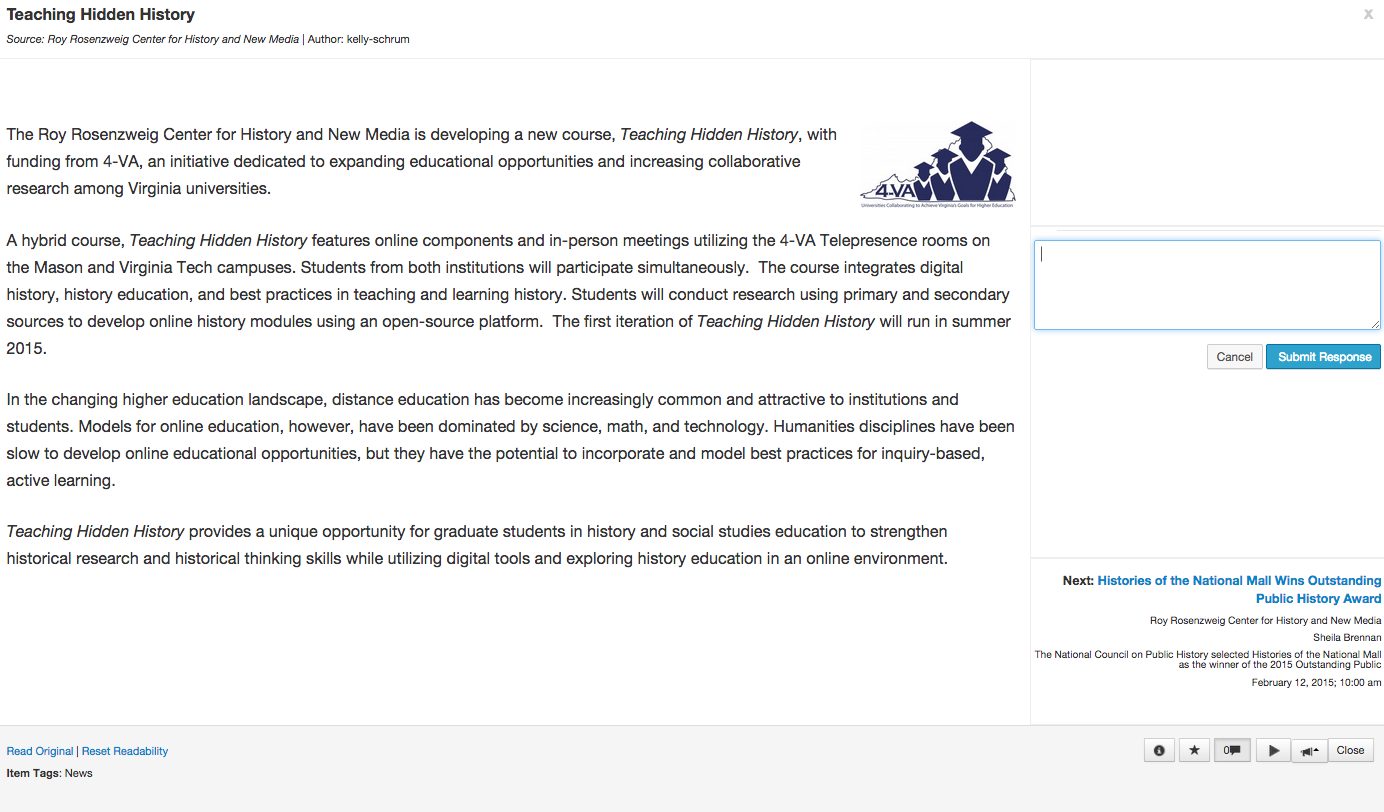
- In All Content, clicking on the title of a feed item will open the Reader View. This window allows you to view the feed item title, author, and source feed, as well as the complete text and associated images.
- Using the links at the bottom, you can open the original item in a new window, or reset readability if there are errors in the text.
- In the top right corner, you can find information about the item that comes before this item in All Content. In the bottom right corner, you can choose to move to the next item.
- In the middle of the right pane, you can add comments, or read comments added by other users.
- Using the toolbar in the bottom right, you can get information about the item, star it, nominate it, or use the amplify button to send the item to draft or tweet.
-
To close the Reader View, click the 'x' in the top right corner, or use the 'Close' button in the bottom right toolbar.
Select the Nominated tab.

-
In Nominated, the items nominated in All Content or through the Nominate This bookmarklet, will appear in list view with an extended snippet.
-
Using the top navigation bar, nominated items can be sorted and filtered.
- Items can be filtered by starred, unread, drafted, or by whether they have been archived.
- Items can be sorted by Date of Item, by Date Nominated, by Date Retrieved, or by number of Nominations received via buttons on top left.
- The third button, Need Help?, will bring you to this Guide.
-
Like items in All Content, nominated items include the name of the item, the source feed, a longer snippet, the date the item was retrieved, and a toolbar with additional options. There are seven buttons on the toolbar:
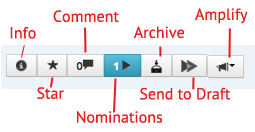
- The first button is the "Info" button. When this button is selected, a popup window containing the item metadata will appear. Click the info button again to close the popup.
- The second button stars the item. You can use the navigation bar options to sort your starred items.
- The third button allows you to comment, and to read the comments of other users, and has a counter that shows how many comments have been added to the item.
- The fourth button is not an action button. The icon on this button shows the number of times this item was nominated.
- The fifth button archives the item.
- The sixth button sends the item to draft. Clicking this button creates an unpublished WordPress post containing the original text of the item, as well as the item metadata found in the info button.
- The final button is the Nominated version of the Amplify button. Clicking here allows you to tweet the item to your timeline.
-
The remaining options in the Nominated item tile allow you to mark items as read, or to delete items completely. Use the two option buttons in the top right corner to perform these actions.
- To open the Reader View within Nominated, click on the title of an item. This will launch the Reader View. This Reader View option works the same way as the Reader View opened from All Content, but contains the extended toolbar associated with Nominated items.
- Using the toolbar in the bottom right corner, you can send posts to draft, see the number of times an item has been nominated, and use the Amplify button to tweet an item to your timeline.
- Once an item has been sent to draft (using the 'send to draft' button in either the All Content Amplify options or the 'send to draft' button in the Nominated item toolbar), users with administrator permissions can access these drafted WordPress posts, edit them, and publish them to the site. Posts sent to draft from the Nominate This bookmarklet will also appear here as drafts.
- Items sent to draft can be found in the WordPress "Posts" menu in the WordPress left sidebar. When you click on posts, you will see a list of posts with "-Draft" after the post title.
- These drafted posts contain the content and metadata that the plugin found in the original feed item. Content and metadata can be edited from within the WordPress post edit interface.
- Text content will appear in the main post window. To see the metadata pulled in by the plugin, and to view or change which author will appear in the published version of the post, click on Screen Options in the top right corner of the post page, then make sure that the Custom Fields option is checked.
- Once this option is selected, a number of custom fields generated by the plugin will appear under the post content. If you have allowed the plugin to overwrite the default WordPress author of the post, the name in the item_author field will appear as the author in the published version of the post. (This option can be found on the Preferences page of the plugin's WordPress sidebar menu, and is on by default.)
- The additional metadata will not be reflected in the published post unless your theme is set to show the content in these custom fields. See the WordPress documentation for custom fields to change these settings.
- Once you have completed your edits, you can publish the post as you would any other WordPress post.
- The Subscribed Feeds page is a list of the feeds that have been added to your PressForward plugin via OPML or individual feed addition. The options at the top of the page, allow you to filter your subscribed feeds by:
- Active feeds - Fully functional feeds that are actively used by the plugin
- Inactive feeds - Feeds that have been sent to draft by users because they are broken or are throwing errors. Dismissing an alert marks a feed as inactive.
- Alerts - Feeds that are throwing alerts in PressForward's feed reader. These feeds may be taking too long to load, may have moved, or may be incompatible with the feed reader. Alerted feeds will also appear red in the "All" filter. You can also see the number of alerts in the Pressforward WordPress Menu next to Subscribed Feeds.
- Under Review - Feeds that have been nominated through the Nominate This bookmarklet. These feeds will appear yellow in the "All" filter until they are approved.
- The Subscribed Feeds table headers allow you to find out more about how the plugin is using a feed.
- The Folders header contains the names of the folders with which a feed is associated.
- The "Last Time Feed Item Retrieved" column tells you when the plugin last found a new feed item on this feed.
- The "Last Time Feed Checked" column tells you when the plugin last checked that feed for new items.
- The "Items" column tells you how many items the plugin has pulled from that feed into All Content.
- Feeds can be manually refreshed from the Subscribed Feeds page by clicking "Refresh" under the url in the Title column.
 ###User Options
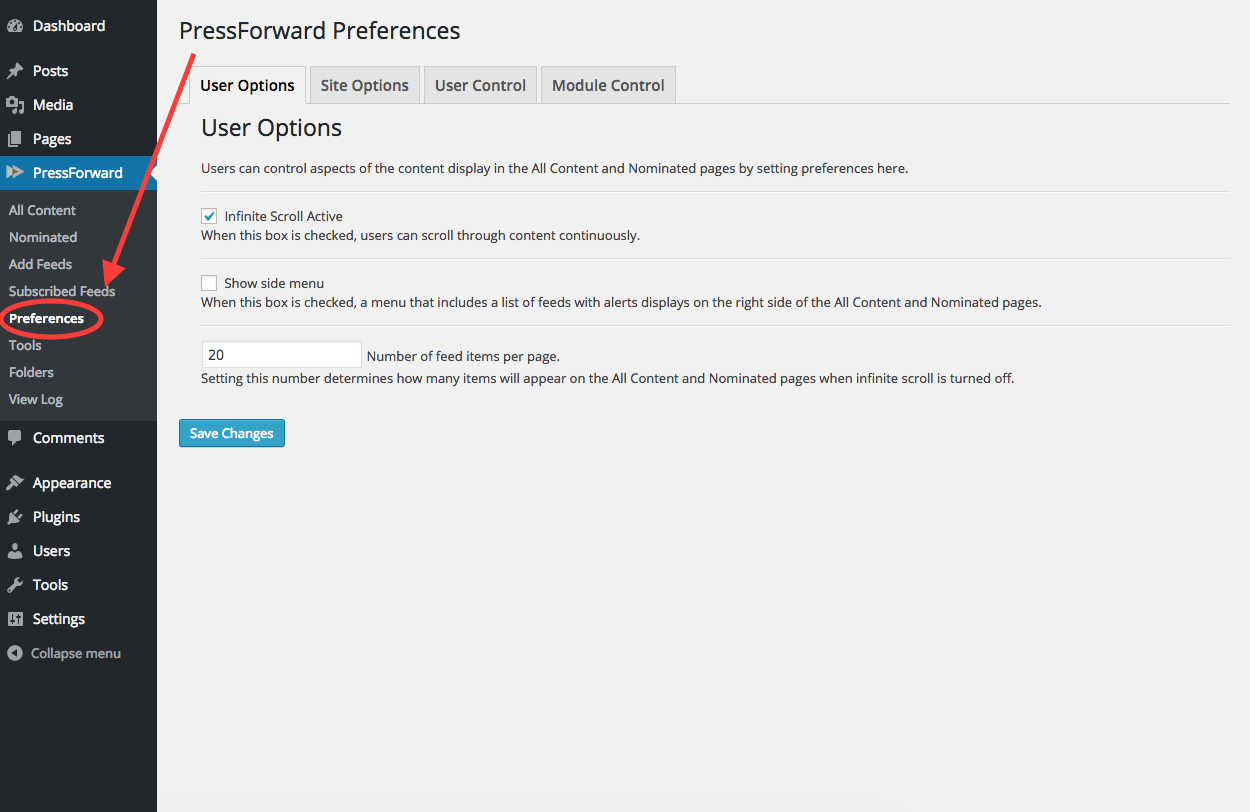
Users can control aspects of the content display in the All Content and Nominated pages by setting preferences here.
###User Options
Users can control aspects of the content display in the All Content and Nominated pages by setting preferences here.
- Infinite Scroll Active - When this box is checked, users can scroll through content continuously. Infinite scroll is on by default.
- Show side menu - When this box is checked, a menu that includes a list of feeds with alerts displays on the right side of the All Content and Nominated pages. The ‘Menu’ option is turned off by default.
- Number of feed items per page - Setting this number determines how many items will appear on the All Content and Nominated pages when infinite scroll is turned off. 20 items per page is the default.
These preferences are available only to users with an Administrator role in PressForward. Options set on this page will determine behavior across the site as a whole.
- Seconds to redirect user to source: 0 means no redirect. PressForward makes use of canonical URLs. If you would like to redirect your readers automatically to the items aggregated by the feed reader and published to your site, this setting will determine how long to wait before redirecting. The default setting is 0 seconds. The redirect setting can be manually overridden in the Edit Post page by editing the forwarding status in the publish box.
- Use advanced user role management?: This option may be needed if you customize user roles or capabilities within your wordpress install. For sites that manage multiple users using special plugins, administrators can use this option to insure PressForward respects customized user roles and capacities. See the Wordpress codex for more information on user roles. This is off by default.
- Show item author as source: When this preference is on, the name of the author in a PressFoward item will appear in the item_author custom field when the item is sent to Draft. This author will overwrite the creator of the post. This is on by default.
- Turn alerts on: By default this option is on. When alerts are on, feeds that continually return errors display as alerted. You can dismiss alerts in the Subscribed Feeds page.
- Months to retrieve and retain feed items: This number determines the number of months that items aggregated by the PressForward feed reader will remain visible in All Content. This is set to 2 months by default.
- Number of errors before a feed is marked as malfunctioning: Feeds sometimes respond slowly or have errors that cause them to be unreadable. This setting determines the number of consecutive errors PressForward will allow from a feed before creating an alert and disabling it. The default is 3 errors.
- Minutes between feed retrieval cycles: This setting is the frequency at which PressForward will attempt to start the process of retrieving all the feeds your list. Warning: if you have a large number of feeds this setting should not go below 30 minutes.
- Post status for new content.: This setting allows you to set a default post status that gets set when you send nominations to become posts. Options include: Published, Privates, Draft or Pending Review. See the WordPress documentation for more information on each post status.
- Post type for New Content: This setting allows you to set a default post status that gets set when you send nominations to become posts. The default WordPress post types are: Posts, Pages, and Media. Any custom post types will also appear here. For more information of Post Types see the WordPress documentation.
These preferences determine the type of access granted to each user role within the PressForward plugin. The user roles allowed by PressForward in order of most restrictive to least restrictive include: Administrator, Editor, Contributor, and Subscriber. These are based on the default WordPress user roles. For more information on customizing user roles refer to the [WordPress codex]((http://codex.wordpress.org/Roles_and_Capabilities).
- PressForward Menu Group: The default is Contributor. PressForward Menu Group sets the user role required in order to access the PressForward plugin from the WordPress dashboard.
- All Content Menu: All Content Menu sets the user role required to see items in All Content. This is set to contributor by default.
- Nominated Menu: Nominated Menu sets the user role required to see items in Nominated. This is set to contributor by default.
- Non-User Preference Tabs: Side-wide Preferences sets the user role required to access the preferences on this page. This is set to administrator by default.
- Feeder Menu: Feeder Menu sets the user role required to access the Add Feeds and Subscribed Feeds pages. This is set to editor by default.
- Internal Commenting Feature: Internal Commenting Feature sets the user role required to be able to add comments in the All Content, Nominated, and Reader View pages. Comments are not publicly visible when an item is moved to draft status in the WordPress Posts menu. This is set to contributor by default.
- Debugging Log: Debugging sets the user role required to access the Debugging page from the PressForward menu when it is turned on. This is set to administrator by default.
PressForward Modules are addons to alter or improve the functionality of the plugin.
- Internal Commenting: This module provides a for users to comment on posts throughout the editorial process. This module is on by default.
- Debugger Log Viewing Module: This module provides a way to view the feed retrieval log within the dashboard. This module is on by default.
- Foo Test Module: This module provides a set of test functions for developers to check. This module is off by default.
- RSS Import Module: This module provides the core functionality to read RSS feeds and translate them into PressForward's system. This module is on by default.
- RSS Output Module: This module provides a way to output RSS Feeds from your subscribed items. An RSS Feed consisting of all your subscribed items will be available at your domain "/feedforward." This module is on by default.
The Tools page contains the Nominate This bookmarklet, as well as debugging tools for developers.
##Folders
The Folders Page allows users to create folders. Folders can be used to organize and group feeds as well as to filter items in All Content and Nominated. Folders work similarly to Wordpress’s post tags however, folders only apply to feeds and will not overwrite your post tags. Feeds can belong to multiple folders at once. OPML subscriptions will automatically import folders and assign feeds according to the OPML structure.
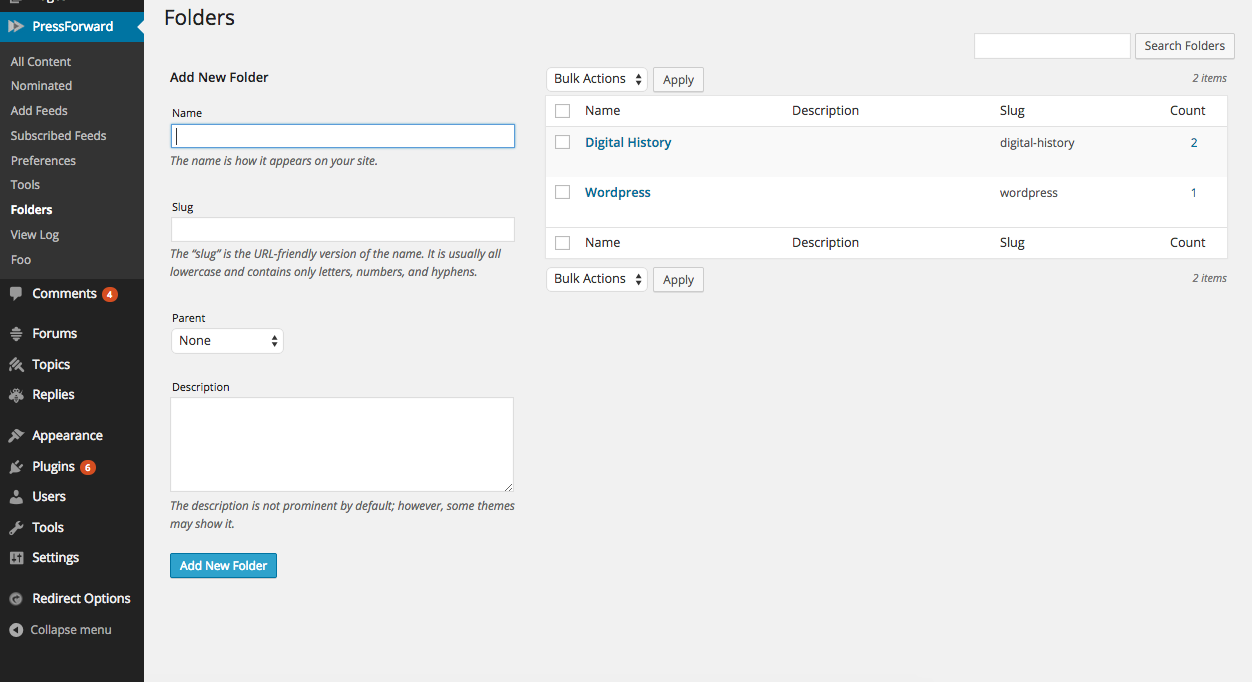
- Select the Folders tab from the PressForward menu in the left toolbar.
- Underneath Add a New Folder enter a name for the folder. The Folder Name must be unique.
- The slug and description fields are optional. These fields may display on your site if your theme supports it.
- When finished, click the Add New Folder button.
- The new folder will appear in the Table of Folders on the right. There are four pieces of information associated with each Folder in this view: The name, description, slug, number of feeds in that folder.
 Add Feeds to Folders:
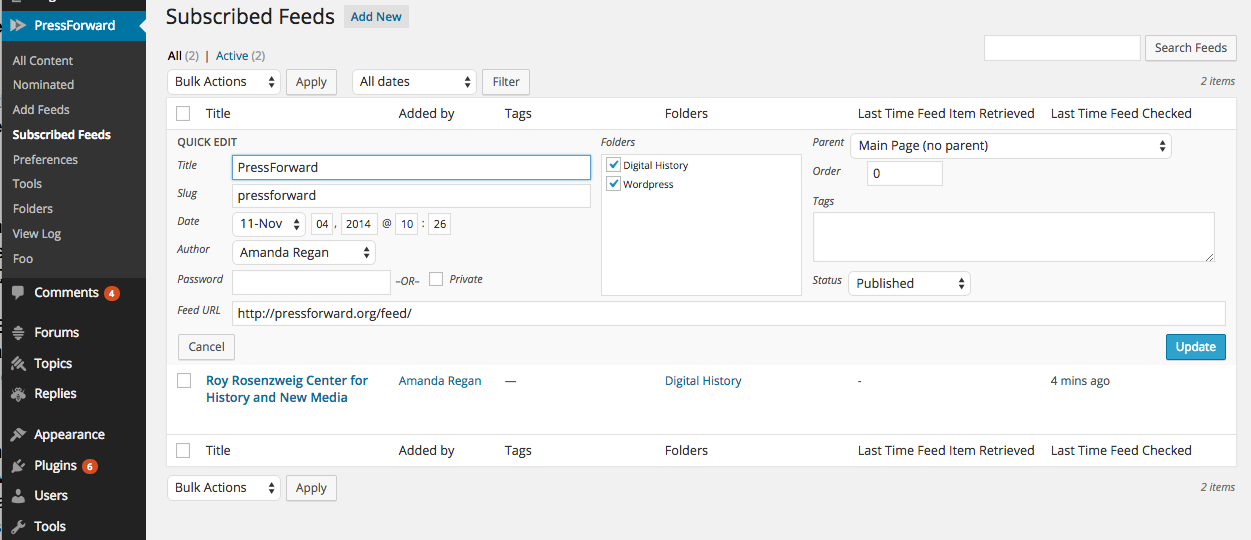
- Feeds can be added to a folder once it is created from the Subscribed Feeds page.
- Hovering over any feed will bring up a menu of actions that can be applied to the feed.
- Feeds can quickly be added to folders by selecting Quick Edit and using the check boxes to assign the feed to folders.
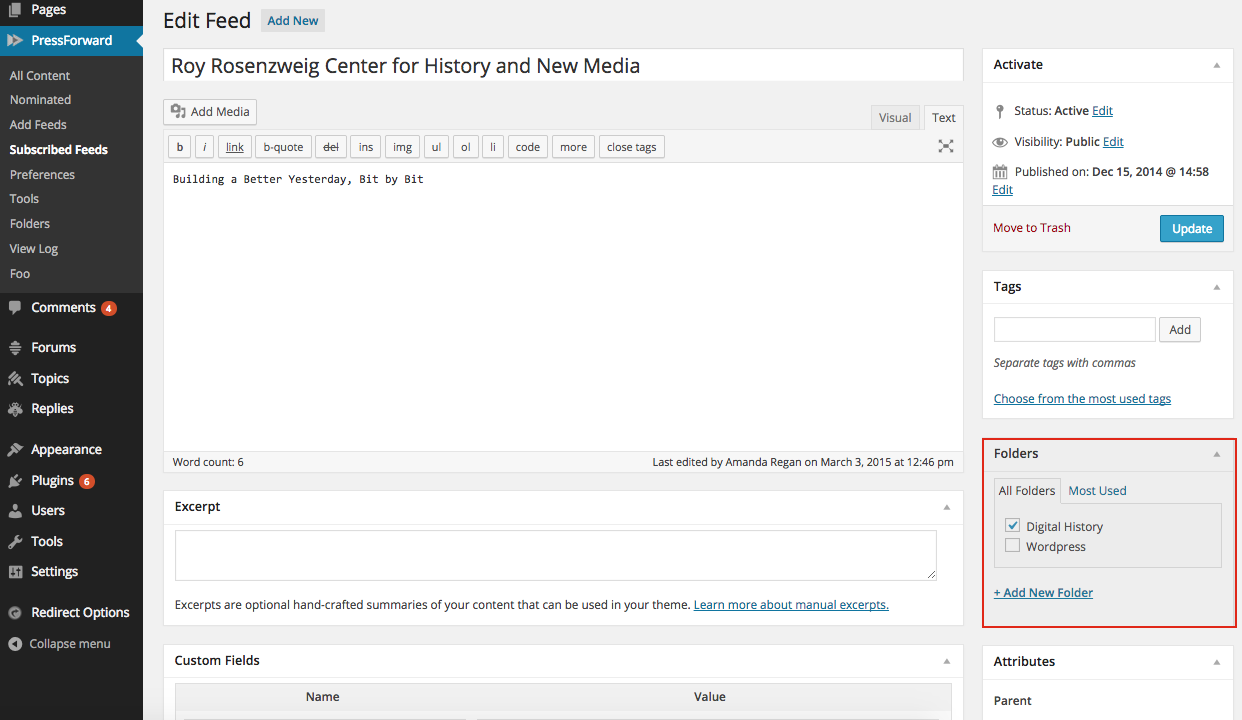
- Feeds can also be assigned to folders inside of the Edit Feed page that appears when you click the title of an individual feed. New folders can also be created from this screen by clicking “+ Add New Folder” in the Folders pane on the right side of the Edit Feed screen.
- Folders can be used to filter feed items in All Content.
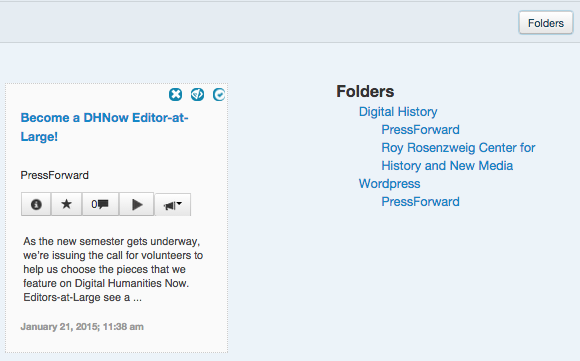
- The Folders button on the right side of the screen will open a vertical pane containing a hierarchy of all the folders with feeds as well as feeds that are not contained in folders.
- A hierarchical list of folders and their associated feeds will appear. Select any folder to filter the content and show only feed items from feeds in that folder.
- To unfilter content select Reset Filter from the Filter drop down menu in the PressForward navigation bar.