If you are looking for the ChilloutVR version, click here.
An unofficial VRChat world-side plugin designed to drive the various Furality shaders. Built up from scratch and inspired by workings of AudioLink. Capable of powering the following:
NOTE: This project is a derivative work and is not part of Furality Online Xperience or created by Furality, Inc.
A live demo is available in the Luminescent Ledge VRChat world!
- Four Luma Glow / Hero and Villain zones for the respective shaders.
- Three gradients for Legendary and Aqua Shader.
- Audio Reactivity for Legendary and Aqua Shader.
- AudioLink integration, using Theme Colors and ColorChord for controlling the colors and bands to control the flashing.
- VR Stage Lighting (VRSL) integration, with a dedicated fixture definition.
- Possibility to set custom colors using Udon.
- Debug functionalities.
- Extreme level of customization.
Requires: AudioLink v0.2.6+ for the integration to properly function.
Optional: VR Stage Lighting v1.10+ for DMX functionality. (NOTE: Currently doesn't support horizontal layout.)
- Import the Unity package.
- Drag the
LumaDriverprefab into the scene. - Make sure it is far away from the scene. It should be on Y=1000000 by default.
- If you wish to use AudioLink, you will have to enable it. Check the AudioLink section below to see how to do that.
- If you wish to use VRSL DMX, you will have to enable it. Check the DMX Control section below to see how to do that and read through the VRSL Fixture Definition section to familiarize yourself with how the fixtures are defined.
- You are done! Enjoy the beautiful glow once more! Check below for customization options for the driver...
If you want to play around with the parameters, open the CustomRenderTexture in the following location: LumaDriver/CustomRenderTexture/LumaDriver_CRT, expand the shader parameters to be able to modify them to your liking. The parameters are split up on four separate pages for easier navigation.
This page allows for customization of global features of the driver.
- Luma Glow Enabled - Toggle the whole functionality on or off. Setting it to off will make the texture go black and innactive.
- Use Original Luma Glow Pixel - Original Luma Glow Shader had a pixel which had to be lit up for it to function properly. This can be used to turn it off.
- Audio Reactive Pixel On When Idle - Allows for the Audio Reactive enabled glows in Legendary Shader to be fully lit when there is no music playing. This will work even if AudioLink is not enabled.
- Debug Zones - Enables a special debug mode, lighting up different zones, gradients and audio reactive glows uniquely for easier identification.
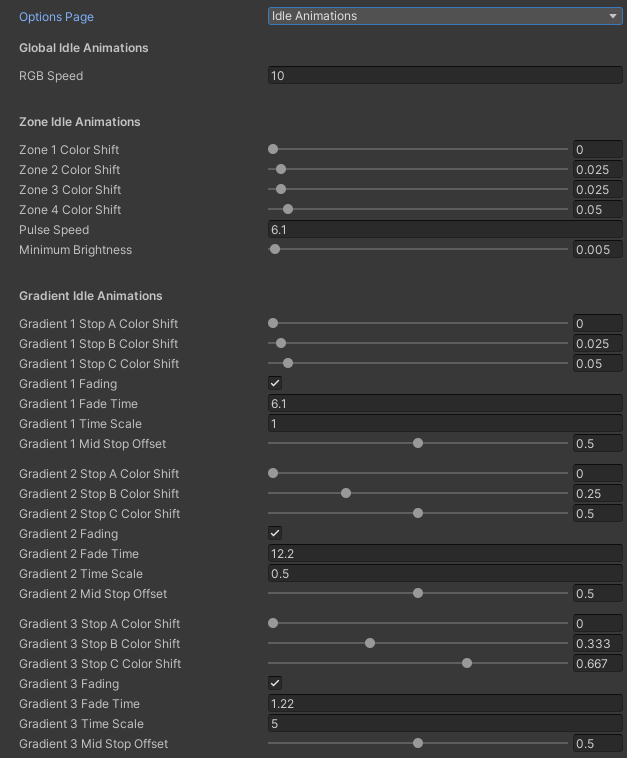
This page allows for adjusting the behavior of idle animations. These are the slowly scrolling and fading animations usually present when there is no music playing.
- RGB Speed - Adjusts the shifting speed of the rainbow color effect.
- Zone X Color Shift - The hue shift of the color effect for each zone.
- Pulse Speed - Speed of the pulsing effect.
- Minimum Brightness - This is a bandaid for an issue with the original Luma Glow where it flashes white when it is in the darkest point, and users have a minimum brightness set on their avatars. This is why it is not suggested to set it to completely 0.
- Gradient X Stop A Color Shift - Color shift of the starting color stop in the gradient.
- Gradient X Stop B Color Shift - Color shift of the middle color stop in the gradient.
- Gradient X Stop C Color Shift - Color shift of the end color stop in the gradient.
- Gradient X Fading - Enables the scrolling fade effect on the gradient.
- Gradient X Fade Time - Controls scrolling speed of the fade effect on the gradient. Lower values are faster.
- Gradient X Time Scale - Controls the density of the fade effect on the gradient. Higher numbers are denser.
- Gradient X Mid Stop Offset - The offset of the middle point of the gradient. This value is also used for AudioLink and for color overrides.
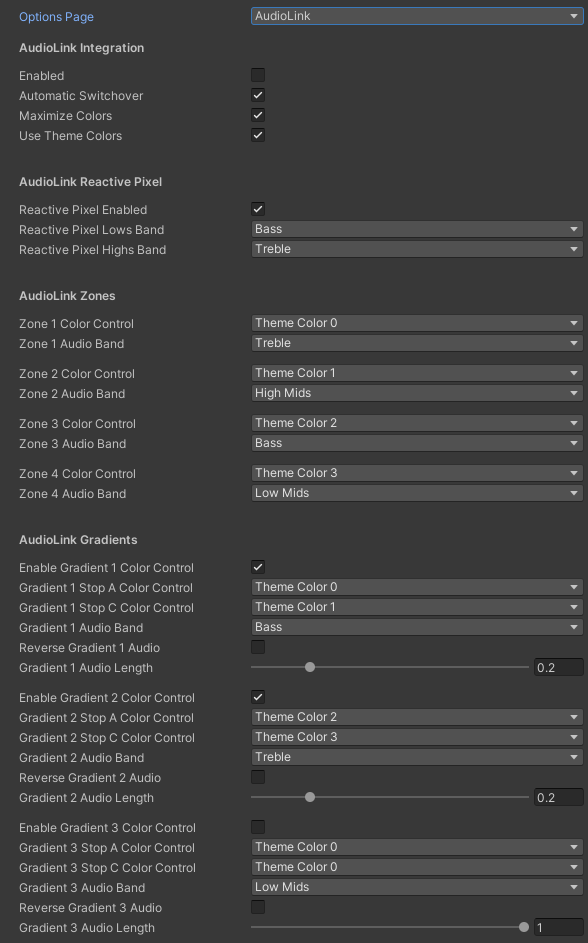
This page allows for adjusting the way how AudioLink interfaces with the driver. All Color Control options can use either AudioLink's Theme Colors or ColorChord feature in order to have interesting and dynamic colors when music is playing. In order to enable AudioLink integration, follow the steps:
- Import AudioLink package and set it up in the world following official instructions.
- Check the Enabled checkbox on AudioLink page in LumaDriver's configuration.
Below are explanations for different configuration options:
- Enabled - Enables AudioLink integration.
- Automatic Switchover - Monitors the audio throughput in AudioLink in order to decide whether idle animations should be playing instead when there is no audio.
- Maximize Colors - Maximizes the intensity of Theme Colors and ColorChord generated colors.
- Use Theme Colors - Enables the usage of AudioLink Theme Colors for all Color Control options. Themes can be customized programatically on AudioLink or adjusted directly on the AudioLink Controller. By default, Theme Colors act as ColorChord. Disabling this option forces ColorChord instead.
- Reactive Pixel Enabled - Enables the AudioLink integration with the Legendary Shader Audio Reactivity features.
- Reactive Pixel Lows Band - Defines AudioLink band to use for the Lows audio reactivity.
- Reactive Pixel Highs Band - Defines AudioLink band to use for the Highs audio reactivity.
- Zone X Color Control - Defines source of colors for the zone. Can be the idle animation, a Theme Color, or one of the ColorChord colors.
- Zone X Audio Band - Defines AudioLink band to use for the zone.
- Enable Gradient X Color Control - Enables the Theme Color or ColorChord control of the gradient.
- Gradient X Stop A Color Control - Defines Theme Color or ColorChord source for the first color stop.
- Gradient X Stop C Color Control - Defines Theme Color or ColorChord source for the end color stop.
- Gradient X Audio Band - Defines AudioLink band to use for the gradient.
- Reverse Gradient X Audio - Reverses the animation of the AudioLink flowing animation on the gradient.
- Gradient X Audio Length - Shortens or lengthens the AudioLink flowing animation on the gradient.
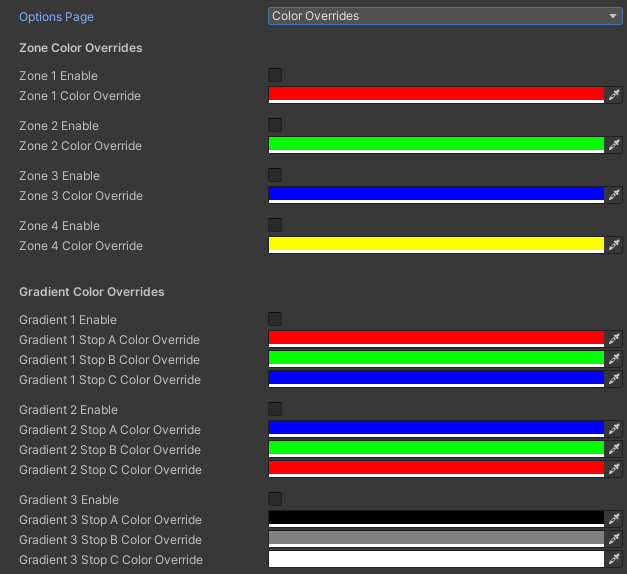
This page allows for overriding the colors in all of the zones and bands. This can be useful for pushing custom colors to the driver using Udon, or for debugging purposes.
- Zone X Enable - Enables color override for the zone.
- Zone X Color Override - The color to use for the zone.
- Gradient X Enable - Enables color override for the gradient.
- Gradient X Stop A Color Override - The color to use for the first color stop of the gradient.
- Gradient X Stop B Color Override - The color to use for the middle color stop of the gradient.
- Gradient X Stop C Color Override - The color to use for the end color stop of the gradient.
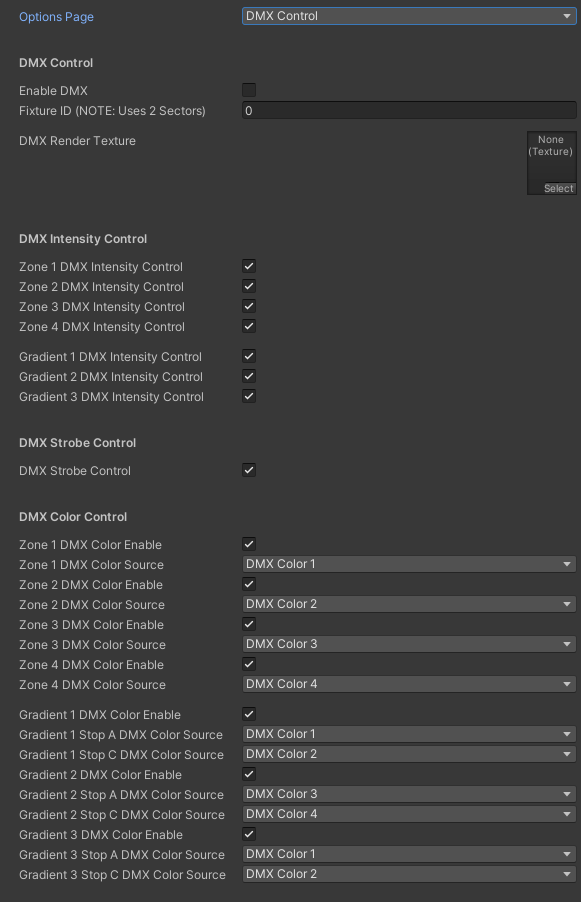
This page allows for adjusting the way how VRSL interfaces with the driver. VRSL is a powerful way of delivering DMX data through a video feed in order to control LumaDriver in sync to a DJ set in a club environment. The integration can adjust intensities of all 4 zones and 3 gradients, change the colors and trigger strobe effects. In order to enable VRSL DMX integration, follow the steps:
- Import VRSL package and set it up in the world following official instructions.
- Check the Enable DMX checkbox on DMX Control page in LumaDriver's configuration.
- Make sure that the correct texture is assigned to the DMX Render Texture slot. It should be set automatically, but if not, it should reference the render texture that comes with the VRSL package and is located in the following path:
Assets\VRStageLighting\VR-Stage-Lighting\Textures\DMXRTViewer-RAWValues - Choose which fixture you wish to use using Fixture ID. Note that LumaDriver takes up two sector slots, meaning that if you set for instance the ID to be 5, it will use sectors 5 and 6.
Below are explanations for different configuration options:
- DMX Enabled - Enables VRSL DMX integration.
- Fixture ID - Sets which fixture LumaDriver will use for the control. Note that this will use two sectors, starting with the one set here.
- DMX Render Texture - This is the render Texture captured by VRSL which contains the fixture control pixels. It should always be set to the texture that comes with VRSL and is located in the following path:
Assets\VRStageLighting\VR-Stage-Lighting\Textures\DMXRTViewer-RAWValues - Zone X DMX Intensity Control - Toggles whether the DMX feed can control the intensity of a zone.
- Gradient X DMX Intensity Control - Toggles whether the DMX feed can control the intensity of a gradient.
- DMX Strobe Control - Toggles whether the DMX feed can trigger strobe effects.
- Zone X DMX Color Enable - Toggles whether the DMX feed can control the color of a zone.
- Zone X DMX Color Source - Defines the DMX color to use for the zone.
- Gradient X DMX Color Enable - Toggles whether the DMX feed can control the color of a gradient.
- Gradient X Stop A DMX Color Source - Defines the DMX color to use for the first color stop.
- Gradient X Stop C DMX Color Source - Defines the DMX color to use for the end color stop.
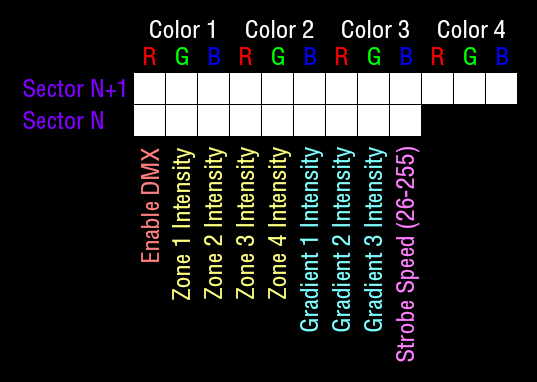
Above is the definition for VRSL DMX fixture(s) which represent LumaDriver.
- Sector N - This is the first sector for LumaDriver. It contains toggles, intensity controls and strobe effects.
[1]Enable DMX - This pixel should be set to a value higher than 127 to enable DMX control. Useful for toggling DMX functionality through the video feed itself.[2, 3, 4, 5]Zone X Intensity - These 4 pixels control the intensity of the 4 zones. Their value is directly multiplied with the existing intensity of the zones.[6, 7, 8]Gradient X Intensity - These 3 pixels control the intensity of the 3 gradients. Their value is directly multiplied with the existing intensity of the gradients.[9]Strobe Speed - This pixel controls how fast the LumaDriver will strobe. Values below 26 will not perform a strobing effect, while values above will control the speed.[10, 11, 12, 13]Unused
- Sector N+1 - This is the second sector for LumaDriver. It contains color data for different zones and gradients. These colors can be freely reassigned in LumaDriver's config.
[14, 15, 16]Color 1 - These three pixels control the red, green, and blue channels of the color respectively. Same applies to other colors.[17, 18, 19]Color 2[20, 21, 22]Color 3[23, 24, 25]Color 4[26]Unused
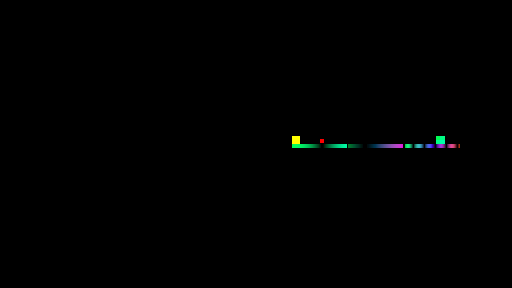
Want to make your own LumaDriver compatible shader? The texture is accessible under the name _Stored and has a resolution of 512x288 pixels You can access the texture generated by the driver by getting it with the following in your shader:
uniform sampler2D _Stored;
Below is a table which lists locations of individual pixels and gradients, along with their functionality:
| Data | Location | Channels | Description |
|---|---|---|---|
| Luma ON | 0.629, 0.511 |
Red | Controls whether old Luma Glow Shader and Aqua Shader are running. Always 255 red. |
| Zone 1 (Heros 1) | 0.856, 0.522 |
RGB | Applies color for the Luma Glow Zone 1. Also counts as Heros 1. |
| Zone 2 (Villains 1) | 0.856, 0.507 |
RGB | Applies color for the Luma Glow Zone 2. Also counts as Villains 1. |
| Zone 3 (Heros 2) | 0.864, 0.522 |
RGB | Applies color for the Luma Glow Zone 3. Also counts as Heros 2. |
| Zone 4 (Villains 2) | 0.864, 0.507 |
RGB | Applies color for the Luma Glow Zone 4. Also counts as Villains 2. |
| Gradient 1 | 0.570 - 0.677, 0.493 |
RGB | Applies the Gradient 1 data for Legendary Shader. Has a range along X axis. |
| Gradient 2 | 0.680 - 0.788, 0.493 |
RGB | Applies the Gradient 2 data for Legendary Shader. Has a range along X axis. |
| Gradient 3 | 0.791 - 0.898, 0.493 |
RGB | Applies the Gradient 3 data for Legendary Shader. Has a range along X axis. |
| Audio Reactive Lows | 0.578, 0.515 |
Red | Sends the Audio Reactive Lows data for Legendary Shader. |
| Audio Reactive Highs | 0.578, 0.515 |
Green | Sends the Audio Reactive Highs data for Legendary Shader. |

