NOTE: This repo contains only the documentation for the private BoltsOps Pro repo code. Original file: https://github.com/boltopspro/java-frontend/blob/master/README.md The docs are publish so they are available for interested customers. For access to the source code, you must be a paying BoltOps Pro subscriber. If are interested, you can contact us at contact@boltops.com or https://www.boltops.com
Simple java project demos how to build a war file to be deployed on a Tomcat server.
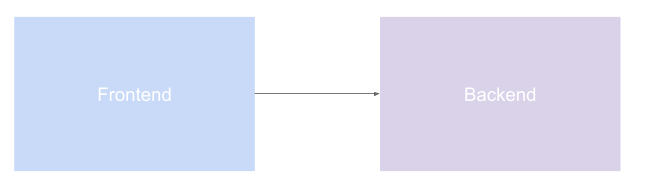
The frontend app makes a network call to the backend app. The backend app has a NetworkPolicy that only allows pods in the java-backend and java-frontend namespace to talk to it.
- docker:
brew install docker - maven:
brew install maven
The app is a small demo of a java servlet app. Here's the source code to url mapping:
| Source | Url | Url2 |
|---|---|---|
| src/main/java/Hello.java | localhost:8103/demo/Hello | localhost:8103/ |
| src/main/webapp/index.jsp | localhost:8103/demo/index.jsp | localhost:8103/index.jsp |
The app is also dockerized so you can test this via docker.
The build script uses mvn package to produce a demo.war file and then bundles it with a Docker image that runs Tomcat. Usage:
bin/build
- mvn package was ran and the
target/demo.warwas moved intopkg/demo.war - a docker image was built which copied the
pkg/demo.warto/usr/local/tomcat/webapps/demo.war. Check out the Dockerfile for details.
Here's an example of some things to check after running the build script:
$ ls pkg/demo.war
pkg/demo.war
$ docker images
REPOSITORY          TAG                 IMAGE ID            CREATED             SIZE
java-frontend           latest              88092dfb7325        6 minutes ago       591MB
tomcat              9.0                 a92c139758db        2 weeks ago         558MB
$
Here are the summarized commands to run and test that Tomcat is serving the war file:
bin/build # build Docker image
docker run --rm -d -p 8103:8103 --name java-frontend --link java-backend -e BACKEND_ENDPOINT=http://java-backend:8102 java-frontend:latest
docker exec -ti $(docker ps -ql) bash
curl localhost:8103/demo/Hello
curl localhost:8103/demo/index.jsp
exit
docker stop $(docker ps -ql)
Then you can hit the the [HOSTNAME]:8103/demo/Hello and to verify that Tomcat is servering the demo.war file. You should see an html page that says "Hello World". The output should look similar:
$ bin/build # build Docker image
$ docker run --rm -p 8103:8103 -d --name java-frontend java-frontend:latest
2ba7323481fa5c4068b90f2edf38555d9551303e9c2e4c27137ab0545688555b
$ docker exec -ti $(docker ps -ql) bash
root@2ba7323481fa:/usr/local/tomcat# curl localhost:8103/demo/Hello
<h1>Hello World Hello.java</h1>
root@2ba7323481fa:/usr/local/tomcat# curl localhost:8103/demo/index.jsp
<html>
<body>
<h2>Hello World index.jsp!</h2>
</body>
</html>
root@2ba7323481fa:/usr/local/tomcat# exit
exit
$ docker stop $(docker ps -ql)
2ba7323481fa
$ docker ps -a
CONTAINER ID        IMAGE               COMMAND             CREATED             STATUS              PORTS               NAMES
$
Note: You'll need to have a docker repo that you can push to set up. The example here uses a google GCP repo.
$ kubes deploy
=> docker build -t gcr.io/google_project/java-frontend:kubes-2020-07-18T21-35-07-275a1c8 -f Dockerfile .
Pushed gcr.io/google_project/java-frontend:kubes-2020-07-18T21-35-07-275a1c8 docker image.
Docker push took 1s.
Compiled  .kubes/resources files to .kubes/output
Deploying kubes resources
=> kubectl apply -f .kubes/output/shared/namespace.yaml
namespace/java-frontend created
=> kubectl apply -f .kubes/output/web/service.yaml
service/web created
=> kubectl apply -f .kubes/output/web/deployment.yaml
deployment.apps/web created
$
List the resources:
$ kubectl config set-context --current --namespace=java-frontend # kubens java-frontend
$ kubectl get pod,svc
NAME                       READY   STATUS    RESTARTS   AGE
pod/web-6b58688558-nz567   1/1     Running   0          117s

NAME          TYPE        CLUSTER-IP     EXTERNAL-IP   PORT(S)   AGE
service/web   ClusterIP   192.168.0.42   <none>        80/TCP    117s
Grab the pod name and exec into it to test.
$ kubectl exec -ti pod/web-6b58688558-nz567 sh
# curl localhost:8103
frontend calling backend: resp from backend: message from java backend: src/main/java/Hello.java
# curl 192.168.3.184
frontend calling backend: resp from backend: message from java backend: src/main/java/Hello.java
# curl web.java-frontend
frontend calling backend: resp from backend: message from java backend: src/main/java/Hello.java
#
You can see the message: frontend calling backend: resp from backend: message from java backend: src/main/java/Hello.java
Test with a another pod. Note: We'll launch this pod in the default namespace.
$ kubectl run tester -it --rm --restart=Never -n default --image=ubuntu sh
# apt-get update ; apt-get install curl -y
# curl web.java-frontend
frontend calling backend. response from backend: message from backend
#
Note, you will not be able to curl web.java-frontend from the tester container because it's in the default namespace.
# curl web.java-backend
curl: (28) Failed to connect to web.java-backend port 80: Connection timed out
#
Remember, only the java-backend and java-frontend namespace can reach the backend pods. This is because the java-backend app has a NetworkPolicy with these rules.
$ kubes delete -y
Compiled  .kubes/resources files to .kubes/output
=> kubectl delete -f .kubes/output/web/deployment.yaml
deployment.apps "web" deleted
=> kubectl delete -f .kubes/output/web/service.yaml
service "web" deleted
=> kubectl delete -f .kubes/output/shared/namespace.yaml
namespace "java-backend" deleted
$
Here are some notes on the initial generation of the project. The initial files and project structure was generated with the mvn archetype:generate command. Note, you do not have to run the command it is just noted here for posterity. More info: Creating a webapp and Introduction to the Standard Directory Layout.
Change were made like adding a simple Hello.java Servlet class.
The original command was:
mvn archetype:generate \
  -DinteractiveMode=false \
  -DgroupId=com.domain \
  -DartifactId=demo \
  -DarchetypeArtifactId=maven-archetype-webapp