Installation
This guide explains how to obtain and install Argo on Excel.
Table of Contents
Visit https://github.com/boozallen/argo/releases to download the latest release. If you have a 64-bit version of Excel please ensure that you download the 64-bit version.
After clicking the download link, you will be directed to a download webpage on your web browser and your download will begin automatically. It will download an EXE file called "Argo-4.1.3-Setup.exe". When the file finishes downloading, navigate to the EXE file and double-click it. This will display the prompt shown below:
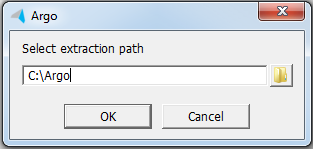
Choose a directory and click OK to extract your files there. Remember this file-path for later.
Start Excel and open a blank workbook. Open the file menu and click "Options". This will open the Excel Options window. On the left, click on the tab labelled "Add-ins". Select "Excel Add-ins" from the Manage drop-down box and then click "Go..."
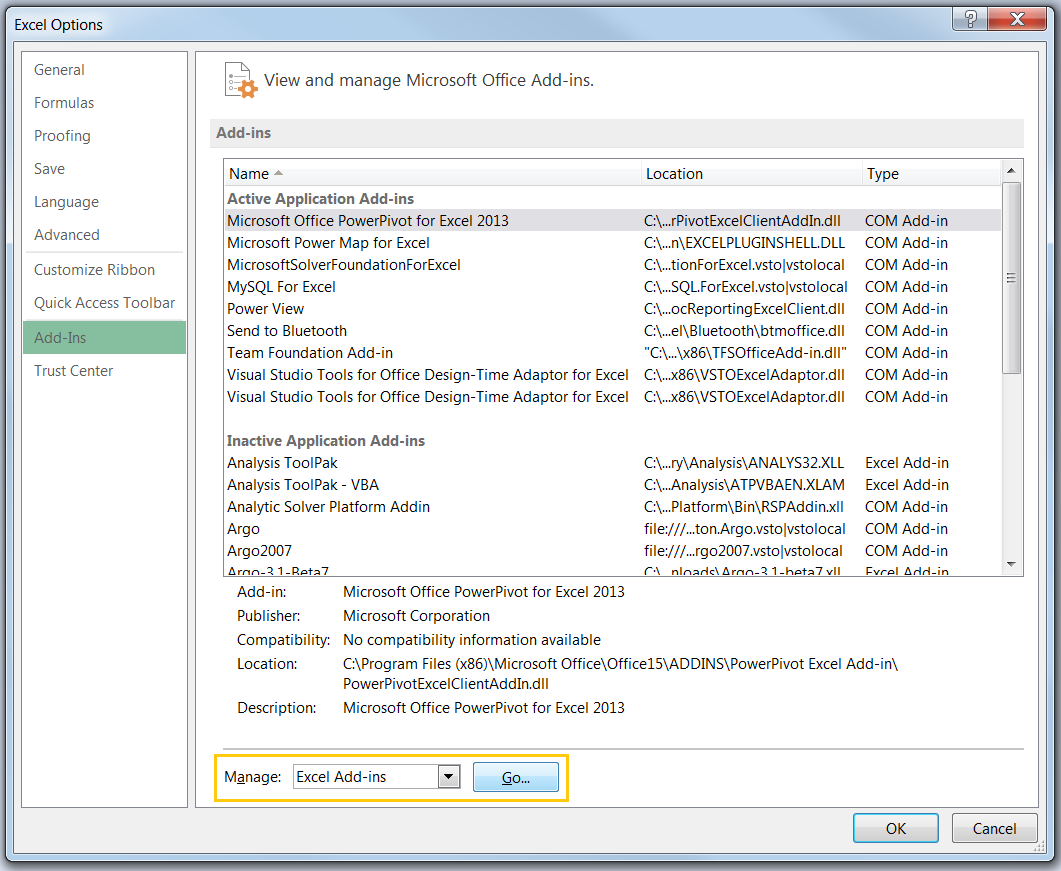
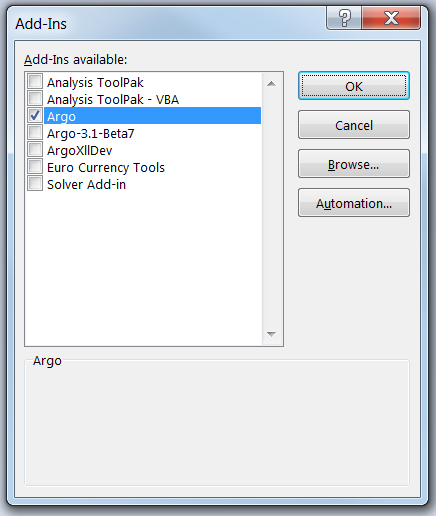
You have now opened the Add-in manager, shown below.
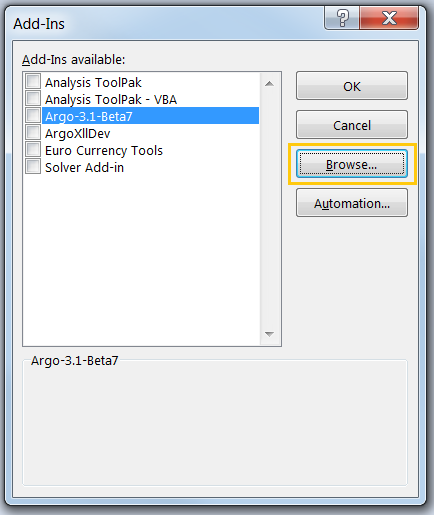
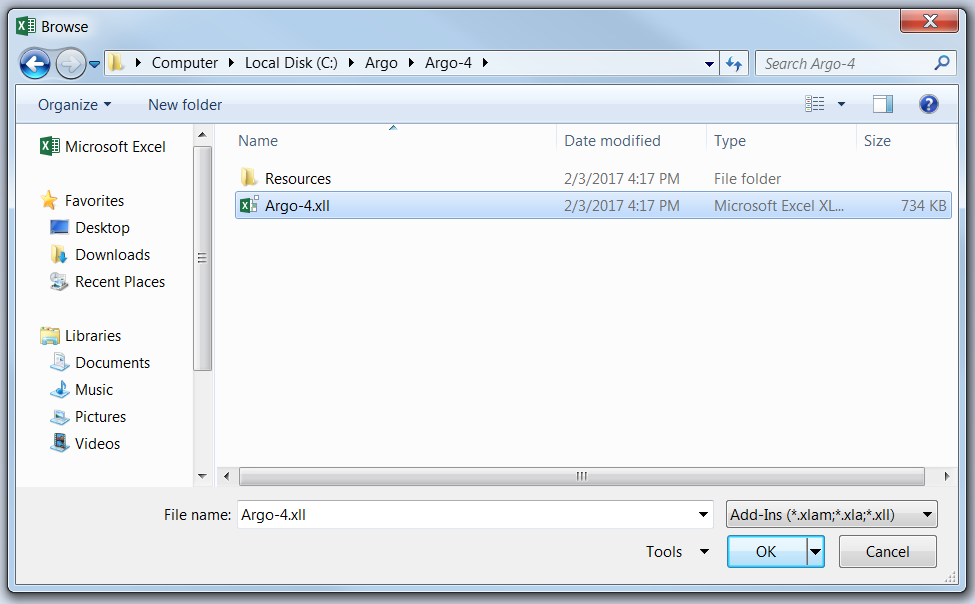
The Add-in manager lists the current Excel Add-ins enabled on your computer. If you have a previous version of Argo enabled here, please uncheck it now! Next click "Browse..." and navigate to the Argo folder that you extracted earlier. Select the file "Argo-4.1.3.xll" and then click "OK".
The Add-in manager should now display the Argo add-in and it should automatically be checked. Click "OK".
You should see a new "ARGO" ribbon tab at the top indicating that Argo successfully loaded. Loading Argo only needs to be done once. In the future, Argo will automatically load when you start Excel. If you want to disable Argo, navigate back to the Add-in manager and uncheck Argo.