Run this in cmd (Administrator)
1. locate project directory
2. keytool -genkey -v -keystore c:\Users\USER_NAME\key-keystore.jks -storetype JKS -keyalg RSA -keysize 2048 -validity 10000 -alias key
3. make and put key.properties file in android/ folder

  storePassword=keystorePassword
  keyPassword=keystorePassword
  keyAlias=key
  storeFile=D:/Keep Out/Asal Ngoding/Development/WORKSPACE/Flutter/on_tracker/android/upload-keystore.jks

  CHECK Keystore
  1. open cmd and go to android folder > cd android
  2. type gradlew signinReport

4. Add the keystore information from your properties file before the android block in [project]/android/app/build.gradle

   def keystoreProperties = new Properties()
   def keystorePropertiesFile = rootProject.file('key.properties')
   if (keystorePropertiesFile.exists()) {
       keystoreProperties.load(new FileInputStream(keystorePropertiesFile))
   }

    android {
         ...
   }

5. Find the buildTypes block in [project]/android/app/build.gradle

     buildTypes {
       release {
           // TODO: Add your own signing config for the release build.
           // Signing with the debug keys for now,
           // so `flutter run --release` works.
           signingConfig signingConfigs.debug
       }
   }

6. And replace it with the following signing configuration info:

   signingConfigs {
       release {
           keyAlias keystoreProperties['keyAlias']
           keyPassword keystoreProperties['keyPassword']
           storeFile keystoreProperties['storeFile'] ? file(keystoreProperties['storeFile']) : null
           storePassword keystoreProperties['storePassword']
       }
   }
   buildTypes {
       release {
           signingConfig signingConfigs.release
       }
   }
KEYTOOL LIST in Visual Studio Code terminal
keytool -list -v -keystore ~/.android/debug.keystore -alias androiddebugkey -storepass android -keypass android
Flutter has 4 channel stable(the latest stable version), master(on progress development like -pree version), beta, and dev
1. flutter channel (will show the list of channel)
2. flutter channel (channel name)
3. flutter upgrade
1. flutter upgrade (this command will upgrade the latest version your current channel)
1. locate flutter directory, for example **C:\flutter**
2. run git bash
3. git checkout (flutter version) / example git checkout 1.22.6 / example git checkout 2.10.2
4. flutter doctor (to perform download and compile for the selected version)
- install git
- sign in git in cmd / terminal
git config --global user.name "your_username"
git config --global user.email "your_email_address@example.com"
note: for a simple config just use the same email with github
- create ssh key in your pc/laptop
- Generate SSH
$ ssh-keygen
note: for enter passphrase just empty it
- See ssh (must use git bash in windows or mac)
$ cat ~/.ssh/id_rsa.pub or $ pbcopy < ~/.ssh/id_rsa.pub
note: if it fail to locate ssh key just recreate it again and check in the directory /c/Users/USERNAME/.ssh(hidden file)/id_rsa.pub if the key is created
- Check ssh // tbh i forgot what is this command doing hehe
$ dir .ssh
- sign the ssh key from your device pc/laptop to git web service profile

- when cloning if asked to enter password create token in git web profile
- install Settings Sync extension from author Shan Khan
- press f1 and choose download settings to download stored settings
- choose update/upload to upload new settings
For zsh:
- Open Terminal
- Run: nano ~/.zshrc
- Add: export PATH="[PATH_TO_FLUTTER_GIT_DIRECTORY]/flutter/bin" (DIR ex: /Users/user/flutter/bin) *to get this path easily just drag flutter/bin to terminal and you will get the path
- Run: source ~/.zshrc
- restart terminal
- Run: flutter doctor -v
- Choose which folder to save the cloned repo
- Right click in the folder and choose git bash
- run command:
git clone (repo/remote url)

# Cloning repo will only clone the master and cannot choose spesific branch to clone but you can choose spesific branch with command
git checkout (branch name ~~without bracket~~)
What is forking? it is copying other people repo with all the history to our repo it's just like making new repo but the repo is from other people repo. To do it just press 'Fork' in the repo you want to fork
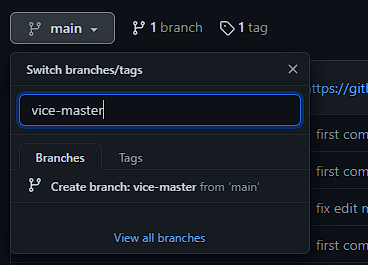
If you want to add new branch from another branch, just select the branch first then add new branch
This will update your branch with your code that has been updated, it will only add new code or remove the code that you had remove in Text Editor not uploading all files but but only updated code/files
1. git add  (the . means adding all files that has changed)
2. git commit -m 'Commit message explaining what change you do to the code
3. git push
git checkout -- .