- mobx
Assetstore
- addAsset
- updateAsset
- removeAsset
- mobx
Poolstore
- addPool
- UI to add data (optional)
- assets table
- error handling when addPool with assets length less than 2
Code changes

Initial page

Error handling

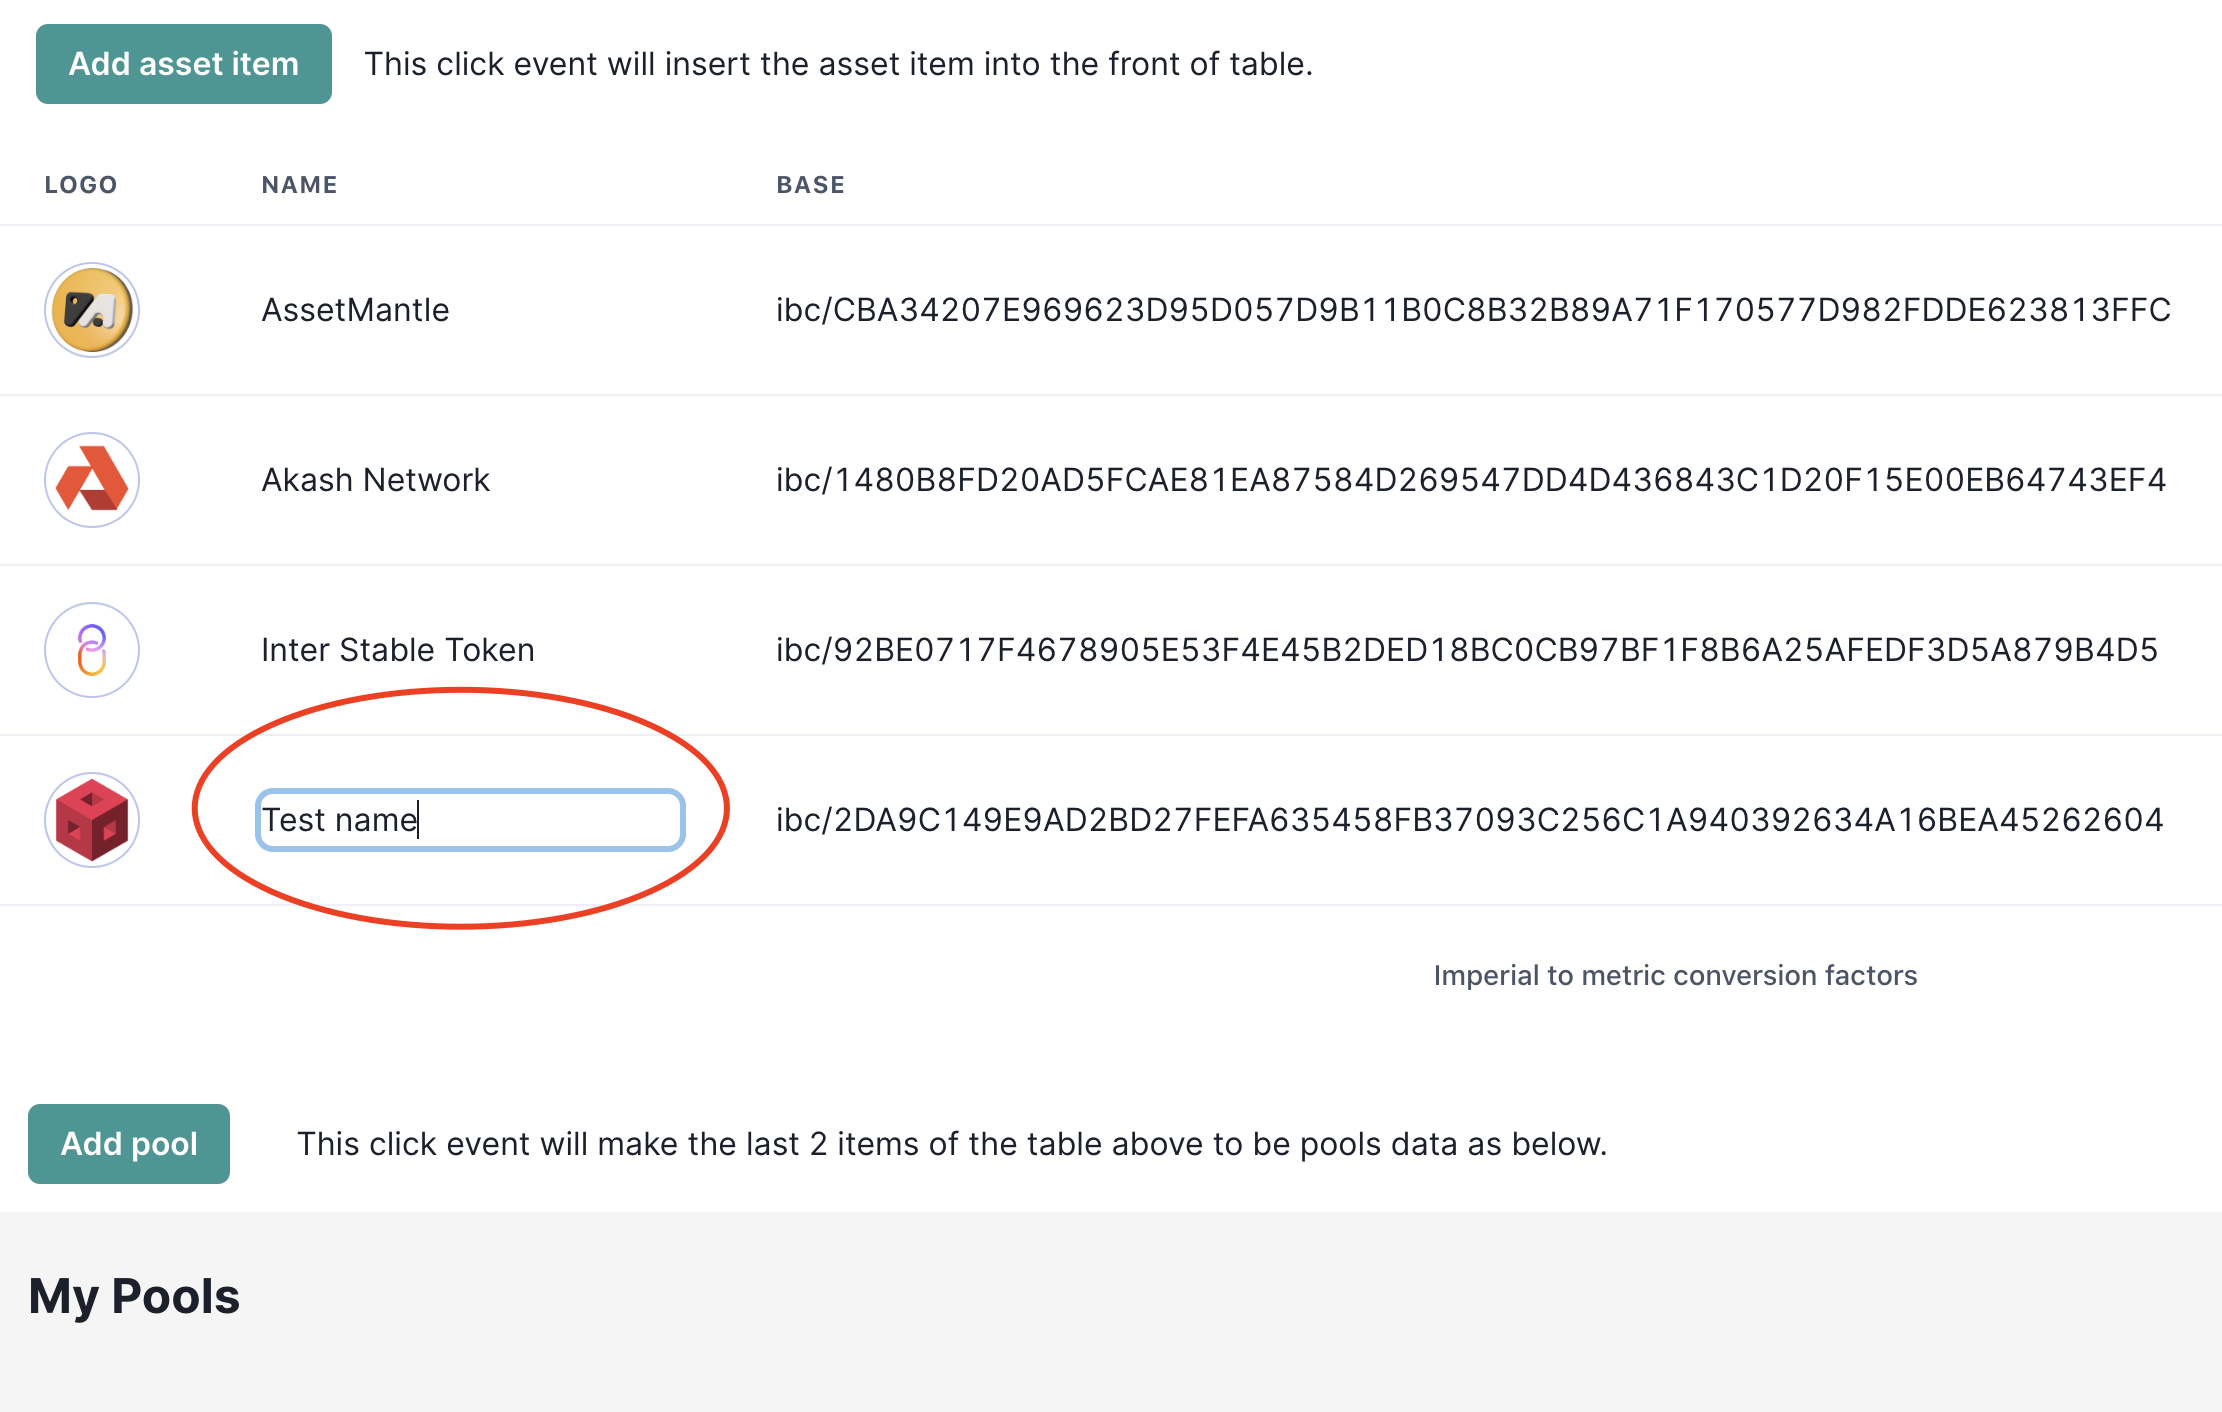
Follow below steps for testing updateAsset & addPool case:
- Click the "name" cell and update it
- Then click the "Add pool"
- Assets table will remove last 2 items and put them into pools data, and the "name" has been updated.

You'll be working in ./packages/app. The goal is to use mobx stores and display the data in a user interface.
We'll be using https://mobx.js.org/, and chain-registry, which will help us create the genesis state for a mobx store.
In this example, we'll be using the chain-regitsry's Osmosis Asset list
addAsset(asset: Asset)
this should add an asset, e.g. ATOM or OSMO tokens
updateAsset(asset: Asset)
this should update an asset, denom_units, base, logo_URIs, etc.
removeAsset(asset: Asset)
addPool(asset1: Asset, asset2: Asset)
This should add a pool of two assets.
A react next.js page exists at packages/app/pages/index.tsx
Components are already built using https://chakra-ui.com/ — it's optional if you want to add new UI.
cd ./packages/app/
yarn dev
A pool list UI is already ready, but is hard-coded to use asset-list. It should be hooked up to the mobx store instead.
Update ListPools to take react props to connect to the mobx store. When you call addPool, it should add pools to the UI.
The pools component is here: packages/app/components/pools-list.tsx
you can optionally make a form, or, you can use code to seed the mobx store and manually call addPool.
yarn
yarn bootstrap
cd ./packages/app
yarn dev