As you saw in class, your GitHub profile is your central place to showcase your computer science work and skills. Your profile page can be seen by fellow students, collaborators, and potential employers! For this reason, it is extremely important to set up a nice GitHub profile. Throughout this assignment, you will get to create your own very own GitHub profile! You will get to explore your fellow students' profiles once the assignment is completed.
The first step of creating your GitHub profile is to input your information! You want to complete the following steps:
- Set a Profile Picture (3pts): The profile picture is a great way to personalize your profile, and it helps identify you across GitHub in pull requests and comments. Profiles with profile pictures have greater visibility and helps your profile to appear more professional. Try to use a photo including your face that is presentable in a reasonably professional setting.
- In the upper-right corner of any page on GitHub, click your profile photo, then click Settings.
- Under "Profile Picture", select Edit, then click Upload a photo....
- Select an image, then click Upload.
- Crop your picture.
- Click Set new profile picture.
Note: Points will be rewarded even if you do not feel comfortable including a a photo.
-
Include your Name: (2pts): By default, GitHub profiles may only include a lowercased username. Make sure to input your name in the appropriate field with proper casing.
- In the upper-right corner of any page on GitHub, click your profile photo, then click Settings.
- Under "Public profile", in the "Name" field, type the name you want to be displayed on your profile.
-
Update your Bio (4pts): Add a bio to your profile to share information about yourself with other GitHub users! You can include @mentions (to mention organizations or other people), as well as emojis. Bios are very short, so provide a very quick description about you! It is common to include information such as your major / school, as well as a company or organization, if you are a part of it. For example, "CS major @ UNC".
- In the upper-right corner of any page on GitHub, click your profile photo, then click Settings.
- Under "Public profile", in the "Bio" field, type the content that you want displayed on your profile. The bio field is limited to 160 characters.
- Click Update profile.
-
Include Pronouns (0pts): Optionally, you may also choose to include your pronouns.
- In the upper-right corner of any page on GitHub, click your profile photo, then click Settings.
- Under Pronouns, add the pronouns that you want displayed on your profile. You may add custom pronouns.
- Click Update profile.
-
Location and Timezone (0pts): Optionally, include your general location! This will help you be seen by employers near you. You can be general - since you are a student at UNC-Chapel Hill, including Chapel Hill would be reasonable.
- In the upper-right corner of any page on GitHub, click your profile photo, then click Settings.
- Under "Public profile", in the "Location" field, type the location you want to be displayed on your profile.
- Optionally, display the current local time on your profile.
- Select Display current local time.
- Select the Time zone dropdown menu, then click your local time zone.
- Click Update profile.
-
Social Media Accounts (0pts): Optionally, you can include links to valid social media. We highly recommend including your LinkedIn profile, not personal accounts such as Instagram.
- In the upper-right corner of any page on GitHub, click your profile photo, then click Settings.
- Under "Social accounts", in a blank "Link to social profile" field, type the full URL of the social account. For example, for the @GitHub Twitter account, type https://twitter.com/github.
- Click Update profile.
Now that you have set up your profile, you can create a profile landing page! This is a relatively newer feature of GitHub, but it is great to showcase more about yourself, what you know, and what projects you have worked on! The profile page is written in Markdown, which you had the chance to explore in a04.
-
Open an additional tab in GitHub and follow the instructions below.
-
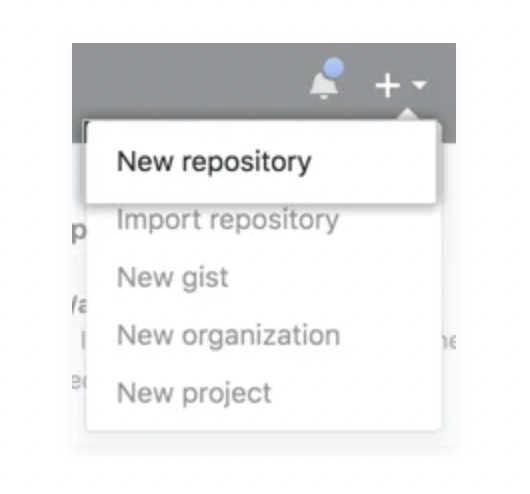
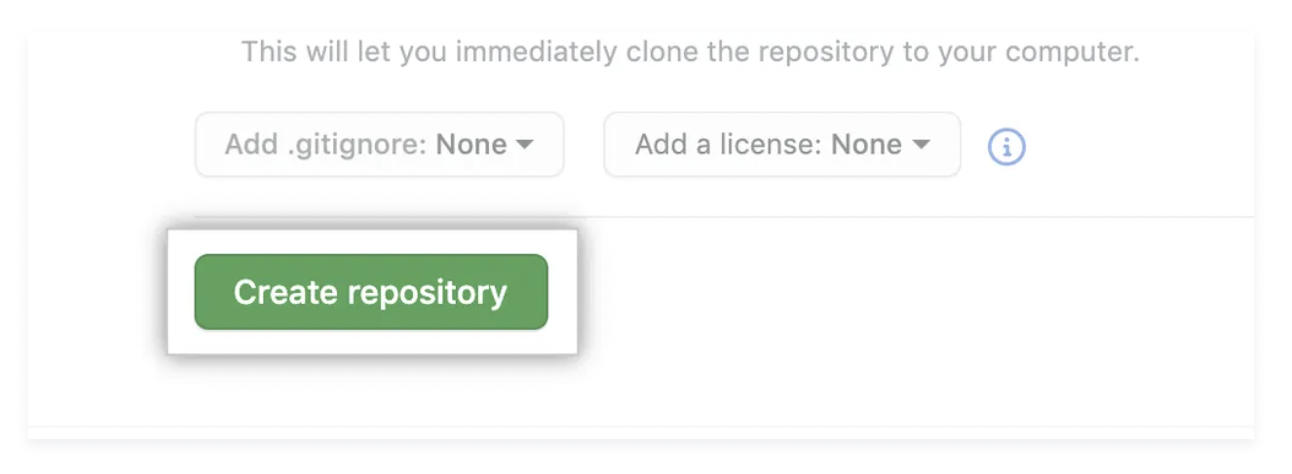
In the upper-right corner of any page, click the ‘+’ and use the drop-down menu, and select New repository.
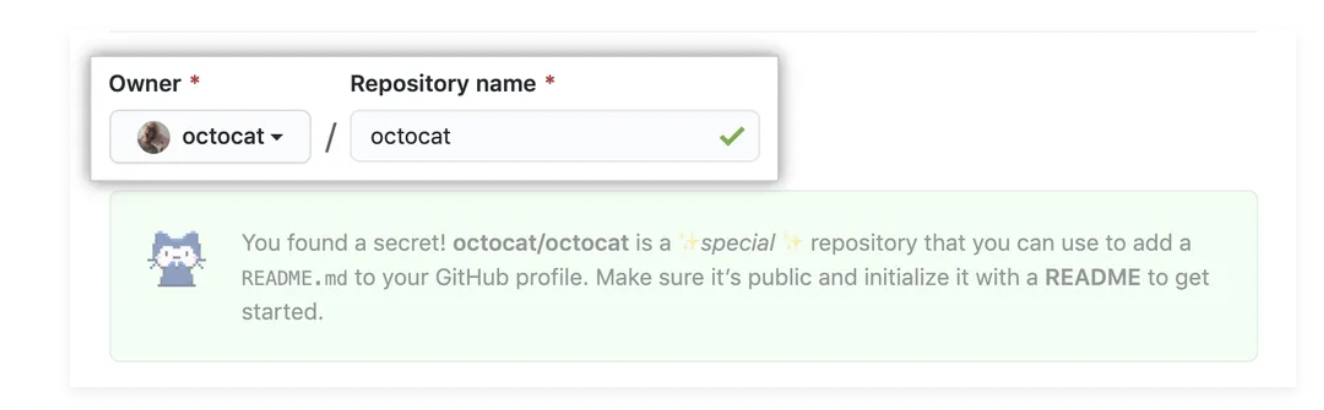
- Under "Repository name", type a repository name that matches your GitHub username. For example, if your username is "octocat", the repository name must be "octocat".
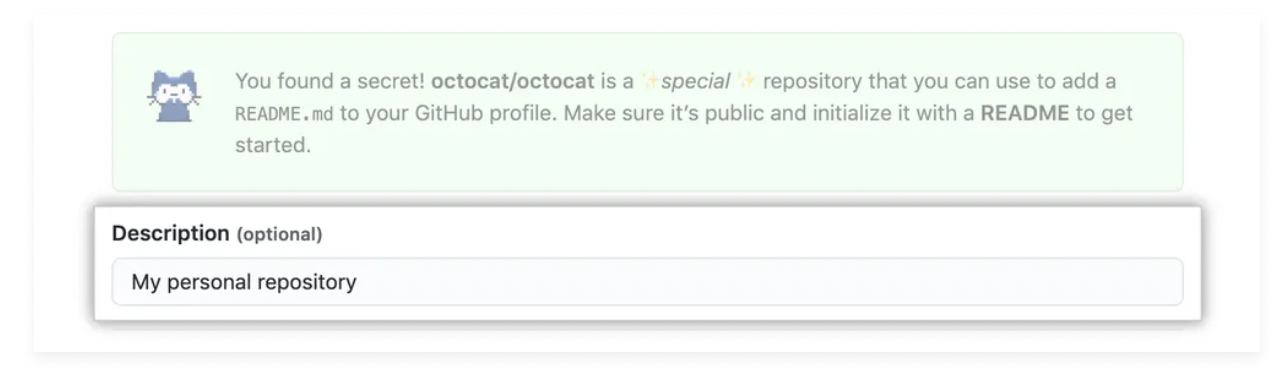
- Optionally, add a description of your repository. For example, "My personal repository."
- Select Public.
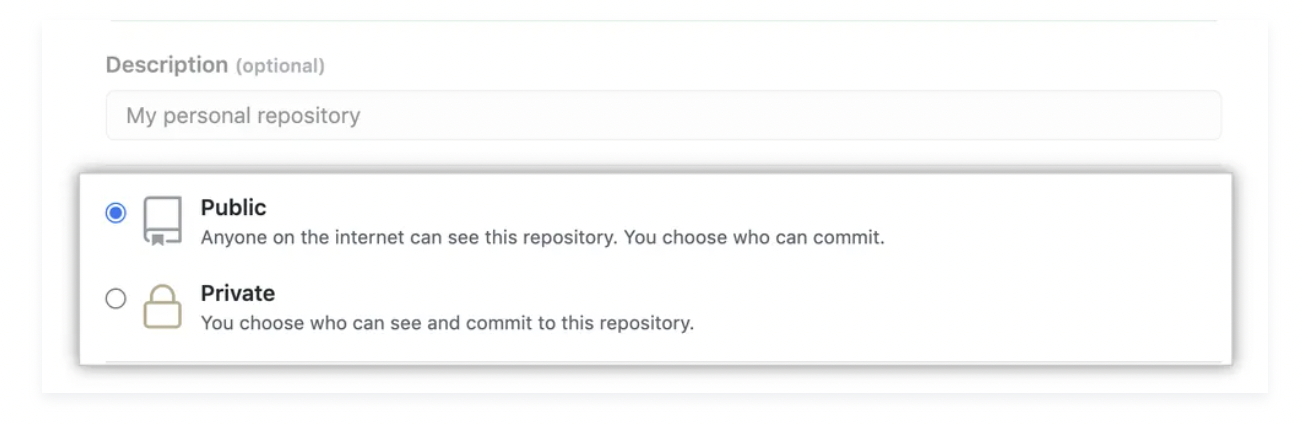
- Select Initialize this repository with a README.

- Click Create repository.
- Above the right sidebar, click Edit README.
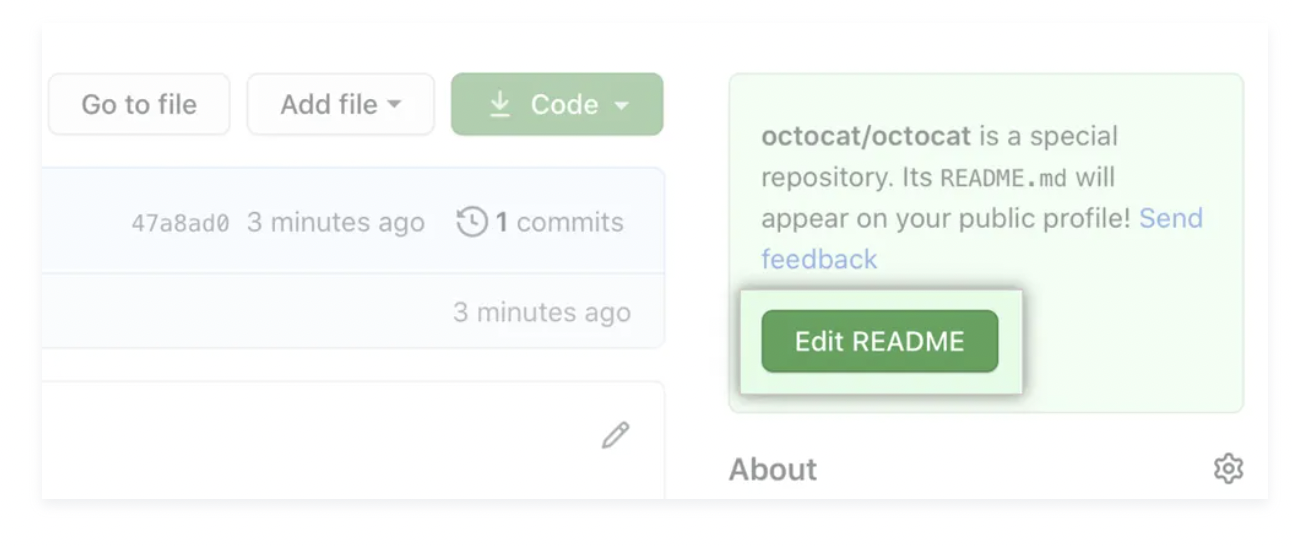
Now that you have created your profile's README file, let's add to it!
Now that you have your profile Readme file created, let's add a few sections! You can copy and paste this template into your file:
## About Me
< Talk a little bit about yourself here! Perhaps include your interests in the field of computer science / software engineering >

## Skills

### Classes
< Talk about what you have learned in different classes here. No need to be extremely specific, but feel free to include COMP 110, COMP 210 (if you have enrolled), and COMP 290! >

### Tools and Programming Languages
< Include programming languages you know here! If you would like, since this list may be relatively short (since you are still an underclassmen!), perhaps include some of the things you have worked on in these languages. *Feel free to include git and Docker too!* >
For some inspiration, here are some examples:
We will grade on this criteria:
- About Section (10pts)
- Classes (5pts)
- Tools and Programming Languages (5 pts)