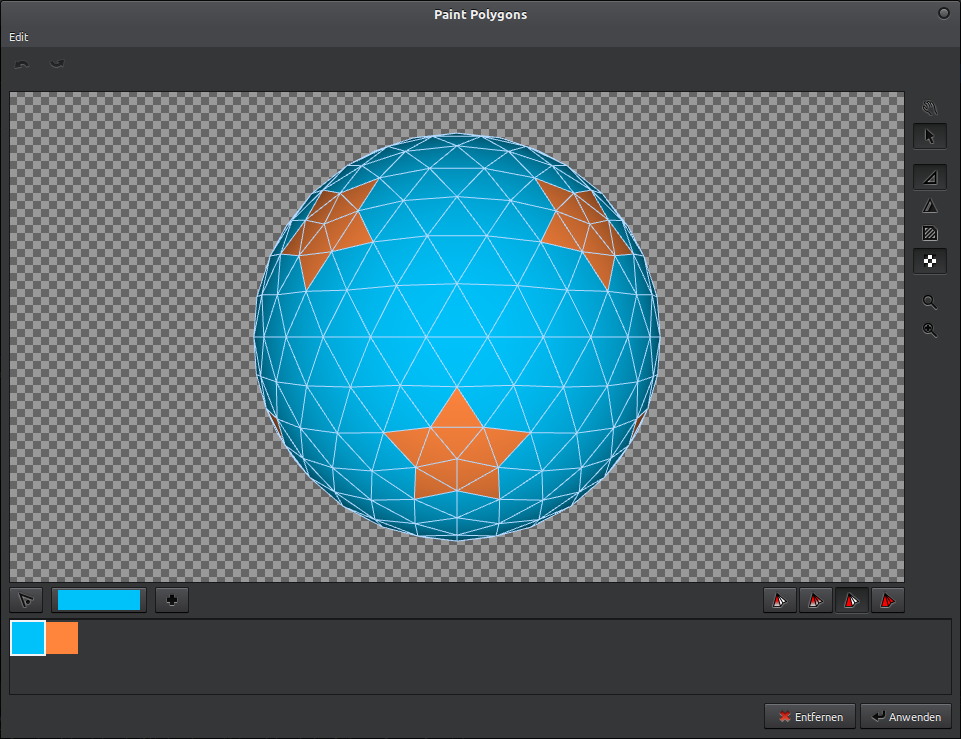
Paint a Single or More Polygons
Coloring polygon can make interesting effects including simulated shadows, lighting, and creative art.
Find it: Click the Paint Polygons button 
Drag the cursor over the buttons in the editor for quick help (a message appears right beside the cursor describing what the button does).
The Polygon Coloring Editor works with the Color Editor. The Color Editor appears when you click the large color button.
Use Pick mode 
Use the paint mode to add color to polygons. Note: Paint works continuously during a drag.
Use the Edit menu to undo and redo color changes (or use Ctrl-z and Shift-Ctrl-z).
The Polygon Coloring Editor lets you add color to models. You must convert your model to an IndexedFaceSet node before you can edit it with the Polygon Coloring Editor. Use the Hammer 
To learn how to add color to a model, follow the basic steps below.
- Select the object you want to color (click on it).
-
Open the Color Editor by clicking its button on the Toolbar:
- Reposition the object.
- Drag over empty space to reposition the object.
- Click-drag and let go to spin the object. Click to stop spinning.
- Scroll up or down to »zoom«, or dolly in or out.
-
Choose how you want the color to be applied.
Drag your cursor over each button for quick help – a description of the button appears in the editor window. The icons describe how the color will appear on the selected vertex:
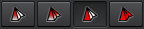
- The first two icons produce a fade effect. The first icon changes the color of a single vertex. The second icon changes the color of adjoining vertices.
- The third icon changes the color of the entire face. This results in solid color.
- The fourth icon colors the whole object.
- Click the arrow
to select a color from a vertex, or select a color from the palette.
- Click-drag over the object to apply color.
- Click Apply when done.
 to select a color from a vertex, or select a color from the palette.
- You must convert your model to an IndexedFaceSet node before you can edit it with the Color Editor. Use the Hammer
button from the Geometry Editor palette to convert.
- Before you click Apply, you can remove all unused color if you select Edit > Remove Unused Colors.
- If your polygon object has so many polygons that applying color to multiple vertices becomes a problem, consider editing the polygon object so that it has fewer polygons.