Modeling Walkthrough
In this walkthrough we will take a look at how to build a complete robot model with Phobos, all the way from creating the kinematic and visual layout, over adding collision bodies and motors to finalize the model by adding sensors and optimizing memory consumption. We will of course need a working installation of Blender and Phobos. Also, if you are completely new to Blender, make sure to have a look at the Blender Basics so you don't get lost along the way.
Once you get the idea of how everything works with Blender and Phobos, you will find that there are numerous approaches to putting together a robot. It depends on what you start working from. If your intent is to model a non-existent robot for use in simulation only, starting out with creating the visuals of it may be reasonable, whereas if you're working with blueprints starting with the kinematic skeleton may be the better way. Even more so, there is no necessity for a visual robot representation, so if you only need a URDF for e.g. motion planning and intend to work with simplified collision bodies only, you may choose to entirely skip this step.
For the purpose of this walkthrough, we will however start with the visual objects, as these usually are the most precise representation of an actual robotic system and thus get all the dimensions right, especially in the case of CAD data import.
We will walk you through the following steps of model editing:
- Creating a Visual Robot Representation
- Creating a Kinematic Skeleton
- Adding Collision Objects
- Defining Masses and Inertia
- Specifying Motors
- Adding Sensors
We will not cover working with Blender to create and arrange objects or even editing meshes here, as there are plenty of tutorials and videos out there. Essentially, what you want to build is a hierarchy of objects, parented to one another in such a way that pairs of objects can be connected with joints to represent the robot's kinematics later on. For this purpose, it is easiest to build the robot in its rest pose, i.e. the way it will look like when all its joints are at their origin position.
One of the nice features of virtually all CAD software is that you can export a part consisting of a number of smaller parts into an equal number of 3D files, for instance STL. We can make use of this and import these files to put together our robot. See Importing from CAD.
For the purposes of this tutorial, we're going to use the example robot distributed with Phobos (models/simple_walker.blend):

Once we have our visuals, we have to let Phobos know that they are visual
objects by assigning the proper phobostype. Select all visual objects and run
Set phobostype from the Phobos toolbar, choosing visual as the type to be
assigned.
Important Note: In most cases, it is a good idea to "finish" an operator by running another operation; hitting A (and thus executing the selection operator) will do the trick. The issue is that operators are continuously re-executed when you change a parameter or switch the object selected as active in Blender (in which case the previous changes of the executing operator will be un-done first).
Next, we have to specify the geometry types of the visual elements. Unfortunately, Blender does not remember the "shape" of objects after their creation - for Blender, a cube and a sphere are both merely mesh data residing in a container called 'object'. URDF however needs to explicitly define the geometry type of visual elements, which can be either primitive shapes or meshes.
Important Note: It is not a good idea to simply declare all visual (or collision) elements as meshes, as it is far more efficient to use primitive shapes where possible.
To set the URDF geometry type for visuals, you can use the Define Geometry
operator in Phobos' object editing panel. Again you can first select all objects
of the same geometry type and then apply the operator.
In most cases it is a good idea to select all meshes and apply the Blender
option: Object->Apply->Rotation & Scale. This will apply the scaling of
objects to their mesh information (vertices) and applies the current
orientation to the mesh as well. After this option all objects have zero
orientation. If this is not desired one can also only apply the Scale.
This topic is covered on its own page: Kinematic Skeleton.
However, we also want to have objects representing collision in our model. This
is done with Phobos' Create Collision Object(s) operator. We start by
selecting the visual of our robot's head, then execute the operator. Choosing
the option box as Collision Type will automatically
place a box with the same dimensions as the visual on the layer for collision
objects:

We can also select multiple objects and create automatically correctly oriented collision objects for them, for instance we could choose to represent the cylindric shapes of the body and legs with collision boxes:
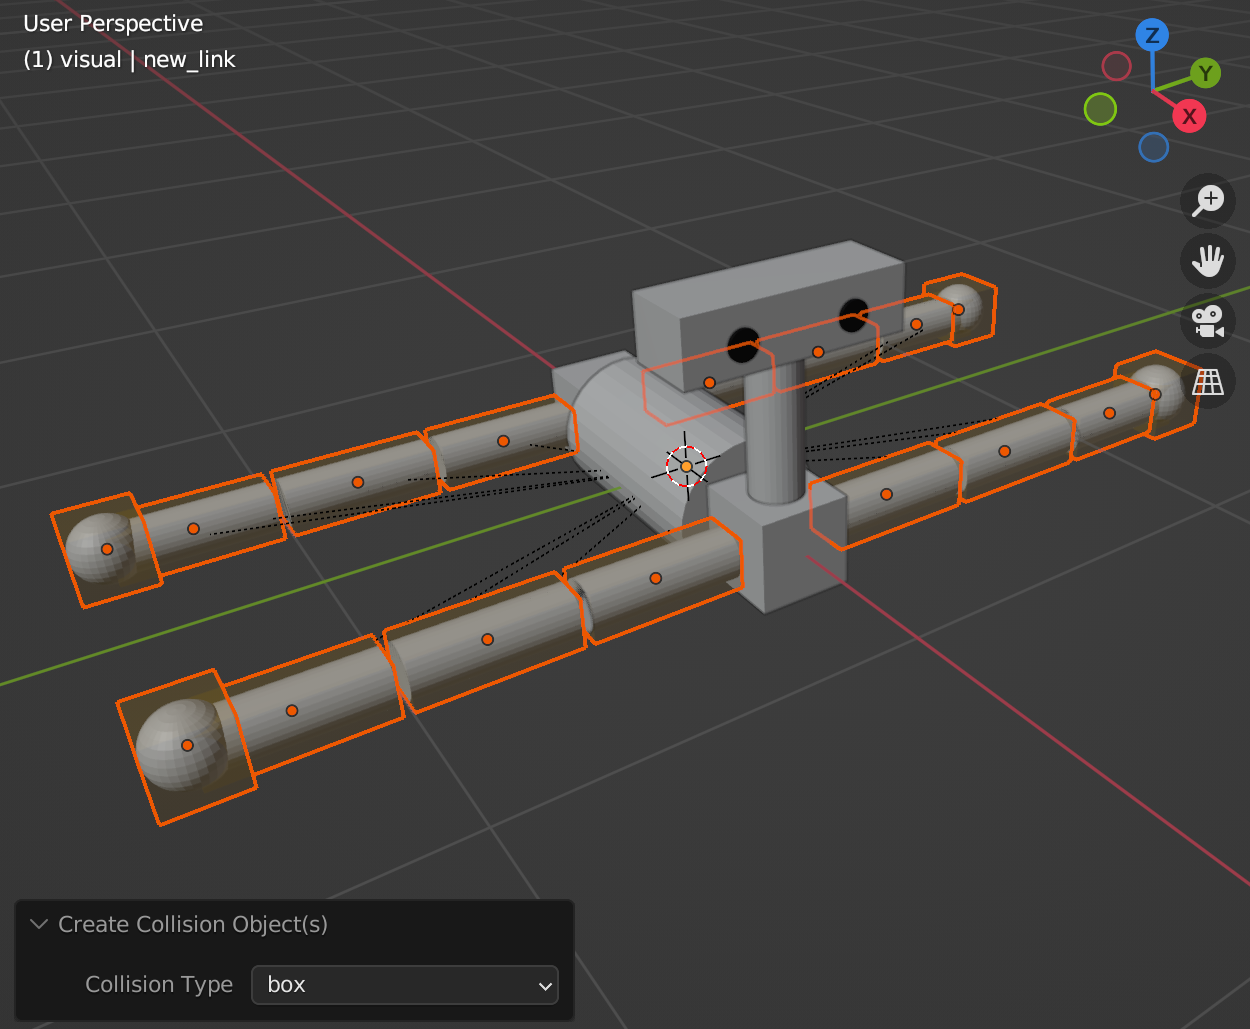
Cylinder would surely be a more appropriate type here. Anyway, we can add
the collision objects as necessary for our purposes and directly visually check
if they are appropriately sized with respect to the visuals. Of course, the
operator only allows to automate the process for simple shapes. If you have
more complicated visuals, you should consider approximating them with a number
of collision objects that you can create yourself, rotate and scale at will and
parent (with the Parent Selection operator in Phobos' object editing panel)
to the link as you please. Just make sure to set
the type properly in the custom properties of your custom collision
objects (or use the aforementioned operator) and change the phobostype to
'collision':

Mass and inertia of the kinematic model are stored in the inertial objects of Phobos. Therefore, you need to create inertial objects first, before you can change the masses.
In order to automatically create inertial objects for a number of visual or
collision objects, select them and use the Create Inertials
operator. See Mass and Inertia for more information on
how Phobos and URDF handle mass and inertia data in your model. However, this
way all selected objects will get the same mass defined by the operator.
In order to edit the mass select an inertial and use the Edit Mass/Inertia operator.
In order to change the mass for a link, select the respective inertial object
and use the Edit Mass/Inertia button in the Masses & Inertia panel.
You can then set the object's mass manually. The mass can also be changed in
the Object property information panel.
Warning: Changing the mass or the inertia of an object manually might lead to inconsistent data. Rather use the respective operator to achieve the changes.
In order to add a motor to an existing joint, use the Add motor operator from
the Hardware section. At first, you need to select the motor type from the
list of defined motor templates. After this the motor type specific settings
can be changed.

You can add your own motor definitions by following the instructions on the Motors page.
The next step is to give our robot some way to feel and recognize the world.
Adding sensor objects to a robot model is essential and so it is also covered
in Phobos. If you want to add some sensors to your robot just use the Add Sensor Operator from the Phobos toolbar. You will have a list to choose your
sensor from. The steps are comparable to adding a motor. You can also define
your own sensor types.
Now there are some different ways to continue. Some sensors require the selection of specific objects or some other information to work correctly. See Sensor Types for all information about specific sensors and how to add them properly.
See the Performance Optimization for information on how to modify your model to save disc space.
See the Materials page to learn how materials in Phobos work.
![]() Back to top.
Back to top.