Import DEM grid
The georaster importer can also be used to import a raster that define a Digital Elevation Model where each pixel values of the image represents a true elevation.
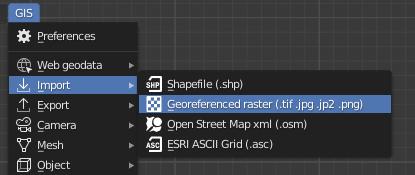
For dealing with this kind of data in Blender, the addon will use them as displacement texture.
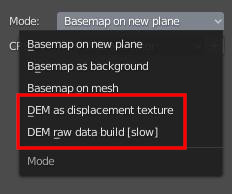
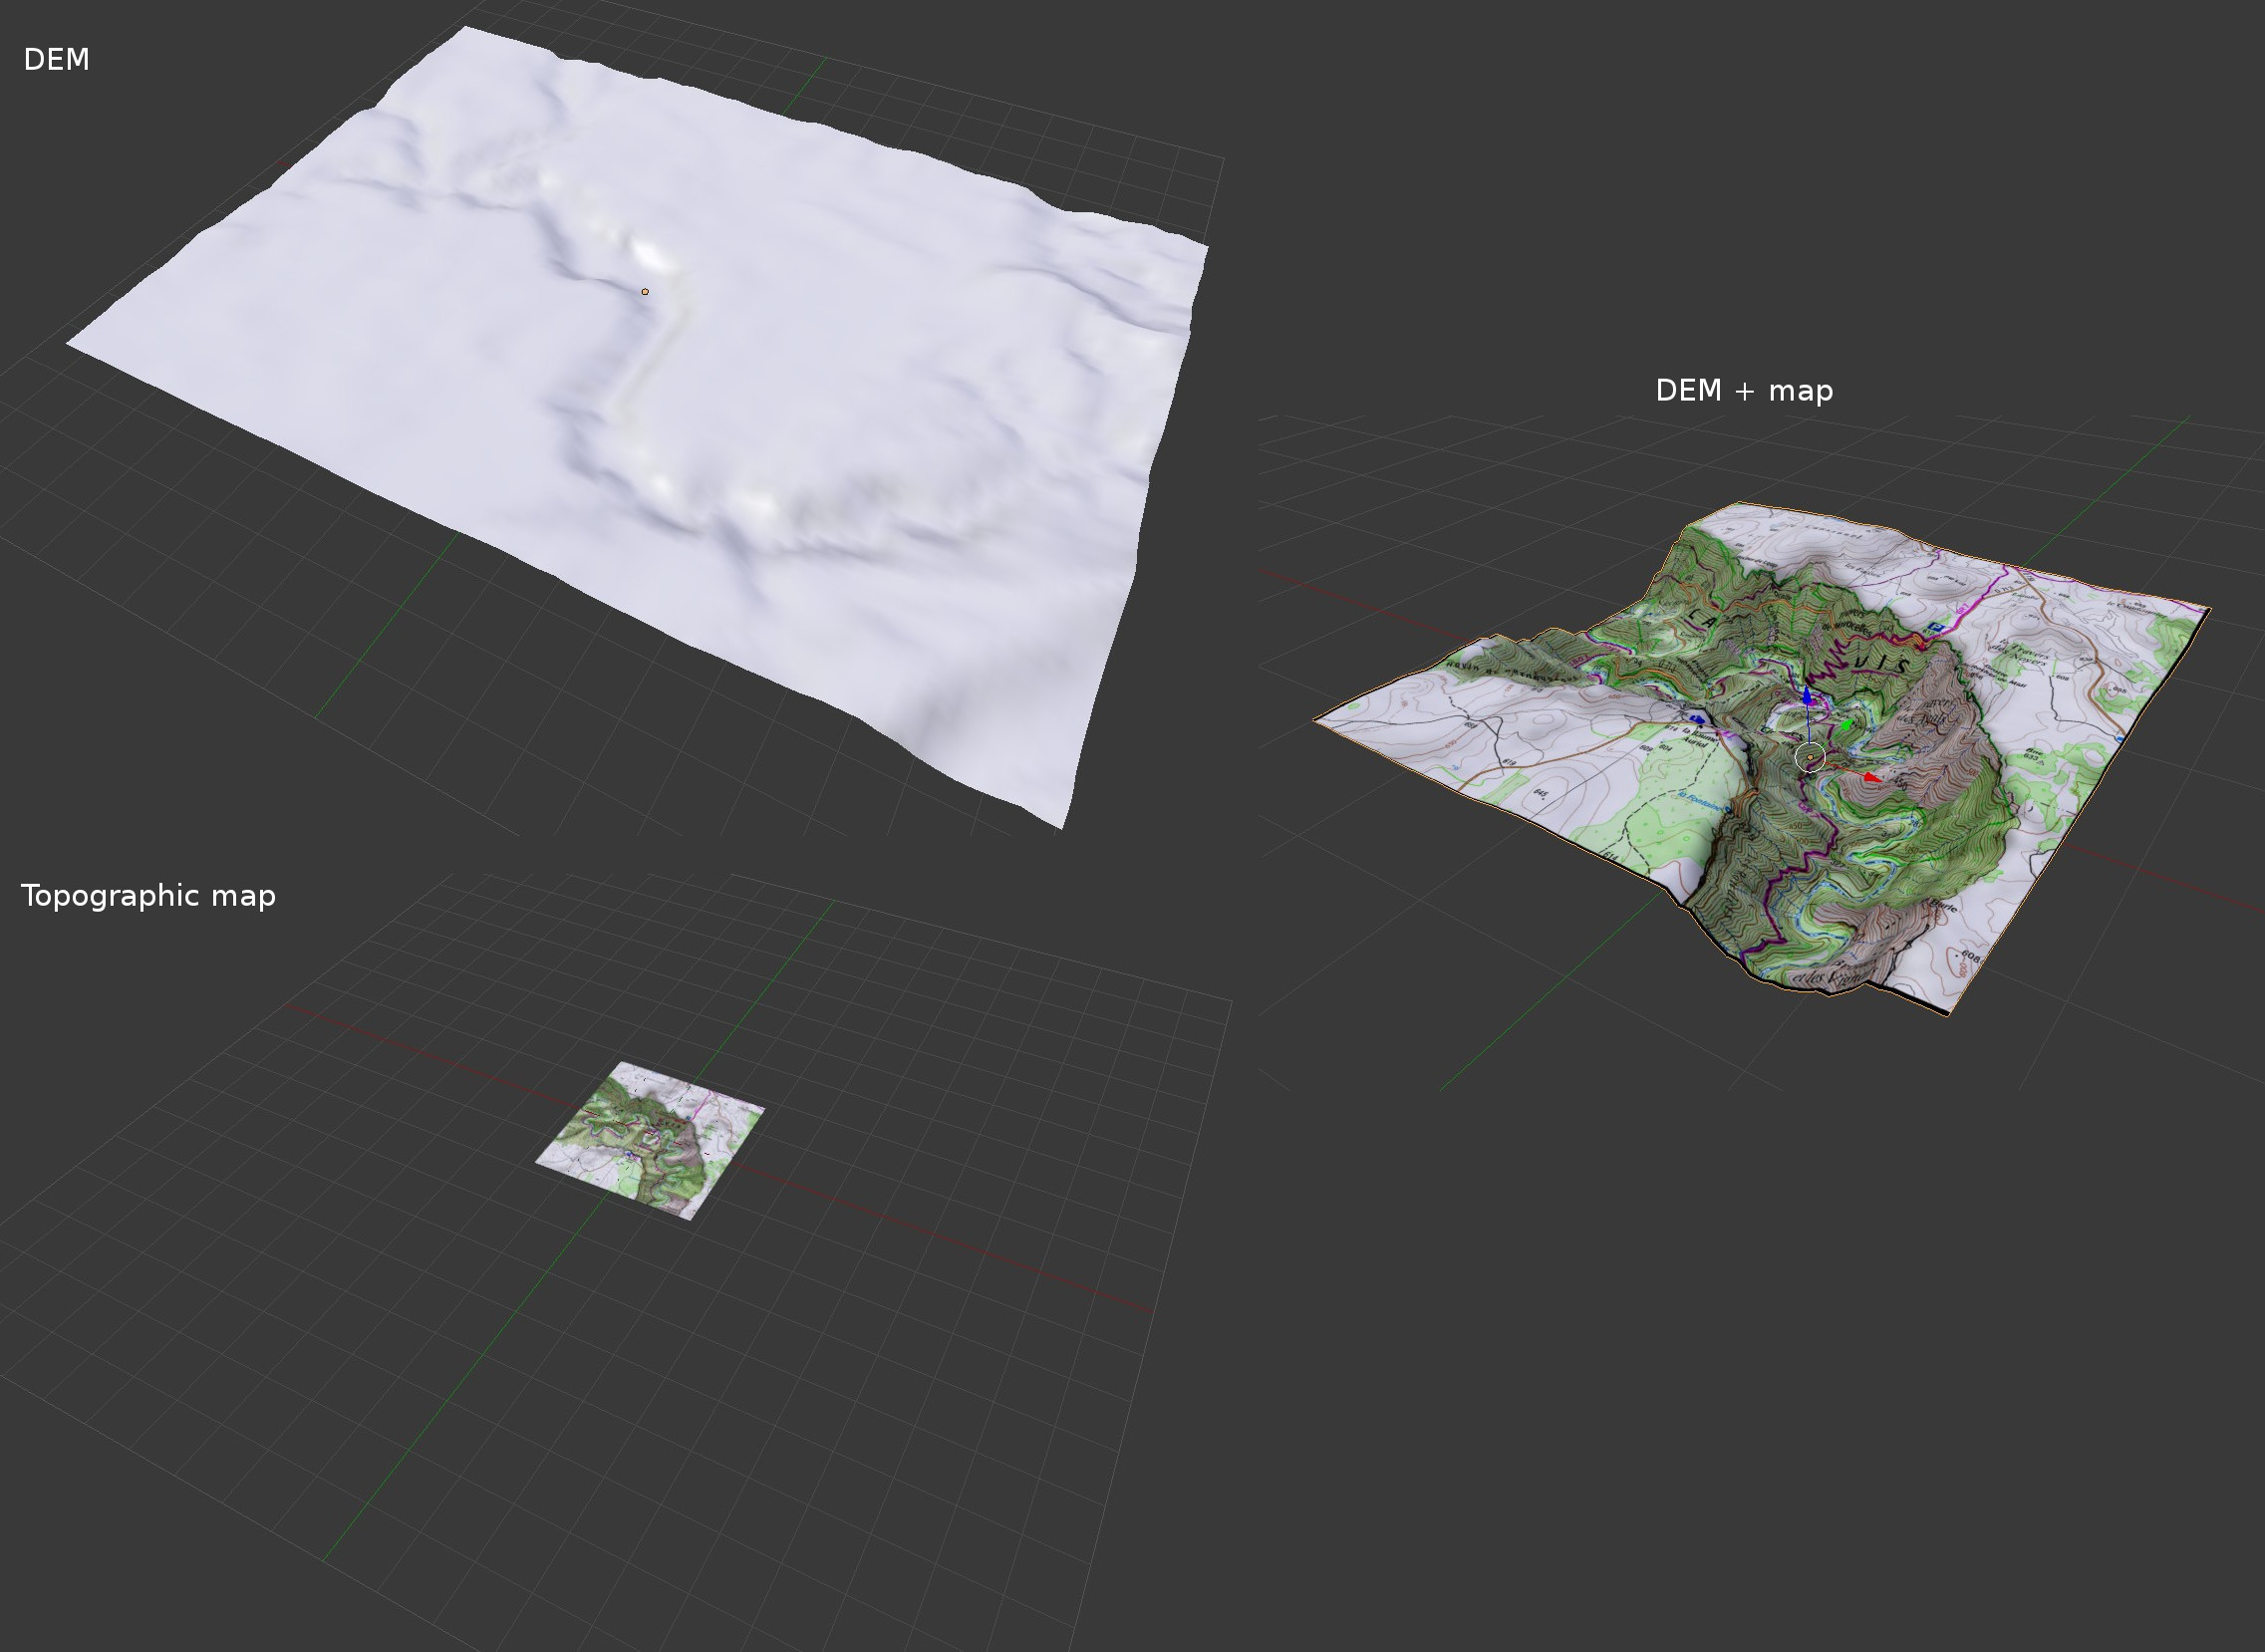
You can import directly a DEM as new mesh but you can also just use it to warp a texture map like topographic map or aerial photo previously imported on a plane mesh.
In this case the previous import will define the working area and will be used as reference for the DEM import. The dimensions of the reference plane and the extent of the DEM dataset don't need to be exactly the same. You can use, without worrying, a DEM larger or that just partially overlap the plane. The script will compute UV mapping according to the georeferencing data so in all cases overlay will be correct.
-
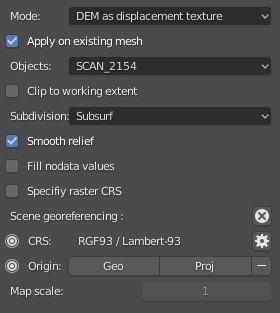
Apply on existing mesh : check this option if you want using the DEM to warp an existing topographic map or aerial photo previously imported as plane.
-
Objects : when trying to import on an existing plane, use this list to select the object that will be used to apply the DEM on.
-
Clip to working extent : when trying to import on an existing plane, it's possible to clip the DEM according to the working extent define by the object that will be used to apply the DEM on.
-
Subdivision : Subdivision is needed because the displacer needs some vertices to work with. The script can subdivise the plane by adding a simple subsurf modifier or by cutting the plane according to the number of DEM pixel which overlay the mesh.
-
Smooth relief : with this option, the displacement values will be interpolate to smooth the result. It can be useful when the DEM raster have a low resolution, but the interpolation will alter a bit the true elevation value. This option is available in the displacement texture properties and so, can be modified at any time.
-
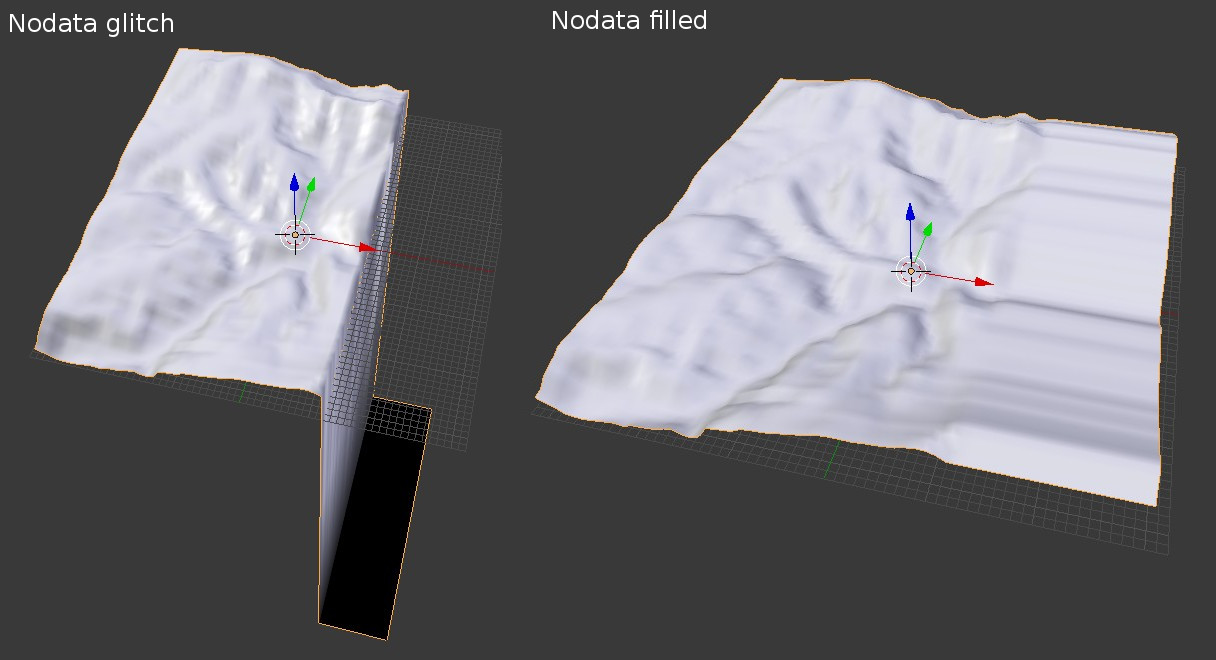
Fill nodata values : because nodata are usually represented by a very high or very low value, it will result huge side effect on the importing mesh. Fill nodata option help to avoid this issue and keep smooth results.
- Angular coords : check this if the raster is in decimal degrees
In the modifier stack you can check the displace settings
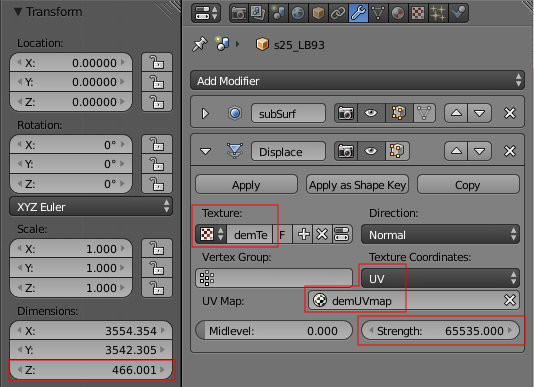
If you want to increase the warp effect just edit the scale Z property
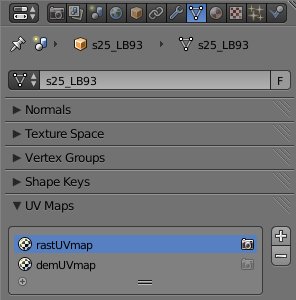
The DEM is used as texture for the displacer and to place this texture the mesh as now a new UV map calculates according to the DEM overlay position.
Strength calculation:
The strength value defines the vertex displacement
Displacement = (Texture value - Midlevel) × Strength
Midlevel represents texture value which will be treated as no displacement by the modifier, for convenience it is always set to zero, so
Strength = Displacement / Texture value
Where displacement is the target elevation change (altitude max - altitude min) and texture value is Blender color value.
With float32 raster the strength value is just equal to 1 because Blender will directly report raw values as color intensity. But with non float raster, Blender will normalize values between 0.0 and 1.0. An intensity value of 1.0 in Blender equal to the maximum value that can be assigned in the raster dataset, so this value depends on raster bit depth
texture value = delta Z / (2^depth-1)
Strength = delta Z / (delta Z / (2^depth-1))
Strength = 2^depth-1
| Bit depth | Range of values that each pixel can contain |
|---|---|
| 1 bit | 0 to 1 |
| 2 bit | 0 to 4 |
| 4 bit | 0 to 16 |
| Unsigned 8 bit | 0 to 255 |
| Signed 8 bit | -128 to 127 |
| Unsigned 16 bit | 0 to 65536 |
| Signed 16 bit | -32768 to 32767 |
| Unsigned 32 bit | 0 to 4294967295 |
| Signed 32 bit | -2147483648 to 2147483647 |
| Floating-point 32 bit | -3.402823466e+38 to 3.402823466e+38 |
Note that signed 16 bits integer raster will always be casted to float to be usable as displacement texture in Blender. Indeed, with this data type positives value are coded from 0 to 32767 and negatives values are coded in reverse order from 65535 to 32768 corresponding to a range from -1 to -32768 so it's just impossible to correctly set a mid value when trying to use it as displacement texture.
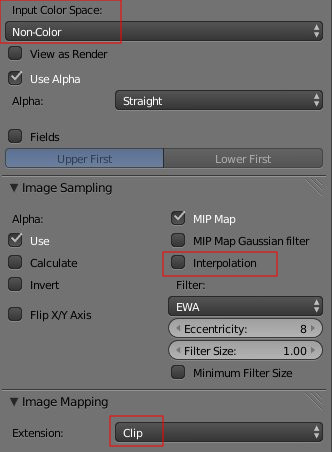
The script also sets some important parameters of the displacer texture:
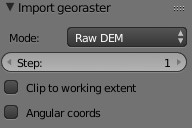
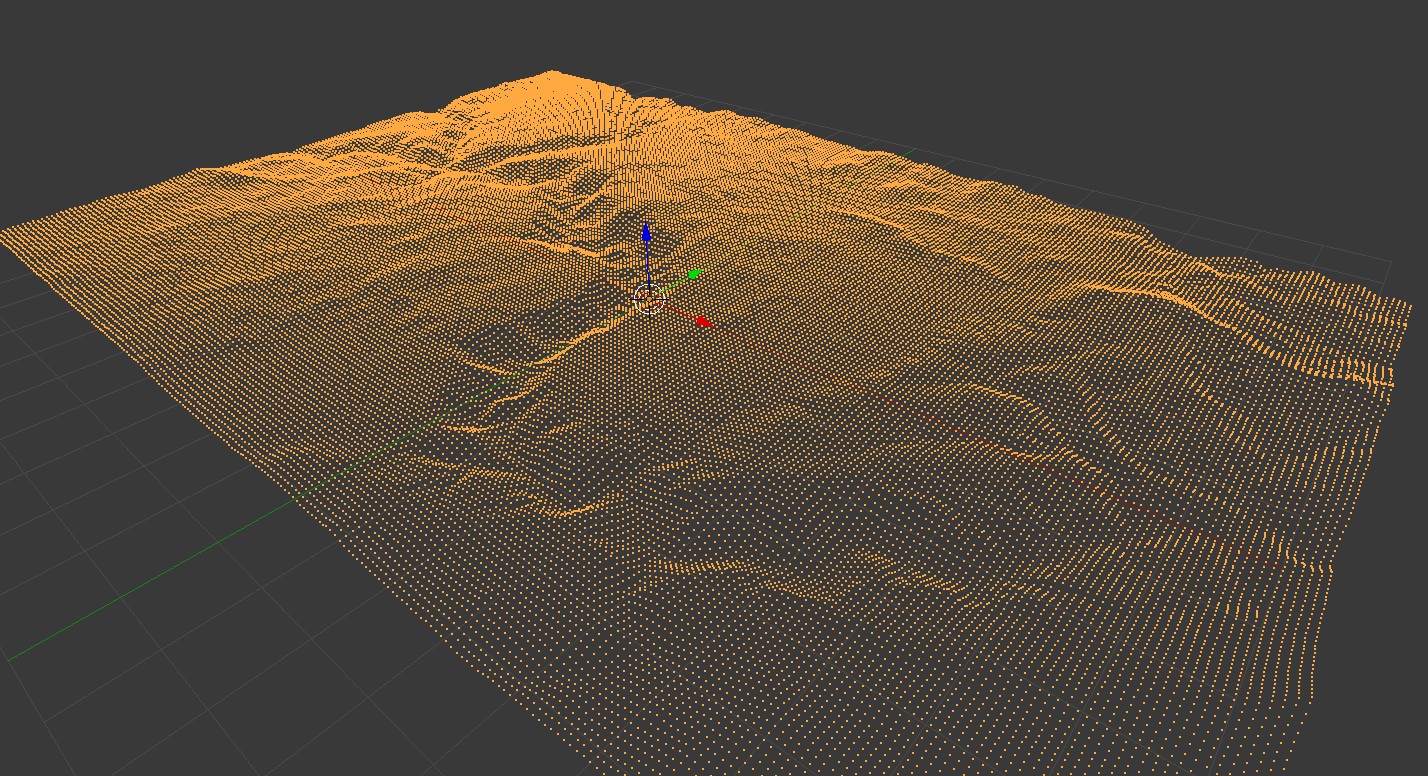
This option allows to create a point cloud from a DEM. It do not use the DEM as displacement texture. Step option can help to reduce the number of resulting points.
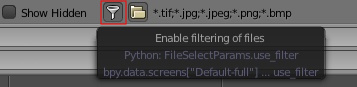
GDAL is a popular and powerful geospatial data processing library. If GDAL is correctly installed, then the addon will automatically use it for import the DEM.
GDAL is an optional dependency, all the functionalities of BlenderGIS are available without it. It will be used only if possible and only for georaster import with the As DEM option. Importing a DEM with the help of GDAL gives exactly the same result than the standard mode but provides 2 main advantages:
-
Process any GIS raster data format that Blender can't natively read
If you need to deal with GIS specific raster format and process it with GDAL, think to disable the filter.
-
Clip large raster data source
GDAL is building to be able of processing very large geospatial dataset that standard softwares like Blender cannot open without memory overflow. With the help of GDAL it's possible to just extract a subset of the raster according to the working extent and then import it to Blender.
Also, fill nodata option will be significantly more efficient.