As a frontend developer, I’ve always been afraid of diving into Amazon’s AWS dashboard. Too many options, complicated, and nothing is frontend-related. Not my cup of tea. Lately I’ve been working on a small project that required running a small NodeJS app on a serverless environment. The requirements were very simple, get an input, run a script using this input, and return the script result. So what I had in my toolbox was my NodeJS knowledge, and the company AWS account. After brainstorming with Tikal’s DevOps superheroes, they suggested using Amazon’s AWS Lambda service. Wait… Lambd.. WHAT?
So in a nutshell, Lambda is an event-driven, serverless computing service, that runs code in response to events (Thank you Wikipedia for this…). Lambda support Python, Java, C# and.. NodeJS! Yay. But wait… when I was reading Lambda’s docs for running NodeJS, it wasn’t the NodeJS code I was expecting to use, they have a little different implementation for NodeJS.
I’ll be going step by step for explaining how to use Lambda, deploying a basic Lambda-style NodeJS app, running it, and watching its logs. Our NodeJS app will handle POST requests and return a result.
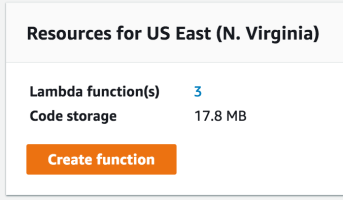
First, our app in Lambda is defined as “Lambda function”. We’ll have to create a new “function” in the Lambda dashboard.
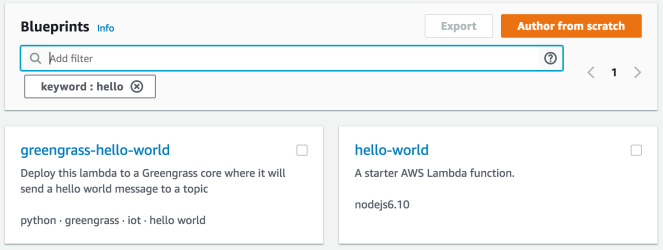
For creating a new function, we’ll have to select a blueprint. Just write ‘hello’ in the blueprint search input, and select the ‘hello-world’ starter function.
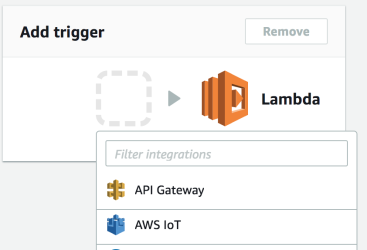
Now we’ll have to configure a trigger. For handling GET/POST/DELETE/PUT requests, we need to configure an API gateway
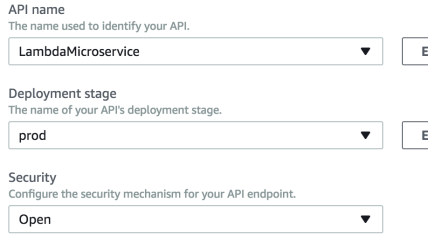
Just leave the ‘LambdaMicroservice’ API name, and ‘prod’ in the deployment stage as they are, but the security should be changed. If we want the outer world to be able to reach our API, we’ll have to change it to ‘Open’. Next…
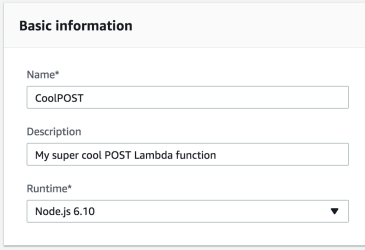
Now it’s time to give a name to our new function. I’ll call it ‘CoolPOST’, and add a short description.
Now, finally, we’ll see some JS code. Don’t worry, we’re not gonna use this basic code example which basically does nothing but returning the input we provide to the API. Let’s skip this part for now, we’ll get back to it later.
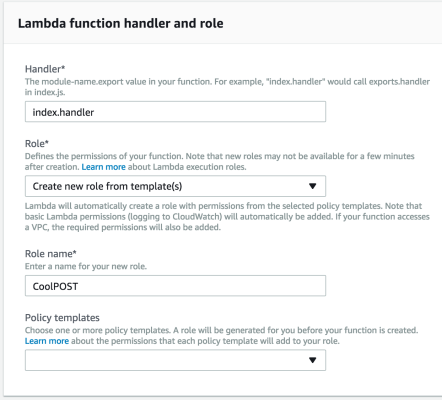
Keep scrolling down, we’ll see the ‘Lambda function handler and role’ configuration box. Let’s understand what each of the fields here means.
The ‘Handler’ field determine what is our app’s main file name is. As default, you’ll see ‘index.handler’. This means that our NodeJS app main file name should be index.js. If your app file name is main.js, you’ll have to change this field to main.handler.
The handler is the app name that we will export from our NodeJS app to Lambda. Right now, the exported function should be named handler, but we can change it to ‘someFunction’, so we’ll define ‘index.someFunction’ in the ‘Handler’ field. For now, let’s leave it as handler.
I’m sure you got the main idea here…
The ‘Role’ field defines the function’s permissions. We can use an existing role for out function, but since it’s our first time in this foreign area, we’ll create a new role, give it a name, and leave the ‘Policy templates’ field empty. This will create basic Lambda permissions, which is exactly what we need.
That’s it for this screen. Next…
Now we get a general review for our function before creating it. Yada yada.. just press the ‘Create function’ button at the bottom. Lambda will create our new function, it might take a seconds. Congratulations, you’ve just created your first Lambda function. We’re live.
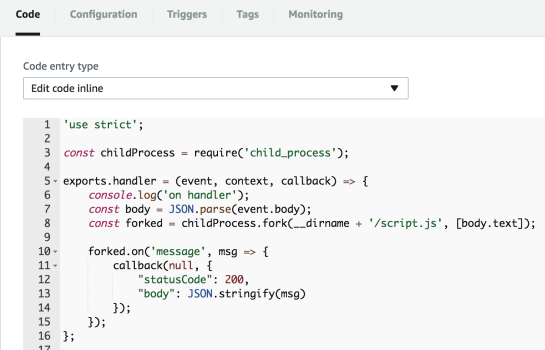
Now, let’s create our NodeJS app and deploy it to our new Lambda function. In the ‘Code’ tab, we can see an online editor. Basically, we can use it. But our app will use more that one JS file, and this editor can handle only one main file for our app. Not good enough for us. Let’s use our own code editor to create our NodeJS app and deploy it to Lambda compressed as a ZIP file. We’ll get to that in a few minutes.
As I explained earlier, we defined our app main file name to be index.js, and it suppose to export a function named handler. So let’s create a new NodeJS project, defined its main file and export the right function.
'use strict';

exports.handler = (event, context, callback) => {

};
In the handler function, we can see there are 3 arguments: event, context, and callback.
In short:
event - Will hold data we get from the caller to the handler.
context - The runtime information of the current Lambda function.
callback - Optional callback function to return information to the caller.
You can read all about it in the official Lambda documentation.
Now let’s make things more complicated. What we’re about to do, is to run a script from another file, and return its result to the caller. We will do it by using NodeJS’s child_nodes module’s fork method.
I won’t get into the fork method implementation, you can read all about it in the NodeJS official documentation, but in short, we will use it to run a different script file, pass it an array of arguments, and listen to its message event with the script’s result.
Note that we are parsing the request’s body to get the parameters sent by the caller, and passing them to the script.
'use strict';

const childProcess = require('child_process');

exports.handler = (event, context, callback) => {
	const body = JSON.parse(event.body);
	const forked = childProcess.fork(__dirname + '/script.js', [body.text]);

	forked.on('message', msg => {
		callback(null, {
			"statusCode": 200,
			"body": JSON.stringify(msg)
		});
	});
};
Now let’s create another file holding a simple script. The script will get the arguments from the fork method by reading the ‘process.argv’ array. You can read about process.argv here.
In our case, we only have our text argument. We will use the text and return the script result using process.send method. This will send the ‘message’ event back to the process parent. In our case, the index.js script.
const text = process.argv[2];

if (text) {
	const result = `I received the text: ${text}`;

	process.send({
		"result": result
	});
}
That’s it, now we have our first Lambda-ready NodesJS app. Let’s deploy it to Lambda and see if it’s working.
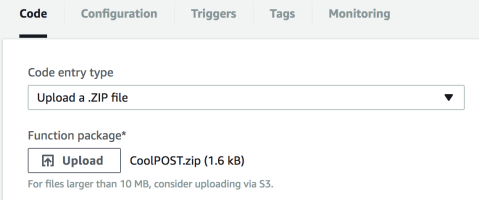
To deploy our files to Lambda, we need to compress all the NodeJS app files into one ZIP file. Once we’ve done that, we will go back to the our Lambda function code tab, and change the ‘Code entry type’ to ‘Upload a .ZIP file’, and simply upload our file to Lambda using the ‘Save’ button.
Note: If you want to use a 3rd party modules, you MUST include the node_modules folder in the Lambda app ZIP.
After uploading the ZIP file, Lambda should show you the index.js file content. This means you’ve done everything I explained. Great.
Now let’s find out if our first Lambda NodesJS app is up and running!
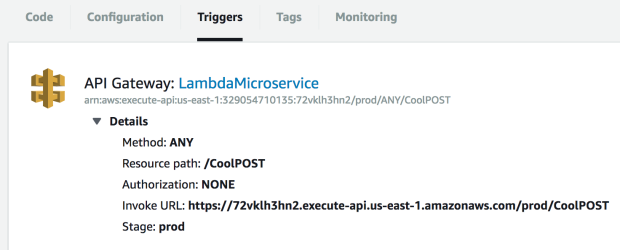
To find our Lambda app url, we will go to the Lambda function’s Trigger tab, and expand the API Gateway details, there we will find the ‘Invoke URL’. This is our app url.
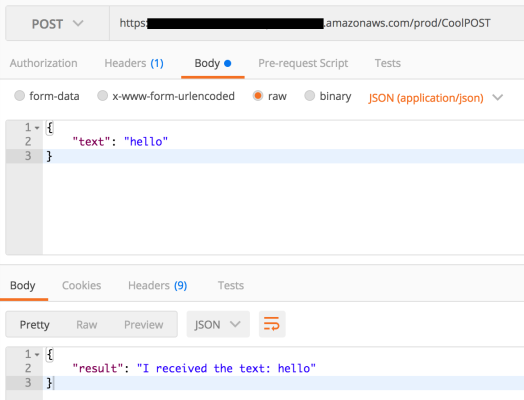
Use this url to make the HTTP request. I’m using the Postman app to create HTTP requests, but you can do that with any app you’d like.
Don’t forget to send in your request body a JSON with the ‘text’ parameter. You should get a result with the text I received the text: hello as we defined earlier in our script.js file.
Congratulations, you’ve just created your first POST endpoint on Amazon’s Lambda.
You can find all this project files here.
Cheers, Erez.
Tikal: Erez Carmel
Twitter: @erezcarmel
LinkedIn: Erez Carmel
Mail: erez@tikalk.com
