This is my attempt to implement the projects by Morgan Mcguire in https://graphicscodex.com/projects/projects/index.html. It is a good refresher for the basics and gives concrete goals that is excellent when distracted by many things.
Since I am actively working on it, new information will surface as I push through them. My notes and a simple review of each project is written in my blog.
The first project's goal is to create a scene using only cubes. I implemented a way to read an image and create a cube grid for each pixel, where each cube's height is determined by the corresponding pixel's luminance. Simple pixels to cubes.
 Horizontal view Horizontal view |
 Vertical view Vertical view |
|---|
For the second project, we move to something more ambitious where we have to procedurally generate a wine glass. This can be done however we want, but I decided to utilize images again for the generation. The user needs to provide a grayscale image which contains the half of the cross-section of the model they wish to generate. Then, using a "Quality" slider, they can change how much geometry is generated and how faithful the final mesh is to the input image. The "Quality" slider is using a distance and an angle criterion in order to reject triangle rings. The lower the "Quality" the less geometry is generated, although one can notice that the low "Quality" meshes are cleaner.!
 Input grayscale image |
 Low quality without distance and angle criteria |
 Low quality with distance and angle criteria |
|---|
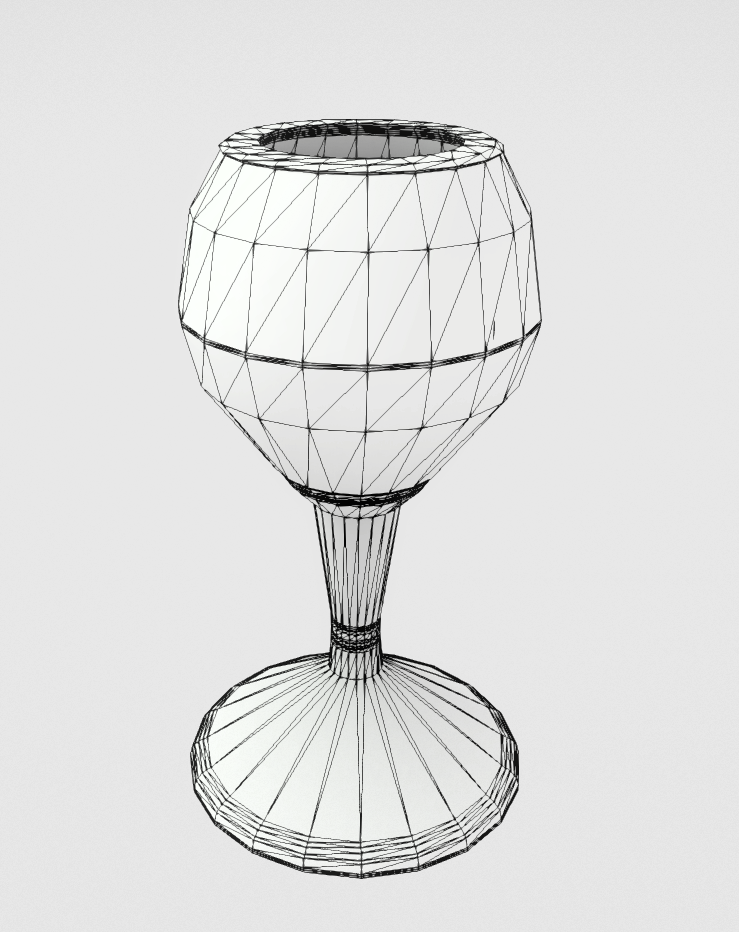
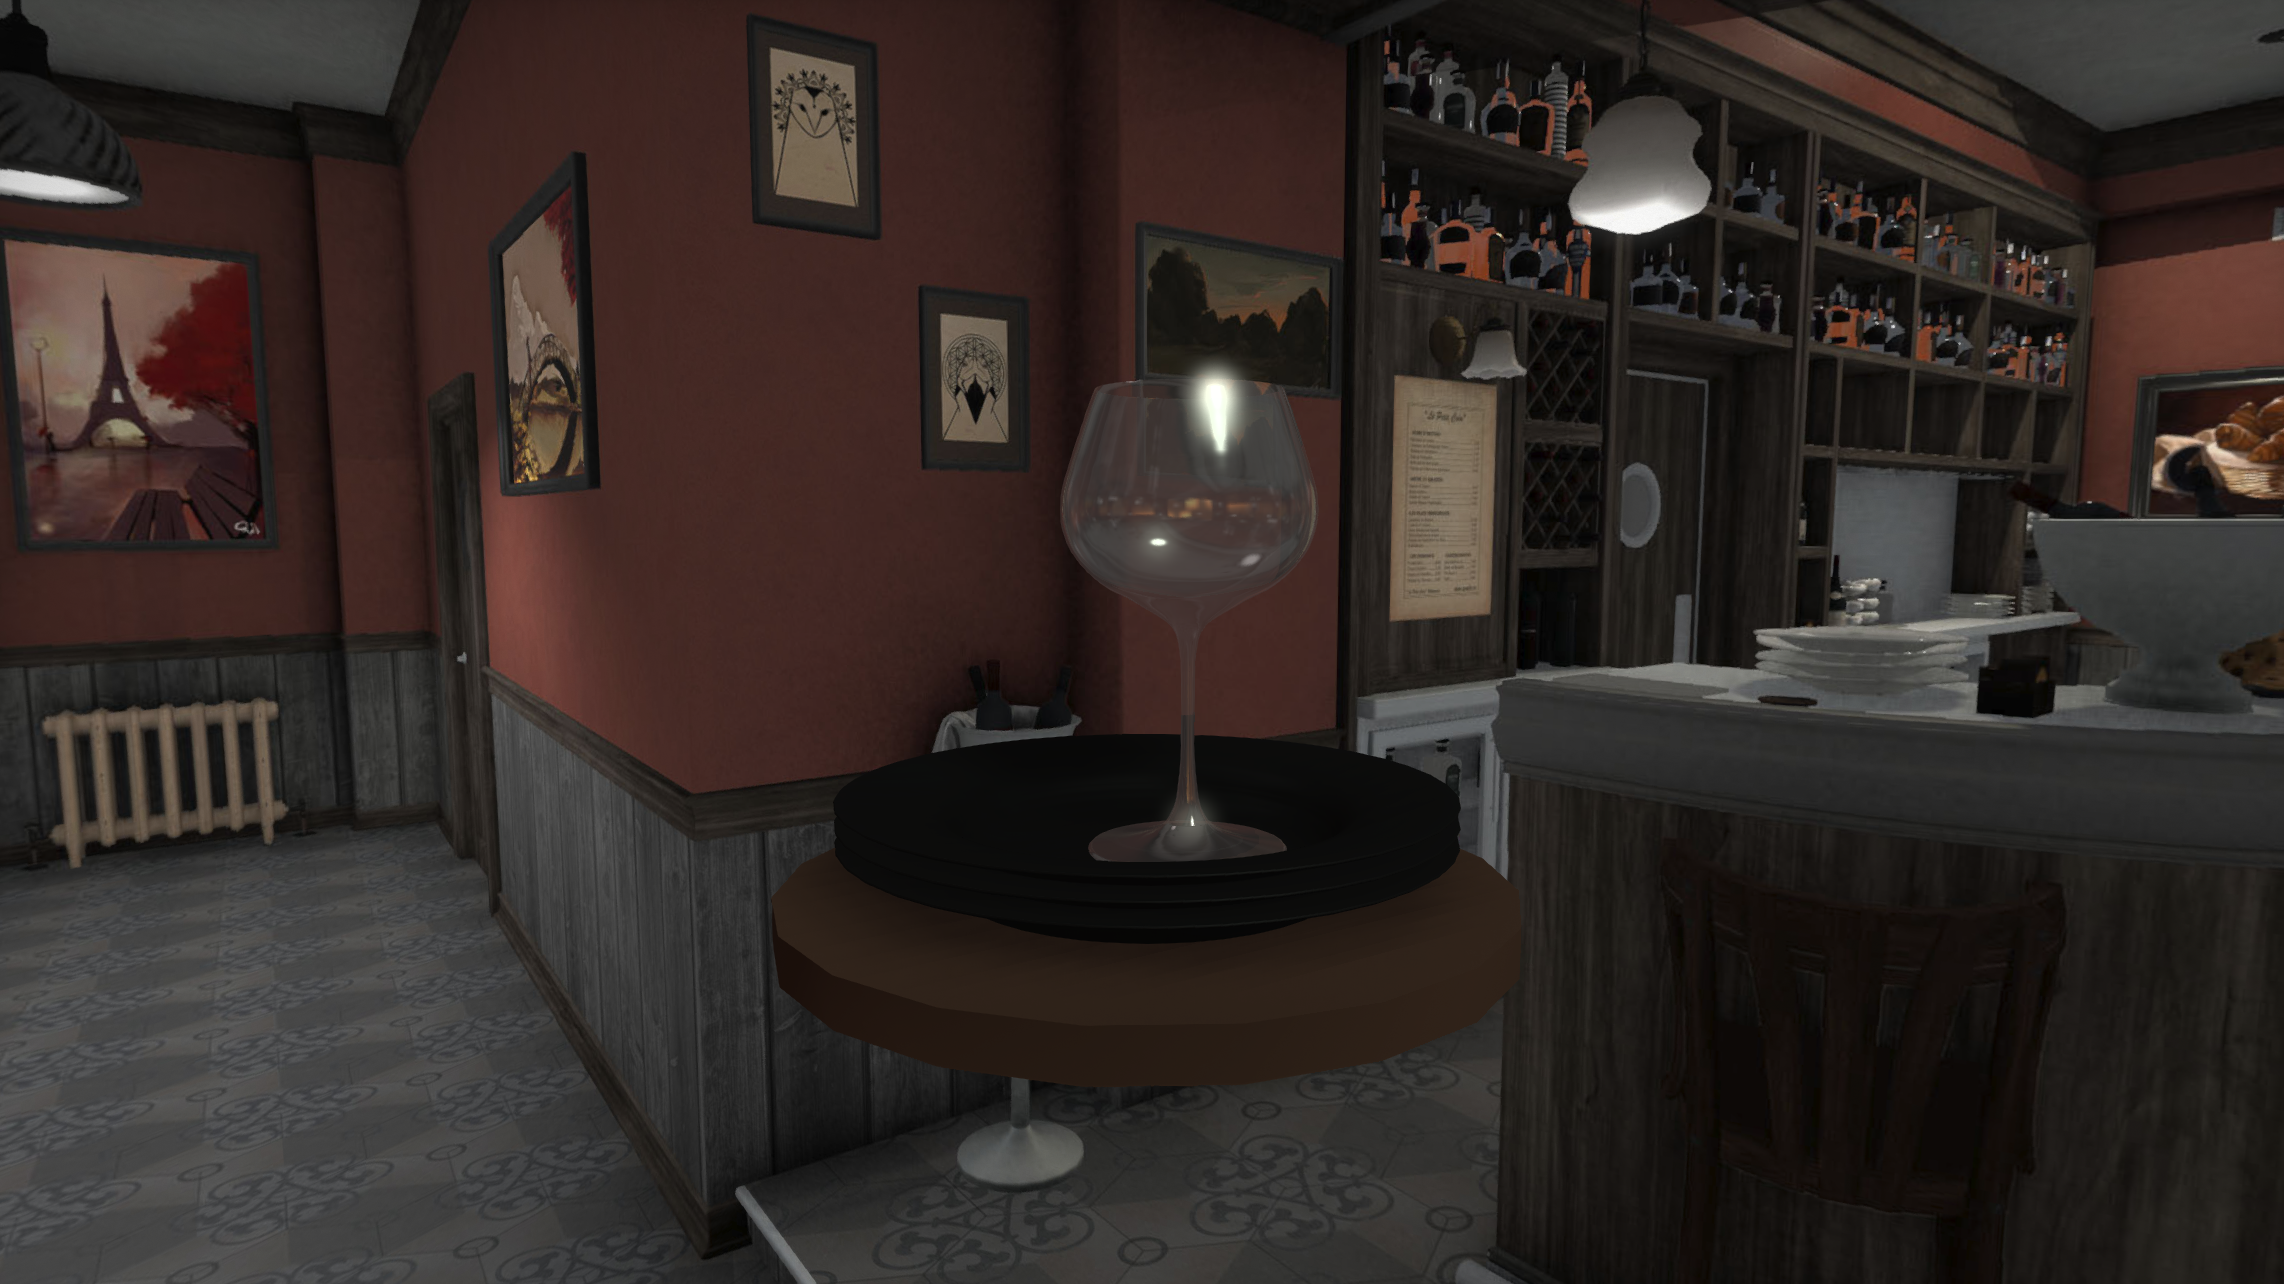
After settling to a solution that is good enough, I had to make a scene to present the results in an appealing way. For this reason, I created a more refined wine glass and a plate model with the same technique and arranged them in a bar setting. Below are the input image and resulting mesh for the wine glass and the plates and a render of them in a bar skybox.
 Wine glass grayscale image input |
 Wine glass mesh output |
|---|---|
 Plate grayscale image input |
 Plate mesh output |
 Rendering of the wine glass and plate in G3D |
|---|
This project did not introduce new features regarding the resulting image but it made the Rays project insanely faster by introducing AABBs and instances. Please refer to the above linked blog post about what was done.
Now this project is the first real challenge of the series. The project requires to build a CPU ray tracer from scratch which supports:
- intersection with spheres and triangles,
- support multithreading,
- direct illumination from point, spot and directional sources,
- shadows, only for lights that can cast them in G3D (such as point lights and spot lights; area lights are not supported),
- 0-2048 indirect rays for each pixel.
Since the tracing can get quite time-consuming, I present the Cornell Box rendered with and without indirect illumination and a scene with a car under a spotlight.
 No indirect rays No indirect rays |
 With 2048 indirect rays With 2048 indirect rays |
|---|
The indirect rays provide a more accurate representation because we can observe: a) the left side of the left rectangle has a red tint, b) the right side of the right cube has a green tint and c) there is a slight shadow at the bases of the rectangle and the cube. The shadows should be more prominent but we don't perform correct shadow calculations for area lights in this project.
 No indirect rays No indirect rays |
 With 2048 indirect rays With 2048 indirect rays |
|---|
The indirect rays are not improving the image too much except for the cavities which are brightened and more details can be observed. The image with the indirect rays has noise because the car's material is metallic and the finiteScatteringDensity of it's surfaces is very high. Blender has a setting to reduce that source of noise.
This is the project that pieces everything together to finally produce beautiful images without waiting days; but still, some hours were required. In this project, I:
- refactored the code from the Rays project into a more scalable solution based on the ray count,
- supported multiple transport paths per pixel to reduce noise (but have fixed variable maximum path scattering depth),
- implemented light importance sampling for point lights and spotlights.
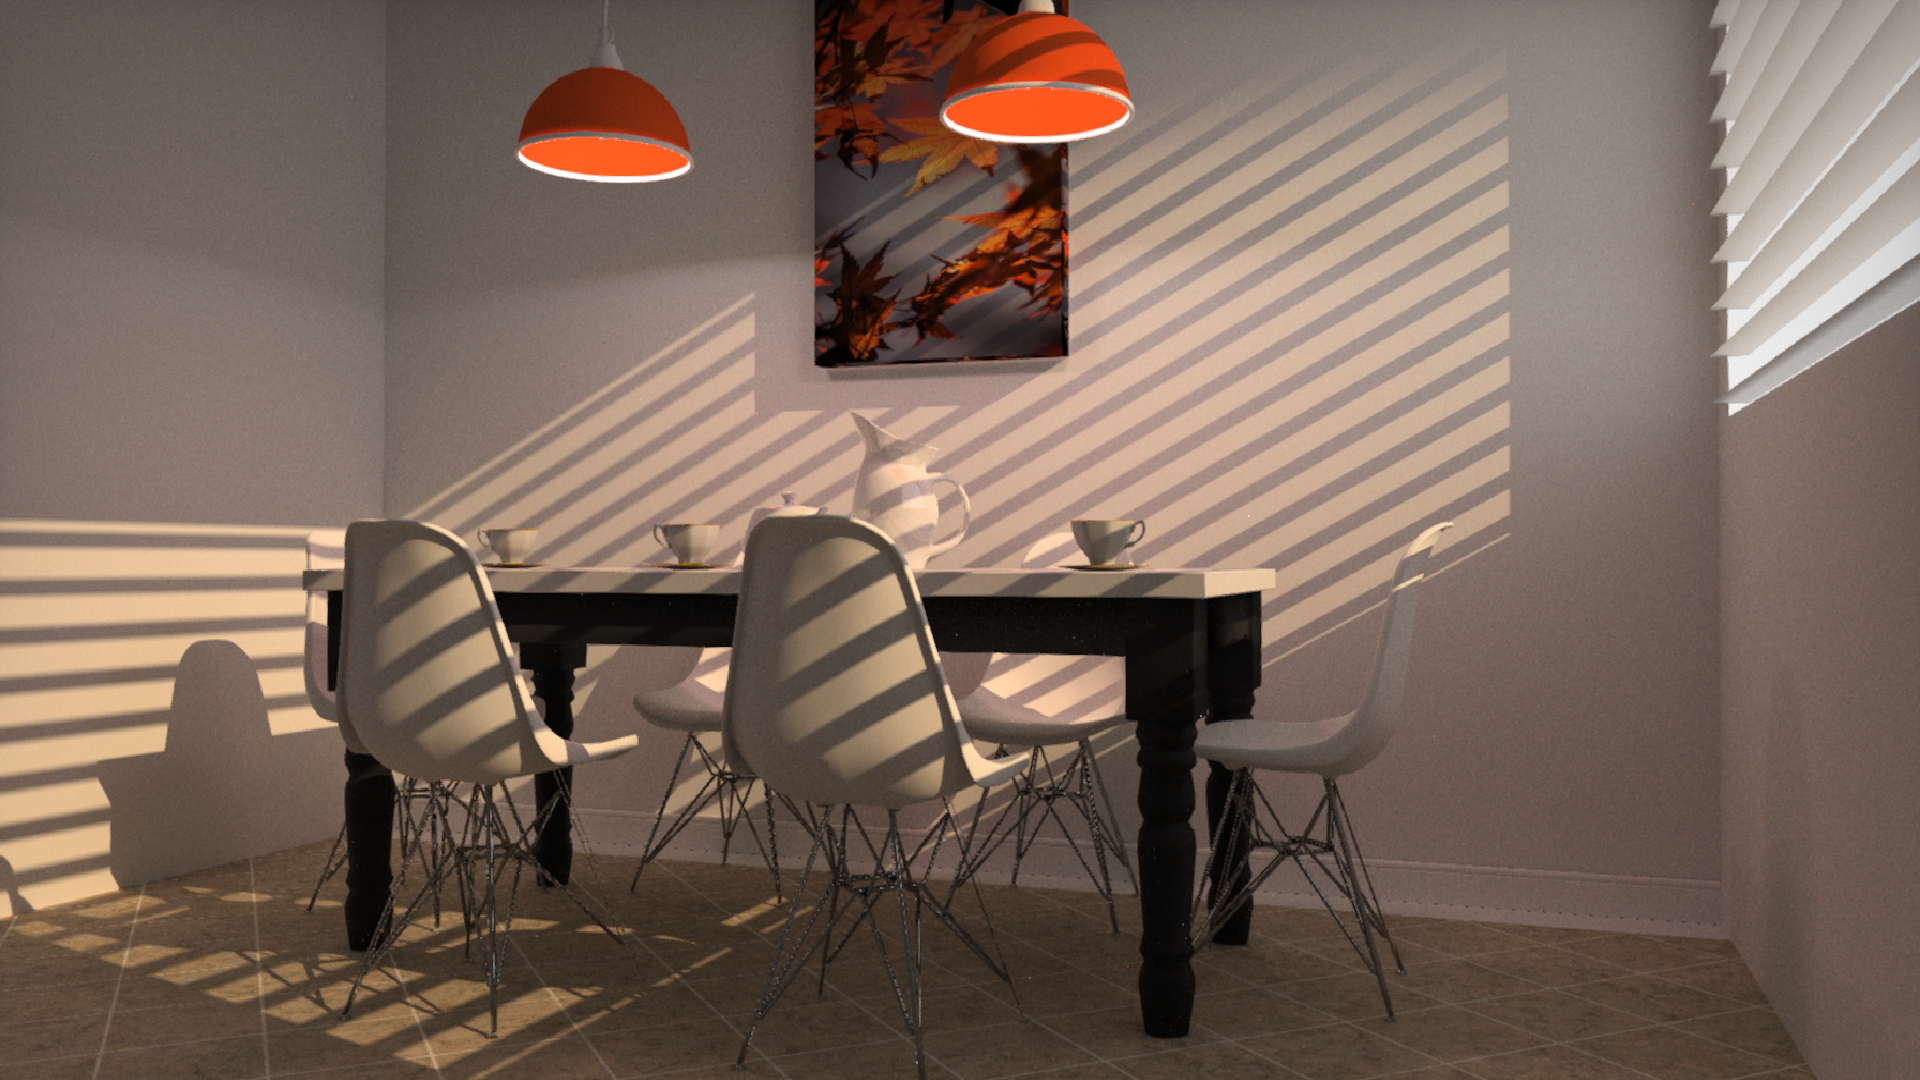
Below are some renderings that were produced from this project along the settings used and the time taken. A lot of optimizations can be done and will be done in the next project.
 Breakfast room, 1920x1080, 1024 paths, 6 scatter events: 1h7m time |
|---|
 San Miguel, 1920x1080, 1024 paths, 6 scatter events: 1h3m time |
|---|
 Sponza 1920x1080, 4096 paths, 6 scatter events: 3h54m time |
|---|
This project is split in two parts: one is the optimizations and the second is the fog.
For the optimizations, we can see almost a 2x speedup but with some visual artifacts in certain cases. The optimizations were focused on removing unecessary work in the ray tracing department such as:
- stopping any transport paths with a very small modulation value,
- culling lights with zero contribution and degenerate shadow rays,
- use of bilinearIncrement so that a path contributes to a quad of pixels instead of only one.
The use of bilinearIncrement is the one that introduces the artifacts which you can see below. I provide a before and after the optimizations images and another one highlighting the differences.
 Before the optimization Before the optimization |
 After the optimization After the optimization |
|---|
 The differences between the above images |
|---|
For the fog part, I proceeded with a naive implementation where for each transport path's rays:
- we intersect it with the scene as we normally would,
- we produce a probability to hit a particle based on the distance that it will travel,
- we generate a random number and see if there is indeed an intersection with a particle,
- if there is no intersection with a particle, we continue normally,
- if there is intersection:
- we generate another random number (0, ray_length) to determine the position of the particle along the ray’s direction,
- we replace the previous surfel with the particle,
- we continue with the shading as normal,
- when the scattering is calculated, we generate a new random ray on the unit sphere around the intersected particles.
Below you can see some generated images with the uniform medium implemented. The noisy images stem from the fact that we use a lot of uniform random numbers and we don’t perform any importance sampling for the scatter directions. As the number of scatter events and transport paths increases, so does the noise is reduced. Still, the rendering times are high because everything is running on the CPU.
 512 paths, 12 scatter events, 41m time 512 paths, 12 scatter events, 41m time |
 2048 paths, 16 scatter events, 2h23m time 2048 paths, 16 scatter events, 2h23m time |
|---|
 4096 paths, 32 scatter events, 8h15m time 4096 paths, 32 scatter events, 8h15m time |
|---|
And that brings us to the last project which involves Ray Marching on the GPU and the Sphere Tracing approach in particular. The whole project is writing GLSL code that is exclusively run on the GPU, so the code is only written in shaders. The "Ray Marching" chapter does an insanely good job at explaining the method to absolute beginners and it doesn't require reading any of the previous chapters.
Developing the ray marching code from scratch can be a pain at the start because we start with very simple shapes but the code can break down and not be extendable when it is time to build very complex scenes. This was my experience as it was the first time doing something like this and supporting the first 3 primitives and combining them to have something meaningful took many iterations of rewriting my GLSL API to finally be at a state where it is usable.
For this project I created an ancient Greek helmet which you see below. The shading is simple because I devoted more time in making the API consistent with as less bloat as possible. To see the individual steps to create the helmet please look at the end of my post.
 The final shape after a lot of unions and subtractions of primitives The final shape after a lot of unions and subtractions of primitives |
|---|