OpenStack is a free, open standard cloud computing platform. It is mostly deployed as infrastructure-as-a-service in both public and private clouds where virtual servers and other resources are made available to users and in this project we will build Our Platform which includes full network topology and instances. You can know more about openstack through the following link - https://docs.openstack.org/yoga/
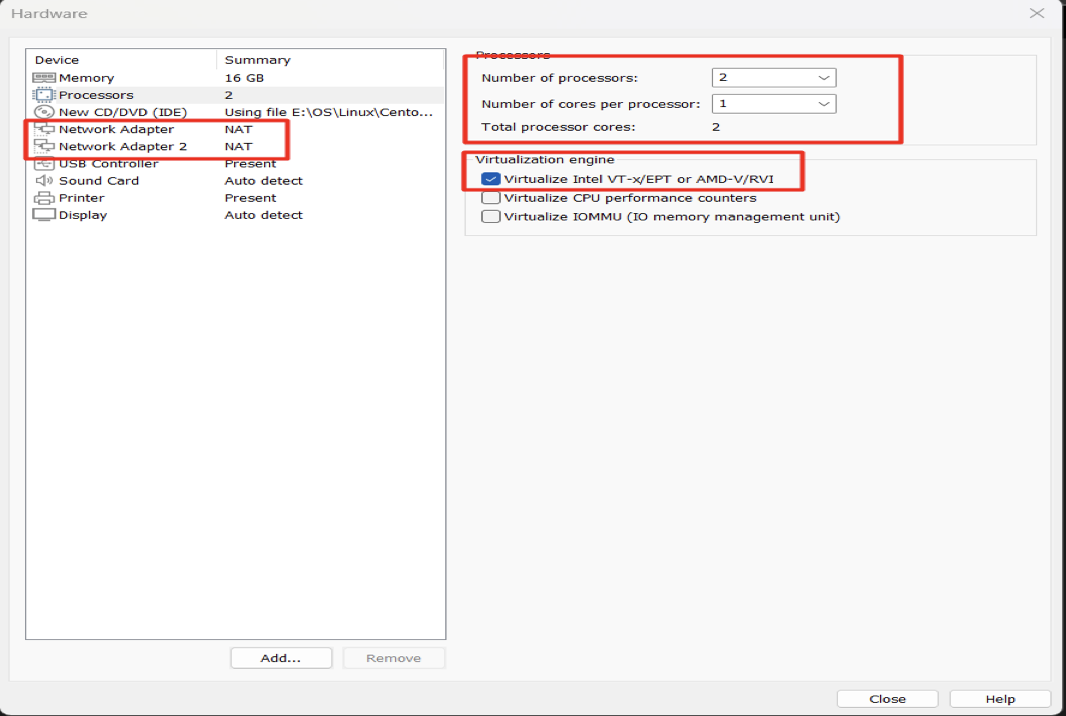
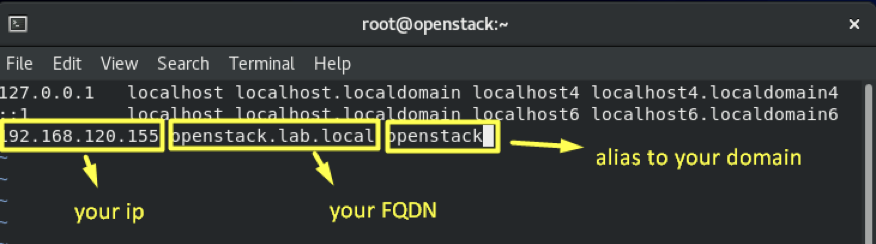
In this project we used CentOS Stream 8-streamn, a single VM of MINIMUM 12 GB RAM, 2 CPUs and 2 NICs FQDN of machine openstack.lab.local, so we should edit /etc/hosts file.
- Enabling nested virtualization
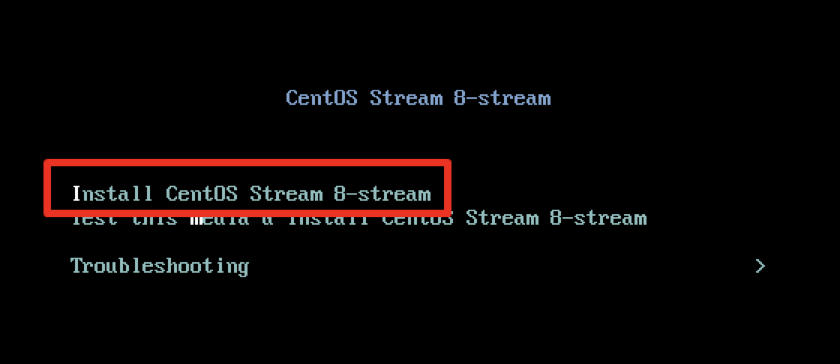
During the installation of the CentOS OS. Move to Install CentOS Stream 8-stream and click tab on your keyboard.
Type a space to separate than the last kernel option, type [ net.ifnames=0 biosdevname=0 ]
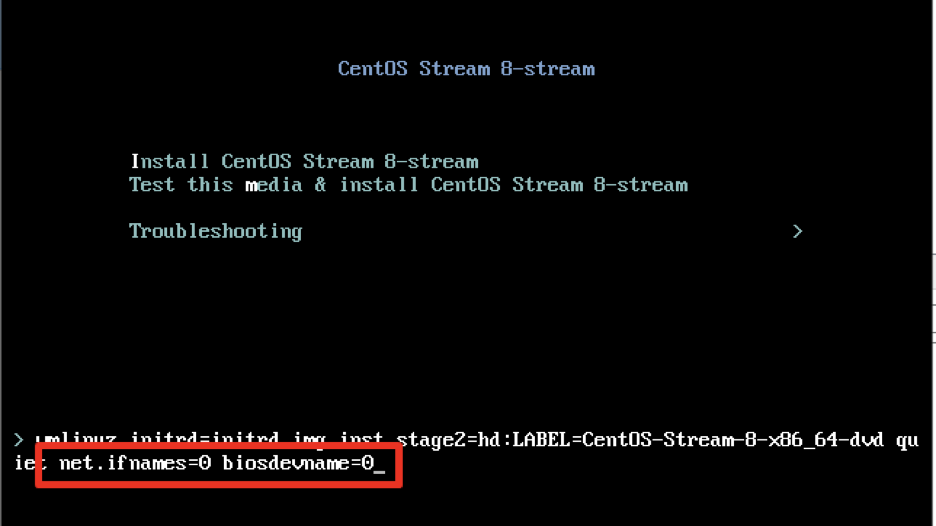
This will enable old Linux NIC card naming (eth0, eth1, …etc)
Now you see the installation screen, Click on Network & Host.
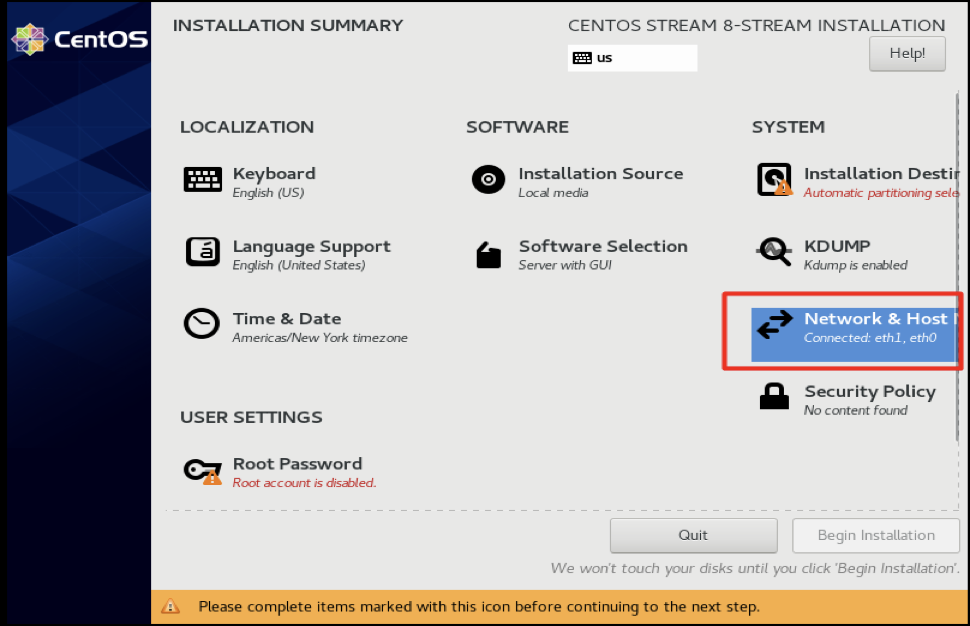
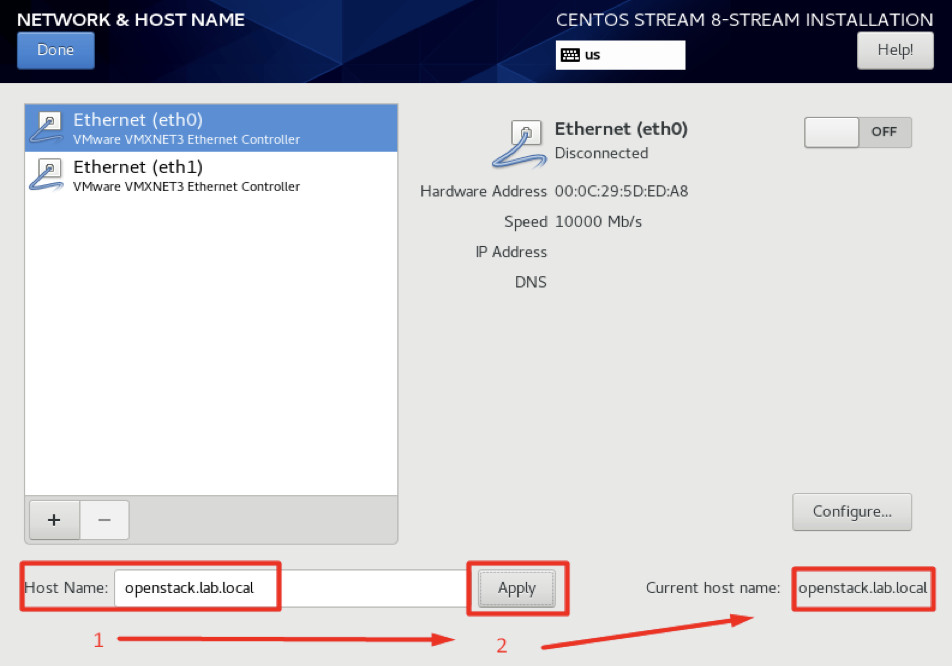
First step we need to set the Host Name,
As a prerequisite, you have to install the needed repos and Adding to that, you must disable some services and enable the legacy network service. The below section illustrates the actions we have to follow: Firstly, we need to check the hostname, and check if we can reach the internet or not, and switch to be root.
4.1- Add the hostname to /etc/hosts and make an alias for it.
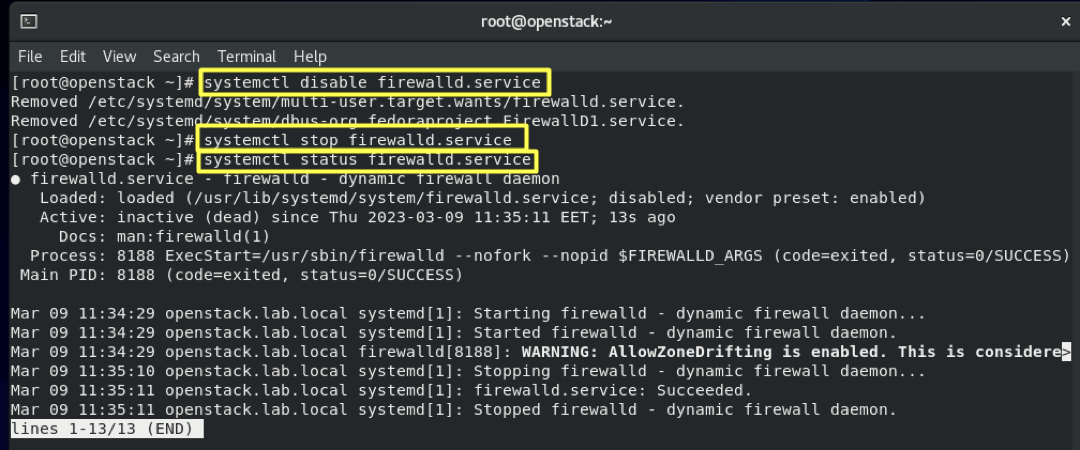
4.2- Disable and stop firewalld:
systemctl disable firewalld
systemctl stop firewalld
systemctl status firewalld
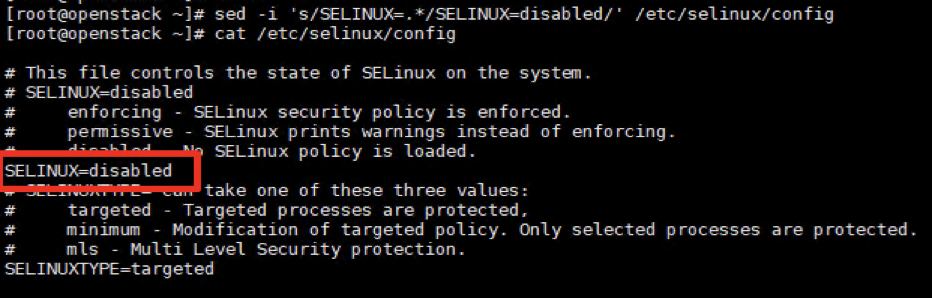
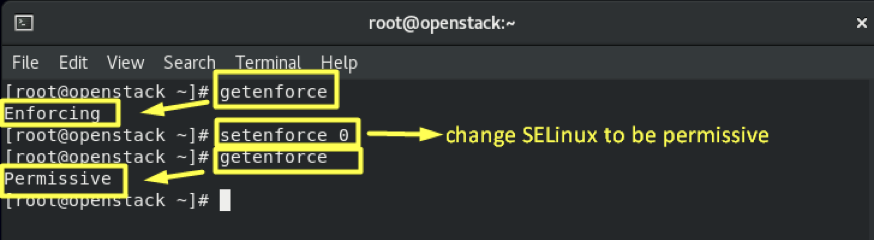
4.3- Disable SeLinux:
setenforce 0
sed -i 's/SELINUX=.*/SELINUX=disabled/' /etc/selinux/config
4.4- Disable and stop Networkmanager
systemctl disable NetworkManager
systemctl stop NetworkManager
systemctl status NetworkManager

4.5- Download network-scripts:
dnf install network-scripts -y

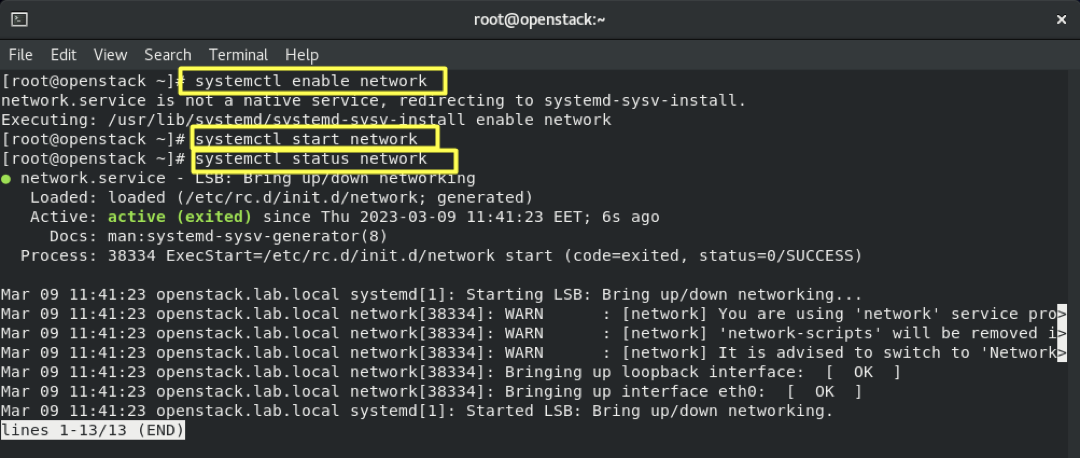
4.6- Enable and Start network-scripts:
systemctl enable network
systemctl start network
systemctl status network
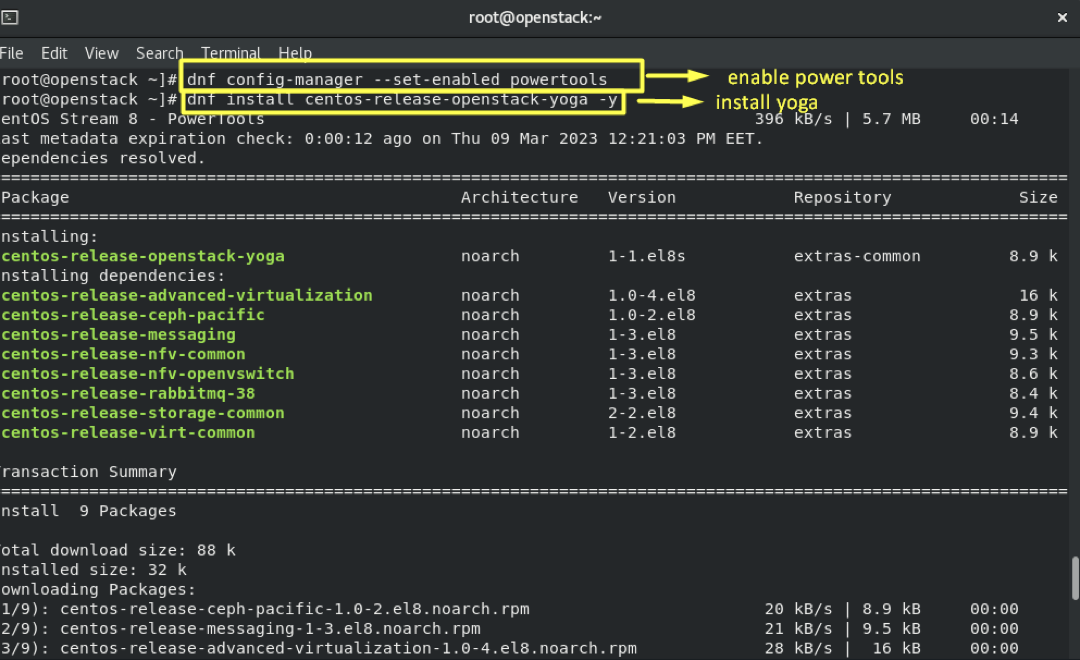
4.7- Enable power tools and install yoga:
dnf config-manager --enable powertools
dnf install -y centos-release-openstack-yoga
4.8- Update the system:
dnf -y update
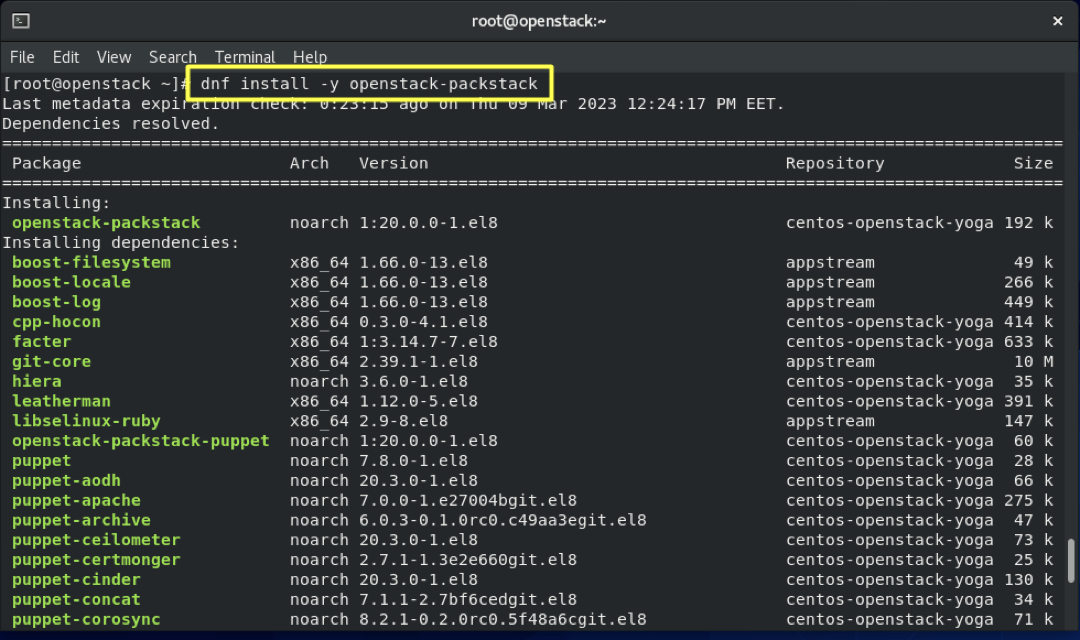
4.9- Install Packstack:
dnf install -y openstack-packstack
4.10- Generate answer file:
packstack --gen-answer-file=/root/answers.txt --os-neutron-l2-agent=openvswitch
--os-neutron-ml2-mechanism-drivers=openvswitch --os-neutron-ml2-tenant-network-types=vxlan --os-neutron-ml2-type-drivers=vxlan,flat
--provision-demo=n --os-neutron-ovs-bridge-mappings=extnet:br-ex --os-neutron-ovs-bridge-interfaces=br-ex:eth0
--keystone-admin-passwd=redhat --os-heat-install=n

- To check the answer file:

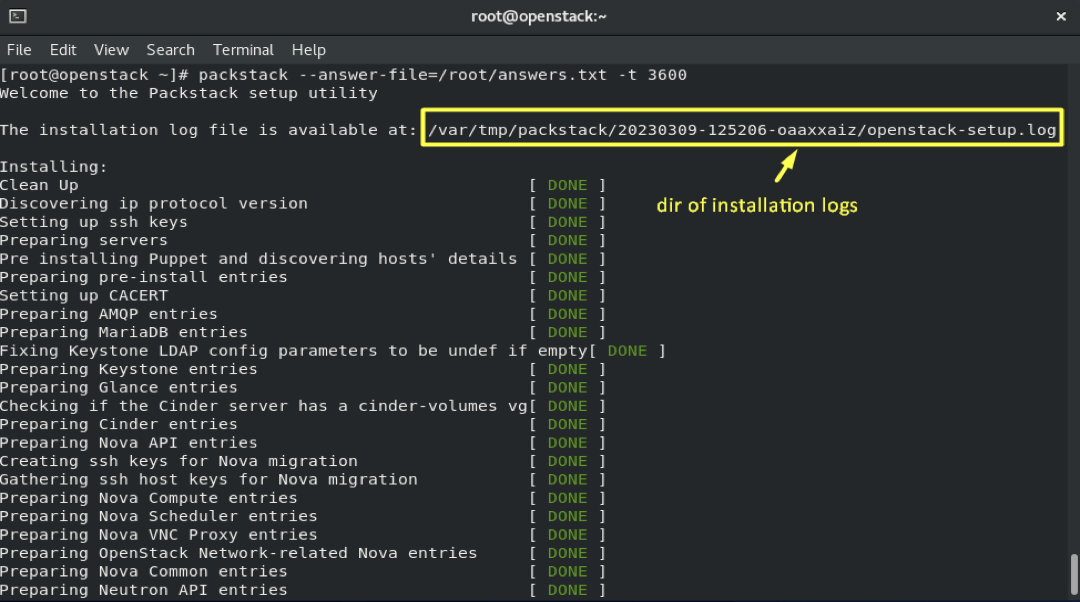
4.11- And finally let's start the installation:
packstack --answer-file=/root/answers.txt -t 3600
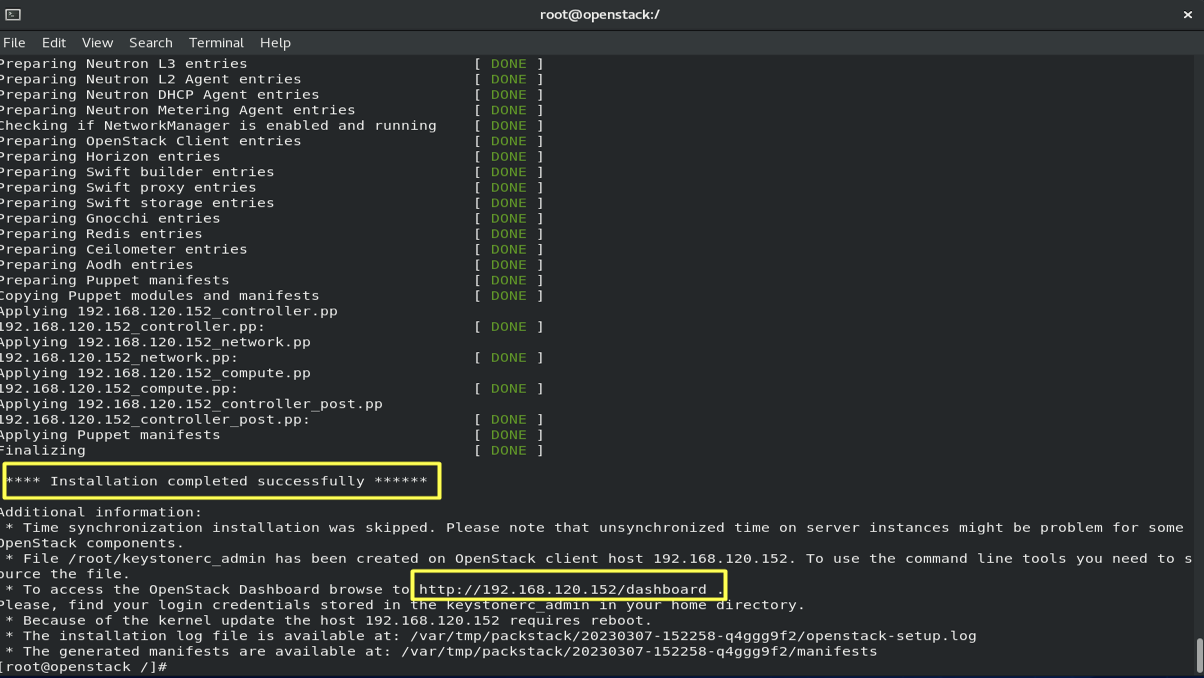

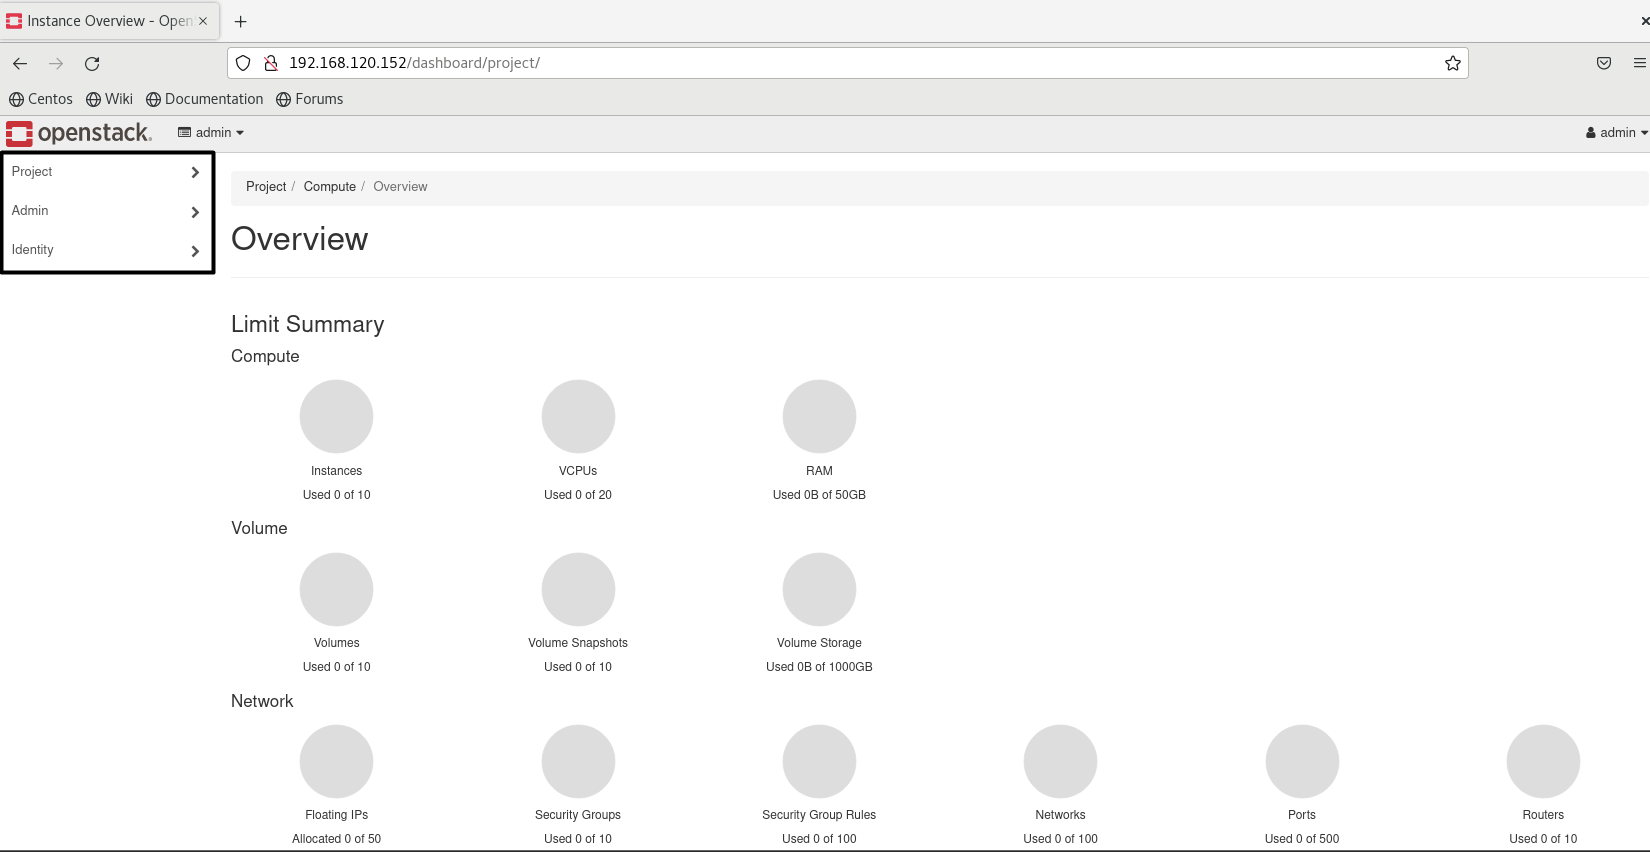
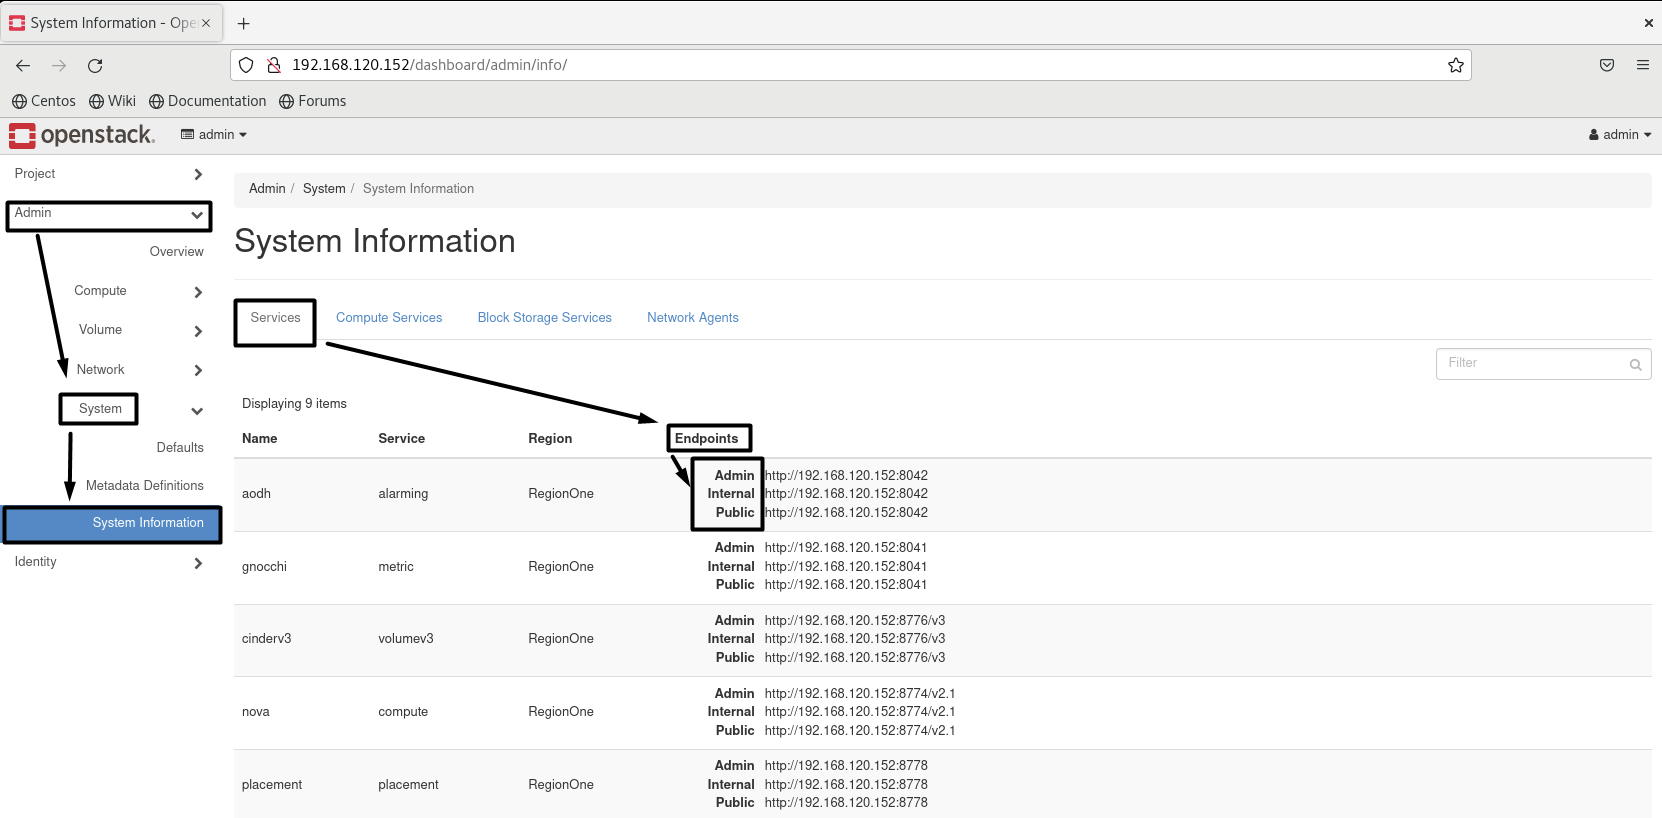
- NOW WE CAN EXPLORE OPENSTACK DETAILS:
Heading to => dmin => System => System Information
- Each service has 3 Endpoints, “Admin, Internal, Public”:
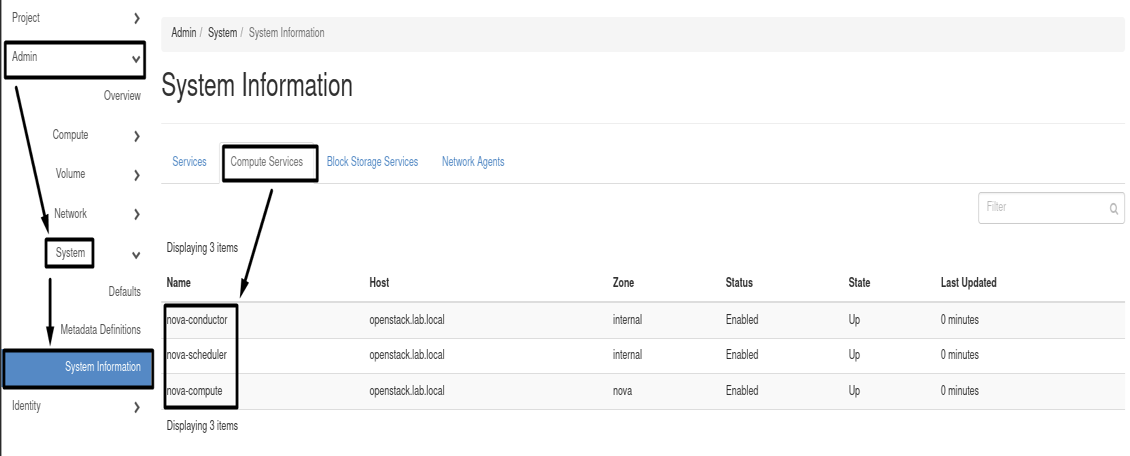
- Compute Component:
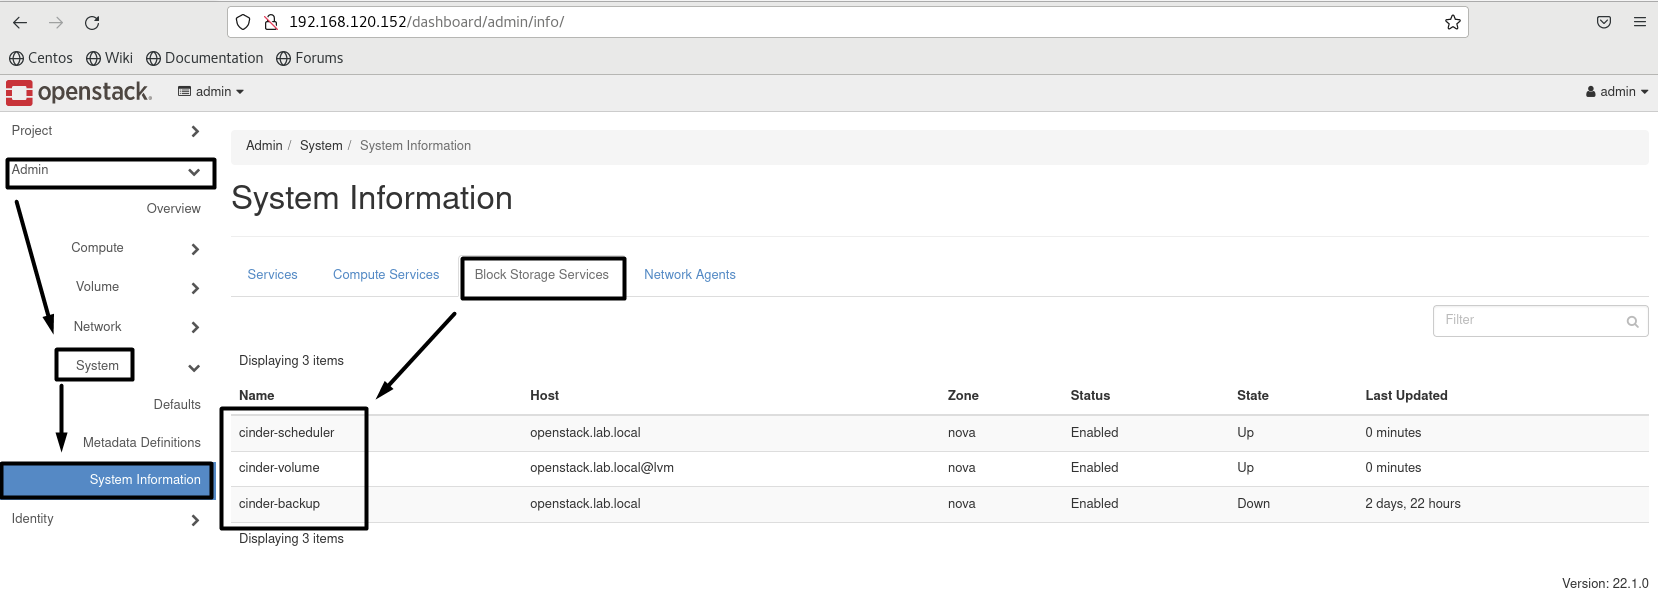
- Block Storage Services:
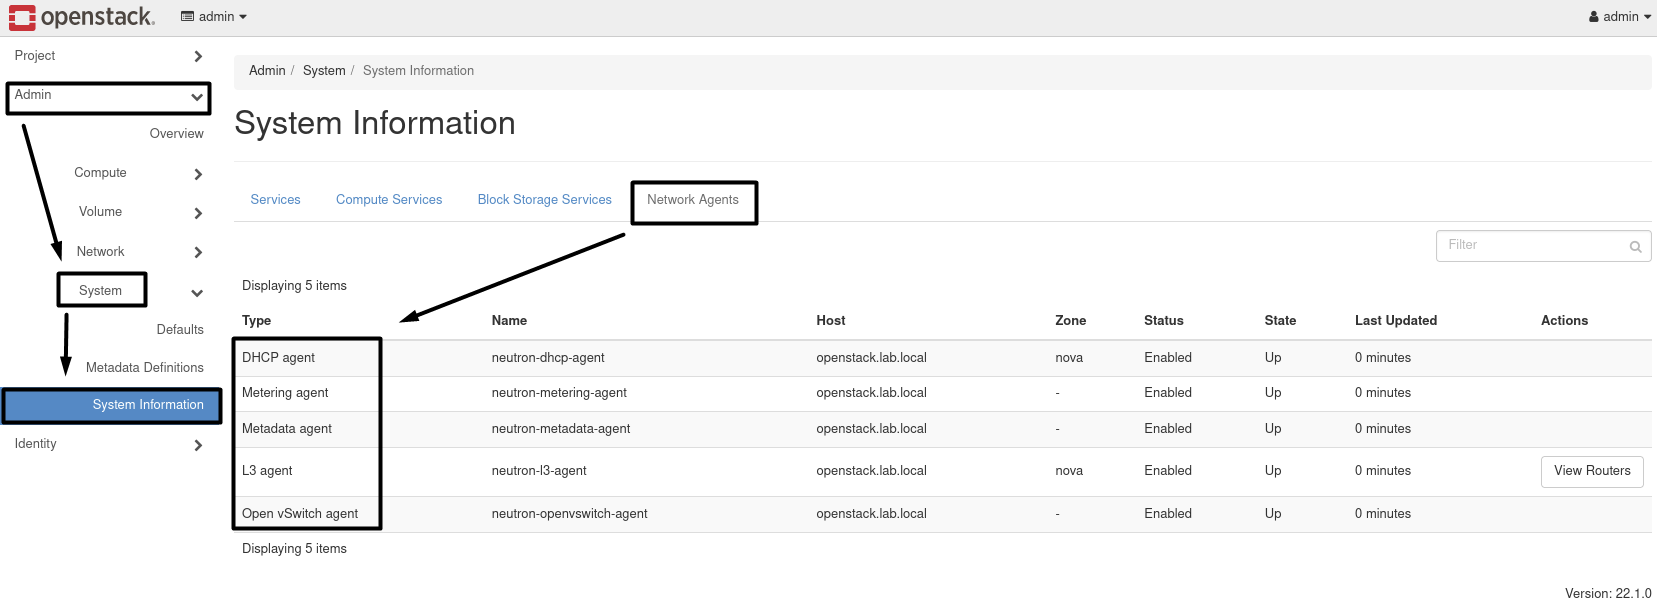
- Network Agents :
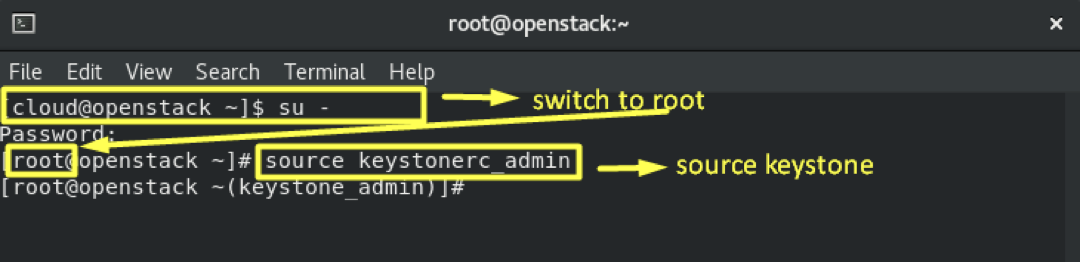
Firstly, we need you to be root and source the keystonerc_admin file to run the openstack commands:
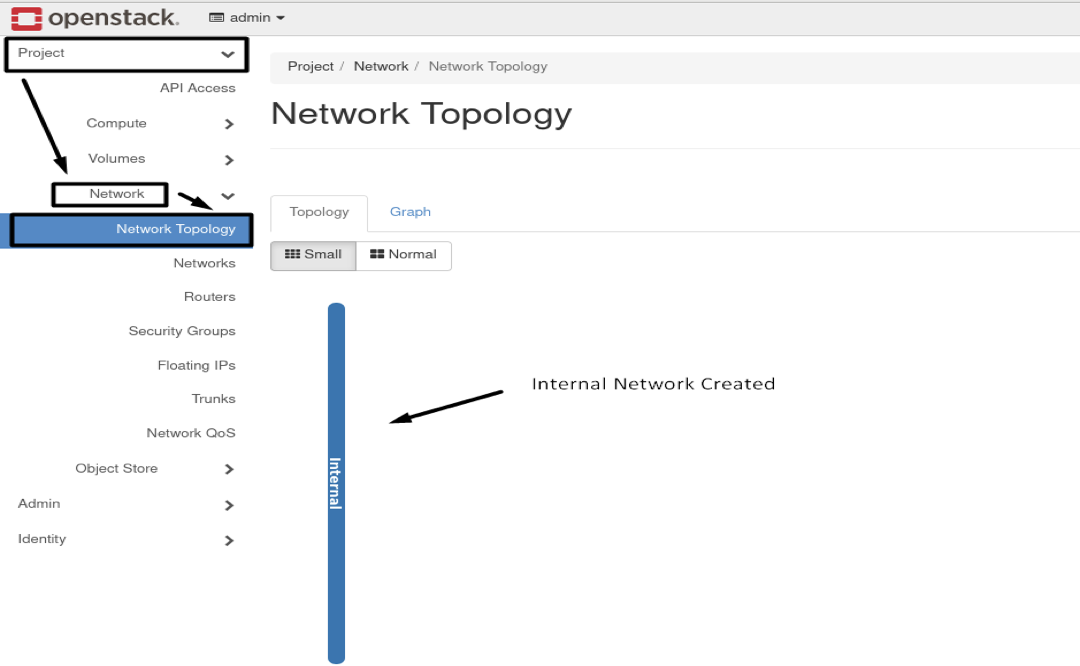
6.1- Create a Private Network:
neutron net-create Internal

- Results :
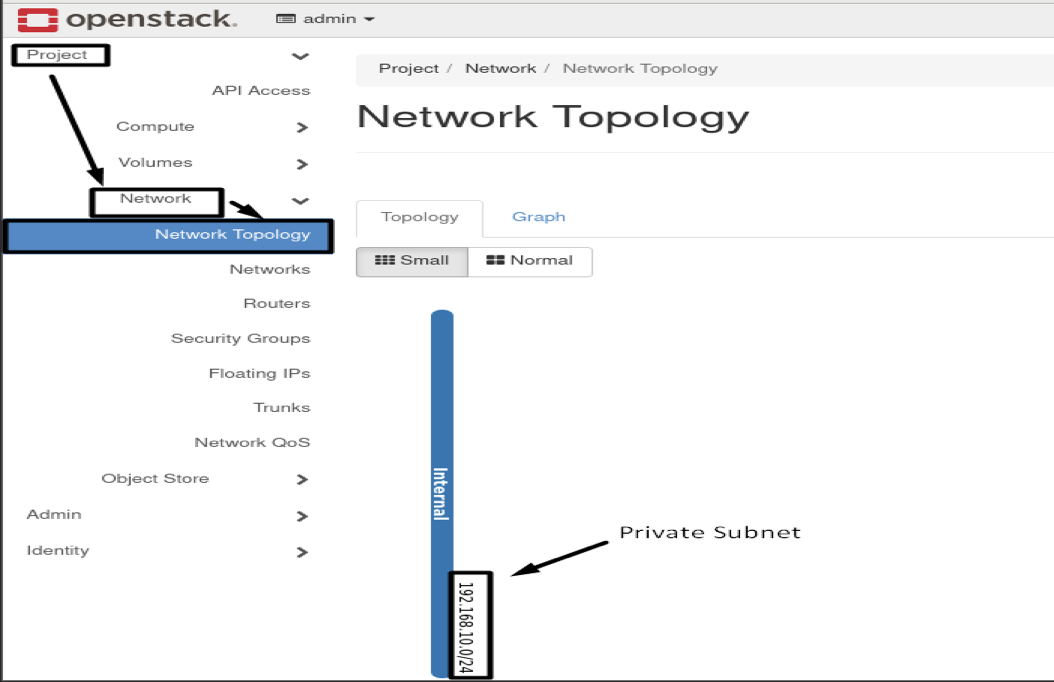
6.2- Create a Private Subnet:
openstack subnet create --network Internal --subnet-range 192.168.10.0/24 --dhcp Internal_subnet
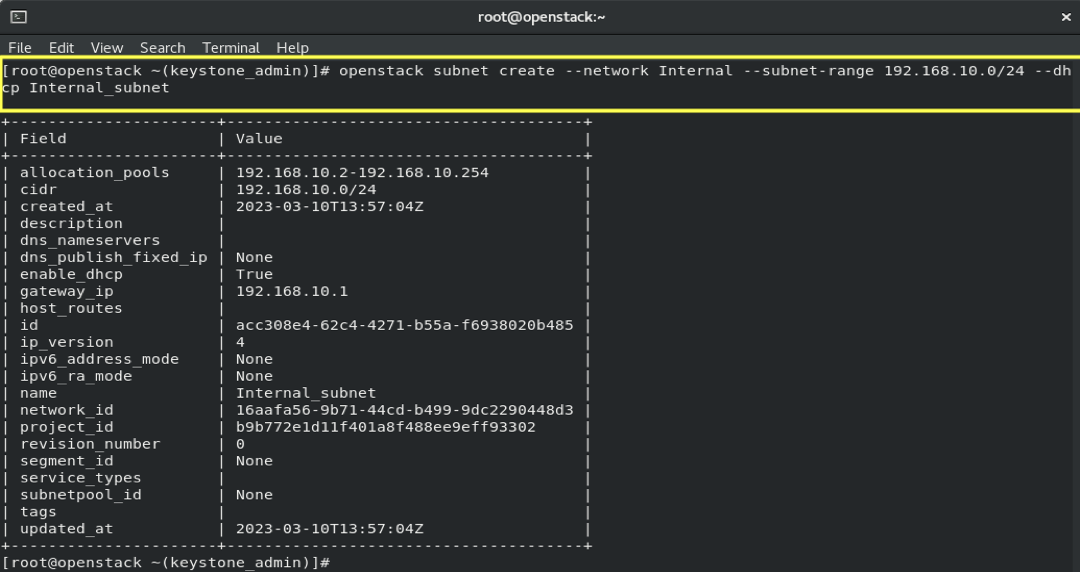
- Results :
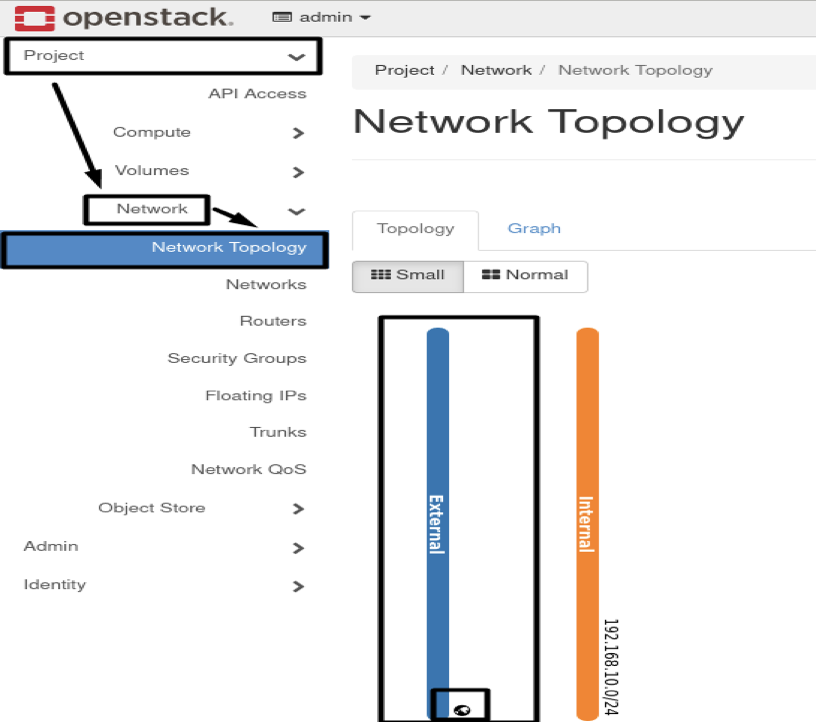
6.3- Create an External Network:
openstack network create External --provider-network-type flat --provider-physical-network extnet --external
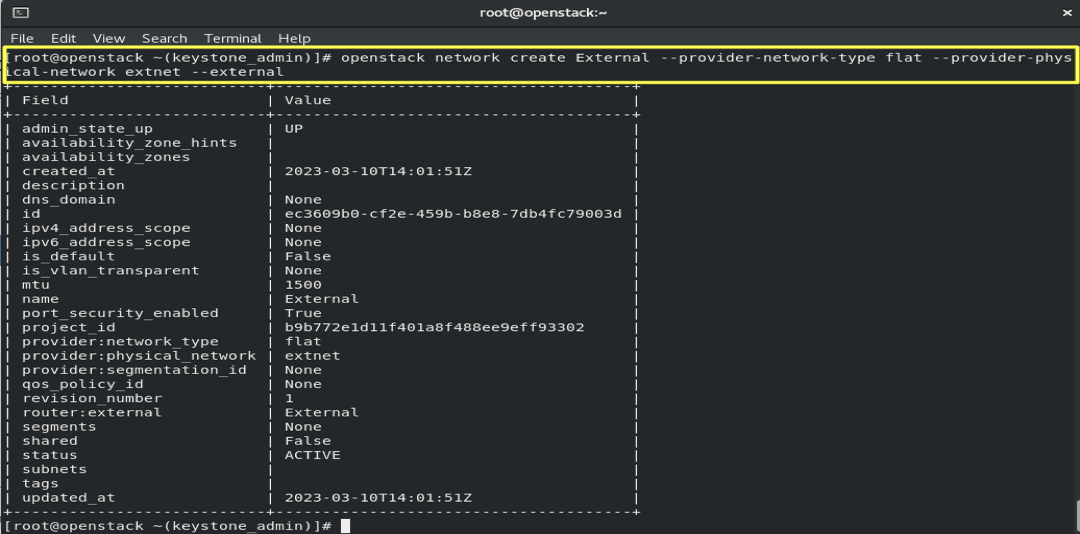
- Results :
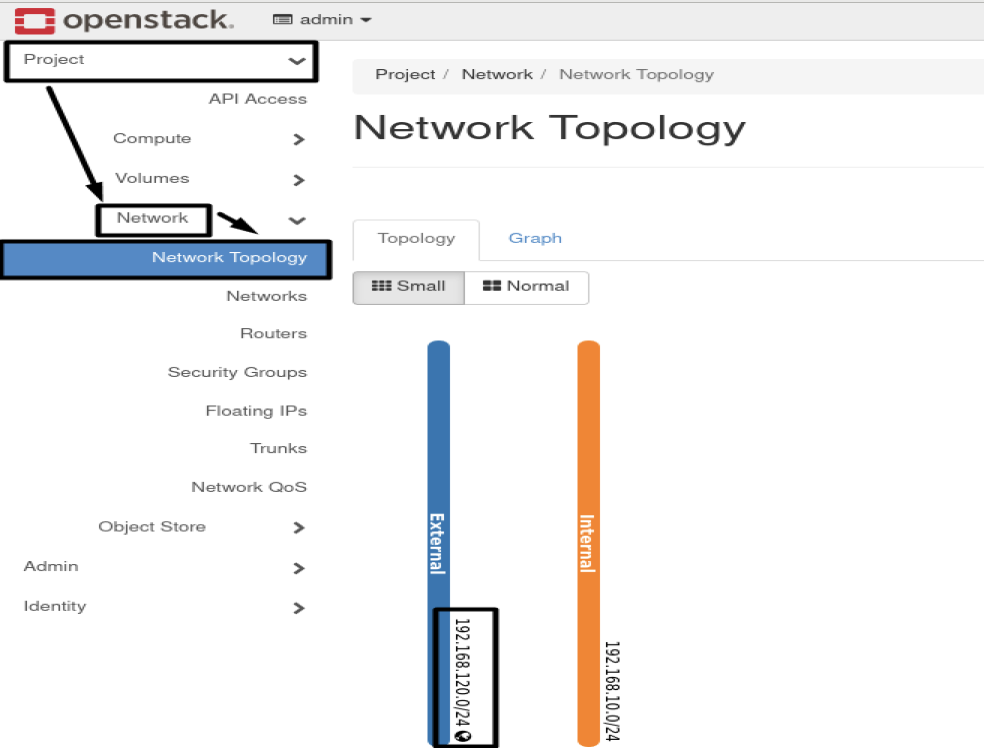
6.4- Create an External Subnet:
openstack subnet create External_subnet --no-dhcp --allocation-pool start=192.168.120.160,end=192.168.120.170 --gateway 192.168.120.2 --network External --subnet-range 192.168.120.0/24
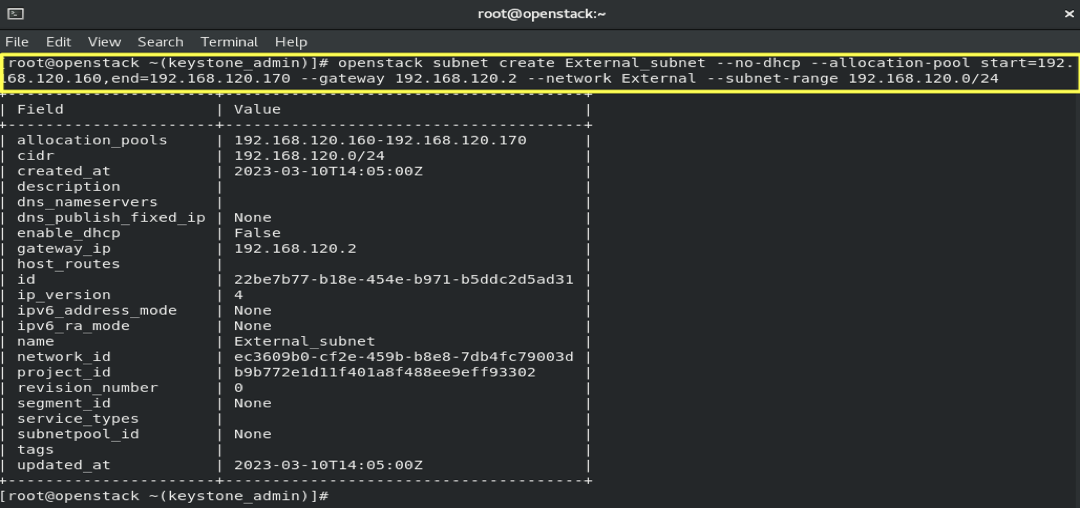
- Results :
6.5- Create a Router: To connect the external network and the internal network to each other.
neutron router-create router
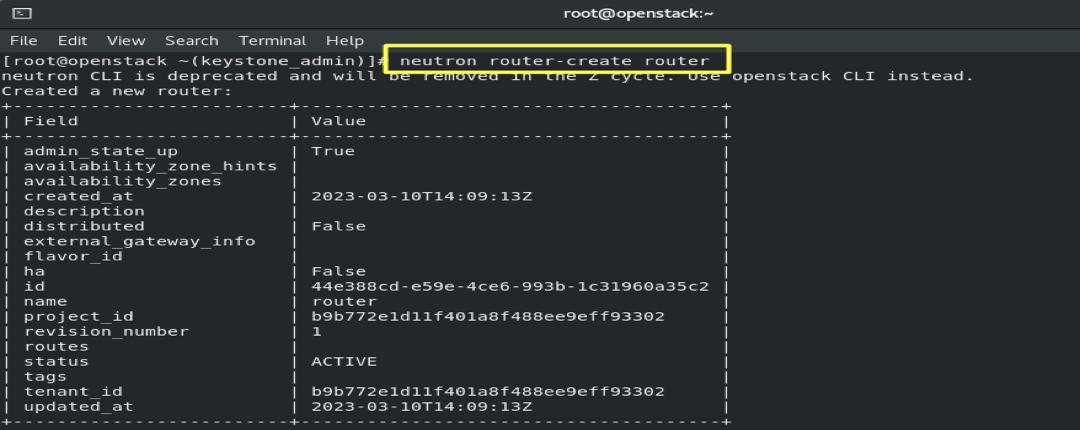
- Results :
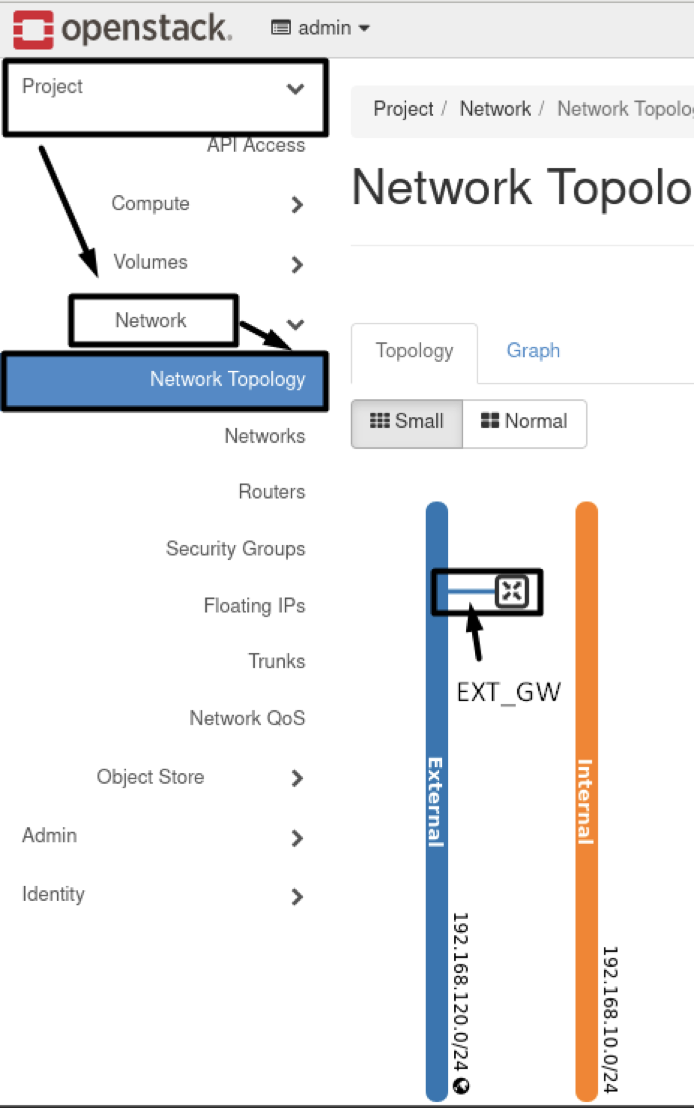
6.6- Set Router Gateway, Using External Network:
neutron router-gateway-set router External

- Results :
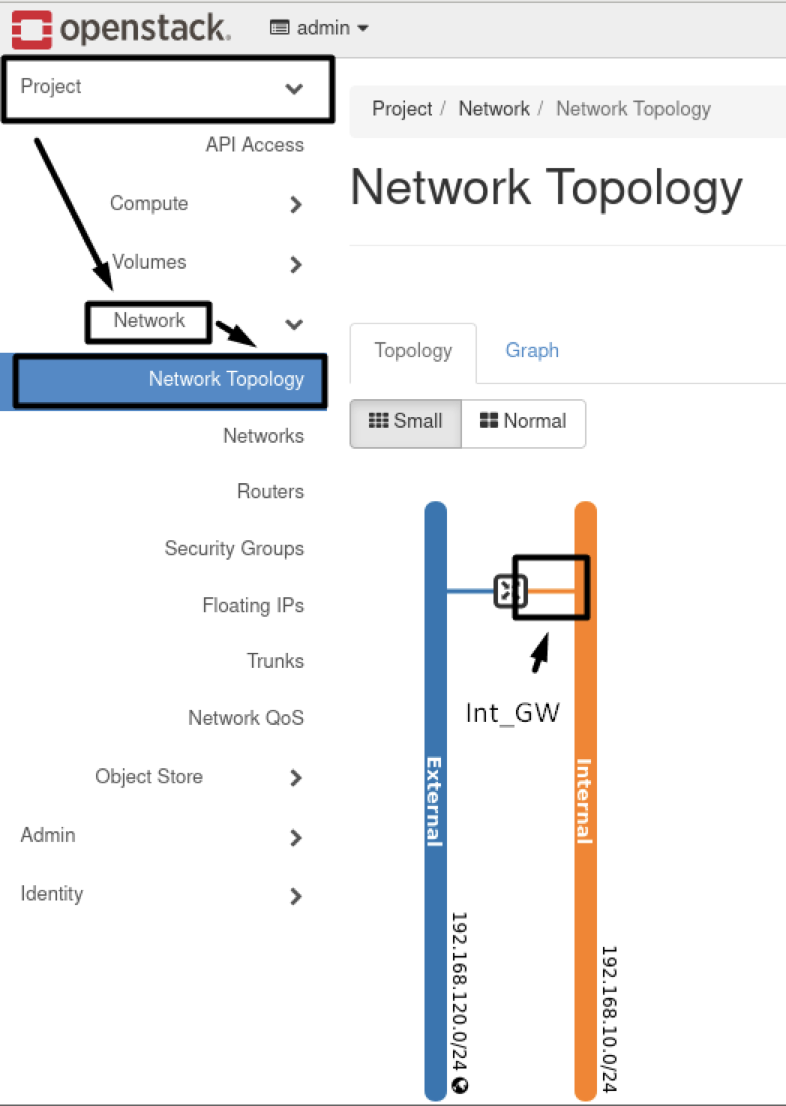
6.7- Set Router Gateway, Using Internal Network:
neutron router-interface-add router Internal_subnet

- Results :
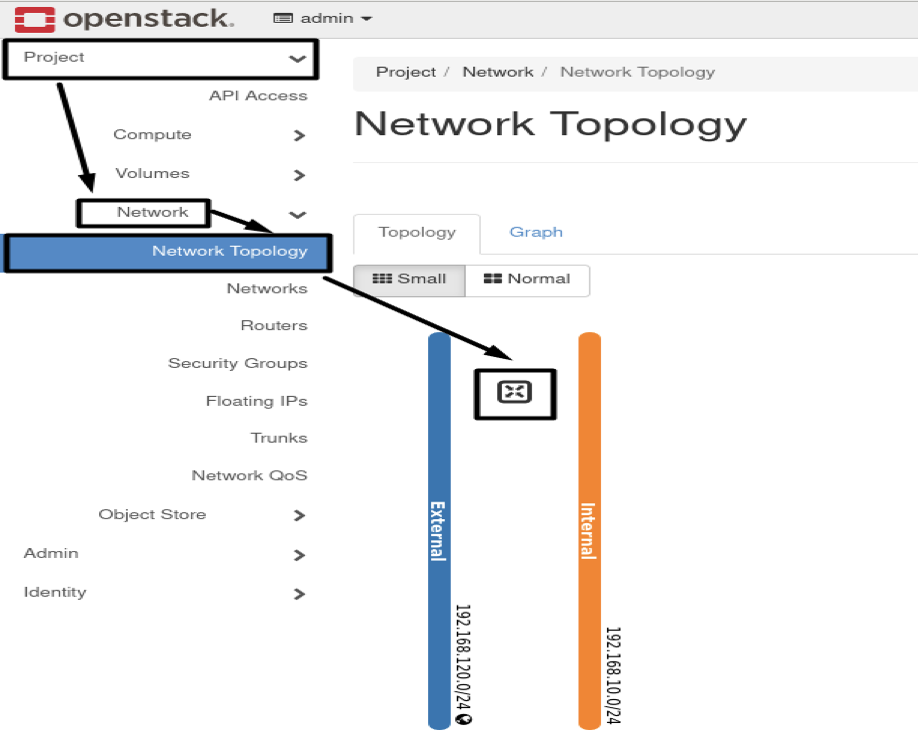
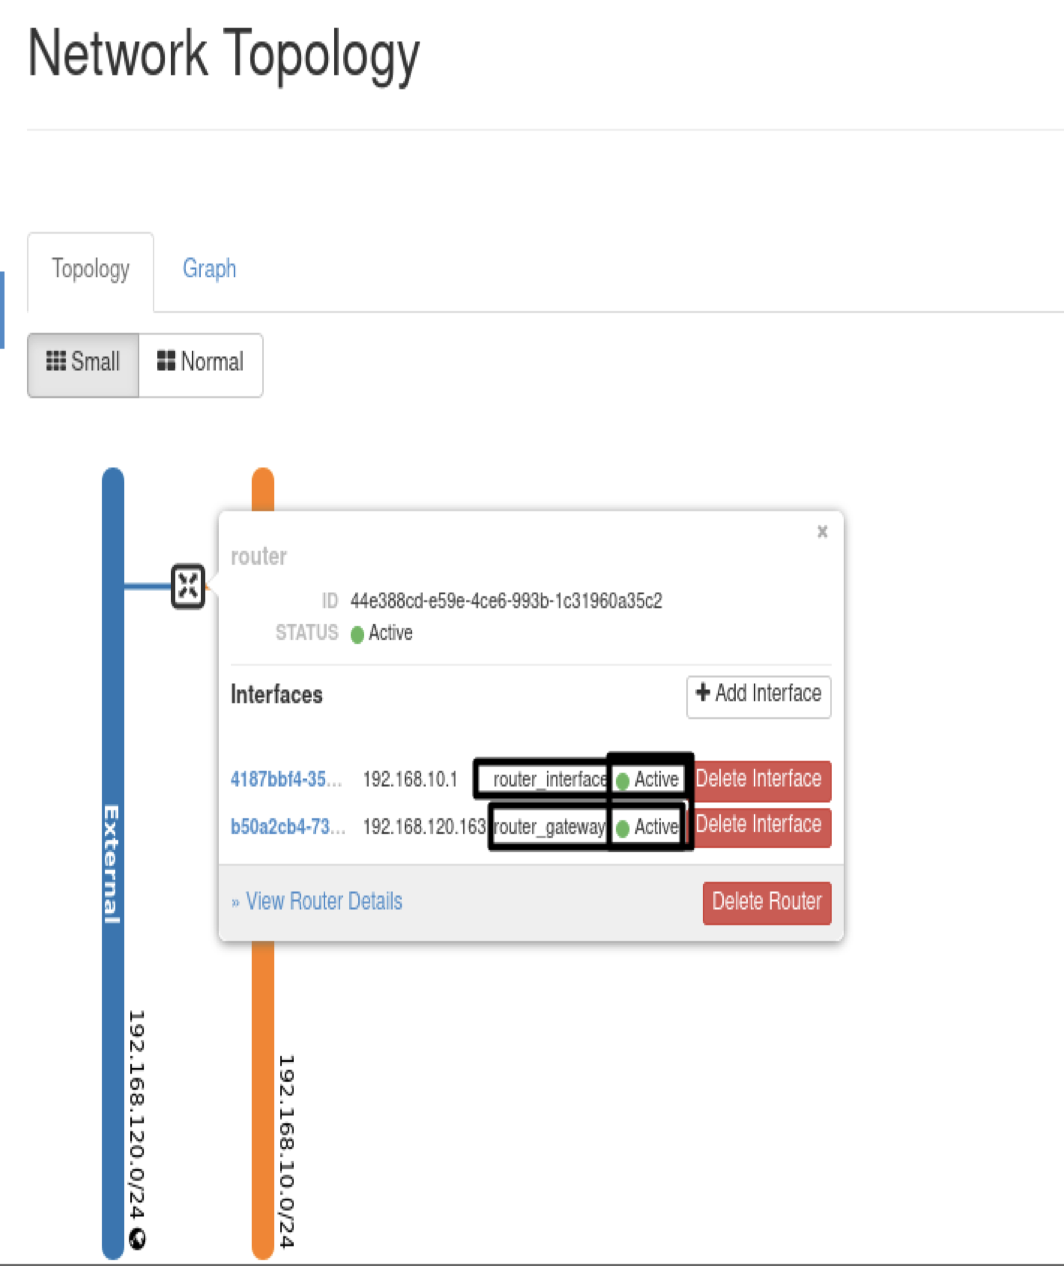
- FULL TOPOLOGY RESULTS
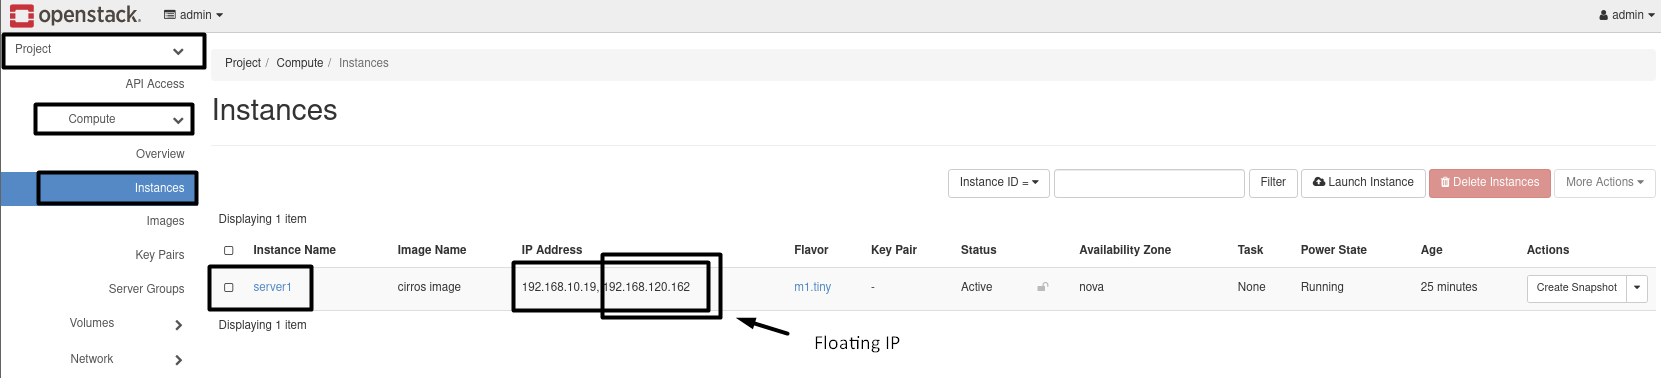
7.1- Create Instance:
openstack server create --image 'cirros image' --flavor m1.tiny --network Internal server1
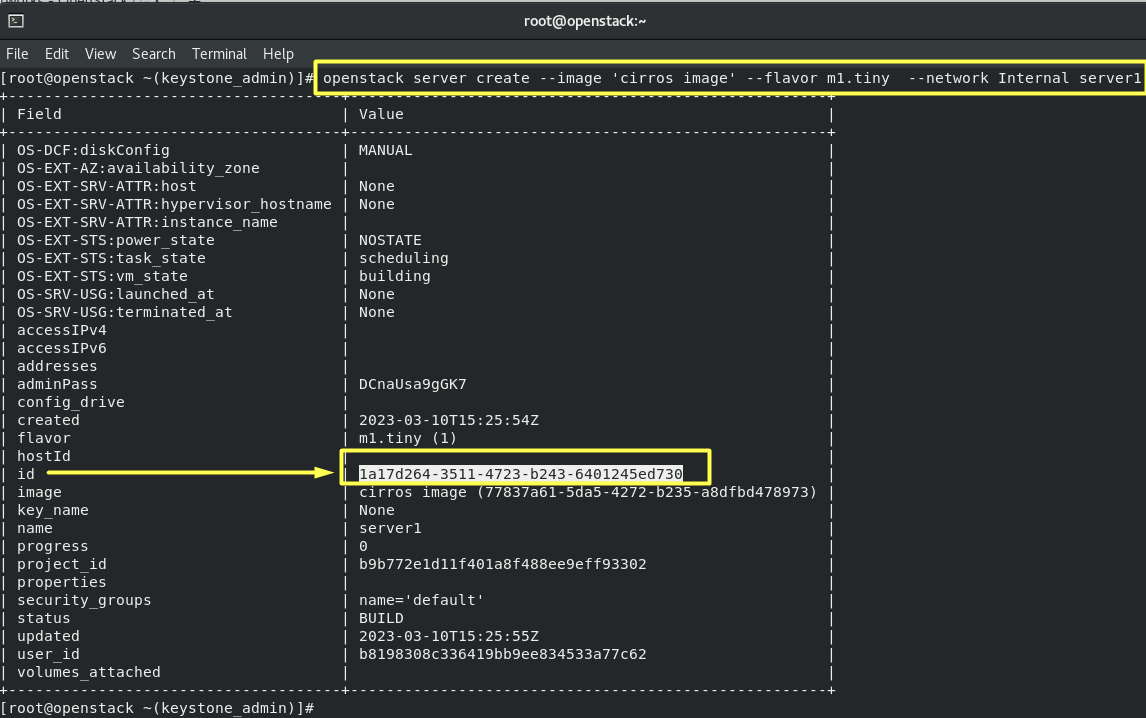
Results :

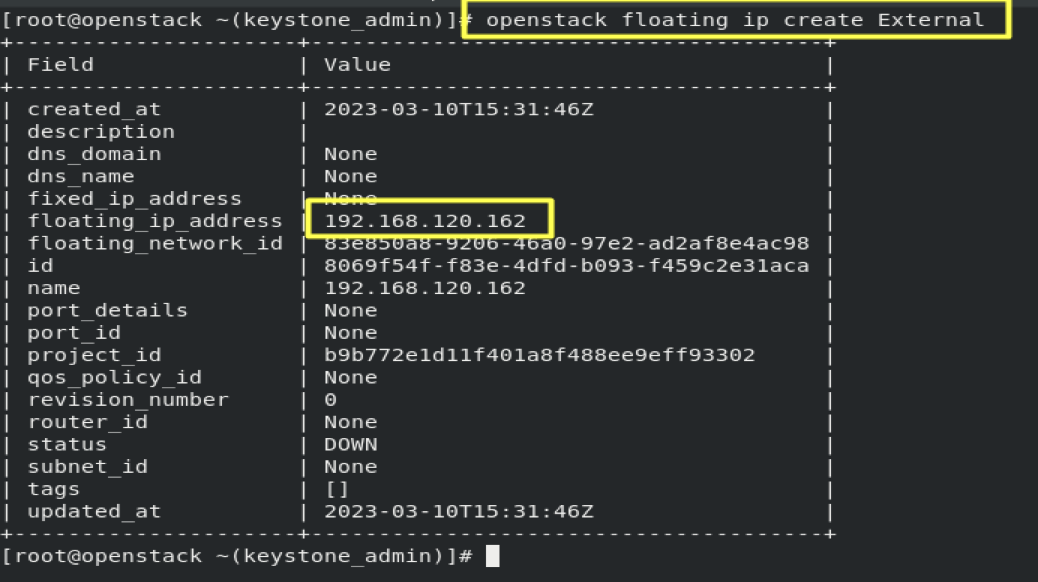
7.2- Create FloatingIP, to reach our instance from the Internet.
openstack floating ip create External
7.3- Assign the FloatingIP to the Instance_Port.
openstack port list

openstack floating ip set --port 967bac43-0eca-4ba2-be64-dfe0a86893d5 192.168.120.162

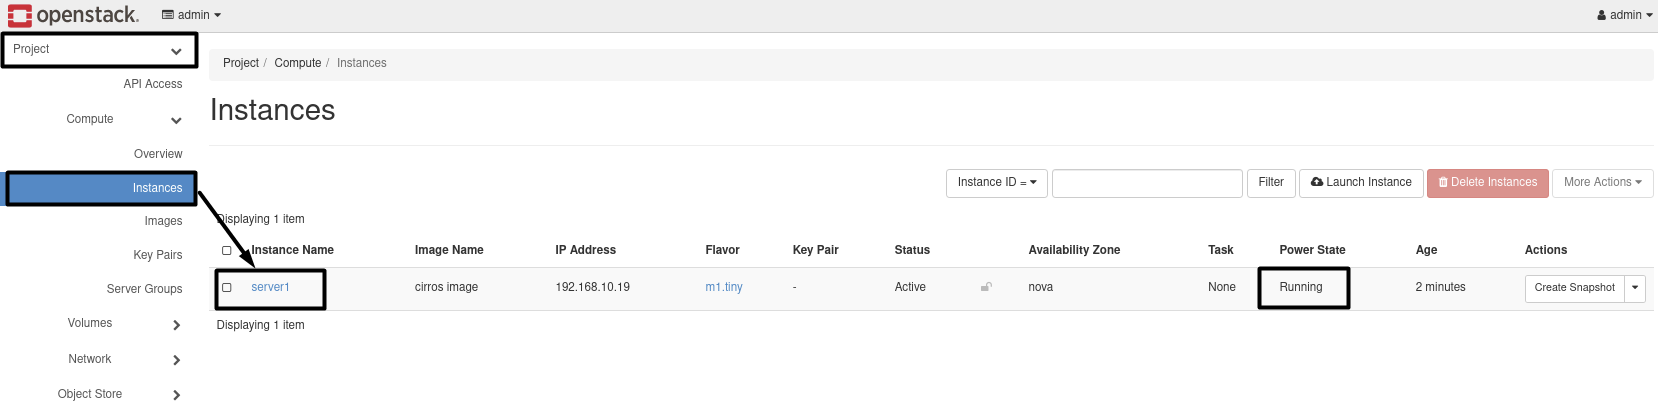
Results :
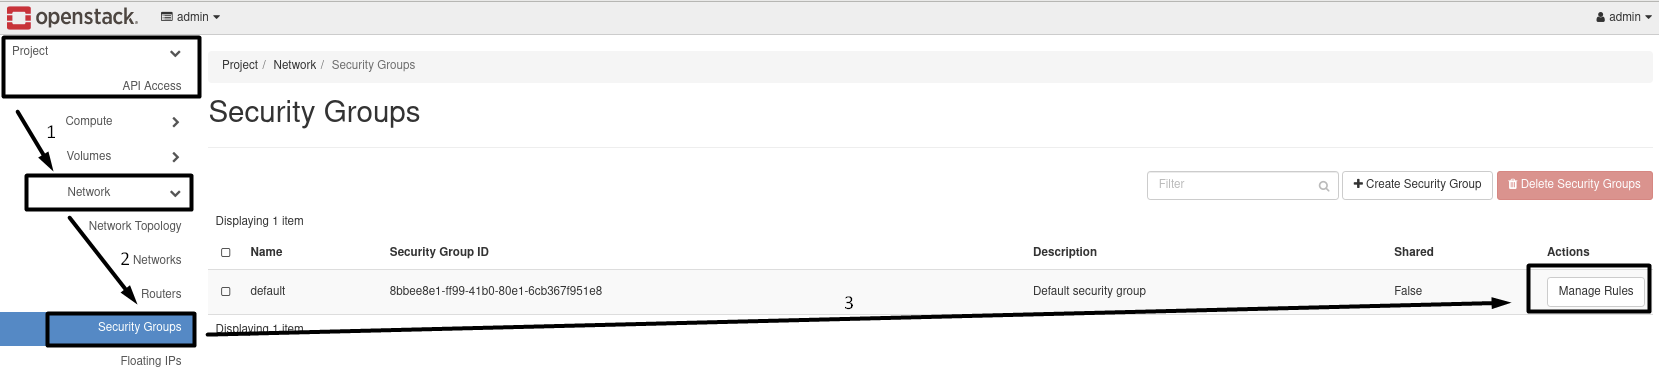
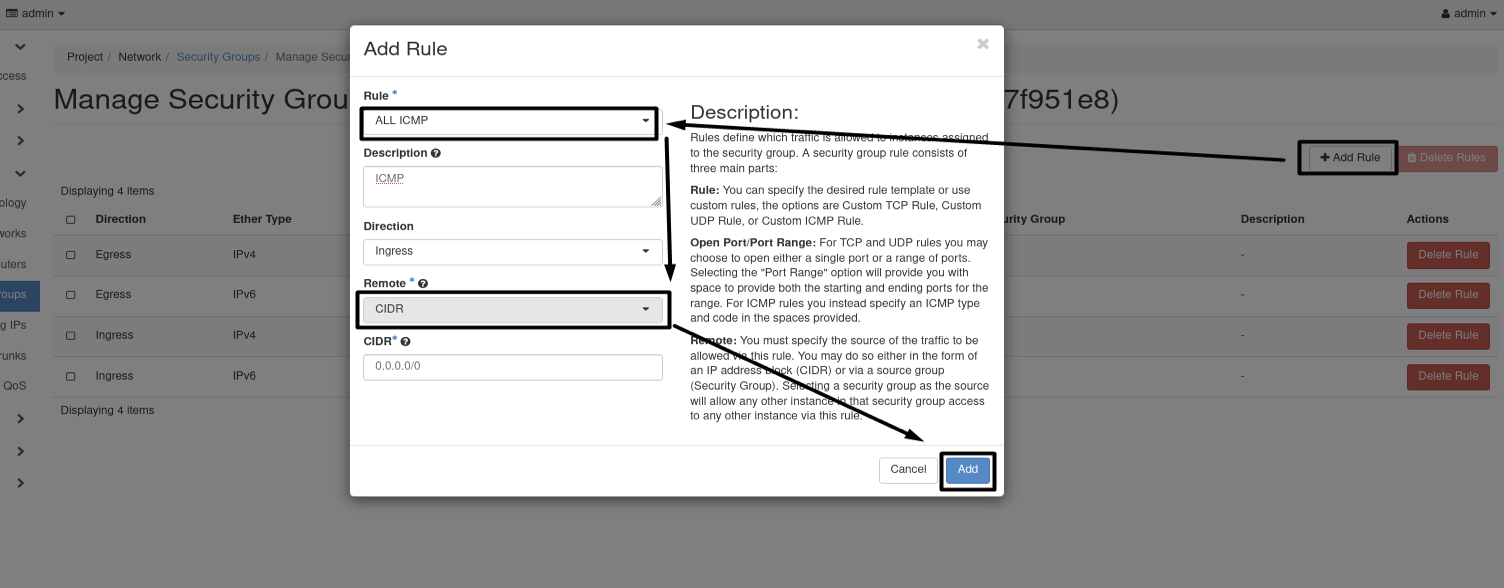
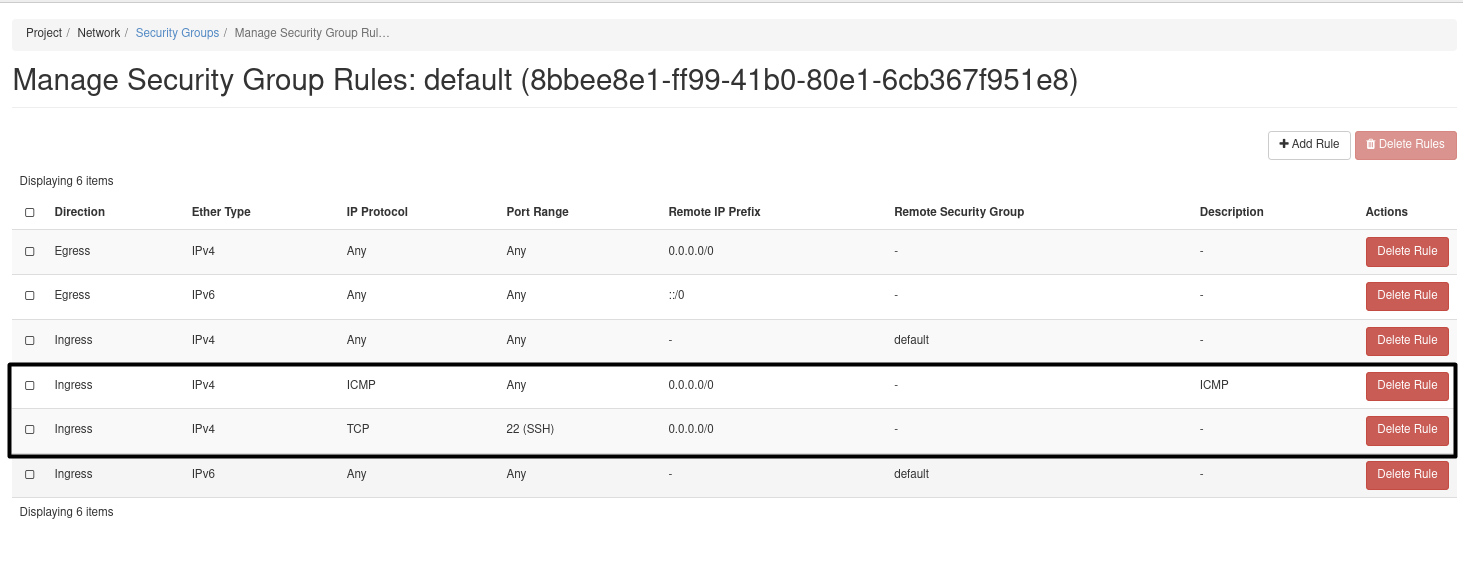
7.4- Add two rules in the default security group to enable ssh port and ICMP Project => Network => Security Groups => Manage Rule
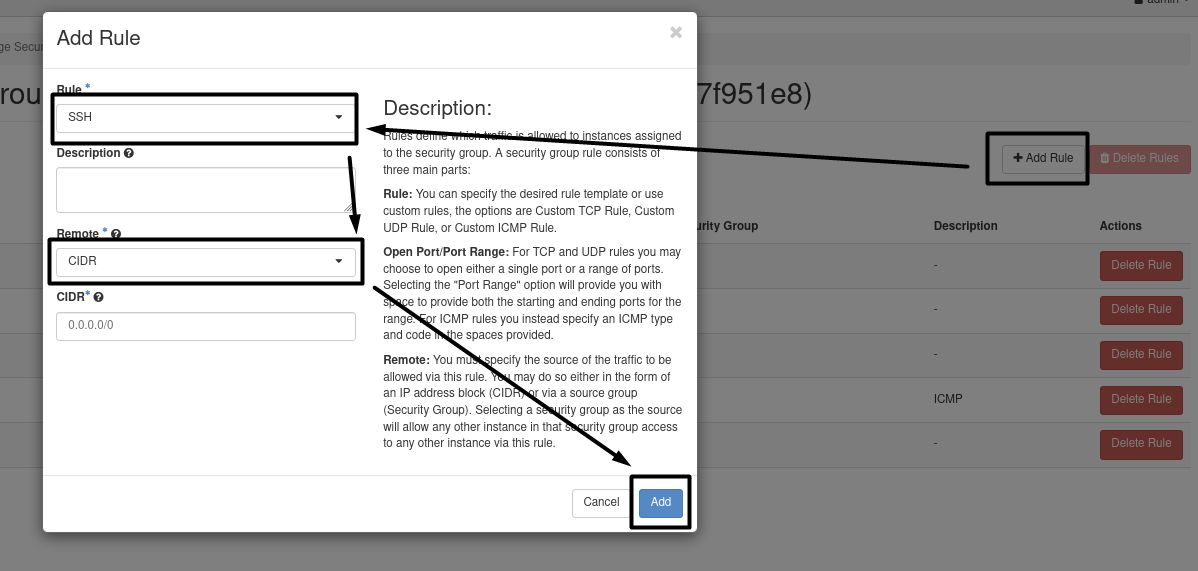
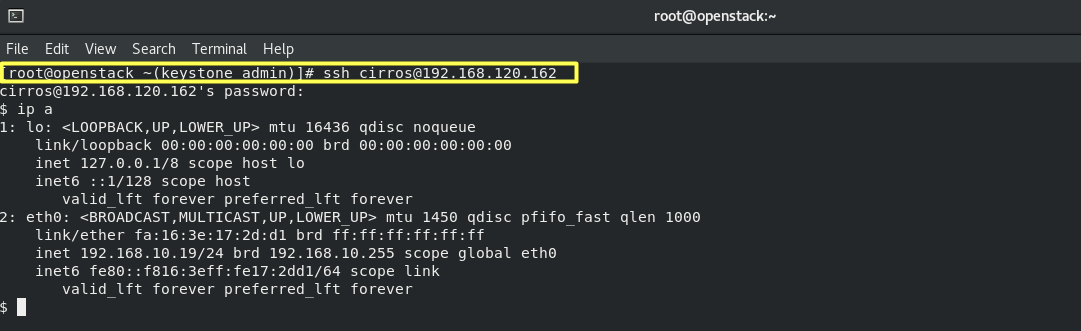
7.5- Connect to your instance by SSH:
ssh cirros@192.168.120.162