Thank you for participating in this workshop! As part of my master thesis, I have created a survey to collect feedback on the workshop and the Ionic framework. I would be grateful if you could take a few minutes to complete the survey after you have finished the workshop exercises and any other related tasks. Survey
To begin, follow these steps:
-
If you haven't already, install the Ionic CLI:
npm install -g @ionic/cli(Check if installed with
ionic -v) -
Clone this Git repository, go to the project folder
cd .\create-hybrid-mobile-apps-with-ionic-framework\, and runnpm install. (If you don't want to use React you can follow one of these tutorials for Angular and Vue: Build your first APP) -
Start the development server by running the following command:
ionic serve
-
Open http://localhost:8100 in your web browser to view your app.
-
If you want to use your browser to code, we recommend using the device emulation mode. Press F12 and then Toggle device emulation (Ctrl + Shift + M or Cmd + Opt + M) and choose an emulated phone device.

-
First, ensure that you have the Android Studio installed.
-
Add the Android platform to your Ionic project by running the following commands in your project directory:
ionic cap add androidThis should add folder "android" to your project.
-
Then build the Android app:
ionic cap build android(run this again after you make changes, you can add --watch to )Android Studio should open. You might need to a new add device emulator.
-
Press "Run 'app'" in the Android studio after the Gradle build is ready. You need to have an emulated device and the correct app selected.

Alternatively, you can run your app using the Ionic CLI with the command:
ionic capacitor run android
Note: If you encounter any issues running your app, try running ionic capacitor sync android to sync your Android app.
-
Xcode must be installed, and for this, you need to have a Mac laptop
-
Add the iOS platform to your Ionic project by running the following commands in your project directory:
ionic cap add iosThis should add folder "ios" to your project.
-
Then build the iOS app:
ionic cap build ios(do this every time you make changes) -
Xcode should open. Select a simulator and press start in the Xcode. You might need to add a new device simulator. Alternatively, you can run
ionic cap run ios
Note: If you encounter any issues running your app, try running ionic capacitor sync ios to sync your iOS app.
This is an app called ScreenScore, where you can browse and add ratings for all your favorite films and shows. Currently, the app only lists ratings from sample data. Let's add functionality to allow users to add new ratings and view existing ones. If you get stuck, don't hesitate to ask for help or look to the solutions folder for guidance.
To add a form for adding new ratings, follow these steps:
- Add an IonModal
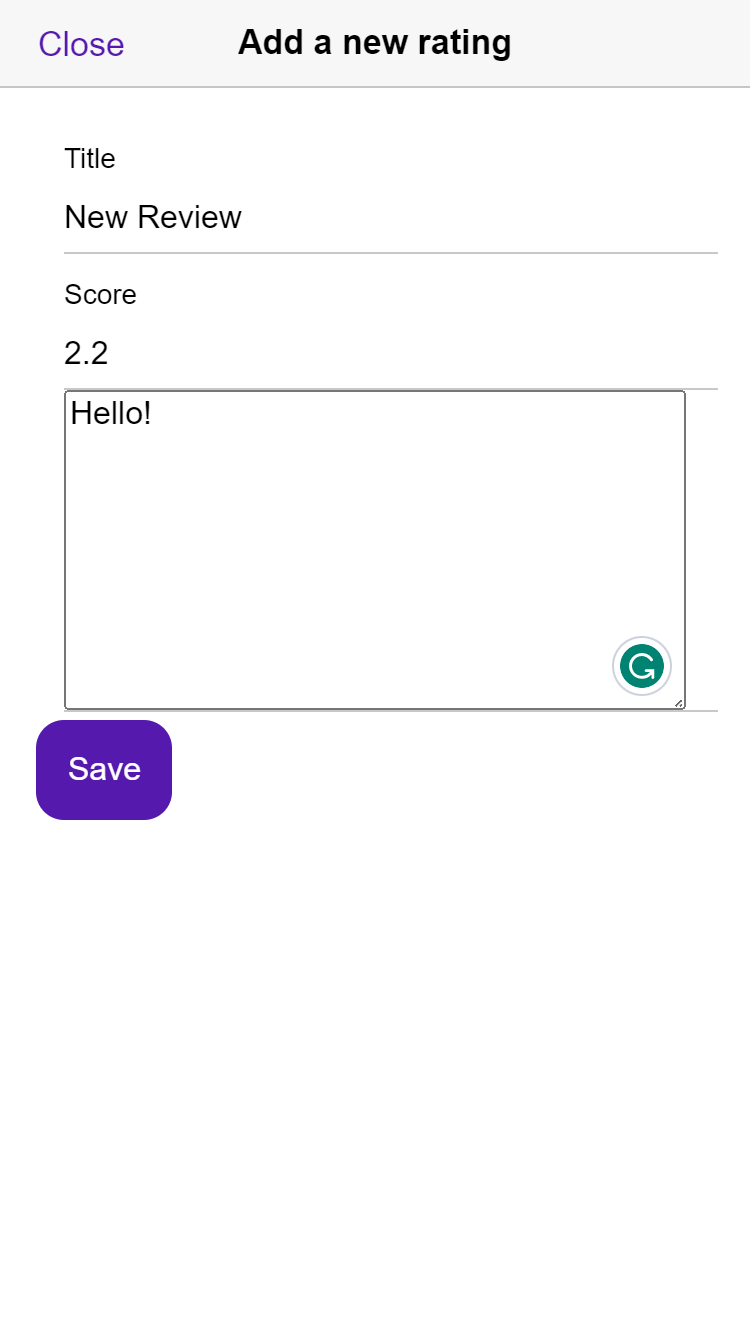
Take an example from this: https://stackblitz.com/edit/angular-pfw55s?file=src%2Fmain.tsx. Open the file "src\components\AddRatingForm.tsx" and add there IonModal that opens when the button is clicked. Add the following components to the modal: Header, Toolbar, IonTittle "Add a new rating", IonButton "Close" that sets the isOpen to false, and IonContent.
- Add a form to save new ratings
Now, let's create a form using Ionic and React Hook Form to add new ratings to our app. Here's the base for the form:
       <form onSubmit={handleSubmit(submitForm)}>
            <IonItem>
              <IonInput
                label="Title"
                labelPlacement="stacked"
                type="text"
                {...register("title", { required: true })}
              />
            </IonItem>
            {/* Add Score input here */}
            <IonItem>
              <textarea
                placeholder="Write a review"
                {...register("review", { required: true })}
                className="custom-textarea"
              />
            </IonItem>
            <IonButton type="submit" disabled={!formState.isValid}>
              Save
            </IonButton>
          </form>
This form is missing input for the score. Create this input using IonInput. Take an example from title input.
Score input should have type "number", and add min=0 and max=5 attributes. Also, add a step="0.1" to be able to use decimals. Step.
(Note that the register name should be "score")
-
Open the file "src\App.tsx" and add a route for path "/rating/:id", containing component ViewRating. Take an example from the home-path. https://ionicframework.com/docs/react/navigation#ionreactrouter
-
In the "src\components\RatingListItem.tsx" file, add to the IonItem component a "routerLink" property with the value /rating/${rating.id}. This will create a link to the rating page.
Now you should be able to click rating items on the Home page, and you will be directed to a rating page.
- To make it easy to navigate back to the Home page, add an IonBackButton component to the "src\pages\ViewRating.tsx" file. Follow this example: IonBackButton (Select React and src/page-two.tsx)
If you have extra time, try adding the following features to the app:
Add buttons to the Home page that allow users to sort the ratings by title or score. You can use the sortByTitle and sortByScore functions for this. To make the buttons look better, test different styles from the Ionic API to them. https://ionicframework.com/docs/api/button
Navigate to the theme folder and change the --ion-color-primary.
Then add to Home.css:
#home-page ion-title { color: var(--ion-color-primary); font-size: large; }
Look how the app looks now.
Don't forget to take the survey!
Once you have completed these exercises, the App should look something like this:

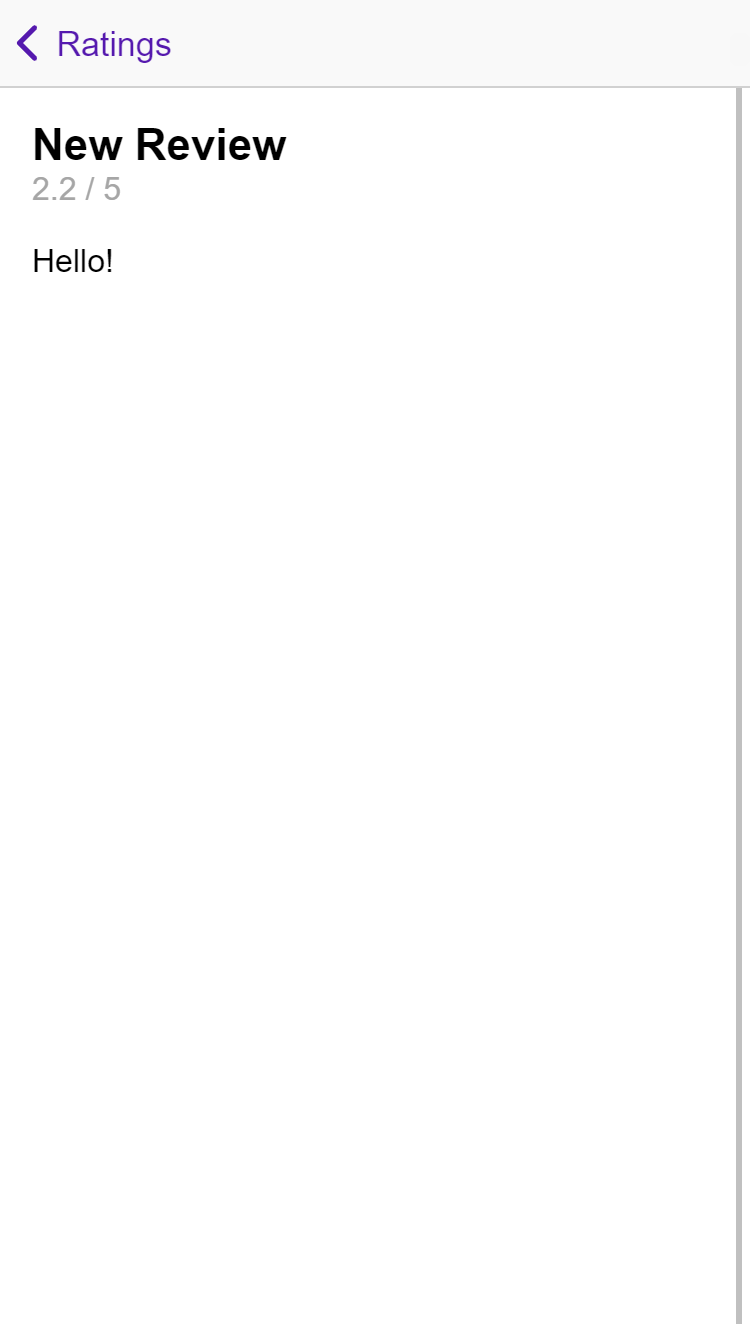
Note that this might look different with iOS and Android.
If you want to take your Ionic skills to the next level, I encourage you to try creating your own app using the instructions below. Good luck!
-
To create a new project, run the command
ionic start.(Alternatively, you can use the command
ionic start ScreenScore list --type=react --capacitor, to skip steps 2-5. Learn how to use this command ) -
When the Ionic CLI asks, "Use the app creation wizard?" select "n" if you want to use the CLI to create your project. Note that you need to have or create an Ionic account to use Ionic's wizard.
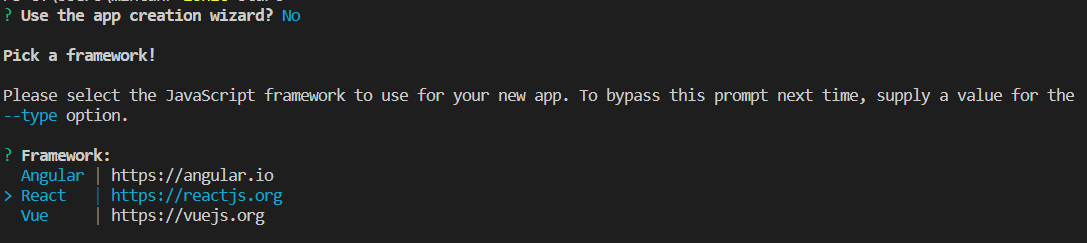
-
Select the JavaScript framework you want to use.
-
Give your project a name, such as "ScreenScore".
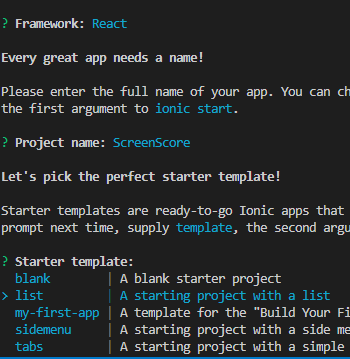
-
Choose a preferred starter template.
-
The project creation process will take some time. Once it's done, navigate to your project folder by running the following command in your terminal:
cd .\ScreenScore\
Here are the complete guides available on the Ionic website for each JavaScript framework: Build your first APP