-
Notifications
You must be signed in to change notification settings - Fork 0
Configure the LIDAR and the Pi Lidar net (Lidar with Networking)
This part is inherited from https://github.com/linorobot/linorobot/wiki/4.-Laser-Sensor and used to integrate the SICK TIM571
In order to work together the Lidar and the Pi communicate via ethernet (also USB would be possible) with a LAN. To start is good to put a switch in between to have connected your PC, the LIDAR and the Pi.
_The configuration refer to be connected to a simple local network. _ _The one I have created is 192.168.0.0/24 with fix IP for Lidar(192.168.0.50) and Pi(192.168.0.51). _ Change accordingly to your need, this was for an easy debug configuartion.
In order to setup a static IP, you need to hack a little bit some configuration file.
check your network name (normally is eth0 but here the MAC address is used instead) by running ifconfig in a console on the embedded PC
You should find something starting for enxb827 ....... the last part is the mac address HW specific.
Use as superuser vi, nano or transfer with an editor (BUT BE CAREFUL ABOUT THE ENDLINE, Windows uses another endline than Unix so the script could not work) modify the file
ubuntu@ubiquityrobot:~$ sudo vi /etc/network/interfaces
auto lo
iface lo inet loopback
auto eth0
iface eth0 inet static
address 192.168.0.51
netmask 255.255.255.0
gateway 192.168.0.1
auto enxb827eb8dbecd
iface enxb827eb8dbecd inet static
address 192.168.0.51
netmask 255.255.255.0
gateway 192.168.0.1
Reboot and check the IP is correct.
After you have start a bringup node you should see the lidar connected
In order to configure the lidar, on a windows machine download from the SICK website the latest version of SOPAS
We have used the version 2018.3
Intuitively go through the software and detect your Lidar
The Lidar start on net 192.168.0.1, this could conflict ending with the device being not reachable with your configuration.
Probably you have to adjust your network for the first configuration
Detection and connection, you should see something like this
Change the IP to be compatible your LAN
If everything is working at network connection you should be able to ping the Lidar from the PI and if your PC is in the same LAN you can also connect to the sensor
To achieve full autonomy, navigation stack requires a robot to have at least one source of laser information to perceive the robot's environment and avoid obstacles along its way. Linorobot supports multiple LIDAR and 3D depth sensors configurable through an env variable LINOLIDAR. This configuration is done MANUALLY during installation. You can run:
echo $LINOLIDAR
LINOLIDAR=sick_tim_5xx
on your robot's computer to check the configured LIDAR for your build. It should be sick_tim_5xx Change accordingly with your setup/
If not check the .bashrc
If you're using a different LIDAR sensor, change the default launch file in laser.launch to run the correct ROS driver during run time. Here are some good tips from Clearpath Robotics how to select the right sensor for your application.
In ROS page mantained by SICK you can find the ROS node to run the different Lidars
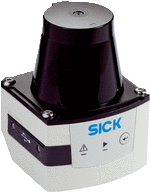
The family is TiM571 p/n 1079742
1 layer max. range: 25m, ang. resol. 0.33 [deg] Scan-Rate: 15 Hz
Follow the instructions at chapter 2 in the page, by cloning and compiling the module, on the embedded system.
source /opt/ros/<rosdistro>/setup.bash
mkdir -p ~/pluto_ws/src/
cd ~/pluto_ws/src/
git clone -b devel --single-branch git://github.com/SICKAG/sick_scan.git
cd ..
catkin_make
In the embedded system run (to be confirmed use sick_tim_5xx)
roslaunch sick_scan sick_scan sick_tim_5xx.launch
In the VM you can use RVIZ, but it seems to crash in the virtual machine. (Investigation on going)
rviz rviz
If rviz crash you can subscribe to a topic like on your development computer
ubuntu@ubuntu-VirtualBox:~$ rostopic list
if run a on an active topic you should see some messages
rostopic echo /cloud
On your development computer, be sure to have installed lino_visualize
git clone https://github.com/linorobot/lino_visualize.git
Then run rviz:
roscd lino_visualize/rviz
rviz -d laser.rviz
git clone https://github.com/linorobot/lino_visualize.git
VERIFIY FOR LASER SCAN MESSAGES!!
source ~/pluto_ws/install/setup.bash
