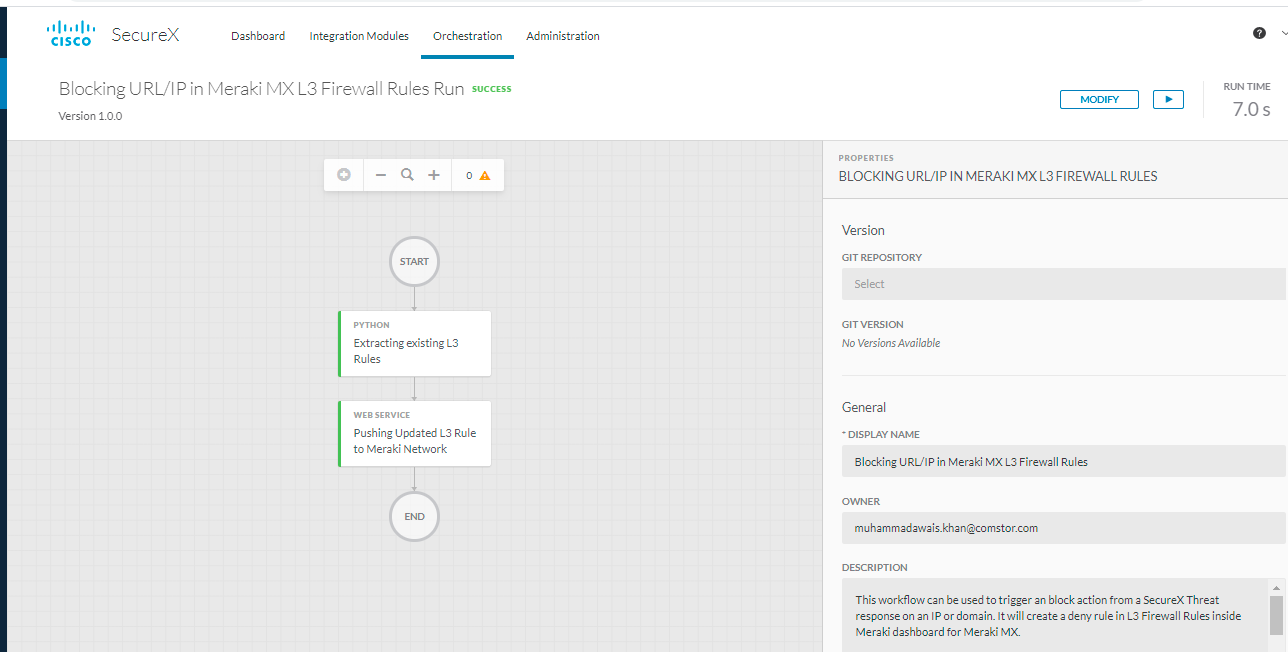
Cisco SecureX Workflows with Meraki MX Firewall
The time required to investigate source of threat & then orchestrate policies in the network to block that threat throughout a large Enterprise Network is critical for organizational security. This code leverages the Meraki API's to orchestrate a deny rule in MX Security policies, which can be trigger directly from Threat Response
{{Configuration Steps}
- Logged into https://securex.cisco.com/ and navigatte to SecureX orchestration
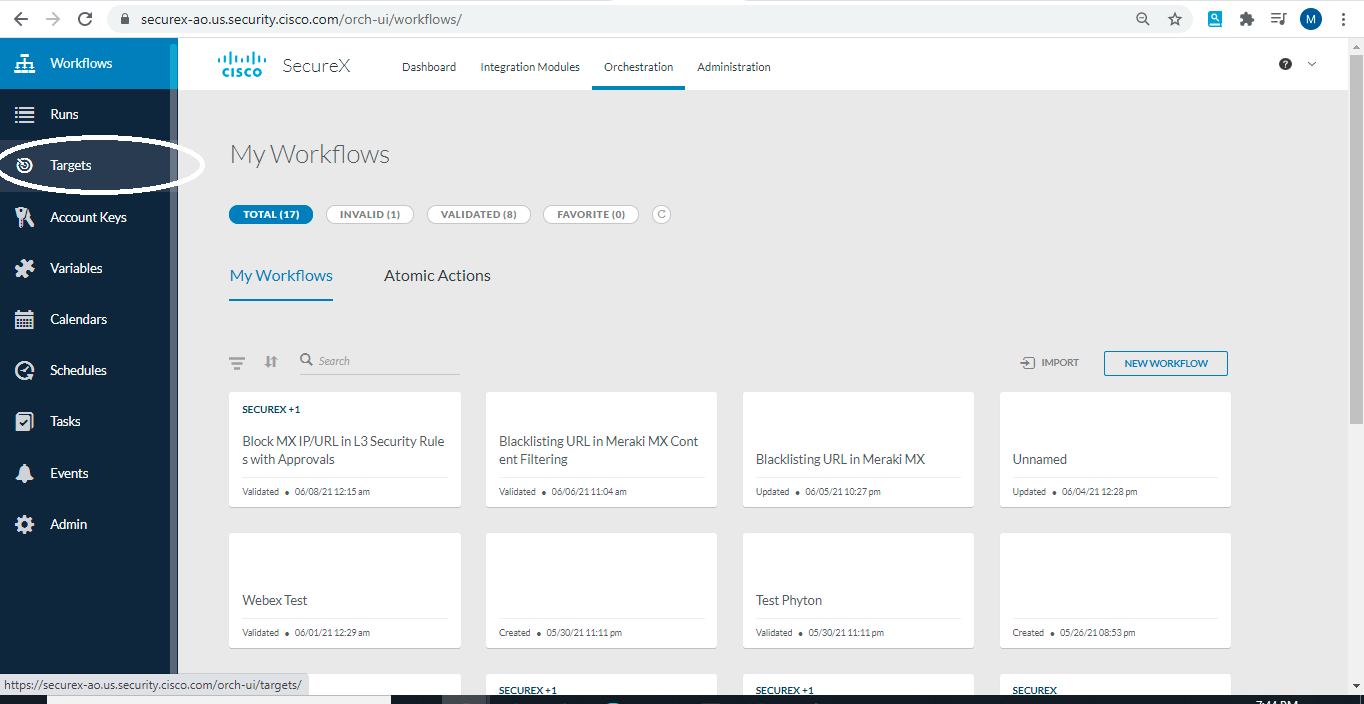
- Define targets by navigating to Targets on the left hand side as show below:
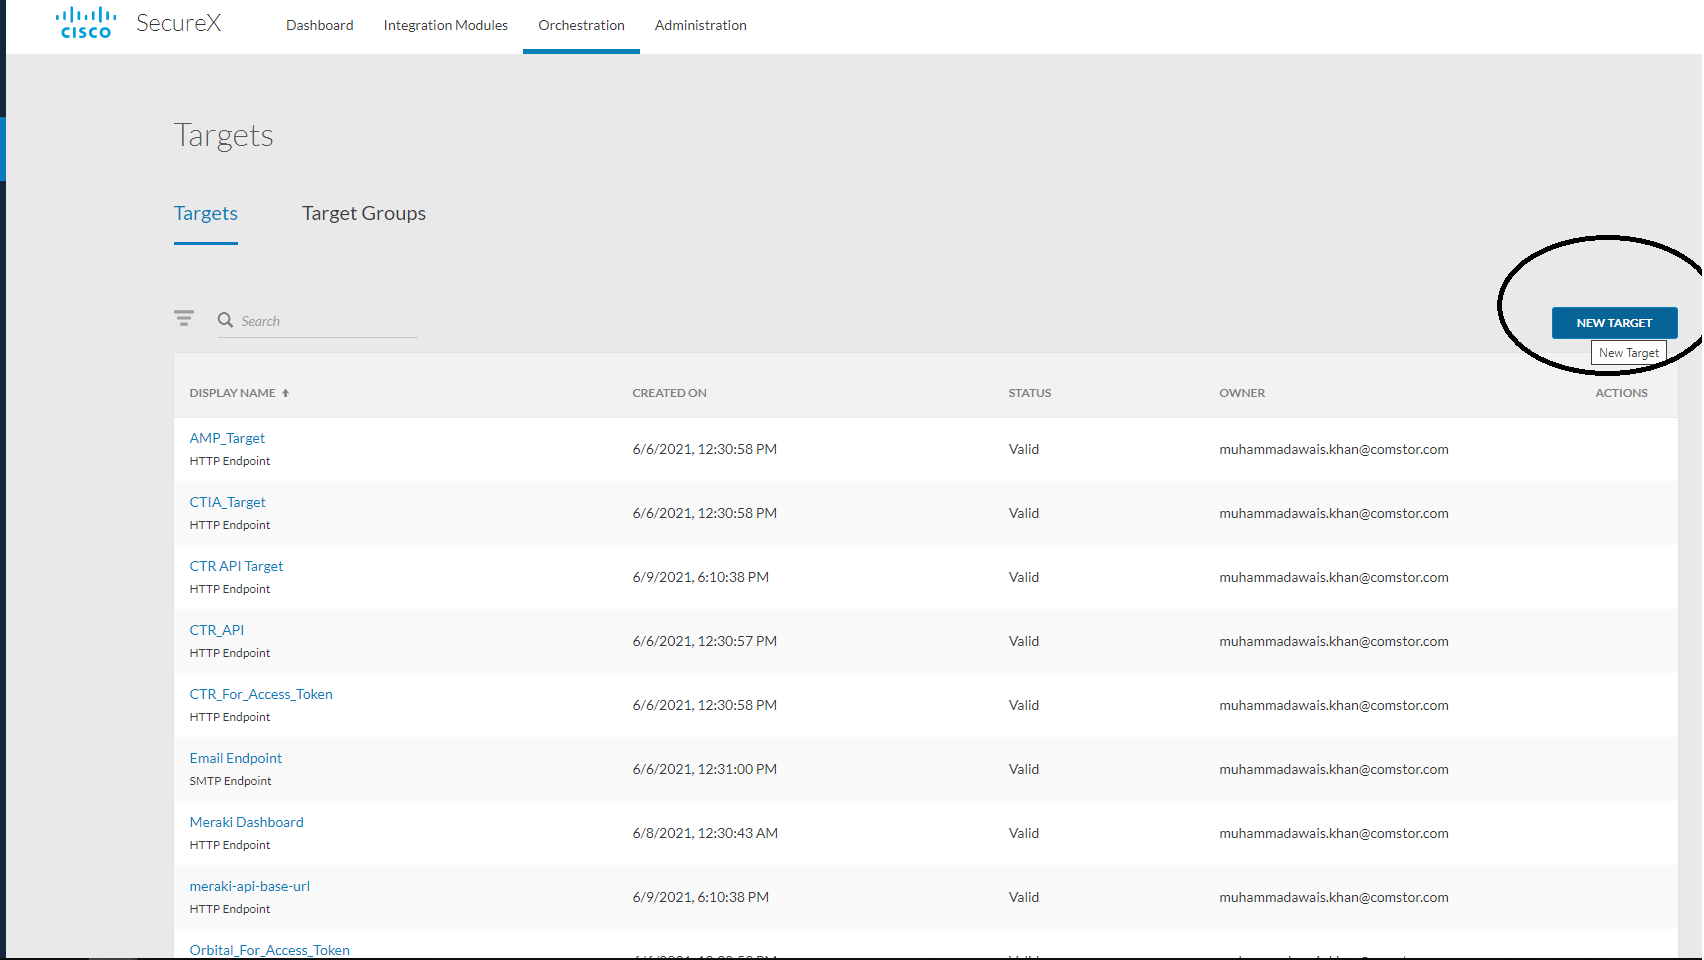
- Add new target with below settings:
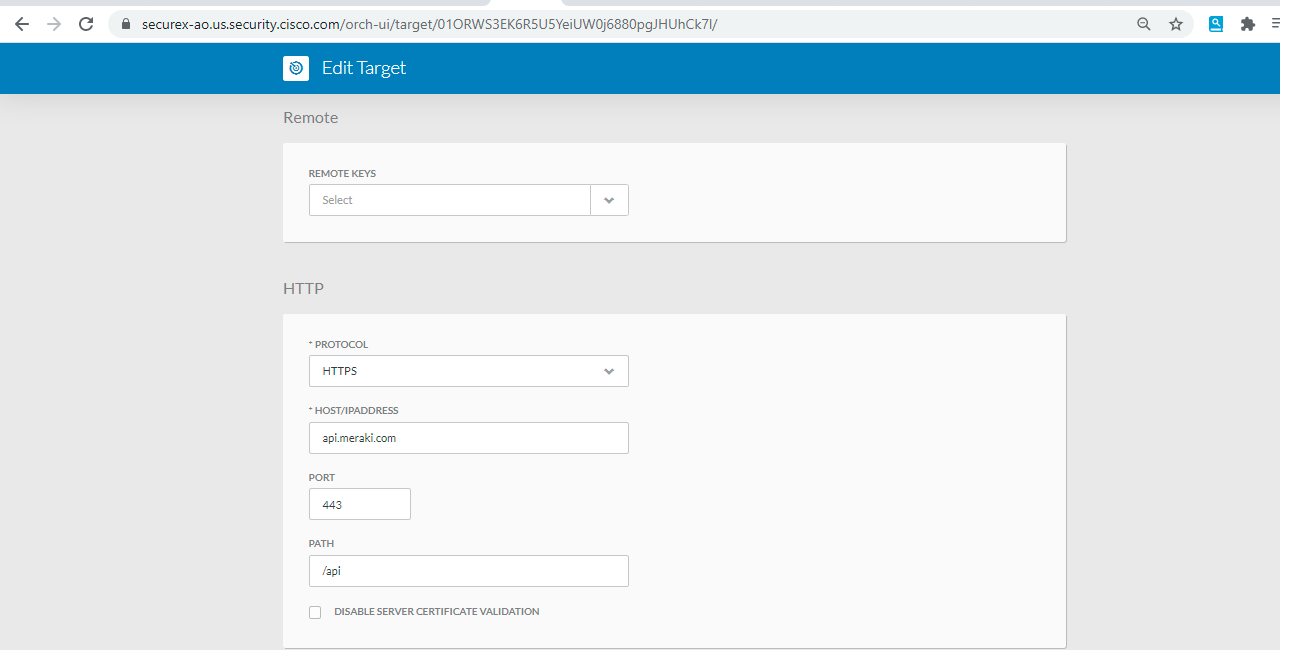
- Display name: Meraki
- Account Keys: No Account Keys - True
- HTTP- Protocol: HTTPS, Host/IP Address: api.meraki.com, port 443, PATH:/api
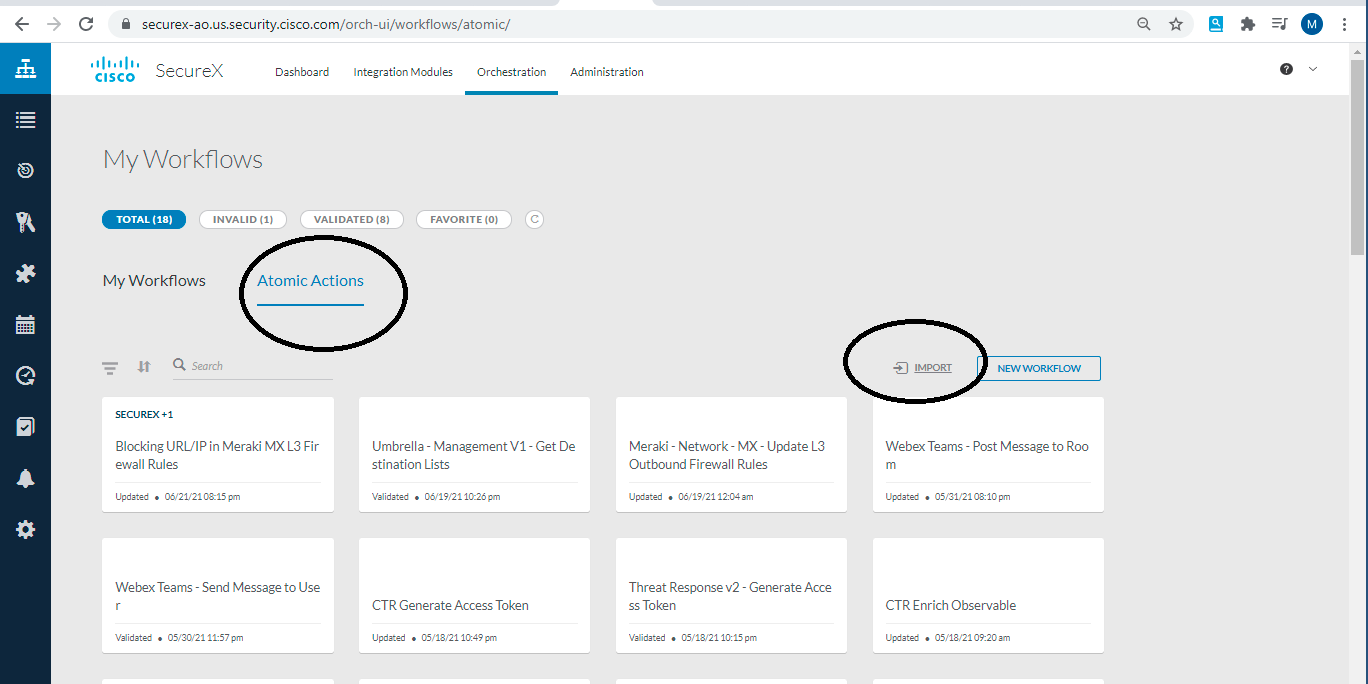
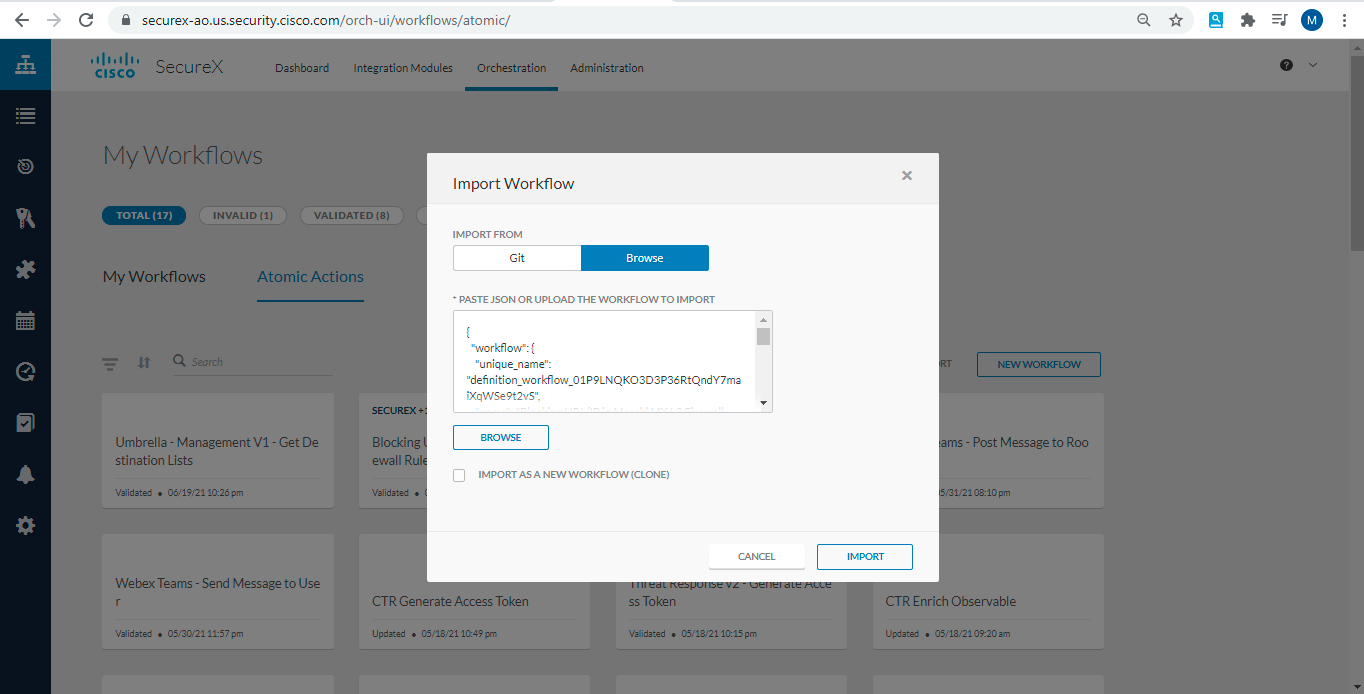
- Now goto "workflows", choose "atomic" and select import as shown below:
- Click on import and then paste the code which you have just copied
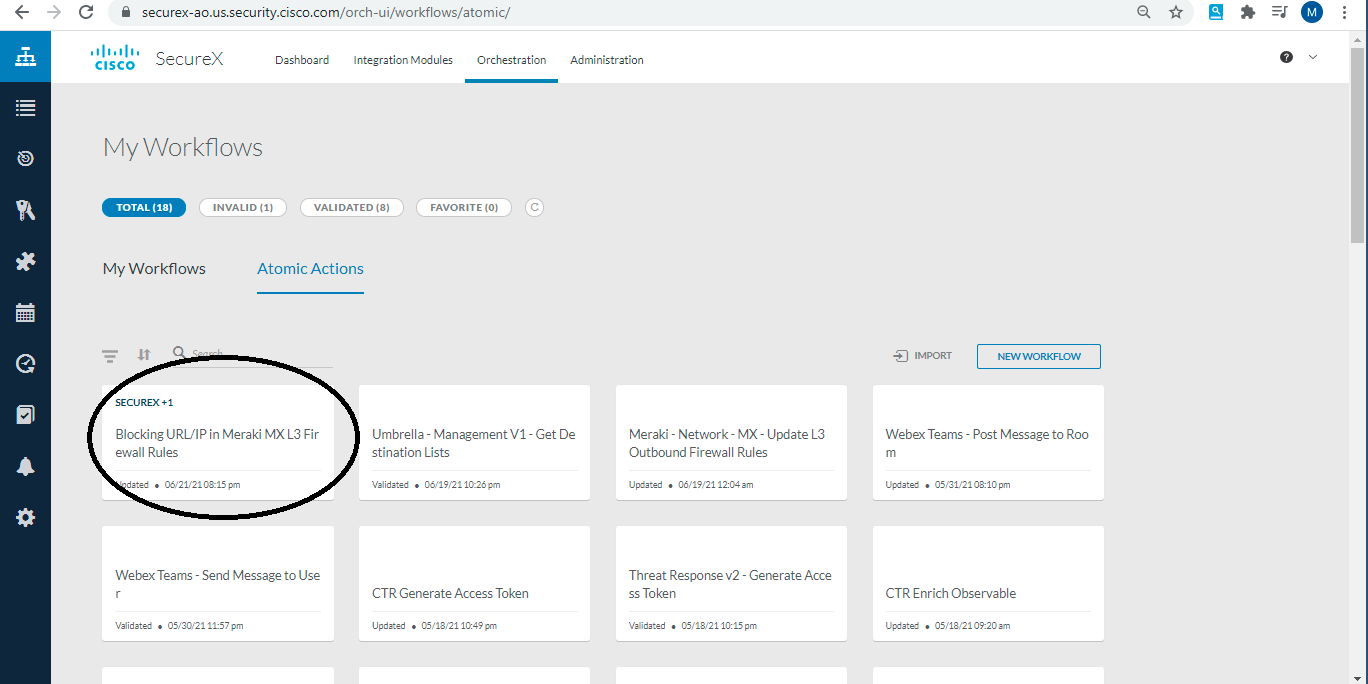
- Now Atomic Action has been imported, open the newly imported Atomic Action
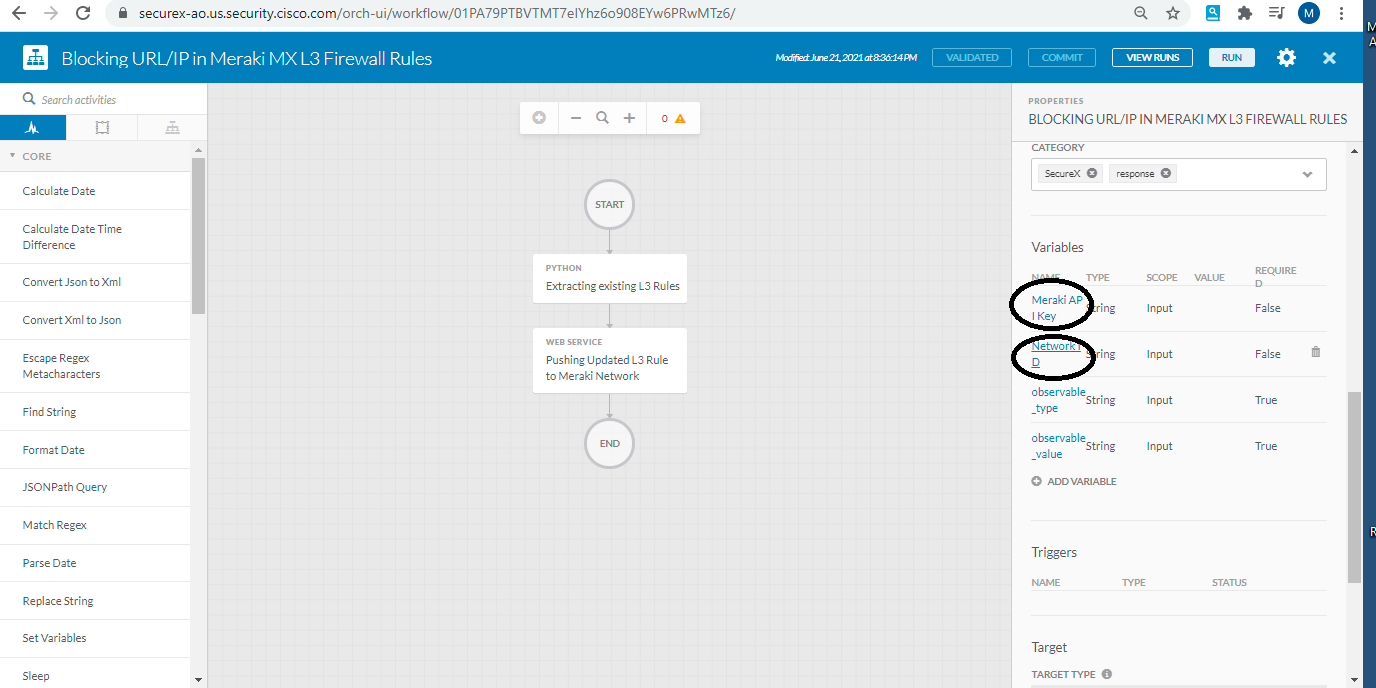
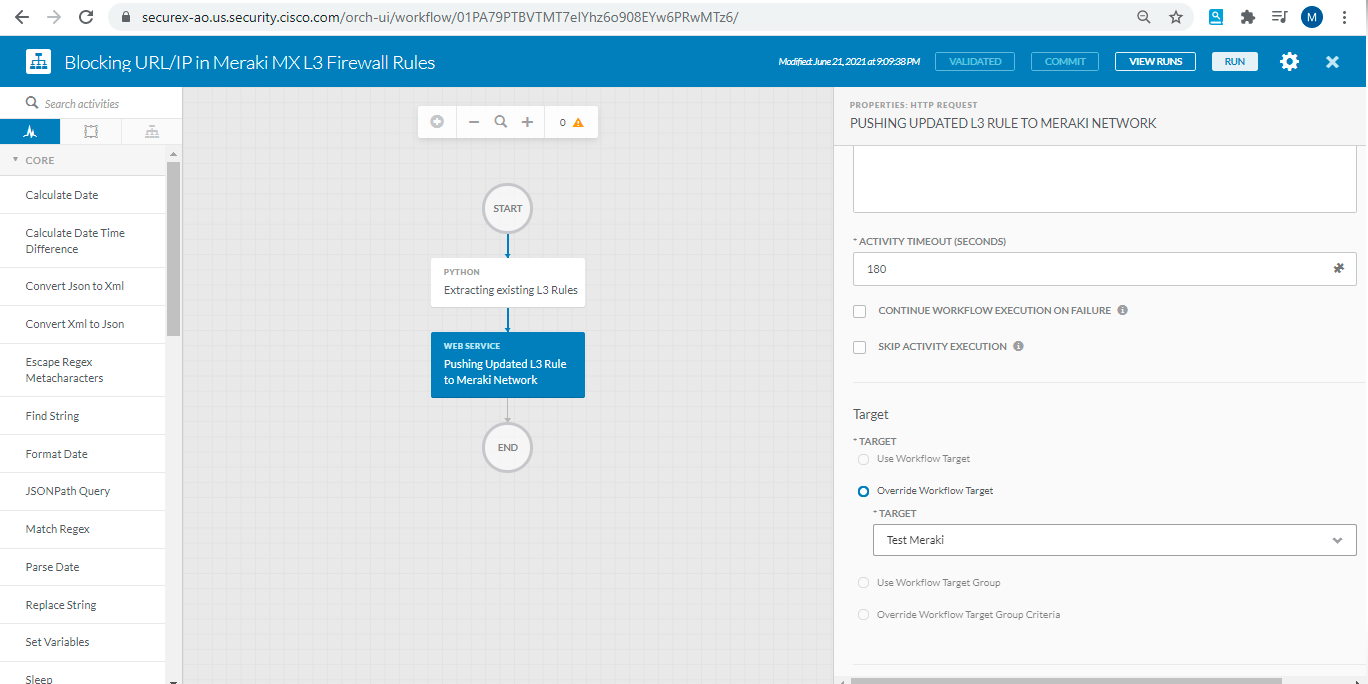
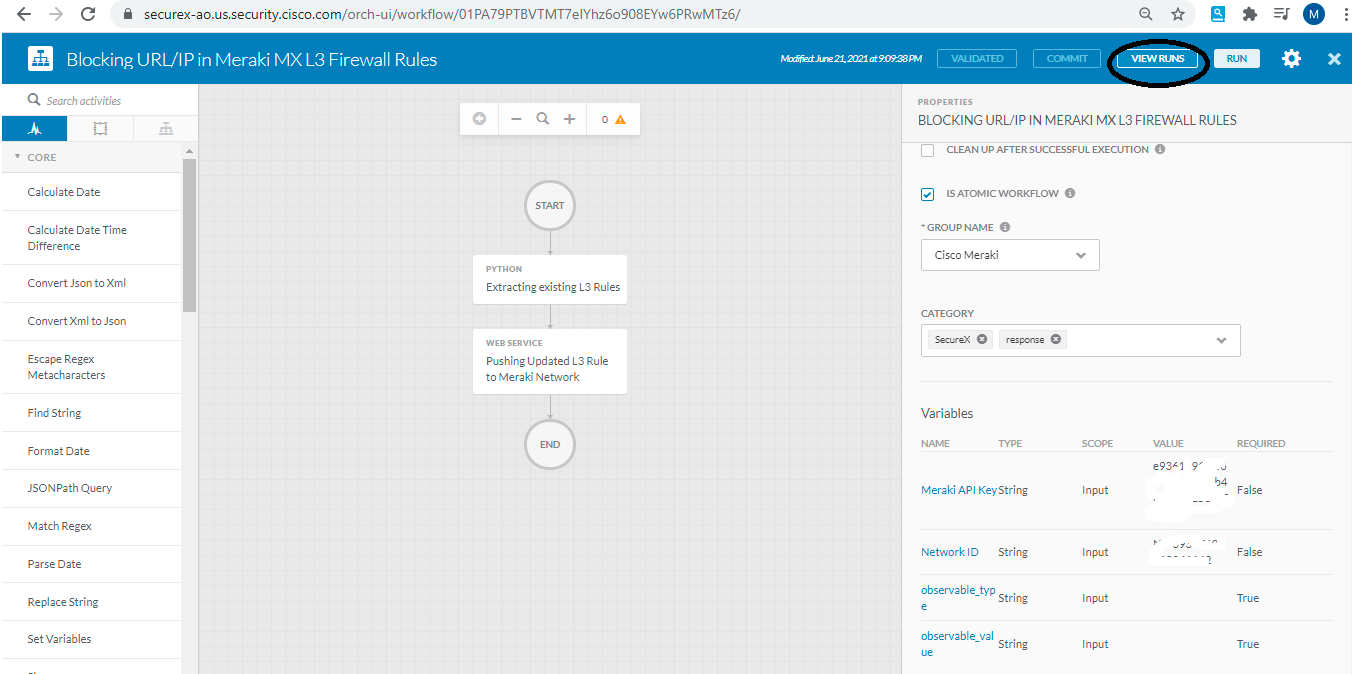
- Now you have to update the two variables " Meraki API Key" & " Network ID". Network ID will be the ID of your Meraki Network. Also you need to update the Target which you have created earlier
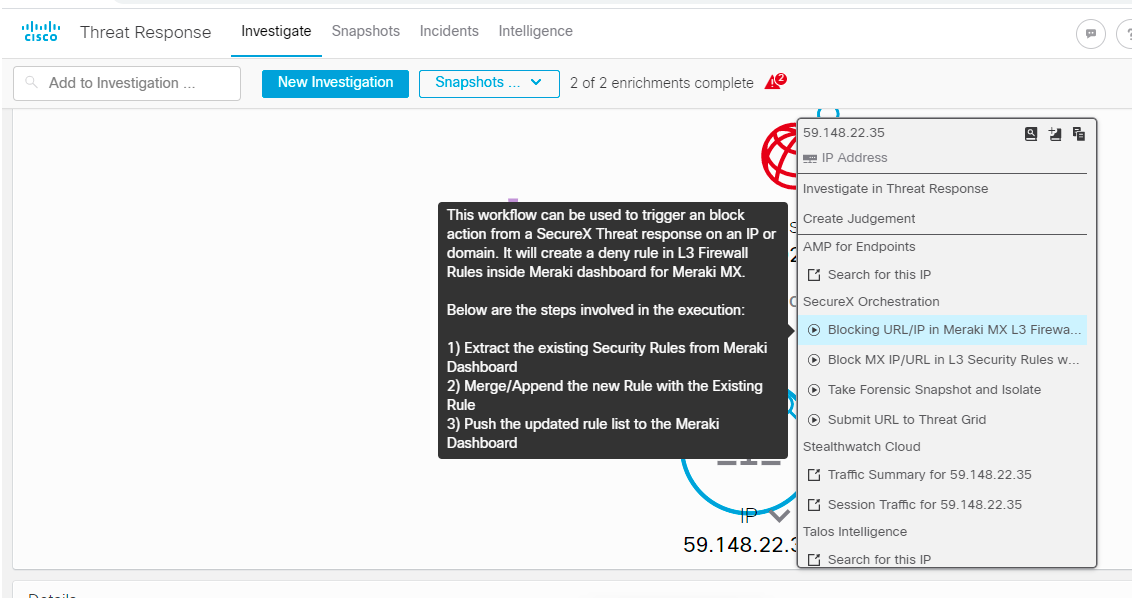
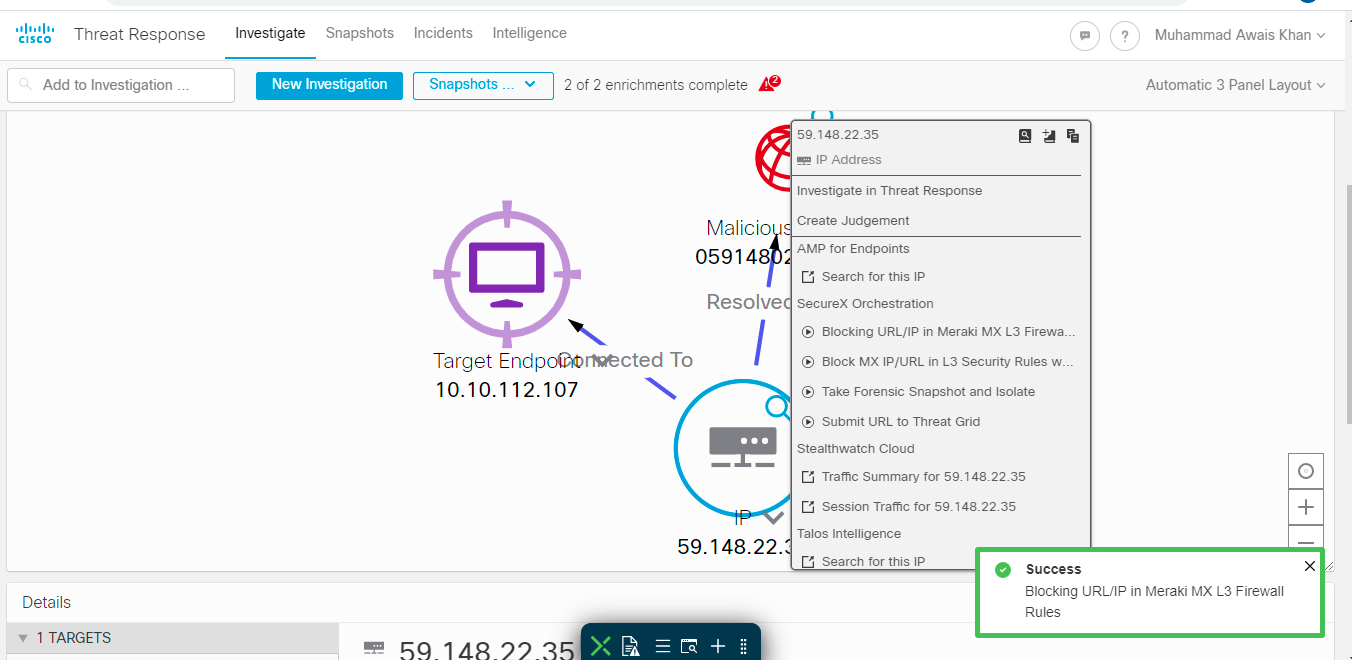
- At this stage, you are ready to Run this workflow directly from same window or you can execute this from SecureX Threat Response. Open the threat response page, start any investigation and then from the observable graph, you can righ click on any observable ( IP or Domain ) and select the workflow which you have just imported "Blocking URL/IP in Meraki MX Firewall
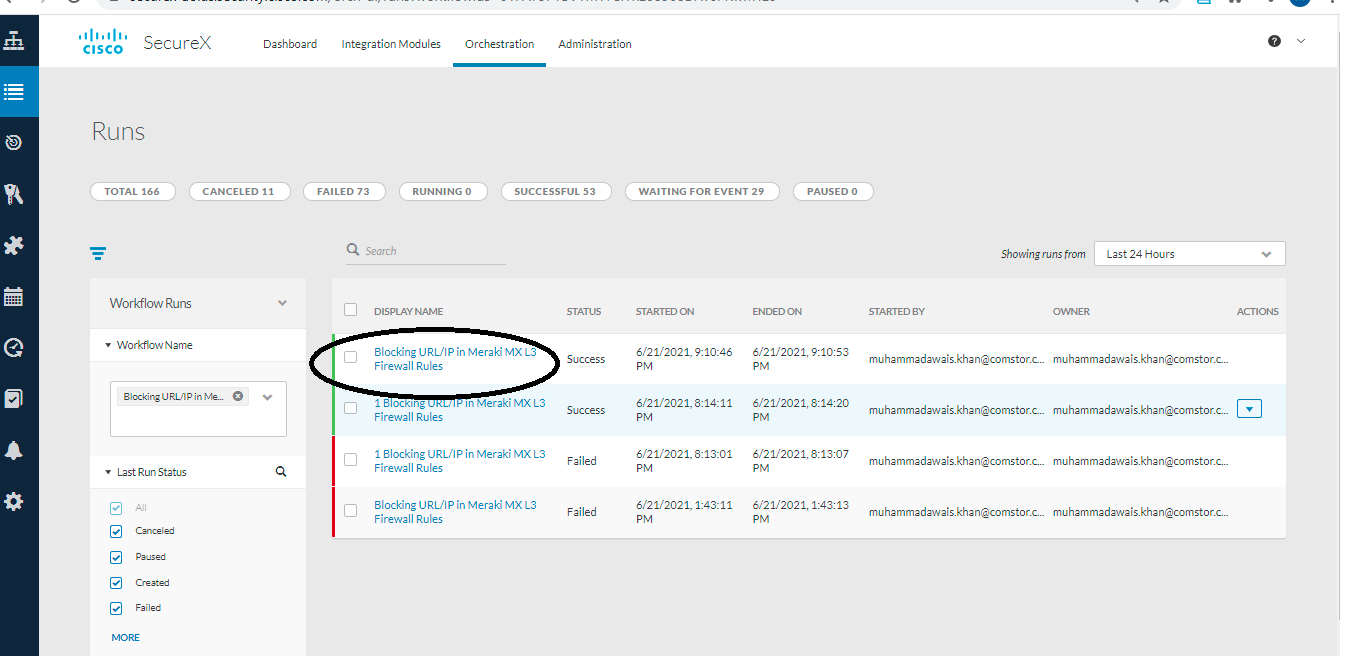
- Now go back to orchestration page where atomic action was already open, you can click on "view Runs" to validate whether your workflow was sucessfully executed
You have now seccessfully orchestrate a Layer 3 deny rule while doing threat hunting from SexureX Threat Response
