PUBG plane tracking bot for Discord
- Go to this page on Discord's site.
- Select the server that you want Plane Pal to be added into.
- Hit the "Authorize" button.
- Start plotting!
|<erangel|miramar> <Plane's Heading> <X Grid Marker><Y Grid Marker>[Grid Subsection]
Plane Pal get activated with the pipe: | character by default, and it can plot out the plane's path with either the erangel or e keywords if you want to plot the path on the original PUBG map, Erangel. Alternatively, you can plot the map on the newer desert map, Miramar with the miramar or m keywords.
To get the bot to plot the plane's trajectory, it needs two pieces of information:
- The plane's current heading
- The plane's current position (its grid markers)
The plane's heading just comes from looking forward while the plane is flying, and seeing what the compass at the top of the screen says.
The grid marker comes from the letters representing the plane's X and Y location on the map. For example, in Erangel, grid marker BK has the Georgopol bridge running through the middle of it, and marker EO has most of the military base inside it. Just make sure that the X marker comes before the Y marker when invoking Plane Pal.
You can also more accurately position the plane with the optional Grid Subsection argument, which just comes from further subdividing the plane's current grid into nine equal squares, each with an imaginary number that corresponds to the squares location. The numbers are oriented in the same way as a keyboard in that square one is at the bottom left corner, and square nine is at the top right corner. If you omit this, the bot will just assume that the plane travelled through the middle of the grid.
See the examples section below.
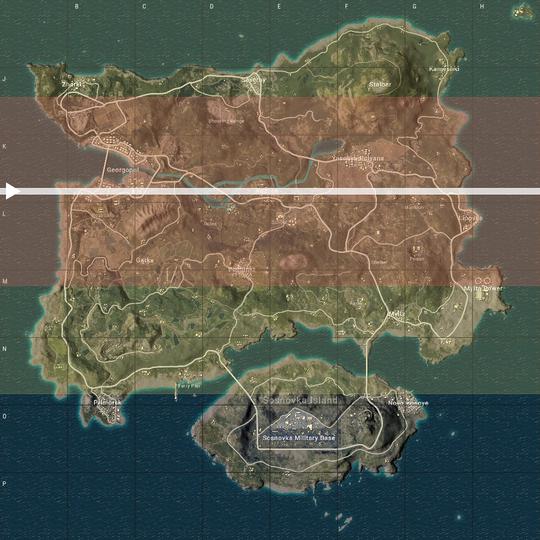
|erangel 90 ak1
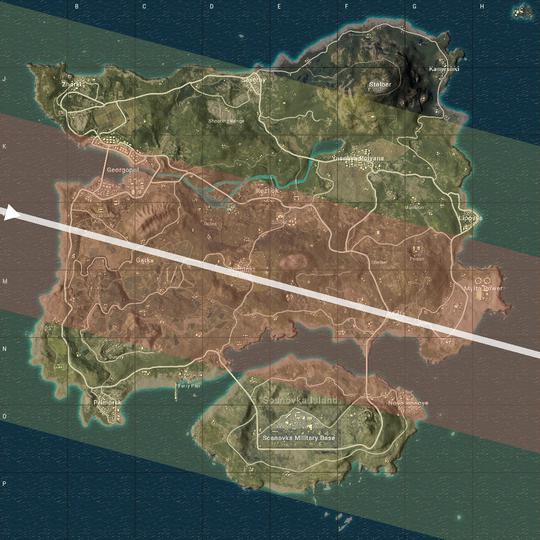
|e 105 al7
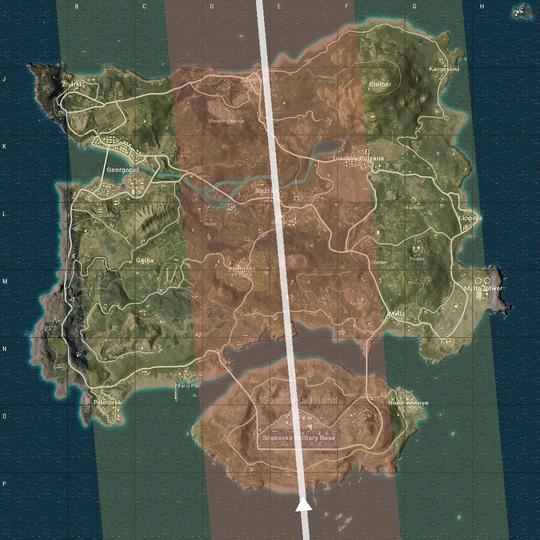
|erangel 355 ep
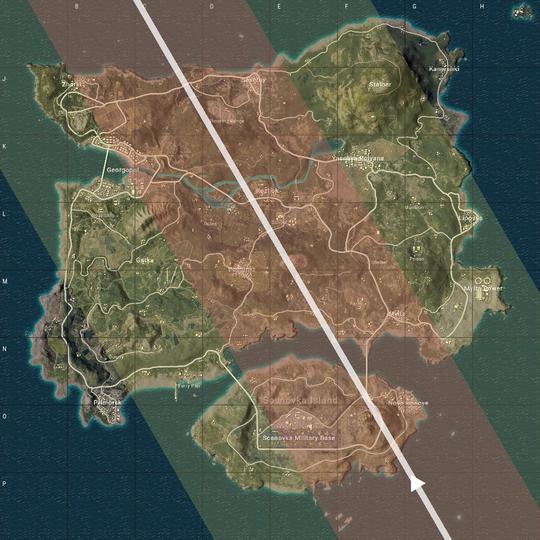
|e 330 gp7
|e 275 hn
|miramar 115 al
|m 175 ei1
|miramar 280 ho
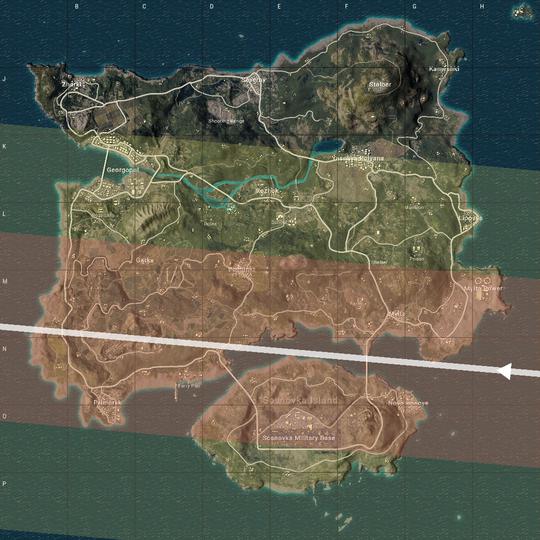
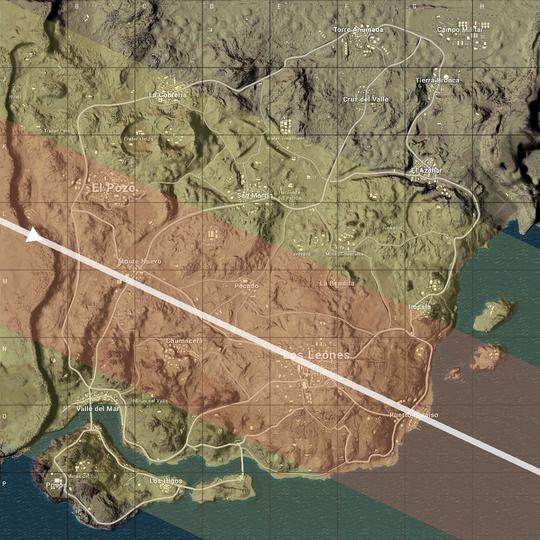
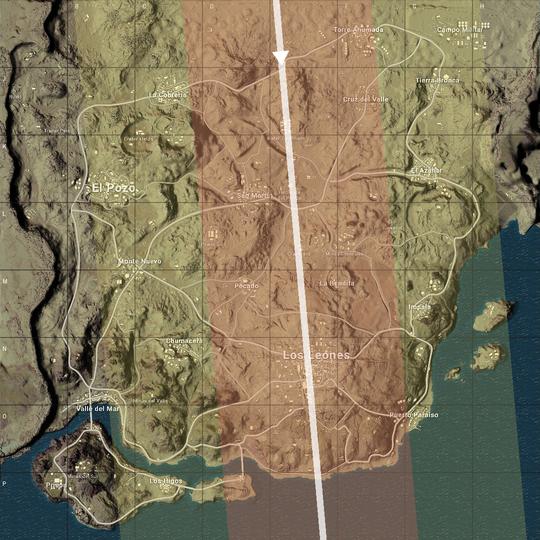
The colors seen on the maps represent common distances you can travel from the plane's path. Data was pulled from this post by Sarillexis. (I'd also recommend looking at this video by WackyJacky101 for a good parachuting overview.)
- The white line shows the plane's path over the game's map.
- The orange-ish area shows the distance that a player can travel by gliding as far as possible from the plane before they're forced to pull their parachute.
- The yellow-ish area shows the distance that a player can travel by opening their parachute immediately and maintaining a 30 km/h vertical speed.
If you want to customize the bot to suit your needs, you may want to install and run it locally. If you're on Linux, then you can probably figure out how to do this on your own. To do that:
- Make sure you've got Python 3.5 or greater, and virtualenv installed (
pip install virtualenv) cdinto the directory that you'd like the project to gogit clone https://github.com/naschorr/plane-palvirtualenv plane-pal/cd plane-pal- Activate your newly created virtualenv with:
./Scripts/activate - Install the required modules with:
pip install -r requirements.txt - Create a Discord app, flag it as a bot, and put the bot token inside
plane-pal/token.json - Register the Bot with your server. Go to:
https://discordapp.com/oauth2/authorize?client_id=CLIENT_ID&scope=bot&permissions=0, but make sure to replace CLIENT_ID with your bot's client id. - Select your server, and hit "Authorize"
- Check out
config.jsonfor any configuration you might want to do. It's set up to work well out of the box, but you may want to change the colors, distances, or the pathing.
Tested and running on Windows 10, and Ubuntu 16.04. Currently hosted on my freebie EC2 instance, so I've got no idea what kind of demand that thing can handle.
If you run into issues during PyNaCl's installation on Linux when installing the requirements, you may need to run: apt install build-essential libffi-dev python3.5-dev to install some supplemental features for the setup process.
