Smartgit guidelines for Committers
This guidance aims to explain how SmartGit manages branches so any committer is capable of switching between them, creating local branches and pushing contributions into the corresponding github repository.
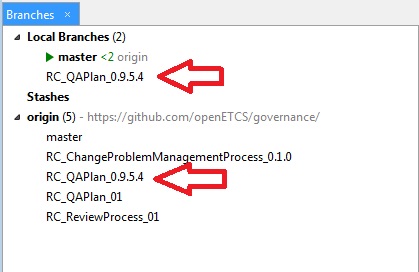
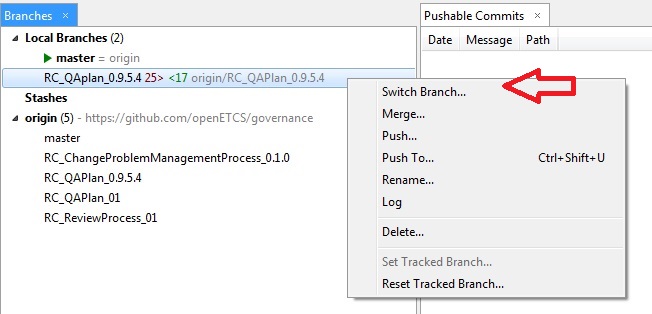
Whenever it is necessary to work with a branch different from the default one (the master branch), a local branch shall be created and linked to the branch available remotely. As you see in the next image you have in the ‘Branches’ tab two sections:
- Local branches: list of the branches created and managed locally by the user. By default the master branch is created and linked to the master branch available remotely in github.
- Origin: all the branches available remotely in github.
At the moment of the creation of this guidance there were the following remote branches available in the origin (github). Additional information about the last commit is provided by putting the pointer over any of them:
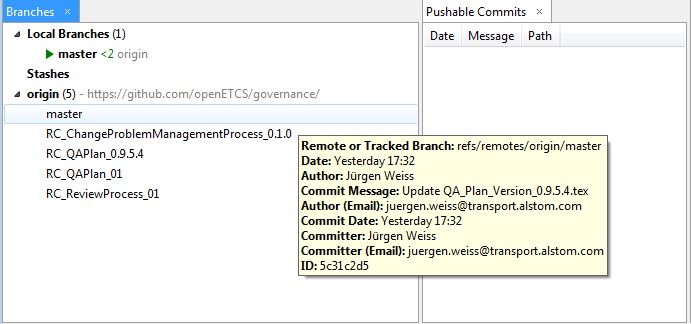
The remote branches cannot be managed using the Smartgit tool, so the user should work with local branches linked to the remote ones. Any change done in the local branches, once it has been confirmed by doing the commit and push operations, is reflected remotely.
In the example given there is only one local branch available: the master branch. It appears by default and it is linked to the master tree in the origin. In this way the user can work with that branch without further configuration.
However, in the openETCS project we shall work in a branch in case we are completing sections or after the launch of a revision process. In this way, the version available in the tree master is stable and maintains coherence and integrity while the authors of the document or committers are working on it using a different branch.
The new branch shall be created remotely (directly on github) by the Product Owner and then the committers should create a local branch an link it to this branch available in the origin before pushing contributions. Otherwise the changes shall be included in the master branch and it is not the behavior desired.
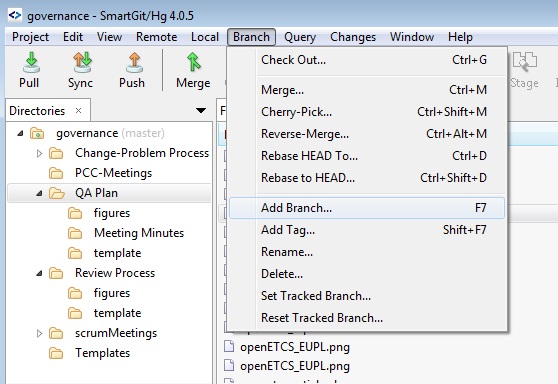
Follow these steps to create a new branch and link it to the remote branch:
1.Click on Branch –> Add Branch.
2.Enter a new branch name. It is highly recommended to use the same name the remote branch has in order to avoid confusion.
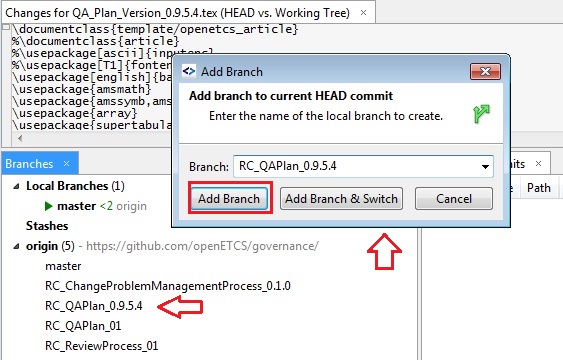
3.Click the button Add branch.
4.You have now two branches called ‘RC_QAPlan_0.9.5.4’; the remote github branch and one called with the same name at your PC.
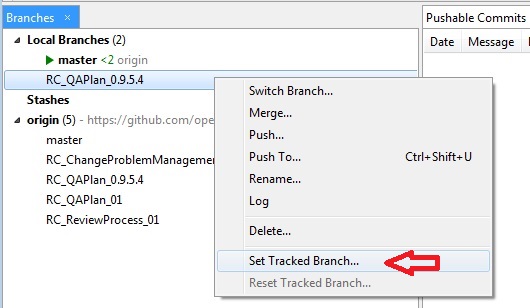
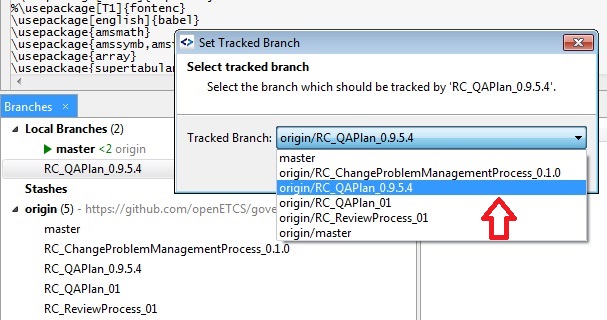
5.However the branches are not linked yet. You need to inform Smartgit to what remote branch you want to link the new local branch. To do this, selected the branch you have just created locally and in the contextual menu select Set tracked branch. A new dialog appears and there you should select the remote branch you want be linked to.
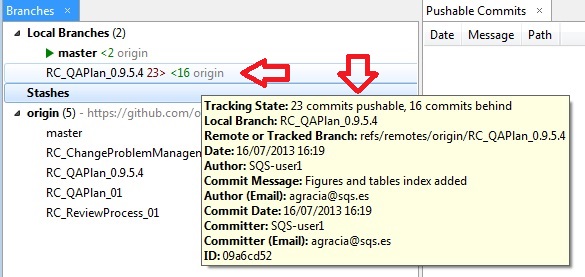
6.From this moment on, you can see that the local branch ‘RC_QAPlan_0.9.5.4’ is linked to the remote one thanks to the label ‘origin’ that has just appeared. Sometimes you see some numbers on red or/and green:
a. The green numbers indicate there are some changes available in that branch that have been not download in the local repository you have. If you click on the ‘Pull’ button the local repository is updated for the selected branch and the green numbers disappear.
b. The red numbers: you have pushable commits in that local branch that have been not included in the remote repository. You can perform a synchronization or a push and then the numbers disappear.
In the image the master branch has been updated and the green numbers have disappeared.
7.Now the ‘RC_QAplan_0.9.5.4’ branch is ready to use. As you are by default in the master branch you shall switch the branch to put this local branch as the working branch. To do this, select in the context menu of the new branch the Switch branch option and confirm the operation.

Be aware of whenever you perform a Branch switch, the corresponding local repository be automatically updated; so the versions of the documents you have when the selected branch is the ‘master branch’ may differ from the versions you see when you are in another branch.
Be sure you have switched to the desired working branch before adding contributions to a file/document or the update shall be done incorrectly.
It is highly recommended to maintain a copy of your working documents in another local directory, so the switching operation does not interfere in your daily work and no conflicts appear when commiting due to you have an older version of the document.
Once you have all the changes and contributions you want to include in a document in a copy of that document in a separated directory, then do the following to upload then to the github repository.
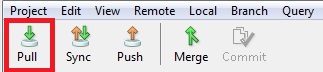
1.Press the Pull button and assess whether there is an update of the document or not.
a. No updates: copy directly the document you have been working on into the appropriate repository you have cloned locally.
b. Updates made after the last pull: this happens when someone has included several changes after you have taken the document to start working with; open the document you have just updated in the cloned repository and copy your contributions there, section by section, from the document you have been working on. Doing this you avoid conflicts, overwriting sections modified by other committers and update refusals because you have been working an older version than the one available in the remote repository.
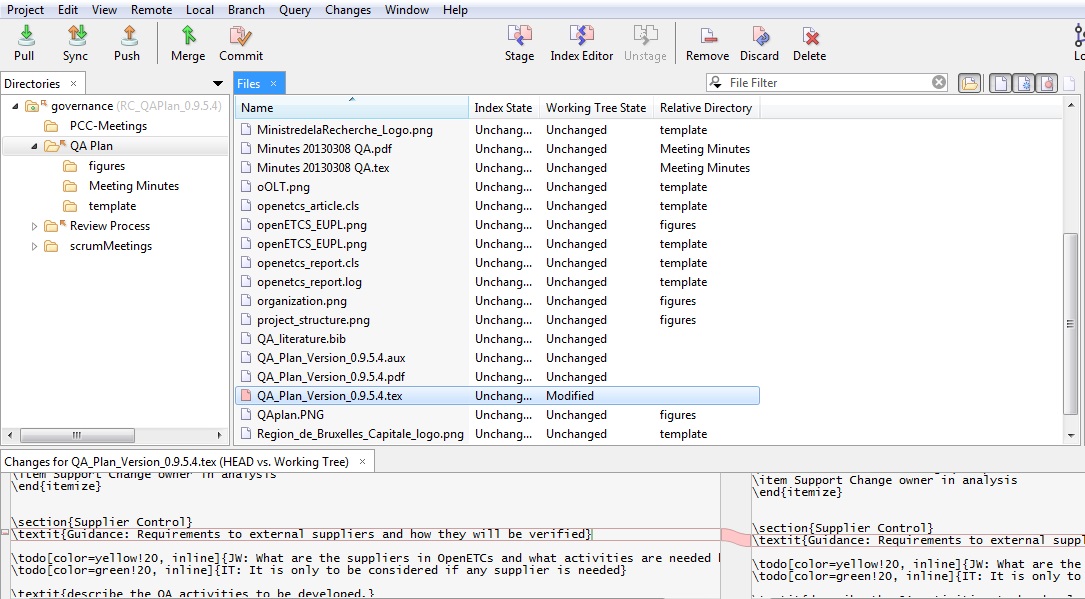
When you perform a change, the document is highlighted in red in the Smartgit tool, so you know it has been modified. Something similar happens when you create a new file/document, being that document marked in blue, or delete an item, appearing a mark of discontinuity.
When there add a modification, in the ‘Changes’ tab you can see the previous version on the left and the modified version on the right with the differences highlighted (this file comparison only works when you are working with a .tex file or code file, not a pdf for example).
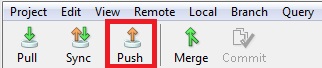
2.Press the Commit button and give a brief description about the contributions you have made.
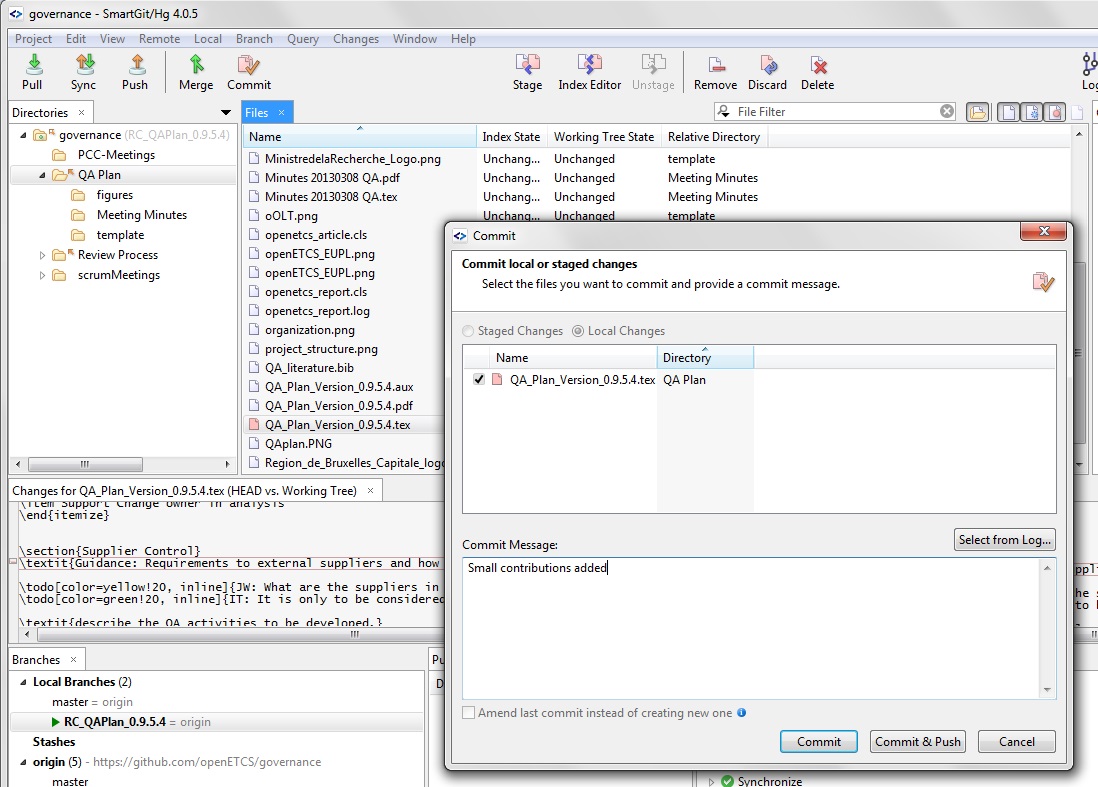
3.Press the Push button. As you have the RC_QAPlan_0.9.5.4 branch selected, the changes made shall be included in that remote branch in github.