- EditorConfig helps maintain consistent coding styles for multiple developers working on the same project across various editors and IDEs.
- The EditorConfig project consists of a file format for defining coding styles and a collection of text editor plugins that enable editors to read the file format and adhere to the defined styles. EditorConfig files are easily readable and work nicely with version control systems.
- You can add an EditorConfig file to your project or codebase to enforce consistent coding styles for everyone that works in the codebase.
- EditorConfig settings take precedence over global Visual Studio text editor settings. You can tailor each codebase to use text editor settings specific to that project.
- You can still set your own personal editor preferences in the Visual Studio Options dialog box. Those settings apply whenever you are working in a codebase without an .editorconfig file, or when the .editorconfig file doesn't override a particular setting. An example of such a preference is indent style—tabs or spaces.
- To read more about editor config :
- EditorConfig
- **EditorConfig (Github Repo)**
- **Code style preferences (Microsoft)
- **Code-style rule options (Microsoft)
- Microsfoft Unity Analyser List
- Sometimes you will have files that you wish to include within a solution but that don't belong to any single project. These are usually non-code items, such as documentation or notes.
- However, they can be source code files or resources that you wish to share between multiple assemblies without having the "master copy" held within a particular project. This type of file can be added to your solution as a solution item.
- Solution items can be any type of file. They are linked to the solution, rather than a project.
- The files can be stored anywhere but it is commonplace to place them within the solution's folder structure, making it easier to add them to repositories of revision control systems.
- DO NOT CHANGE THE NAME OF THIS FOLDER
- More on Solution Items : http://www.blackwasp.co.uk/VSSolutionItems.aspx#:~:text=Solution items can be any,repositories of revision control systems
Unity has a set of custom C# warnings, called analyzers, that check for common issues with your source code. These analyzers ship out of the box with Visual Studio.Due to how Unity handles its .csproj files, it does not seem possible to install packages automatically.
-
You will need to download the analyzers from the NuGet website manually : https://www.nuget.org/api/v2/package/Microsoft.Unity.Analyzers/1.14.0
-
Create a “NuGet” folder in the root of your unity project where the solution file is present.
-
When you're done, open the package file using a tool such as 7zip and extract
Microsoft.Unity.Analyzers.dlland place it inside the NuGet folder you just created.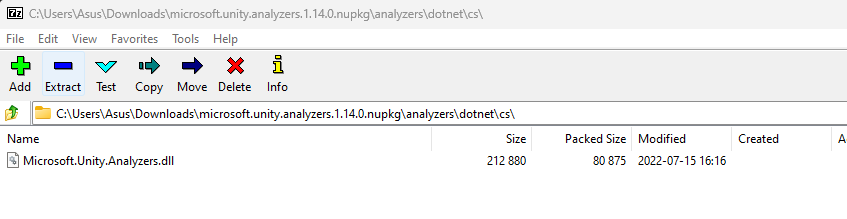
-
Do not place it inside
AssetsorPackages, as that will cause Unity to try to process the.dll, which will make it output an error in the console.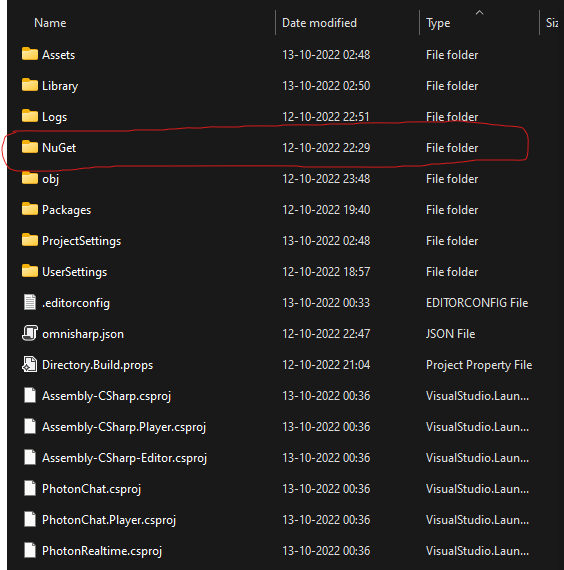
-
Next, create a json file with a name
omnisharp.json(case sensitive) file at the root folder of your project.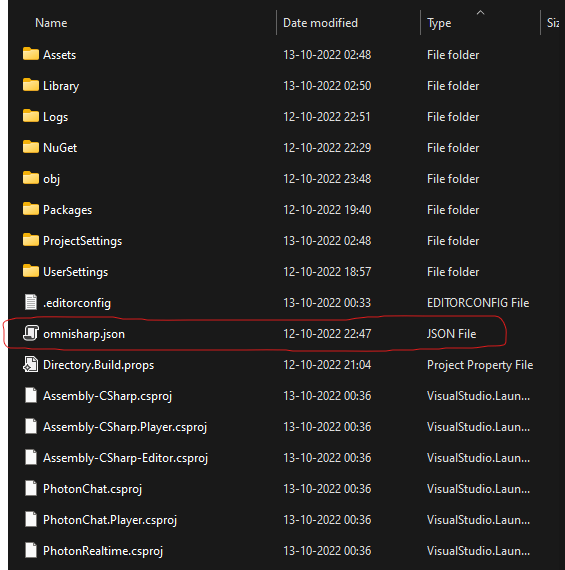
-
Analyzer support in OmniSharp is experimental at the moment, so we need to enable it explicitly. We also need to point it to the
.dllfile we just extracted. -
Add this code to this newly created
omnisharp.jsonand save it.{ "RoslynExtensionsOptions": { "EnableAnalyzersSupport": true, "LocationPaths": ["./NuGet/microsoft.unity.analyzers.1.14.0"] } }
-
Keep in mind the current version of
microsoft.unity.analyzersat the making of this document is 1.14.0, if you download any other version, you’ll have to specify that version in theomnisharp.json -
LocationPaths
"./NuGet/microsoft.unity.analyzers.1.14.0"is a relative path pointing to the folder containing the.dllfile in the root project. For consistency, we will be creating a folder names “NuGet” (case sensitive) when we were setting up the analyzer, as mentioned in Step 1.
Note that while it is possible to activate these analyzers, the suppressors they ship with the package (that turn off other C# warnings that may conflict with these custom ones) may not be picked up by OmniSharp at the moment, according to this thread. You can still turn off specific rules manually by creating a .editorconfig file.
Work flow for .editorconfig file with Unity :
-
Once all the above steps are done, open the unity project from Unity hub.
-
Create and compile a new C# script. This will create a new
Assembly-CSharpandAssembly-CSharp.Playerproject and it will reflect in the Solution Explorer sidebar.
-
Solution Explorer can be accessed from View > Solution Explorer

-
Once the
Assembly-CSharpandAssembly-CSharp.Playerprojects are created, right click on the Solution (top most row on the Solution Explorer Sidebar), hover mouse over “Add” and click on “New EditorConfig”.
-
If every thing goes right, you should see a new folder now automatically created called “solution item” with a
.editorconfigfile also generated.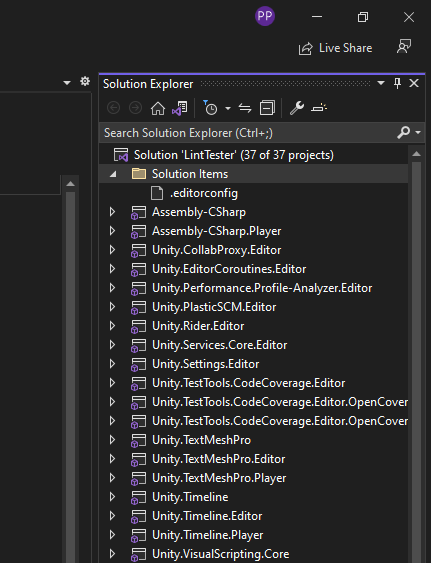
-
If you try to open this
.editorconfigfile , this is what it’ll look like. (It might take some time to load)
💡 **IMPORTANT :** If you try to open the editor file, it’ll look like this very friendly UI. But it has a **serious bug** right now. You’d think the UI would be updating as per you make changes to the file, but no. The UI is extraordinarily buggy and not getting fixed any time soon.
These links will give you a better idea : dotnet/roslyn#54556 dotnet/roslyn#58609
!! PLEASE DO NOT MAKE ANY CHANGES TO THE CONFIG FILE !!
-
As soon as you can see the
.editorconfigfile, save the project and close Visual Studio as well as the Unity Project. -
You’ll now see that a new file has been created in the root of the project directory with mostly 0KB size.

-
Replace that
.editorconfigfile with the one provided from **github.** -
Now if you open the Unity project again, go to Assets Tab > Open C# Project
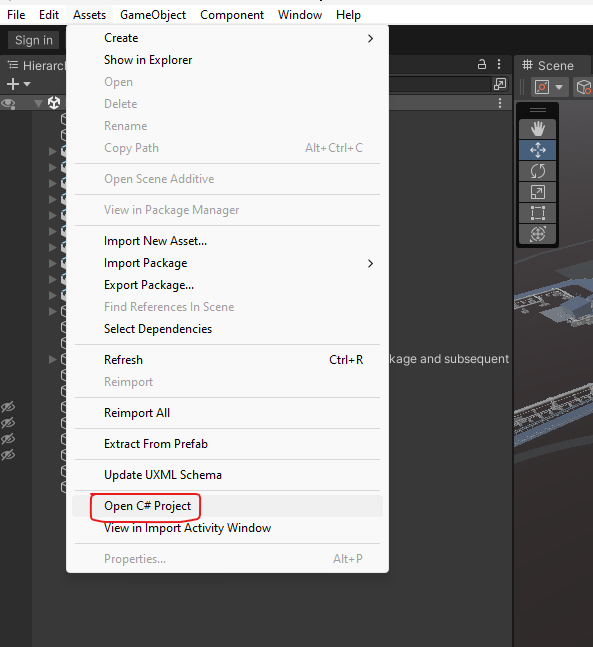
-
Visual Studio will start compiling all the scripts again. The bottom left of the IDE would be doing background tasks now that you could see.
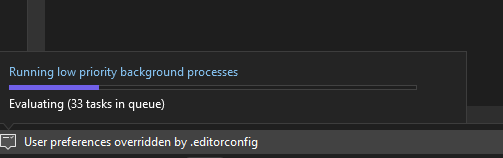
-
Wait for all the tasks to get completed. Once its done, it should say ready at the bottom left.
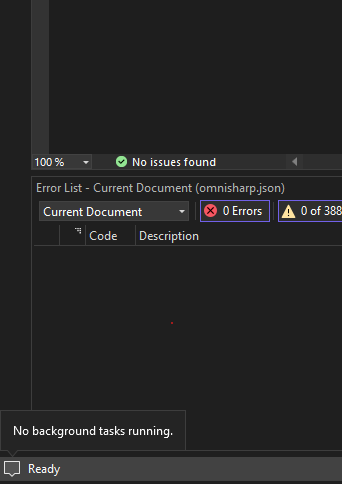
-
As a fail-safe measure, make sure “Follow project coding conventions” is checked in VS Studio. To check, go to Tools > Options > Text Editor > General, check the option and click OK. With this
**User preferences for this file type are overridden by this project's coding conventions.**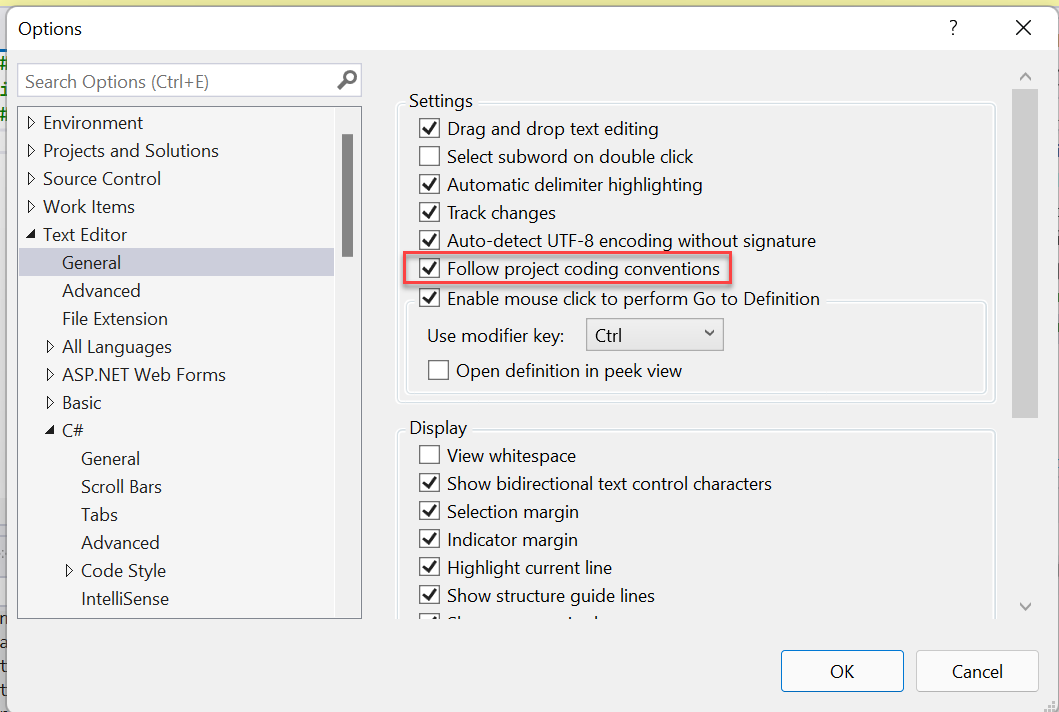
-
If everything goes right, you should now see a lot of warning and squiggly lines in your code. This means the editor config is now working 😄
-
We first need to configure our code clean up profile. There are two profiles in Visual Studio.
-
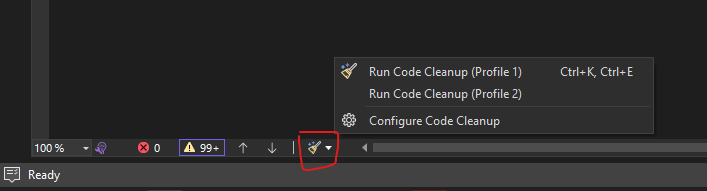
To open this dialog box, click the expander arrow next to the code cleanup broom icon at the bottom and then choose Configure Code Cleanup
-
Alternatively, you can go to Analyse > Configure Code Cleanup

-
Configure which code styles you want to apply (in one of two profiles) in the Configure Code Cleanup dialog box.
-
By Default Profile 1 would be selected with a few rules in Included fixers.
-
Select all the rules from and Available fixers (you can hold shift and select them all) and
click on the up arrow button.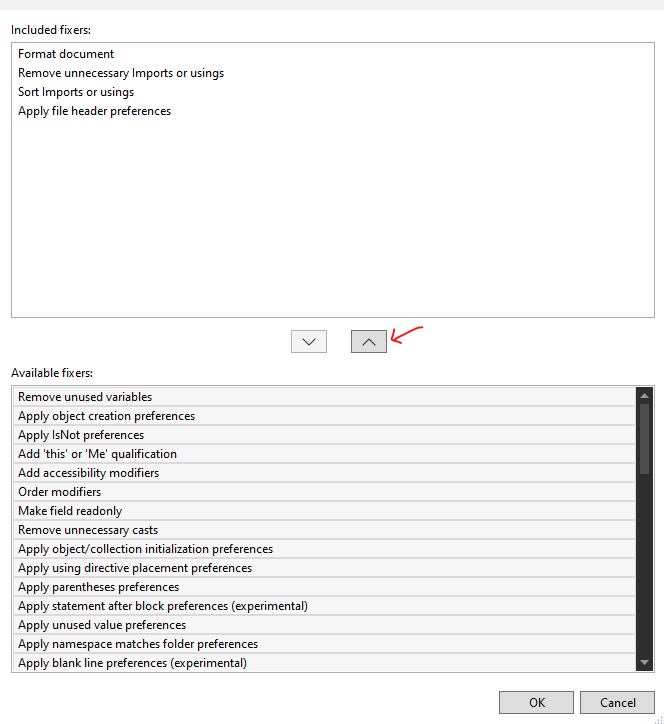
- Click OK and the dialogue box will close.
- You now have a code cleanup profile that is ready to clean any C# file with the new
.editorconfigfile.
-
After you've configured code cleanup, you can either click on the broom icon or press Ctrl+K, Ctrl+E (Keep the Ctrl pressed, notice VS studio waiting for a new key press on the bottom left) to run code cleanup.
-
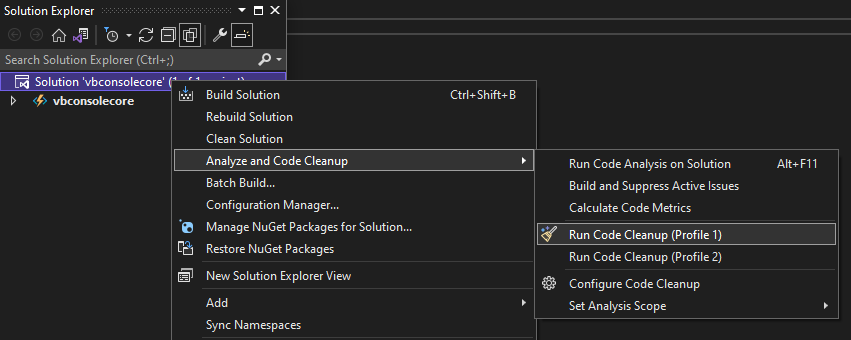
You can also run code cleanup across your entire project or solution. Right-click on the project or solution name in Solution Explorer, select Analyze and Code Cleanup, and then select Run Code Cleanup.
-
It might take some time to apply all the chages as there is a possibility of vs studio not fixing the code automatically sometimes, if this happens please fix the code manually.