-
Notifications
You must be signed in to change notification settings - Fork 80
Installation
The Puma Scan Community Edition is a free, open source security scanner for .NET C# code. Please report all issues using the GitHub project and the Puma Scan team will respond as time allows.
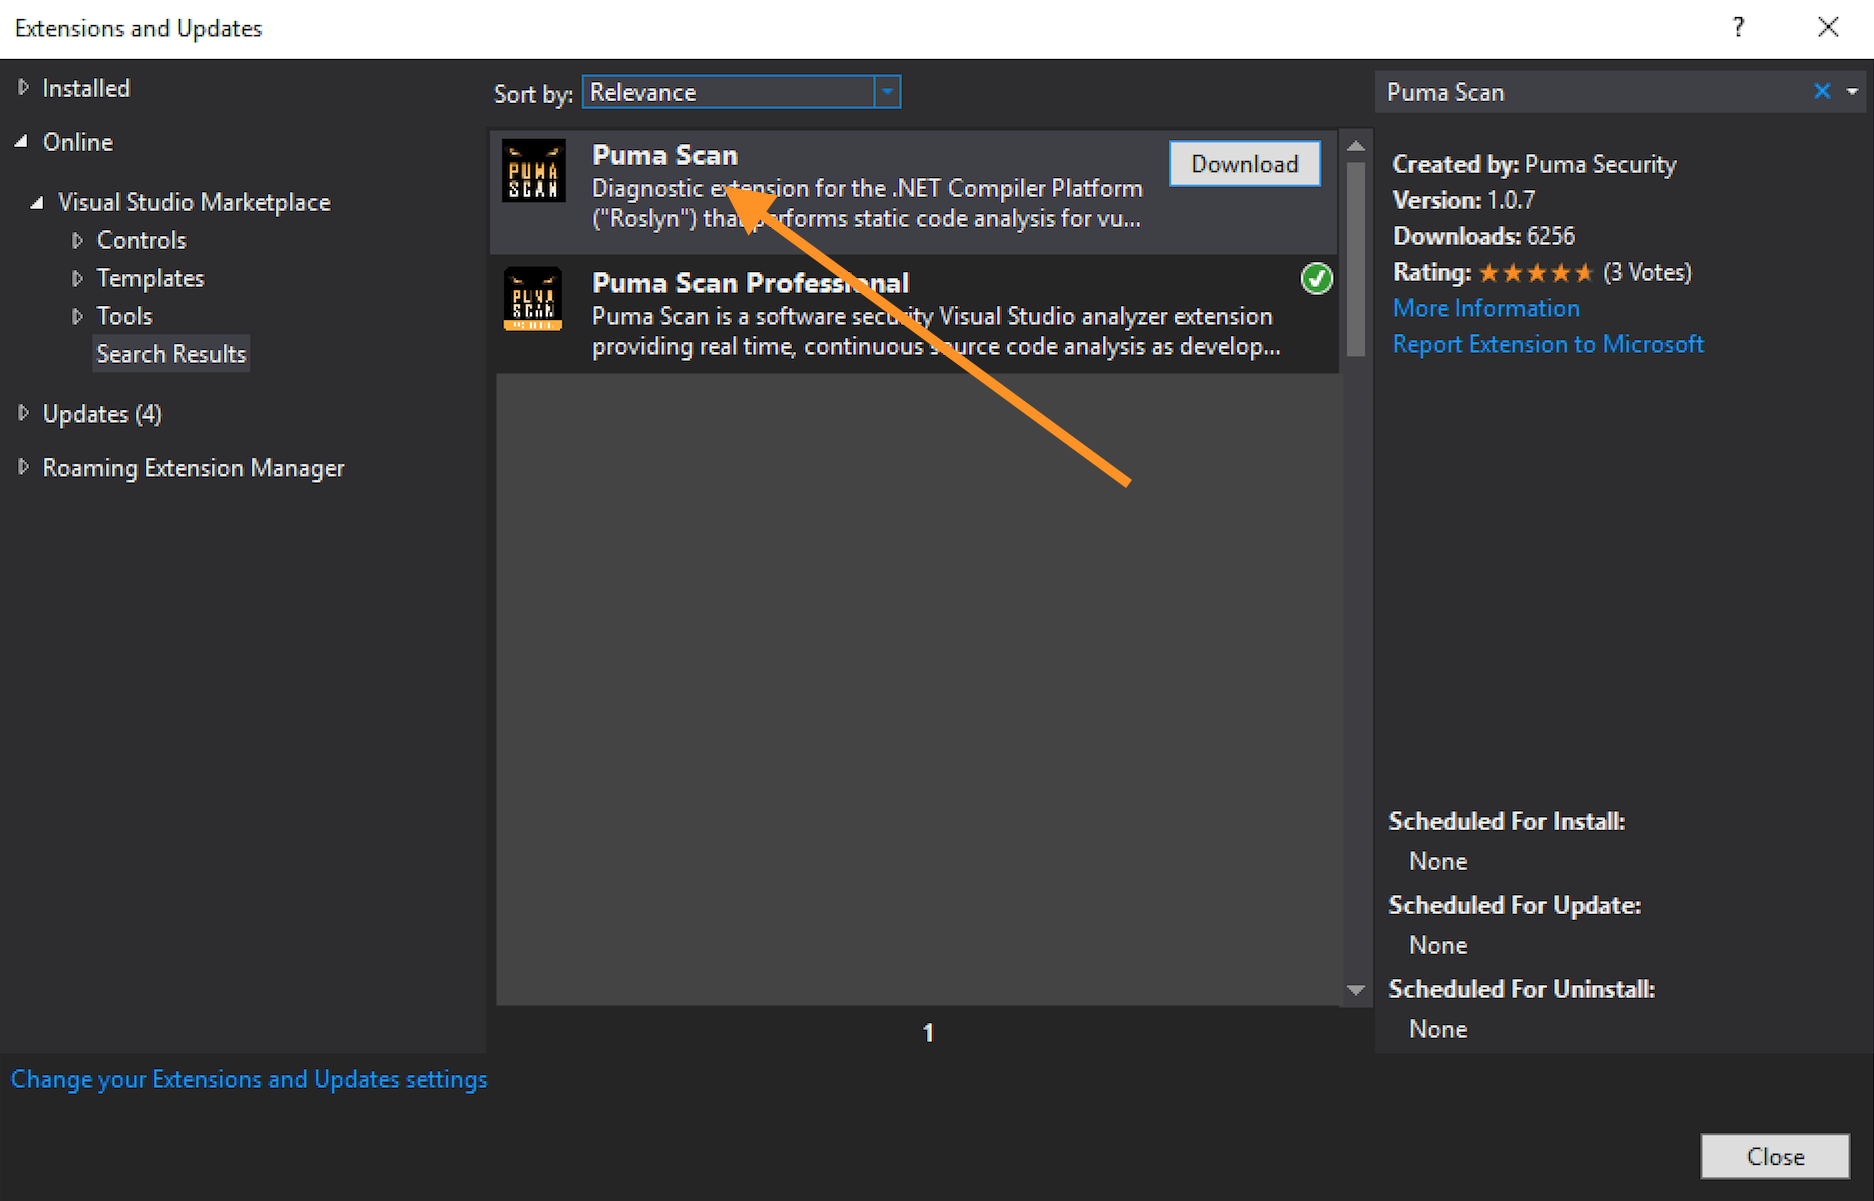
- In Visual Studio, open the Tools menu and select the Extensions and Updates... menu item.
- In the Online > Visual Studio Marketplace, search for "Puma Scan" and download the free community extension.
- Alternatively, you can download and install the VSIX file directly from the Visual Studio Marketplace.
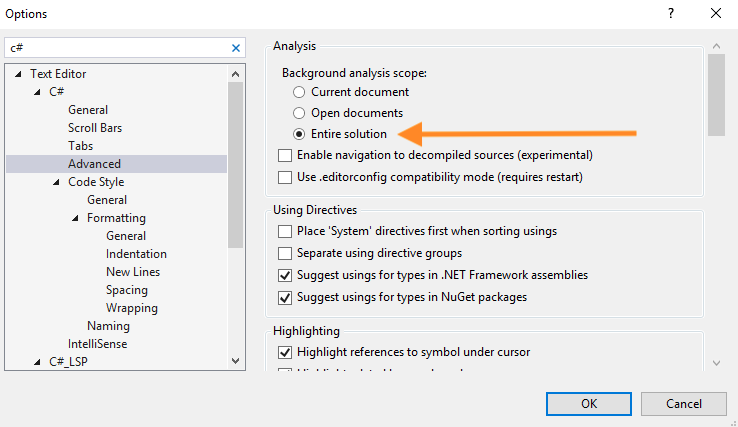
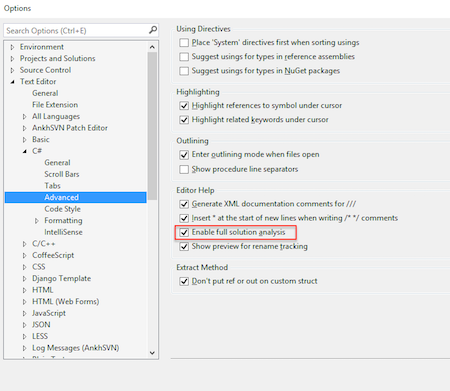
Live code analysis in the IDE is disabled by default to improve performance. For the rules to execute against your code, do the following (see image below for details):
- Open the Tools > Options dialog box
- Choose Text Editor > C# > Advanced
- For Visual Studio 2019 16.5 and greater, under Background analysis scope, select the “Entire solution” option and press OK
- For prior versions of Visual Studio, check the "Enable full solution analysis" option
To enable Puma’s non-code file analyzers (e.g. configuration and view markup files), you must manually edit each project file (.csproj) and add a new "AdditionalFileItemNames" element to the project’s main "PropertyGroup".
The following XML snippet shows an example project file’s main "PropertyGroup" with the required "AdditionalFileItemNames" element adding all content files for analysis.
<?xml version="1.0" encoding="utf-8"?>
  <Project ToolsVersion="12.0" DefaultTargets="Build" xmlns="http://schemas.microsoft.com/developer/msbuild/2003">
    <Import Project="$(MSBuildExtensionsPath)\$(MSBuildToolsVersion)\Microsoft.Common.props"
            Condition="Exists('$(MSBuildExtensionsPath)\$(MSBuildToolsVersion)\Microsoft.Common.props')" />
    <PropertyGroup>
      <Configuration Condition=" '$(Configuration)' == '' ">Debug</Configuration>
      <Platform Condition=" '$(Platform)' == '' ">AnyCPU</Platform>
      ...
      <!-- ADD THE FOLLOWING NEW ELEMENT -->
      <AdditionalFileItemNames>$(AdditionalFileItemNames);Content</AdditionalFileItemNames>
    </PropertyGroup>
  </Project>
You must do this for every project (.csproj, .vbproj) file in a solution.
After enabling the non-code file analyzers, you will notice there are still some limitations for analysis in non-code files:
-
Error list navigation (e.g. double clicking on the warning) to a non-code file is not supported. For now, Puma inserts the file path and offending line of code in the diagnostic message displayed in the error list.
-
Non-code files do not have the same "spellcheck" support as code files. (e.g. no light bulbs, squiggles, or code fix suggestions)
-
Rule suppression support is not yet supported (coming in the next major community release).
-
More details on this limitation and related ticket to treat non-code files as first class citizens can be found here: https://github.com/dotnet/roslyn/issues/11097
To verify your installation is successful, feel free to scan our Puma Prey vulnerable application. This source code contains a number of vulnerabilities that will cause Puma Scan analysis results to appear in the Error List Window.
-
Clone the puma-prey repository to your local development machine, as shown in the following git clone command:
git clone https://github.com/pumasecurity/puma-prey.git
-
In Visual Studio, open the PumaPrey.sln file.
-
Wait a few moments for Puma Scan to display vulnerabilities in the Error List window. See image for an example.


