I will demonstrate the installation and customization of the most popular tool in terminal multiplexer category - Tmux 🪟.
The demonstration given in this article was performed in the Linux Mint 22 distribution environment with Tmux version 3.4 ✍️.
I really love the Nord theme ❄️ from Arcticicestudio⛄️ and prefer to design my system and applications in this palette😌. Tmux is no exception, so for a correct and harmonious display of the configuration, like mine, you will need:
- Any monospaced Powerline icon font ⚡️.
- For example from the Nerd fonts project . I prefer the Hack Nerd Font Mono font . The font must be placed in the path
/usr/share/fonts/or separately for the user in~/.local/share/fonts/and applied to the terminal.
- For example from the Nerd fonts project . I prefer the Hack Nerd Font Mono font . The font must be placed in the path
- Any terminal emulator 🧑💻, with TrueColor and Nord theme support.
- For example, Gnome-terminal or drop-down terminal – Guake . In my experience, this theme is available for any popular terminal emulator;
- (Optional) Console editor 📝 with Nord theme.
- For example Vim/Neo .
- (Optional) Interactive command shell 💻.
- For example Zsh + Oh-My-Zsh with the agnoster theme .
For those who are just getting to know Tmux, I will briefly list its entities🧐:
- Session – the basic unit of work, containing windows and panels;
- Window – a separate terminal in a session;
- Panel – division of the window into several terminals (panels);
- Commands – instructions for control
tmux; - Prefix key – key for activating commands (default
Ctrl-b); - State – active and inactive windows and panels;
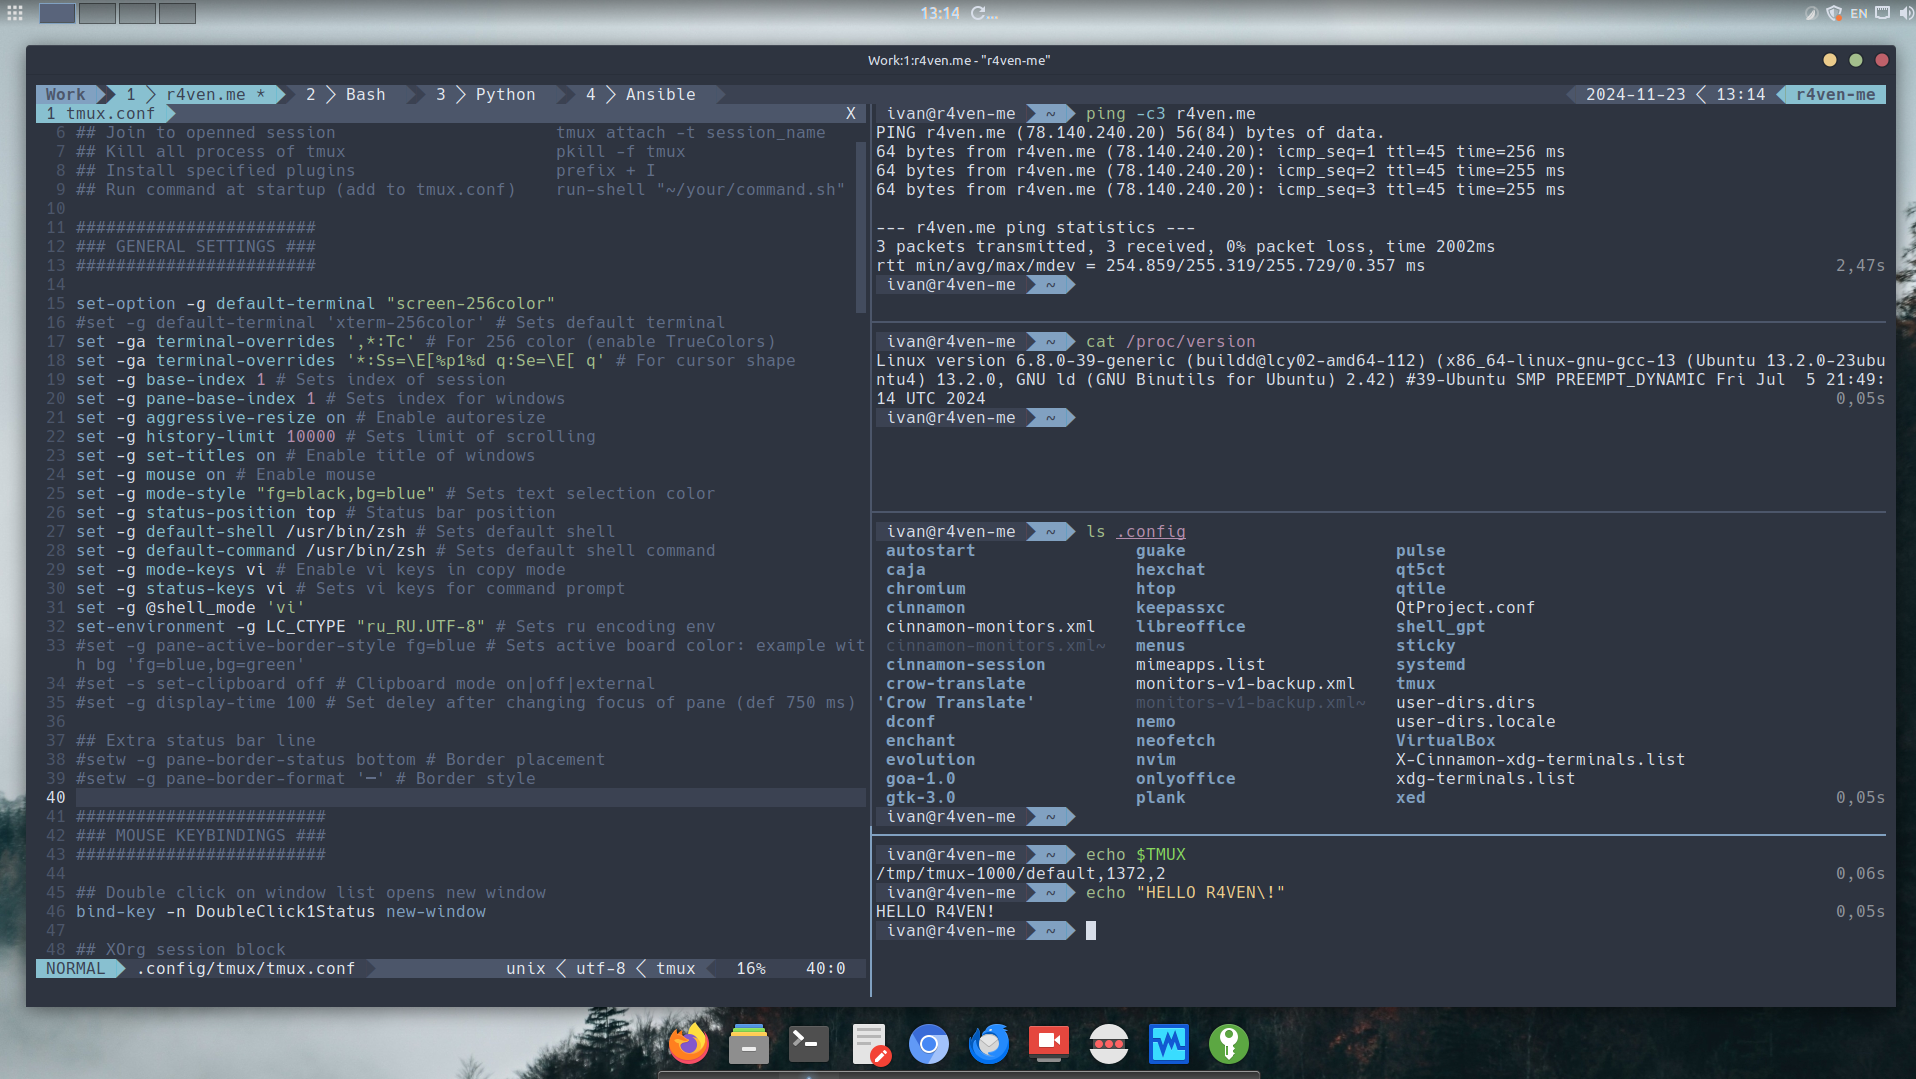
- Configuration (config) – tmux settings, for example in a file
~/.tmux.confor~/.config/tmux/tmux.conf.
We can begin the installation.

Tmux is almost always available in the standard repositories, and many Linux distributions even come pre-installed👌.
Open the terminal and execute:
sudo apt update && sudo apt install -y git xclip fzf tmuxgit– version control system and utility of the same name for working with git repositories (needed for installing third-party plugins);xclip– a clipboard management utility in Xorg desktop systems, usually pre-installed (if you are installing tmux on a system without a gui, you don’t need to install it);fzf- fuzzy finder, required for the tmux-fzf plugin. It adds functionality for quickly launching long commands and creating SSH sessions in adjacent tmux panes;tmux– the terminal multiplexer itself.
Now let's use the utility gitto download the Tmux configuration files from this GitHub 😇 repository:
git clone https://github.com/r4ven-me/tmux.git ~/.config/tmuxAll that's left is to launch Tmux😳. The first launch will take some time⏳, because the plugin manager will be downloaded and then the plugins themselves will be downloaded using this manager.
The configuration is built so that when adding new plugins, during the launch/restart of Tmux, they will be installed automatically😌. To install plugins manually, use
prefix+I.
To create a new named session, use the command:
tmux new -s WorkWhere:
new– command to create a new session;-s– key for specifying the session name;Work– arbitrary session name.
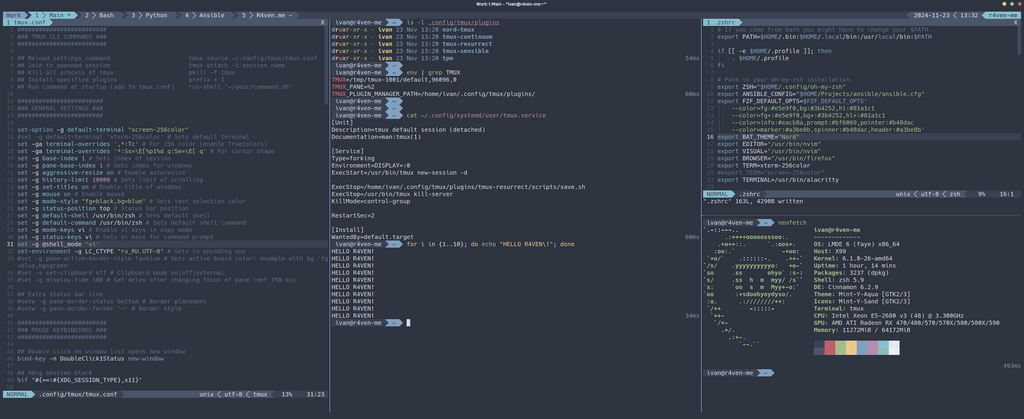
It should look something like this:
That's it 😃 the setup is complete! Now you can actively use:
Liked my Neovim config? You can easily create a similar one according to the article: Neovim – Installing and configuring a code editor with IDE elements in just a few commands .

And if you have a wide monitor, then it’s even better!

You can even live in a terminal like this😎
To exit tmuxwithout closing sessions, send a command dettachusing a special hotkey: first press the so-called prefix key combination, by default it is Ctrl+b, and then immediately press the key d, abbreviated: prefix+d.
Yes, this is the style of hotkeys in Tmux🤷♂️. First, you press the key prefix, and then the action/command key. You need to get used to this method. The key prefixcan be changed in the configuration. But it is not recommended to do this in order to maintain versatility🫠.
To return to a running session, use the command:
tmux attach -t Work || tmux new -s WorkWhere:
attach– command to connect to a running session;-t– key for specifying the tag/name of an existing session;Work– the name of the session we launched earlier;||– a logical “or” in a shell context, in other words, an execution control parameter that will run the next command if the previous one fails.
I recommend that you immediately create a convenient alias for your shell :
echo 'alias T="tmux attach -t Work || tmux new -s Work"' >> ~/.profile

source ~/.profile
Replace ~/.profilewith a file containing your shell environment preparation parameters if necessary☝️.
Now you can connect to an existing session named Work using a single letter command T.
General settings📖:
- 256 colors support enabled:
tmux-256color; - TrueColor support is enabled for more accurate color display;
- windows are numbered from 1, not 0 (
base-index 1); - panels in windows are also numbered starting from 1 (
pane-base-index 1); - history buffer limit increased to 10,000 lines for terminal scrolling;
- the mouse is enabled! you can click to select windows, scroll the output, change the size of panels, swap them, and you can also call the context menu via the right mouse button;
- Automatic updating of terminal window titles is enabled;
- uses vi-style keys to work in copy mode (
mode-keys vi) and interact with tmux commands (status-keys viinvoked byprefix+:); - Zsh is set as the default shell (replace with your own if you use another one);
- The locale is set
ru_RU.UTF-8to display Russian characters correctly.
Mouse control🐁:
- General actions:
- Double click on the status bar creates a new window (
bind-key -n DoubleClick1Status new-window);
- Double click on the status bar creates a new window (
- If you are using an X11 server when working with tmux:
- The middle mouse button pastes text from the system clipboard (used
xclip); - after selecting text with the mouse, copies the text to the clipboard without clearing the selection;
- in copy mode(!) selection of a word/line by double/triple click is supported:
- double-click LMB: selects a word, copies it to the clipboard;
- triple click LMB: selects a line, copies it to the clipboard;
- pressing LMB in copy mode cancels the current selection;
- The middle mouse button pastes text from the system clipboard (used
- In other environments (if not using X11):
- the behavior is similar, but the text is saved only to the internal tmux buffer, not to the system one.
Keyboard shortcuts🎹:
Some keyboard shortcuts have been slightly expanded. For more details, see below: "Item 6. Custom Tmux hotkeys".
List of plugins📋:
tmux-plugins/tpm– plugin manager for tmux:- provides installation and management of other plugins;
tmux-plugins/tmux-sensible– sets optimal tmux default settings;arcticicestudio/nord-tmux– installs the Nord theme for tmux;tmux-plugins/tmux-resurrect– saves the state of sessions (windows, panels, running processes) and allows you to restore sessions after restarting tmux;tmux-plugins/tmux-continuum– extension fortmux-resurrect:- automatically saves sessions at specified intervals (60 minutes);
- automatically restores sessions when tmux starts;
- activation using the systemd unit:
- cm.
systemctl status --user tmux
- cm.
Additionally📦:
- automatic installation of tpm on first launch and checking/installation of new plugins on each launch/relaunch;
- cleaning old session files older than 3 days (in
~/.local/share/tmux/resurrect/); - The recovery system for Neovim is used through the session mechanism.
Below are the most commonly used basic tmux commands/keyboard shortcuts. If you plan to work in the tmux environment regularly, I highly recommend you memorize them🤯.
Prefix❗️:
Ctrl-b – prefix;
Window management (windows) 🪟:
prefix+c– create a new window (looks like a tab on the status panel);prefix+w– show the list of windows;prefix+n– switch to the next window;prefix+p– switch to the previous window;prefix+<номер>– go to the window with the specified number (for example,ptefix+1to the first window);prefix+,– rename the current window.
Managing panels 🎛:
prefix+%– split the window into panels vertically;prefix+"– split the window into panels horizontally;prefix+o– switch to the next panel;prefix+q– show panel numbers (useful for selection);prefix+x– close the current panel;prefix+z– expand the current panel to full screen (and return it back);prefix+{– move the panel to the left;prefix+}– move the panel to the right;prefix+!– move the current panel to a separate window.
Session management 📚:
tmux new -s <имя>– create a new session with a name;tmux ls– show the list of sessions;tmux attach -t <имя>– connect to the session;prefix+d– disconnect from the current session.
Copy and paste 📋:
prefix+[– enter copy mode;- Arrows or PgUp/PgDn – navigation through history;
- Space – start text selection;
- Enter – copy the selected text;
- Esc – cancel selection;
- q – exit copy mode;
prefix+]– paste the copied text.
Additionally 📦:
prefix+t– show the clock;prefix+?– show help about all key combinations;prefix+s– show the list of sessions.
Added/changed commands/keys from my config.
Copy mode and working with the clipboard 📝:
prefix+v– turns on the copy mode (analogprefix+[);v(in copy mode) – starts selecting text;Enterandy(in copy mode, X11):- copies the selected text to the system clipboard using
xclip; - ends copy mode;
- copies the selected text to the system clipboard using
y(in copy mode, not X11):- copies the selection to the buffer
tmux; - ends copy mode;
- copies the selection to the buffer
p(in copy mode, X11):- ends copy mode;
- Pastes the contents of the system clipboard using
xclip.
p(in copy mode, not X11):- ends copy mode;
- inserts the contents of the buffer
tmux;
prefix+]andprefix+P(in normal mode, X11):- pastes the contents of the system clipboard using
xclip;
- pastes the contents of the system clipboard using
prefix+]andprefix+P(in normal mode, not X11):- inserts the contents of the buffer
tmux.
- inserts the contents of the buffer
Navigate between panels (vi style) 🎛:
prefix+h– switch to the panel on the left;prefix+j– switch to the panel below;prefix+k– switch to the panel at the top;prefix+l– switch to the panel on the right.
Resizing panels (vi style)🎛, command key can be pressed multiple times :
prefix+H– increase the panel to the left by 2 pixels;prefix+J– increase the panel down by 2 pixels;prefix+K– increase the panel up by 2 pixels;prefix+L– increase the panel to the right by 2 pixels.
Saving and restoring the environment via tmux-resurrect 💾:
prefix+F5:- saves the current state of tmux using
tmux-resurrect; - moves the last saved session to a file
~/.local/share/tmux/resurrect/main.txtfor easy recovery; - shows a message about manual saving;
- saves the current state of tmux using
prefix+F6:- loads a saved state from a file
main.txt.
- loads a saved state from a file
FZF: search and insert long command from a list :
prefix+Ctrl+b

FZF: search and run SSH session with hosts from ~/.ssh/config :
prefix+Shift+b
