Tiles
Tiles are placed at the bottom elevation set through the Levels module. While background tiles are rendered as well it's highly suggested that you instead use a single background image or you will have popping and flickering issues. The module DF Architect has an option to merge all your background tiles and background image into a single image.
For props or entire 3D Maps, use the 3D Tiles!
To place a 3D Tile, open the filepicker while in 3D Mode and in the Tiles Layer. The file picker will now show 3D Files instead of 2D Images. Drag and drop a file from the filepicker to the scene to create a 3D Tile, 3D Canvas will give your tile a placeholder 2D Image as well, required for Levels to adjust visibility when needed and to make it clear that you have 3D Tiles on the map, you can change this placeholder image but it's not suggested to leave it Blank.
If you wish to see 3D Models previews in the file picker, you will need the Filepicker+ and 3D Portraits Modules (Check the home page for the Recomended Modules).
Once a Tile is on the scene you can select it and use the quick tile editor controls to manipulate the tile. All the shortcuts are documented in the Controls Wiki Page.
The 3D Tab contains all the settings to manipulate the tile manually through numbers, although most of these settings are self explanatory, we will focus on some that could be confusing:
This option tells 3D Canvas if the tile should be included in collision and/or vision calculations, for example, if one of your tiles represents Water, you would need to disable both options.
These options behave the same as core foundry. Tile Doors also do a range check against players so they will need to be no more than 1 Square away from the door to be able to open it.
This will change how the tile is displayed:
- Fit: Will fit the 3D Model inside the tile bounds, preserving proportions.
- Stretch: Will stretch the 3D Model to fill the box defined by the tile.
- Repeat: Will make multiple copies of this tile, "tiling" it inside the tile bounds.
This option will set the Gap between the repeated 3D Models. Will only work with Repeat Fill Type
All this options will only affect the Repeat Fill Type
The seed used to generate the randomization, you can change this seed to some arbitrary characters if you want to re randomize the tile.
IMPORTANT: For this to work, first enable the "Mirror Levels Tile Visibility" in the 3D Tab in your Scene Configuration.
If you wish to make a multilevel 3D Map, where the 3D Objects above you are not visible, Open the Levels UI and define the amount of levels you wish, then, select a level. A Magenta colored Plane will appear, to indicate where you are building, start draging and dropping 3D Object onto that plane to build on that level, repeat for the other levels. If you now explore the map with a token selected, you will see that Objects above you will be hidden.
3D Canvas supports MATT click and double click events on tiles
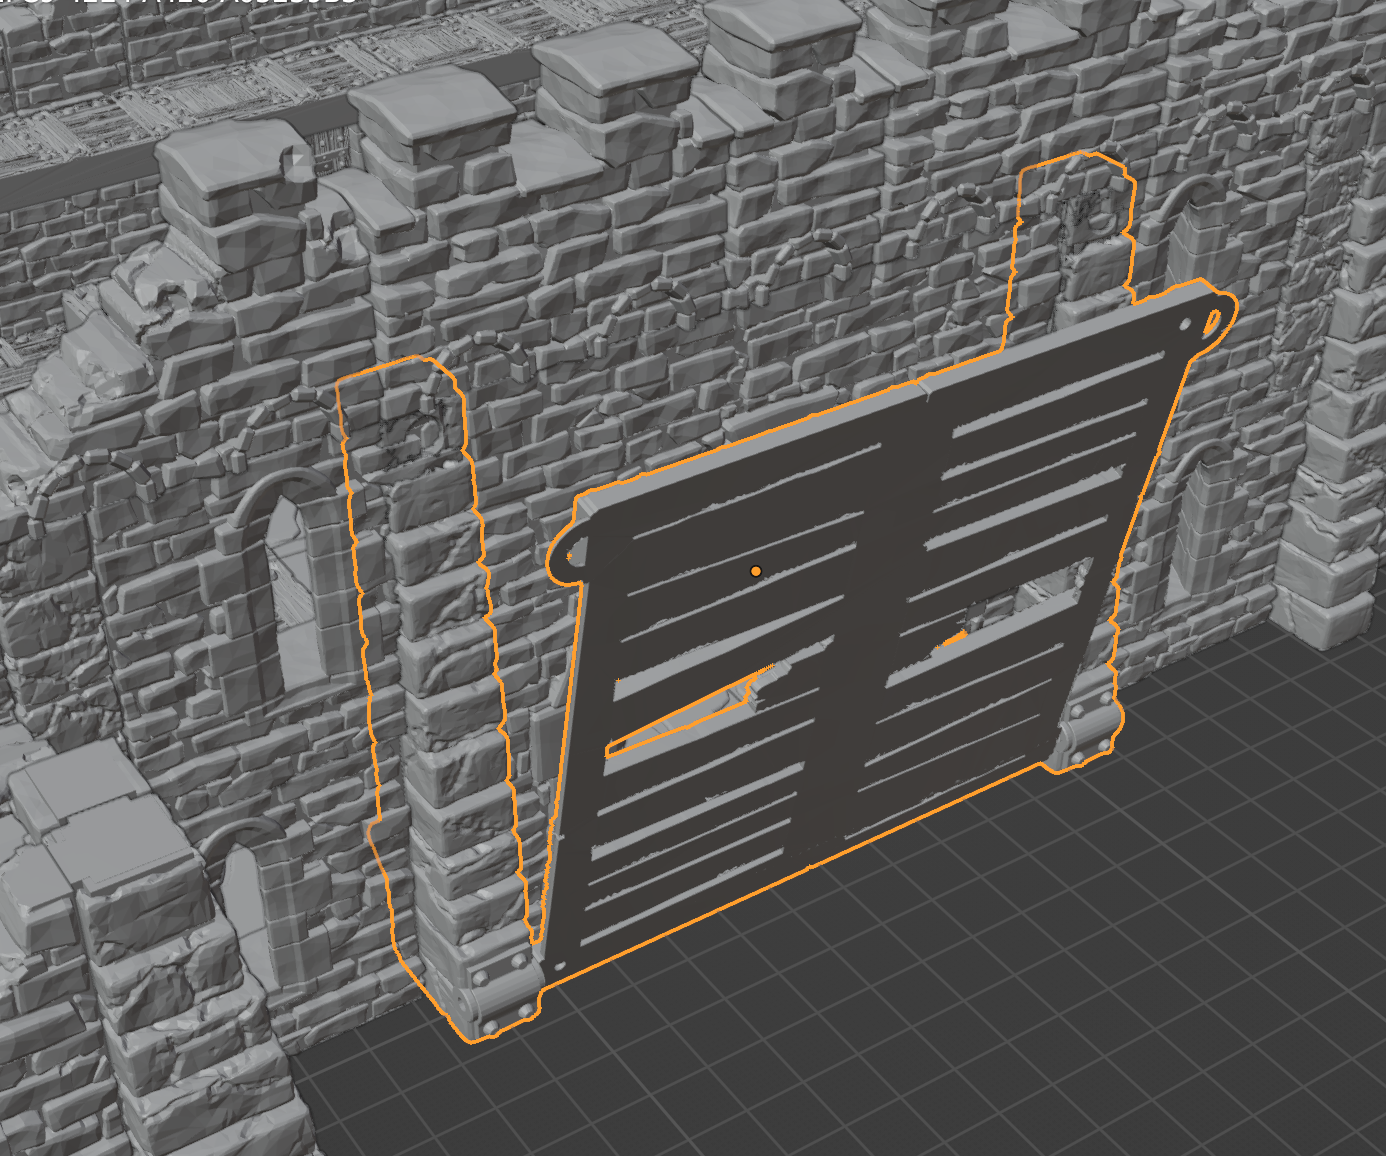
You can add metadata to your 3D Models in a way that 3D Canvas will be able to read it and automatically make parts of your Mesh Doors or set collision\sight blocking on submeshes separetly
-
Select the mesh you wish to tag
-
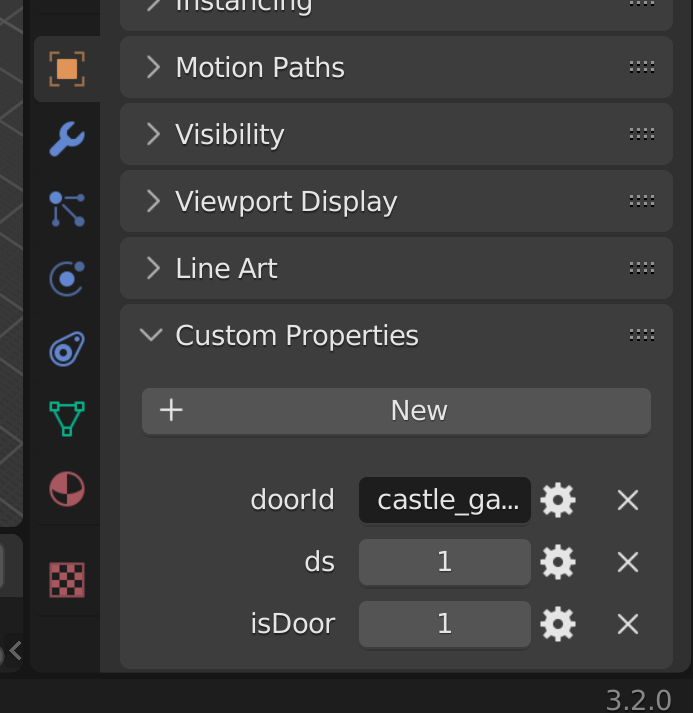
Head to the 'Object Properties' tab and scroll to the bottom
-
Expand 'Custom Properties' and add them as needed (list of supported properties below)
-
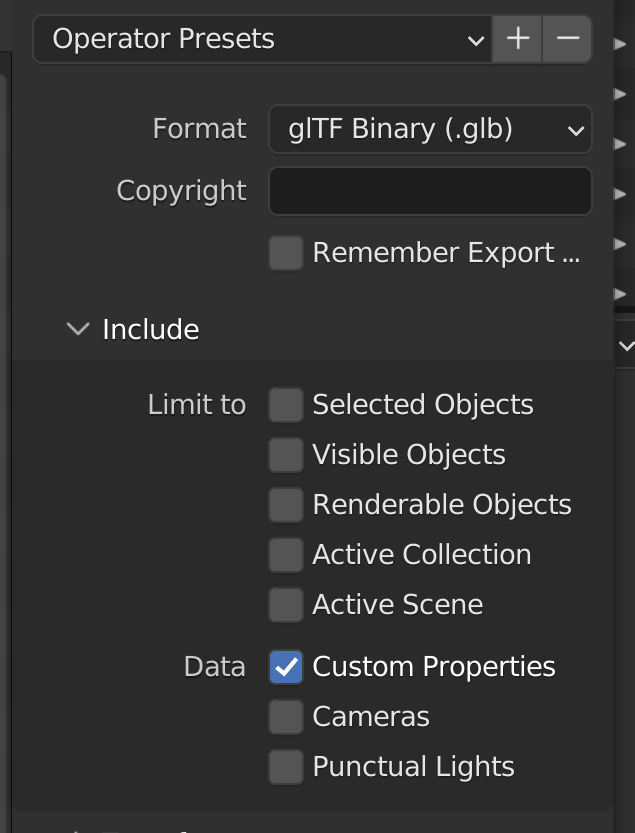
When you are done tagging all your meshes export the file as GLTF/GLB and make sure to include the custom properties in the export
The property names are case sensitive!
| Property Name | Type | Value |
|---|---|---|
| collision | Integer | 0/1 |
| sight | Integer | 0/1 |
| isDoor | Integer | 0/1 |
| doorId | String | Any Unique Name |
| ds | Integer | 0/1/2 |
Setting collision and sight will tell 3D Canvas whether to block these 'senses', for example you would set on solid meshes both 'collision' and 'sight' to 1, while on a window 'collision' to 1 and 'sight' to 0. If you had an ethereal wall for example, you would set both to 0 or 'collision' to 0 and 'sight' to 1.
In order for 3D Canvas to recognize and process a door correctly, any door you want to tag must have 'isDoor' set to 1 and a 'doorId' of your choice (eg "Tavern_Door_A". Keep in mind that every doorId must be different (no duplicate Ids)
The 'ds' property tells 3D Canvas the Door State: 0 - Open, 1 - Closed, 2 - Closed and Locked