GFS is a very simple file server. GFS is meant to be a simpler replacement for FTP, in the case where the only requirement is remote upload and download of files.
To get started with GFS simply download the latest release of GFS from the GitHub releases for the server OS. Once you have it downloaded and put on the server just start GFS like any normal program.
If no starting args are supplied to following will be default:
Username: "username"
Password: "password"
It's highly recommended to change these immediately to ensure no malicious access to the server.
This can be done by running gfs -persist -username <newUsername> -password <newPassword>, where <newUsername>
and <newPassword> are replaced by the new values.
By default gfs is available at http://servername:8080. The port can be changed using the -port flag.
By default files are served from:
| OS | path |
|---|---|
| Windows | C:\ProgramData\gfs\storage |
| Linux/mac | /var/gfs/storage/ |
GFS has various different options available should the default options not fit. All options can be saved to the config
file by running GFS with the -persist flag. Next time GFS is run the flags won't have to be supplied.
All available flags for gfs can be seen by running gfs --help.
GFS's config file is saved at the following paths by default:
| OS | path |
|---|---|
| Windows | C:\ProgramData\gfs\gfs.json |
| Linux/mac | /etc/gfs/gfs.json |
It's possible to use a non-default config path by supplying the -config flag. This flag has to be supplied
every time at startup.
The port gfs runs on can be changed by running gfs with the -port flag, like so gfs -port 5678 to run
gfs on port 5678.
This is the path where gfs serves files from, and upload files to. It can be changed using the -serve flag,
like so gfs -serve /other/path.
Enable this option to make GFS require login even for normal read/download requests. Useful if you just want to use GFS
for uploading files, but are using something like nginx to handle the actual static file serving. Also useful if you
are storing private files.
This option can be enabled by using the flag -loginRequiredForRead, like so gfs -loginRequiredForRead.
A big part of GFS is the api. Any request that is done to GFS can respond with either html (text/html),
json (application/json) or xml (application/xml). To change the response format just change the accept header to the
corresponding value.
E.g. request http://servername:8080/testpath will give the following output depending on the accept header:
text/html
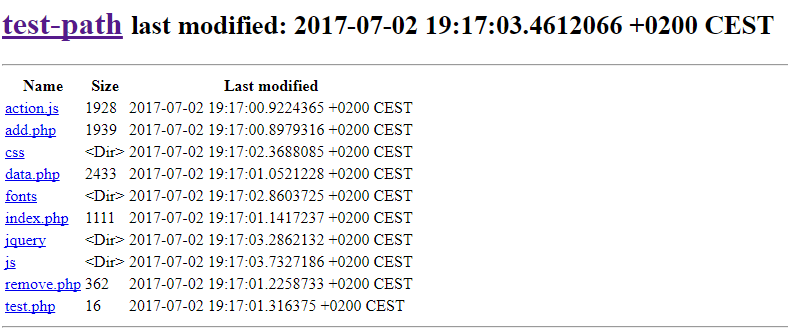
A couple of entries has been omitted to save on space in this document.
application/json
{
    "name": "test-path",
    "path": "/test-path",
    "last_modification_time": "2017-07-02T19:17:03.4612066+02:00",
    "entries": [
        {
            "name": "action.js",
            "path": "/test-path/action.js",
            "size": 1928,
            "is_directory": false,
            "last_modification_time": "2017-07-02T19:17:00.9224365+02:00"
        },
        {
            "name": "add.php",
            "path": "/test-path/add.php",
            "size": 1939,
            "is_directory": false,
            "last_modification_time": "2017-07-02T19:17:00.8979316+02:00"
        },
        {
            "name": "css",
            "path": "/test-path/css",
            "is_directory": true,
            "last_modification_time": "2017-07-02T19:17:02.3688085+02:00"
        },
        {
            "name": "data.php",
            "path": "/test-path/data.php",
            "size": 2433,
            "is_directory": false,
            "last_modification_time": "2017-07-02T19:17:01.0521228+02:00"
        }
    ],
    "authorized": false
}
application/xml
<DirectoryStats>
    <name>test-path</name>
    <path>/test-path</path>
    <last_modification_time>2017-07-02T19:17:03.4612066+02:00</last_modification_time>
    <entries>
        <name>action.js</name>
        <path>/test-path/action.js</path>
        <size>1928</size>
        <is_directory>false</is_directory>
        <last_modification_time>2017-07-02T19:17:00.9224365+02:00</last_modification_time>
    </entries>
    <entries>
        <name>add.php</name>
        <path>/test-path/add.php</path>
        <size>1939</size>
        <is_directory>false</is_directory>
        <last_modification_time>2017-07-02T19:17:00.8979316+02:00</last_modification_time>
    </entries>
    <entries>
        <name>css</name>
        <path>/test-path/css</path>
        <is_directory>true</is_directory>
        <last_modification_time>2017-07-02T19:17:02.3688085+02:00</last_modification_time>
    </entries>
    <entries>
        <name>data.php</name>
        <path>/test-path/data.php</path>
        <size>2433</size>
        <is_directory>false</is_directory>
        <last_modification_time>2017-07-02T19:17:01.0521228+02:00</last_modification_time>
    </entries>
    <authorized>false</authorized>
</DirectoryStats>To be able to use the upload functionality or see directories and files you have to be authenticated first.
Being authenticated means that you have a valid token, either as a cookie, with the name token, or in
the gfs-token header.
To get this token send a POST request to the /login endpoint. Make sure to specify the Content-Type header,
as the endpoint accepts both application/json, application/xml and application/x-www-form-urlencoded.
The accept header should still be specified, and can be any of text/html, application/json or application/xml.
If the accept header is set to text/html, then a cookie is set instead of a token being provided in the response.
Request:
{
  "username": "username",
  "password": "password"
}
Success response:
{
    "token": "some-long-token"
}Request:
<LoginRequest>
    <username>username</username>
    <password>password</password>
</LoginRequest><AuthorizationSuccessResponse>
<token>some-long-token</token>
</AuthorizationSuccessResponse>To upload files login should be done first. Once a token has been acquired a multipart/form-data POST request
can be send to the /upload endpoint.
The request should have two arguments:
uploadfiles: The files that should be uploaded. (How this specifically is done is often language specific.)
path: The path to upload to the files to e.g. /test-path.
The files are then uploaded to <servepath>/test-path, where <servepath> is the serve path that was
set in the configs.
It's also possible to POST a application/octet-stream request to /upload, where the query parameter filename
is set to the name of the file that's being uploaded, path inclusive. This endpoint is mostly available for easy
programmable integration.