Install
You need Autodesk Maya 2014 or above to use dbMayaTextureToolkit
- Download latest zip file from github
- Unzip content to your Maya script folder
- Windows :
C:\Users\<username>\Documents\maya\scripts - Mac OS X :
~<username>/Library/Preferences/Autodesk/maya/scripts - Linux (64-bit) :
~<username>/maya/scripts - For further configuration, you can look at the Tech Artist section
- Go to Getting Started
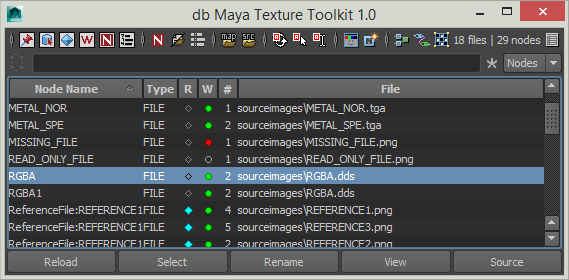
Once you have installed MTT (dbMayaTextureToolkit) as Artists, you can configure it with a json file and a python script used as import policy.
-
The mtt.json file doesn't exist in the install package but will be created when you launch the tool for the first time. This file must be valid after you edit it, no check is made when you launch the tool. I recommend using this tool site to properly edit your configuration file : http://www.jsoneditoronline.org/
This is the default mtt.json file created at first launch :
{ "supported_nodes":[ { "node_type":"file", "node_nicename":"FILE", "node_attr":"fileTextureName" }, { "node_type":"psdFileTex", "node_nicename":"PSD", "node_attr":"fileTextureName" }, { "node_type":"mentalrayTexture", "node_nicename":"MRT", "node_attr":"fileTextureName" } ], "workspace_extend":{ "texture_source_folder":"<WORKSPACE>/PSD/" }, "custom_buttons":[], "import_policy":"from dbMayaTextureToolkit.mttImportPolicy import exec_import_policy" }-
The list of all supported node type, if you use a particular plugin, this is the place where you add texture node type.
For each item, you must supply 3 information :
- node_type : the texture node type
- node_nicename : the text shown in the "Type" column
- node_attr : the node attribute where the file path of the texture is stored
-
A workspace.mel equivalent.
- texture_source_folder : the folder where MTT will search for source files (you can use the reserved name for a relative path)
-
You can add buttons to MTT toolbar with this list. You must supply 3 information per button :
- icon : the resource icon (16x16 bitmap)
- tooltip : the text shown when your cursor hovers over the button
- cmd : the command to execute
-
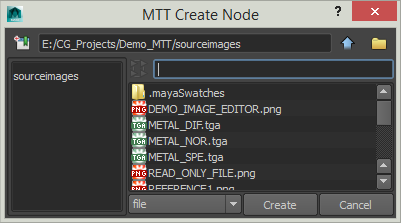
The command used when you create nodes from the MTT create node command.
-
-
The import policy is a rule that you can establish when you create shading nodes. For example, in the game industry, you may have a very basic set of textures composed of a diffuse map, a normal map and a specular map. This trio is always connected to the same channels of a shader. So you have to connect each texture to the same shader input every time. The example file mttImportPolicy.py contain a simple code looking for the suffix of the filename ("_DIF", "_SPE", "_NOR") and connects the node to the selected shader to speed up this process. You can change this command to create your own import policy that matches your needs.
All commands must be launched in Maya. Commands are in Python, so in shelf button or hotkey, check Python.
MEL commands are provided for Marking Menu that does not support Python for now.
PYTHON
import dbMayaTextureToolkit as MTT
reload(MTT)
MTT.show_ui(toggle=False)
MEL
python("import dbMayaTextureToolkit as MTT;reload(MTT);MTT.show_ui()")
-
toggle flag : when set to True, the UI is toggled on and off each time you call it, otherwise the UI is recreated
PYTHON
import dbMayaTextureToolkit as MTT
MTT.create_nodes()
MEL
python("import dbMayaTextureToolkit as MTT;MTT.create_nodes()")

NB : using parameters hides some of the UI
If you still want to start in your sourceimages folder and create file node type :
import dbMayaTextureToolkit as MTT
MTT.create_nodes(define_path='<sourceimages>', define_type='file')
If you want to start in a texture bank folder and create a custom node type :
import dbMayaTextureToolkit as MTT
MTT.create_nodes(define_path='Z:/BANK/TEXTURES', define_type='myCustomType')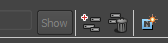
Add this lines to your userSetup.py in your Maya script directory if you want to add some buttons to your HyperShade and NodeEditor. You can try this feature without modifying your userSetup.py by using the menu in MTT and click on "Add Buttons to Panels"
PYTHON
import maya.cmds as cmds
cmds.evalDeferred("import dbMayaTextureToolkit.mttOverridePanels as orp;orp.override_panels()")If you use a plugin or you already override the addCallback of HyperShade or NodeEditor, you can pass you own function with this flags
import maya.cmds as cmds
cmds.evalDeferred("import dbMayaTextureToolkit.mttOverridePanels as orp;orp.override_panels(custom_hs_cmd='myHypershadeFunction')")
or
import maya.cmds as cmds
cmds.evalDeferred("import dbMayaTextureToolkit.mttOverridePanels as orp;orp.override_panels(custom_hs_cmd='myHypershadeFunction', custom_ne_cmd='myNodeEditorFunction')")