![]()
![]()
OmniSharp-vim is a plugin for Vim to provide IDE like abilities for C#.
OmniSharp works on Windows, Linux and MacOS.
The plugin relies on the OmniSharp-Roslyn server, a .NET development platform used by several editors including Visual Studio Code and Emacs.
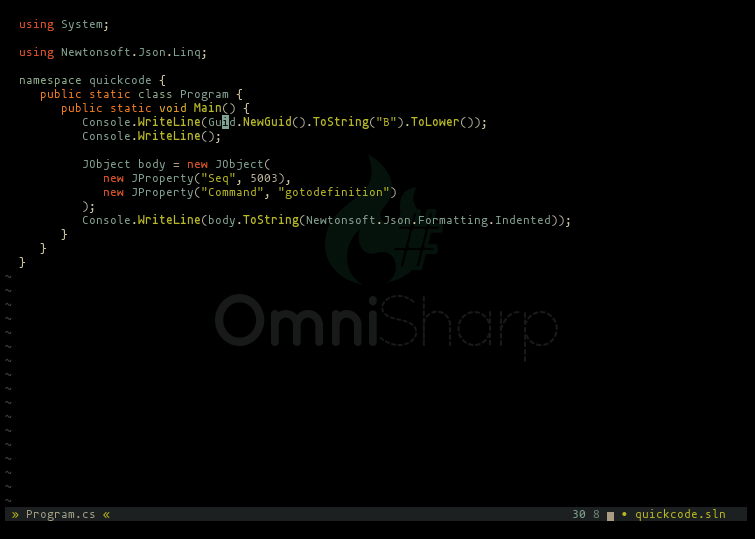
(see the wiki example config for a similar configuration to this demo)
-
Contextual code completion
- Code documentation and type lookup, displayed in popups or the preview window, when available (depends on installed SDKs)
- Completion Sources are provided for:
- Completion snippets are supported. e.g. Console.WriteLine(TAB) (ENTER) will complete to Console.WriteLine(string value) and expand a dynamic snippet, this will place you in SELECT mode and the first method argument will be selected.
- Requires UltiSnips and supports standard C-x C-o completion as well as completion/autocompletion plugins such as asyncomplete-vim, Supertab, Neocomplete etc.
- Requires
set completeopt-=previewwhen using Neocomplete because of a compatibility issue with UltiSnips.
-
Jump to the definition of a type/variable/method
-
Find symbols interactively (uses selector plugin by default: fzf, vim-clap, CtrlP or unite.vim)
-
Find implementations/derived types
-
Find usages (optionally uses selector plugin: fzf or vim-clap)
-
Contextual code actions (unused usings, use var....etc.) (uses selector plugin by default: fzf, vim-clap, CtrlP or unite.vim)
-
Find code issues (unused usings, use base type where possible....etc.) (requires plugin: ALE or Syntastic)
-
Find all code issues in solution and populate the quickfix window
-
Fix using statements for the current buffer (sort, remove and add any missing using statements where possible)
-
Rename refactoring
-
Full semantic highlighting
-
Code error checking
-
Code formatter
-
Run unit tests and navigate to failing assertions
For vim8 and neovim, OmniSharp-vim uses the OmniSharp-roslyn stdio server instead of the older HTTP server, using pure vimscript (no python dependency!). All server operations are asynchronous and this results in a much smoother coding experience.
To use the HTTP server instead, add this to your .vimrc:
let g:OmniSharp_server_stdio = 0Any time g:OmniSharp_server_stdio is modified, the server needs to be re-installed with :OmniSharpInstall.
Install the Vim plugin using your preferred plugin manager:
| Plugin Manager | Command |
|---|---|
| Vim-plug | Plug 'OmniSharp/omnisharp-vim' |
| Vundle | Bundle 'OmniSharp/omnisharp-vim' |
| NeoBundle | NeoBundle 'OmniSharp/omnisharp-vim' |
... or git:
| 'runtimepath' handler | Command |
|---|---|
| Vim 8.0+ Native packages | $ git clone https://github.com/OmniSharp/omnisharp-vim ~/.vim/pack/plugins/start/omnisharp-vim |
| Pathogen | $ git clone https://github.com/OmniSharp/omnisharp-vim ~/.vim/bundle/omnisharp-vim |
If not using a plugin manager such as Vim-plug (which does this automatically), make sure your .vimrc contains these lines:
filetype indent plugin on
syntax enableOmniSharp-vim depends on the OmniSharp-Roslyn server. The first time OmniSharp-vim tries to open a C# file, it will check for the presence of the server, and if not found it will ask if it should be downloaded. Answer y and the latest version will be downloaded and extracted to ~/.cache/omnisharp-vim/omnisharp-roslyn, ready to use. Note: Requires curl or wget on Linux, macOS, Cygwin and WSL.
Running the command :OmniSharpInstall in vim will also install/upgrade to the latest OmniSharp-roslyn release.
To install a particular release, including pre-releases, specify the version number like this:
:OmniSharpInstall v1.35.2Note: These methods depend on the g:OmniSharp_server_stdio variable to decide which OmniSharp-roslyn server to download. If you are unsure, try using the default stdio option first, and only fall back to HTTP if you have problems.
-
vim8.0+ or neovim: Use the stdio server, it is used asynchronously and there is no python requirement.
-
< vim8.0: Use the HTTP server. Your vim must have python (2 or 3) support, and you'll need either vim-dispatch or vimproc.vim to be installed
" Use the stdio version of OmniSharp-roslyn - this is the default
let g:OmniSharp_server_stdio = 1

" Use the HTTP version of OmniSharp-roslyn:
let g:OmniSharp_server_stdio = 0To install the server manually, first decide which version (stdio or HTTP) you wish to use, as described above.
Download the latest release for your platform from the OmniSharp-roslyn releases page.
For stdio on a 64-bit Windows system, the omnisharp.win-x64.zip package should be downloaded, whereas Mac users wanting to use the HTTP version should select omnisharp.http-osx.tar.gz etc.
Extract the binaries and configure your vimrc with the path to the run script (Linux and Mac) or OmniSharp.exe file (Window), e.g.:
let g:OmniSharp_server_path = 'C:\OmniSharp\omnisharp.win-x64\OmniSharp.exe'let g:OmniSharp_server_path = '/home/me/omnisharp/omnisharp.http-linux-x64/run'OmniSharp-roslyn can function perfectly well in WSL using linux binaries, if the environment is correctly configured (see OmniSharp-roslyn for requirements). However, if you have the .NET Framework installed in Windows, you may have better results using the Windows binaries. To do this, let OmniSharp-vim know that you are operating in WSL mode (indicating that file paths need to be translated by OmniSharp-vim from Unix-Windows and back:
let g:OmniSharp_translate_cygwin_wsl = 1Running :OmniSharpInstall from WSL when g:OmniSharp_translate_cygwin_wsl = 1 results in the Windows version of OmniSharp-roslyn being installed to the standard Windows location %LocalAppData%\omnisharp-vim\omnisharp-roslyn.
The automatic installation script for cygwin downloads the Windows OmniSharp-roslyn release. OmniSharp-vim detects that it is running in a cygwin environment and automatically enables Windows/cygwin file path translations by setting the default value of g:OmniSharp_translate_cygwin_wsl to 1.
Note: The Windows stdio server unfortunately does not work from cygwin, so when cygwin is detected (has('win32unix')) the HTTP server is used by default.
The default version of OmniSharp-roslyn requires mono on Linux and MacOS.
The roslyn server releases come with an embedded mono, but this can be overridden to use the installed mono by setting g:OmniSharp_server_use_mono in your vimrc.
See The Mono Project for installation details.
let g:OmniSharp_server_use_mono = 1Any time g:OmniSharp_server_use_mono is modified, the server needs to be re-installed with :OmniSharpInstall.
From version 1.38.0 of OmniSharp-roslyn, a dotnet native net6.0 server version is available.
To use this version, set g:OmniSharp_server_use_net6 in your vimrc before installing the server.
let g:OmniSharp_server_use_net6 = 1For the HTTP server, OmniSharp-Roslyn also requires libuv on Linux and Mac. This is typically a simple install step, e.g. brew install libuv on Mac, apt-get install libuv1-dev on debian/Ubuntu, pacman -S libuv on arch linux, dnf install libuv libuv-devel on Fedora/CentOS, etc.
Please note that if your distro has a "dev" package (libuv1-dev, libuv-devel etc.) then you will probably need it.
Note: This is not necessary for the default stdio version of OmniSharp-roslyn.
Install python 3 or 2: python downloads. Make sure that you pick correct version of Python to match your vim's architecture (32-bit python for 32-bit vim, 64-bit python for 64-bit vim).
Verify that Python is working inside Vim with
:echo has('python3') || has('python')Note: If you are using the default stdio version of OmniSharp-roslyn, you do not need python.
OmniSharp-vim can start the server only if any of the following criteria is met:
- Vim with job control API is used (8.0+)
- neovim with job control API is used
- vim-dispatch is installed
- vimproc.vim is installed
If ALE is installed, it will automatically be used to asynchronously check your code for errors.
No further configuration is necessary. However, be aware that ALE supports multiple C# linters, and will run all linters that are available on your system. To limit ALE to only use OmniSharp (recommended), add this to your .vimrc:
let g:ale_linters = {
\ 'cs': ['OmniSharp']
\}The vim plugin syntastic can be used if you don't have ALE. Configure it to work with OmniSharp with the following line in your vimrc.
let g:syntastic_cs_checkers = ['code_checker']If one of these plugins is detected, it will be used as the selector for Code Actions and Find Symbols features:
If you have installed more than one, or you prefer to use native vim functionality (command line, quickfix window etc.) rather than a selector plugin, you can choose an option with the g:OmniSharp_selector_ui variable.
let g:OmniSharp_selector_ui = 'fzf'    " Use fzf
let g:OmniSharp_selector_ui = 'clap'   " Use vim-clap
let g:OmniSharp_selector_ui = 'ctrlp'  " Use ctrlp.vim
let g:OmniSharp_selector_ui = 'unite'  " Use unite.vim
let g:OmniSharp_selector_ui = ''       " Use vim - command line, quickfix etc.
To use fzf or vim-clap as a selector for :OmniSharpFindUsages results instead of the quickfix list, configure it explicitly:
let g:OmniSharp_selector_findusages = 'fzf'
let g:OmniSharp_selector_findusages = 'clap'By default, the server is started automatically when you open a .cs file. It tries to detect your solution file (.sln) and starts the OmniSharp-roslyn server, passing the path to the solution file.
In vim8 and neovim, the server is started invisibly by a vim job. In older versions of vim, the server will be started in different ways depending on whether you are using vim-dispatch in tmux, or are using vim-proc, gvim or running vim in a terminal.
This behaviour can be disabled by setting let g:OmniSharp_start_server = 0 in your vimrc.
You can then start the server manually from within vim with :OmniSharpStartServer.
To get completions, open a C# file from your solution within Vim and press <C-x><C-o> (that is ctrl x followed by ctrl o) in Insert mode, or use a completion or autocompletion plugin.
To use the other features, you'll want to create key bindings for them. See the example vimrc below for more info.
See the wiki for more custom configuration examples.
OmniSharp-roslyn can provide highlighting information about every symbol of the document.
To highlight a document, use command :OmniSharpHighlight.
By default, .cs files are automatically highlighted when entering a buffer and leaving insert mode.
To disable automatic highlighting, add this to your .vimrc:
let g:OmniSharp_highlighting = 0To update highlighting after all text changes, even while in insert mode, use g:OmniSharp_highlighting = 3 instead.
The g:OmniSharp_highlight_groups dictionary is used to configure highlighting:
let g:OmniSharp_highlight_groups = {
\ 'Comment': 'NonText',
\ 'XmlDocCommentName': 'Identifier',
\ 'XmlDocCommentText': 'NonText'
\}
The :OmniSharpHighlightEcho command can be used to find out what type of symbol is under the cursor.
See the wiki for the full list of symbol types, and configuration details.
Note: Full semantic highlighting uses Vim's text properties and neovim's namespaces, and is only available when using the stdio server, not for HTTP server usage. Check the wiki for how to configure the simpler regex-highlighting when using the HTTP server, or older Vim/neovims.
Diagnostics are returned from OmniSharp-roslyn in various ways - via linting plugins such as ALE or Syntastic, and using the :OmniSharpGlobalCodeCheck command.
These diagnostics come from roslyn and roslyn analyzers, and as such they can be managed at the server level in 2 ways - using rulesets, and using an .editorconfig file.
However, not all diagnostics can only be managed by an .editorconfig file, and rulesets are not always a good solution as they involve modifying .csproj files, which might not suit your project policies - not all project users necessarily use the same analyzers.
OmniSharp-vim provides a global override dictionary, where any diagnostic can be marked as having severity Error, Warning or Info, and for ALE/Syntastic users, a 'subtype': 'Style' may be specified.
Diagnostics may be ignored completely by setting their 'type' to 'None', in which case they will not be passed to linters, and will not be displayed in :OmniSharpGlobalCodeCheck results.
" IDE0010: Populate switch - display in ALE as `Info`
" IDE0055: Fix formatting - display in ALE as `Warning` style error
" CS8019: Duplicate of IDE0005
" RemoveUnnecessaryImportsFixable: Generic warning that an unused using exists
let g:OmniSharp_diagnostic_overrides = {
\ 'IDE0010': {'type': 'I'},
\ 'IDE0055': {'type': 'W', 'subtype': 'Style'},
\ 'CS8019': {'type': 'None'},
\ 'RemoveUnnecessaryImportsFixable': {'type': 'None'}
\}
To find the relevent diagnostic ID, it can be included in diagnostic descriptions (ALE/Syntastic messages and :OmniSharpGlobalCodeCheck results) by setting g:OmniSharp_diagnostic_showid to 1 - either in your .vimrc, or temporarily via the Vim command line:
let g:OmniSharp_diagnostic_showid = 1Note: Diagnostic overrides are only available in stdio mode, not HTTP mode.
Another method for filtering out diagnostic results is via path exclusion using g:OmniSharp_diagnostic_exclude_paths.
This variable is a list of regular expressions that will exclude paths that have a match to any of its entries:
let g:OmniSharp_diagnostic_exclude_paths = [
\ 'obj\\',
\ '[Tt]emp\\',
\ '\.nuget\\',
\ '\<AssemblyInfo\.cs\>'
\]When a recent enough Vim or neovim is used, OmniSharp-vim will use Vim's popup windows or neovim's floating windows in certain situations:
:OmniSharpDocumentation:OmniSharpSignatureHelp:OmniSharpPreviewDefinition(including metadata):OmniSharpPreviewImplementation- completion documentation (Vim only)
OmniSharp-vim will use popups by default for Vims/neovims which support them.
To disable popups completely, set g:OmniSharp_popup to 0:
let g:OmniSharp_popup = 0Apart from the insert-completion documentation window, all popups are closeable/scrollable using these mappings:
| Action name | Default mapping |
|---|---|
close (Gvim, neovim) |
<Esc>, gq |
close (terminal Vim) * |
gq |
lineDown |
<C-e> |
lineUp |
<C-y> |
halfPageDown |
<C-d> |
halfPageUp |
<C-u> |
pageDown |
<C-f> |
pageUp |
<C-b> |
Additionally, the signature-help popup window provides the following mappings for navigating through method signatures and selected parameters:
| Action name | Default mapping |
|---|---|
sigNext |
<C-j> |
sigPrev |
<C-k> |
sigParamNext |
<C-l> |
sigParamPrev |
<C-h> |
These mappings are all configurable, and you can assign more than one mapping for an action.
So to use e.g. CTRL-N and CTRL-P to navigate between signatures instead of CTRL-J and CTRL-K, and to use either CTRL-E/CTRL-Y or j/k for single line scrolling, use g:OmniSharp_popup_mappings like this:
let g:OmniSharp_popup_mappings = {
\ 'sigNext': '<C-n>',
\ 'sigPrev': '<C-p>',
\ 'lineDown': ['<C-e>', 'j'],
\ 'lineUp': ['<C-y>', 'k']
\}
Popups can be closed by using the close action mapping (gq or <Esc> by default), and also by simply navigating to another line.
* NOTE: Vim in the terminal does not have a default <Esc> close mapping, because <Esc> mappings interfere with escape codes in terminal Vim, meaning that key-codes such as arrow keys and <PageUp>/<PageDown> do not work as expected.
Therefore, terminal Vim only has the gq mapping.
Gvim and neovim handle escape codes differently, so are not affected, and have both gq and <Esc> as default close mappings.
If you are happy with this limitation and prefer to use <Esc> anyway, configure it in g:OmniSharp_popup_mappings:
let g:OmniSharp_popup_mappings.close = '<Esc>'Vim and neovim have different options for styling popups, due to the different ways the editors have implemented this feature.
The popup options from :help popup_create-arguments can be used to style Vim popups.
By default, Vim uses the Pmenu highlight group, with no border or padding.
Add a rounded border and padding, and use the Normal highlight group for the window and the Special highlight group for the border like this:
let g:OmniSharp_popup_options = {
\ 'highlight': 'Normal',
\ 'padding': [1],
\ 'border': [1],
\ 'borderchars': ['─', '│', '─', '│', '╭', '╮', '╯', '╰'],
\ 'borderhighlight': ['Special']
\}
See the :help link above for options for border characters, border highlight groups etc.
The g:OmniSharp_popup_options dictionary is a set of window options which can be set for the popup.
The dictionary may also contain an additional property, 'border', which is used as the config.border property passed to :help nvim_open_win().
Enable pseudo-transparency, add a rounded border and change the highlight groups from the default NormalFloat with FloatBorder border to Normal and Special border like this:
let g:OmniSharp_popup_options = {
\ 'winblend': 30,
\ 'winhl': 'Normal:Normal,FloatBorder:Special',
\ 'border': 'rounded'
\}The "documentation" popups (including signature help) are always opened as close as possible to the cursor.
However "buffer" popups (previewing definitions and implementations) may be configured to open in different ways, using the g:OmniSharp_popup_position value:
atcursor: (default) Next to the cursor. Height expands to display as much as possible, so this may result in a very high window.peek: Opens below or above the cursor, with the full width of the current window. Looks like a split, without altering window layout.center: Centered in the Vim window, filling the entire workspace.
It is possible to run unit tests via OmniSharp-roslyn, with success/failures listed in the quickfix window for easy navigation:
" Run the current unit test (the cursor should be on/inside the test method)
:OmniSharpRunTest

" Debug the current unit test (This will not populate the quickfix list with the result)
:OmniSharpDebugTest

" Run all unit tests in the current file
:OmniSharpRunTestsInFile

" Run all unit tests in the current file, and file `tests/test1.cs`
:OmniSharpRunTestsInFile % tests/test1.cs
Note: this is only available using the stdio server, and unfortunately does not work in translated WSL, due to the way OmniSharp-roslyn runs the tests.
Using Vimspector, you can debug C# projects and tests. For debugging tests see the Run unit tests section.
" Starts vimspector with an ad-hoc config that will debug the current project
:OmniSharpDebugProject

" Create a .vimspector config that you can use to debug the current project and
" change as needed.
:OmniSharpCreateDebugConfigBelow is an example .vimrc for getting started with OmniSharp-vim. For a more complete example with autocompletion, fzf integration, statusline indicators etc., have a look at the Example config in the wiki.
" Use the vim-plug plugin manager: https://github.com/junegunn/vim-plug
" Remember to run :PlugInstall when loading this vimrc for the first time, so
" vim-plug downloads the plugins listed.
silent! if plug#begin('~/.vim/plugged')
Plug 'OmniSharp/omnisharp-vim'
Plug 'dense-analysis/ale'
call plug#end()
endif

" Don't autoselect first omnicomplete option, show options even if there is only
" one (so the preview documentation is accessible). Remove 'preview', 'popup'
" and 'popuphidden' if you don't want to see any documentation whatsoever.
" Note that neovim does not support `popuphidden` or `popup` yet:
" https://github.com/neovim/neovim/issues/10996
if has('patch-8.1.1880')
  set completeopt=longest,menuone,popuphidden
  " Highlight the completion documentation popup background/foreground the same as
  " the completion menu itself, for better readability with highlighted
  " documentation.
  set completepopup=highlight:Pmenu,border:off
else
  set completeopt=longest,menuone,preview
  " Set desired preview window height for viewing documentation.
  set previewheight=5
endif

" Tell ALE to use OmniSharp for linting C# files, and no other linters.
let g:ale_linters = { 'cs': ['OmniSharp'] }

augroup omnisharp_commands
  autocmd!

  " Show type information automatically when the cursor stops moving.
  " Note that the type is echoed to the Vim command line, and will overwrite
  " any other messages in this space including e.g. ALE linting messages.
  autocmd CursorHold *.cs OmniSharpTypeLookup

  " The following commands are contextual, based on the cursor position.
  autocmd FileType cs nmap <silent> <buffer> gd <Plug>(omnisharp_go_to_definition)
  autocmd FileType cs nmap <silent> <buffer> <Leader>osfu <Plug>(omnisharp_find_usages)
  autocmd FileType cs nmap <silent> <buffer> <Leader>osfi <Plug>(omnisharp_find_implementations)
  autocmd FileType cs nmap <silent> <buffer> <Leader>ospd <Plug>(omnisharp_preview_definition)
  autocmd FileType cs nmap <silent> <buffer> <Leader>ospi <Plug>(omnisharp_preview_implementations)
  autocmd FileType cs nmap <silent> <buffer> <Leader>ost <Plug>(omnisharp_type_lookup)
  autocmd FileType cs nmap <silent> <buffer> <Leader>osd <Plug>(omnisharp_documentation)
  autocmd FileType cs nmap <silent> <buffer> <Leader>osfs <Plug>(omnisharp_find_symbol)
  autocmd FileType cs nmap <silent> <buffer> <Leader>osfx <Plug>(omnisharp_fix_usings)
  autocmd FileType cs nmap <silent> <buffer> <C-\> <Plug>(omnisharp_signature_help)
  autocmd FileType cs imap <silent> <buffer> <C-\> <Plug>(omnisharp_signature_help)

  " Navigate up and down by method/property/field
  autocmd FileType cs nmap <silent> <buffer> [[ <Plug>(omnisharp_navigate_up)
  autocmd FileType cs nmap <silent> <buffer> ]] <Plug>(omnisharp_navigate_down)
  " Find all code errors/warnings for the current solution and populate the quickfix window
  autocmd FileType cs nmap <silent> <buffer> <Leader>osgcc <Plug>(omnisharp_global_code_check)
  " Contextual code actions (uses fzf, vim-clap, CtrlP or unite.vim selector when available)
  autocmd FileType cs nmap <silent> <buffer> <Leader>osca <Plug>(omnisharp_code_actions)
  autocmd FileType cs xmap <silent> <buffer> <Leader>osca <Plug>(omnisharp_code_actions)
  " Repeat the last code action performed (does not use a selector)
  autocmd FileType cs nmap <silent> <buffer> <Leader>os. <Plug>(omnisharp_code_action_repeat)
  autocmd FileType cs xmap <silent> <buffer> <Leader>os. <Plug>(omnisharp_code_action_repeat)

  autocmd FileType cs nmap <silent> <buffer> <Leader>os= <Plug>(omnisharp_code_format)

  autocmd FileType cs nmap <silent> <buffer> <Leader>osnm <Plug>(omnisharp_rename)

  autocmd FileType cs nmap <silent> <buffer> <Leader>osre <Plug>(omnisharp_restart_server)
  autocmd FileType cs nmap <silent> <buffer> <Leader>osst <Plug>(omnisharp_start_server)
  autocmd FileType cs nmap <silent> <buffer> <Leader>ossp <Plug>(omnisharp_stop_server)
augroup END

" Enable snippet completion, using the ultisnips plugin
" let g:OmniSharp_want_snippet=1Pull requests welcome!
We have slack room as well. Get yourself invited and make sure to join the #vim channel.