You signed in with another tab or window. Reload to refresh your session.You signed out in another tab or window. Reload to refresh your session.You switched accounts on another tab or window. Reload to refresh your session.Dismiss alert
This file contains hidden or bidirectional Unicode text that may be interpreted or compiled differently than what appears below. To review, open the file in an editor that reveals hidden Unicode characters.
Learn more about bidirectional Unicode characters
This article has moved to the Open Identity Platform documentation site:
# Introduction
[Adaptive Authentication: How to Improve Security Without Annoying Users](https://doc.openidentityplatform.org/openam/how-to/adaptive-authentication-how-to-improve-security-without-annoying-users).
Your applications will be attacked sooner or later. Especially if they have become popular and your users don't particularly care about information security.
Please use the documentation site for the current version.
In my 10 years of developing authentication systems, I've seen a constant battle between security requirements and a positive user experience. The easier it is for a user to log into a service, the less annoyed they are. On the other hand, the more complex the authentication process, the easier it is for an attacker to break into the system. Is there a compromise possible here?
<aname="introduction"></a>
In my opinion, yes. An adaptiveauthentication system can recognize a potential attacker and make the authentication process much complex on the fly to prevent hacking.
If the user used the application before, logged in from the same IP address and used the same device or browser, and used the same device or browser, you can log in the user without asking for credentials.
If the user is trying to login using an unknown device or browser, or user's IP address in another country since the moment of the previous login, the user probably is an attacker.
<aname="adaptive-authentication-factors"></a>
Attackers come in several types - bots or real people, who use social engineering for attacks. For each type of attacker. For each type of attacker, you have to react differently.
If an attacker is a bot, you must use a method that only humans can pass - captcha. The most common types of captchas are images of text or certain objects. To authenticate, the user must enter the text from the image, or mark certain objects.
An alternative authentication option is one-time-password (OTP) authentication. The random code is sent to the user via SMS, email, or push notification in a mobile application. In that case, an attacker will not be able to access the application, unless he has access to the user's phone or email. This method is more expensive than captcha but can protect against both bots or real people.
If there is a high probability of hacking, authentication should be disabled for IP address or user account.
<aname="manual-configuration"></a>
To figure out if a user is an attacker, during the authentication process you must collect certain data that can be used to detect attack risk level. This data is called authentication factors.
**IP address.** Using an IP address you can determine several factors:
**If the IP address belongs to a cloud provider.** Hackers use cloud servers to deploy attackers bots or use a cloud server as a VPN server.
**If the IP address is an exit node or anonymous network.** Hackers can use anonymous internet, for example, TOR, for attacks to hide their real location.
**User geographical location.** If the location of current authentication is uncommon for most of your users it could be a hacker attack.
**User speed.** If the user tries to authenticate from one country and five minutes later from another country, this is likely an attack. A real person can't cover such distance so fast.
**The number of unsuccessful authentication attempts for a certain time.** If there are more than 10 unsuccessful authentication attempts in a minute, it is suspected that there is a password brute force attempt.
**The number of unsuccessful authentication attempts per time for an IP address.** If there are more than 100 unsuccessful authentication attempts per minute, there is a suspicion of an attack attempt.
**Unknown or known device or browser.** After successful authentication, the service sets a special tag (cookie) for a device or browser. The tag is transmitted at the next login attempts and allows to determine whether the device is known or not.
**A time from the start of the authentication process to entering your username and password.** A human will not be able to enter credentials and press the "Login" button in a fraction of a second
**A time since the last successful authentication.** If the user has not logged in for several months, it may be worth requesting additional data from the user.
## Adaptive Authentication Policy Setup
Adaptive authentication policies could be determined by security requirements and configured manually. The second option is to use machine learning methods.
## Manual Configuration
You determine by yourself which factors are the most potentially dangerous. For example, it is critical to you that when using a new device or browser, the user must additionally confirm his or her identity. When using a known device, you can log the user in without authentication.
Advantages
- Transparency - you determine which security policy is acceptable to you and configure it accordingly
- Easy maintenance
- Low consumption of computing resources
Disadvantages
- To setup policy experience in the subject area is required
## Automatic Policy Configuration Using Machine Learning
I intentionally do not use the hype terms "artificial intelligence" or "neural networks" because classification methods or decision trees are sufficient for adaptive authentication. Besides, the result of training neural networks cannot be interpreted. So, you will not be able to determine which authentication factors are most important in attack detection.
Advantages
- Machine learning algorithms can identify factors or combinations of authentication factors that are not obvious to the expert
- The possibility of continuous learning while accumulating authentication data and automatic algorithm adjustment when the logic of the authentication services changes
Disadvantages
- Requires qualified personnel to set up
- Cold start problem - the system cannot work until enough data has been collected for machine learning
- Using multiple models simultaneously increases the consumption of computing resources in the process, especially while training the models.
**[Automatic Policy Configuration Using Machine Learning](https://doc.openidentityplatform.org/openam/how-to/adaptive-authentication-how-to-improve-security-without-annoying-users#adaptive-authentication-how-to-improve-security-without-annoying-users-automatic-policy-configuration-using-machine-learning)**
This file contains hidden or bidirectional Unicode text that may be interpreted or compiled differently than what appears below. To review, open the file in an editor that reveals hidden Unicode characters.
Learn more about bidirectional Unicode characters
This article has moved to the Open Identity Platform documentation site:
This article is intended for developers of single-page applications (SPAs) who seek to configure user authentication. The authentication process will utilize the OAuth2/OIDC protocol with PKCE for enhanced security. OpenAM will serve as a designated authentication server.
[Authentication in a Single‐Page Application via OpenAM using OAuth2OIDC Protocol](https://doc.openidentityplatform.org/openam/how-to/authentication-in-a-single-page-application-via-openam-using-oauth2-oidc-protocol).
## OpenAM Configuration
Please use the documentation site for the current version.
## Install OpenAM
<aname="introduction"></a>
Let OpenAM hostname is `openam.example.org` Before starting, add the hostname and IP address to the `hosts` file, for example `127.0.0.0.1 openam.example.org`.
In the login field enter the value `amadmin`, in the password field enter the value from the `ADMIN_PWD` parameter of the setup command, in this case `passw0rd`.
Select the desired realm. In the Dashboard section, click the Configure OAuth Provider item.
**[React-Based Example SPA Application](https://doc.openidentityplatform.org/openam/how-to/authentication-in-a-single-page-application-via-openam-using-oauth2-oidc-protocol#authentication-in-a-single-page-application-via-openam-using-oauth2-oidc-protocol-react-based-example-spa-application)**
- Enter the Name (client_id) `test_client_id` and Password (client_secret) `changeit` of the new application
- Open the application settings
- Set Client type to Public
- Add the URI of your SPA application to the list of Redirection URIs. In our case, it will be http://localhost:5173/
- Add the `openid` value to the scope list, this is to get the user ID from the returned `id_token` object.
- Token Endpoint Authentication Method, set `client_secret_post`.
## CORS Setup
SPA performs cross-domain queries to get access_token and id_token. To prevent these requests from being blocked by the browser, you need to enable [CORS](https://developer.mozilla.org/ru/docs/Web/HTTP/CORS) support in OpenAM.
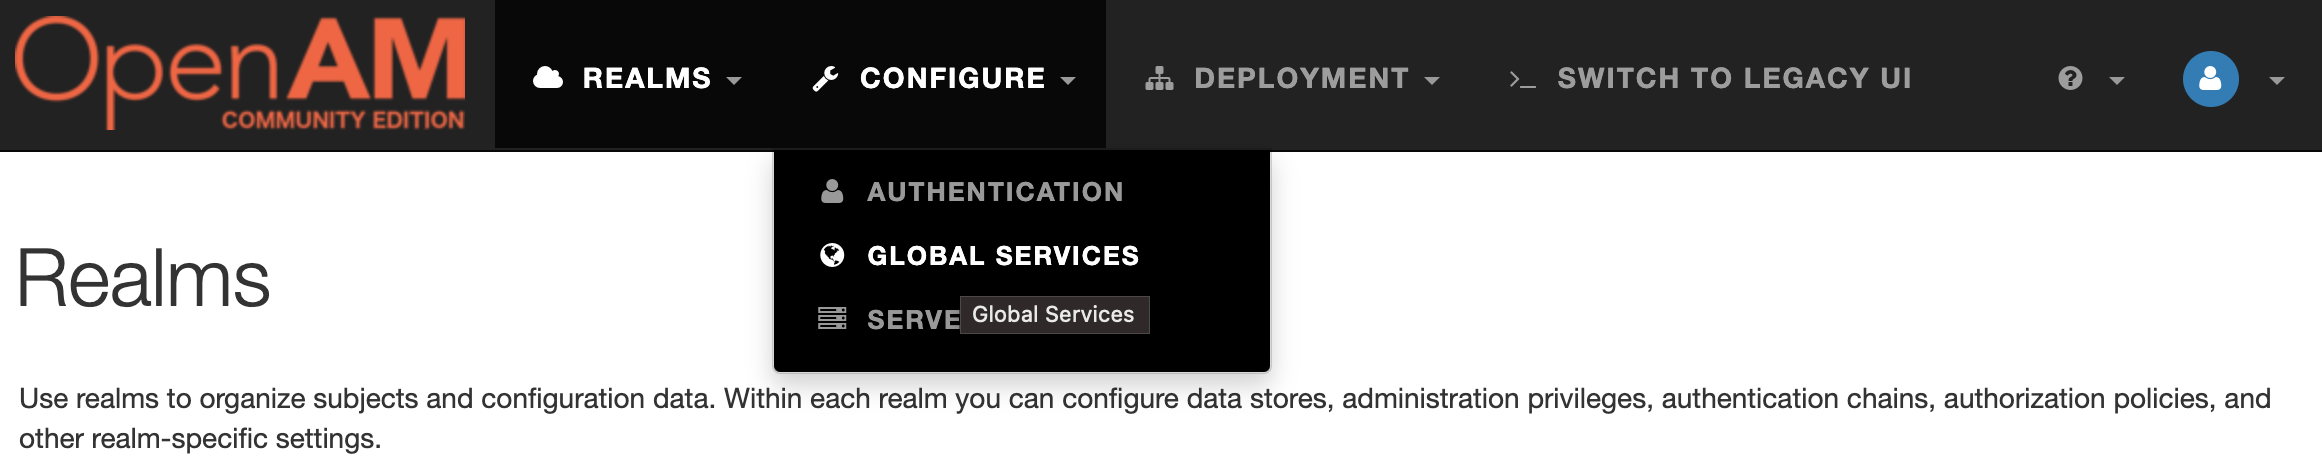
Open the administrator console. In the top menu, select Configure → Global Services.
Next, go to CORS Settings and enable CORS support
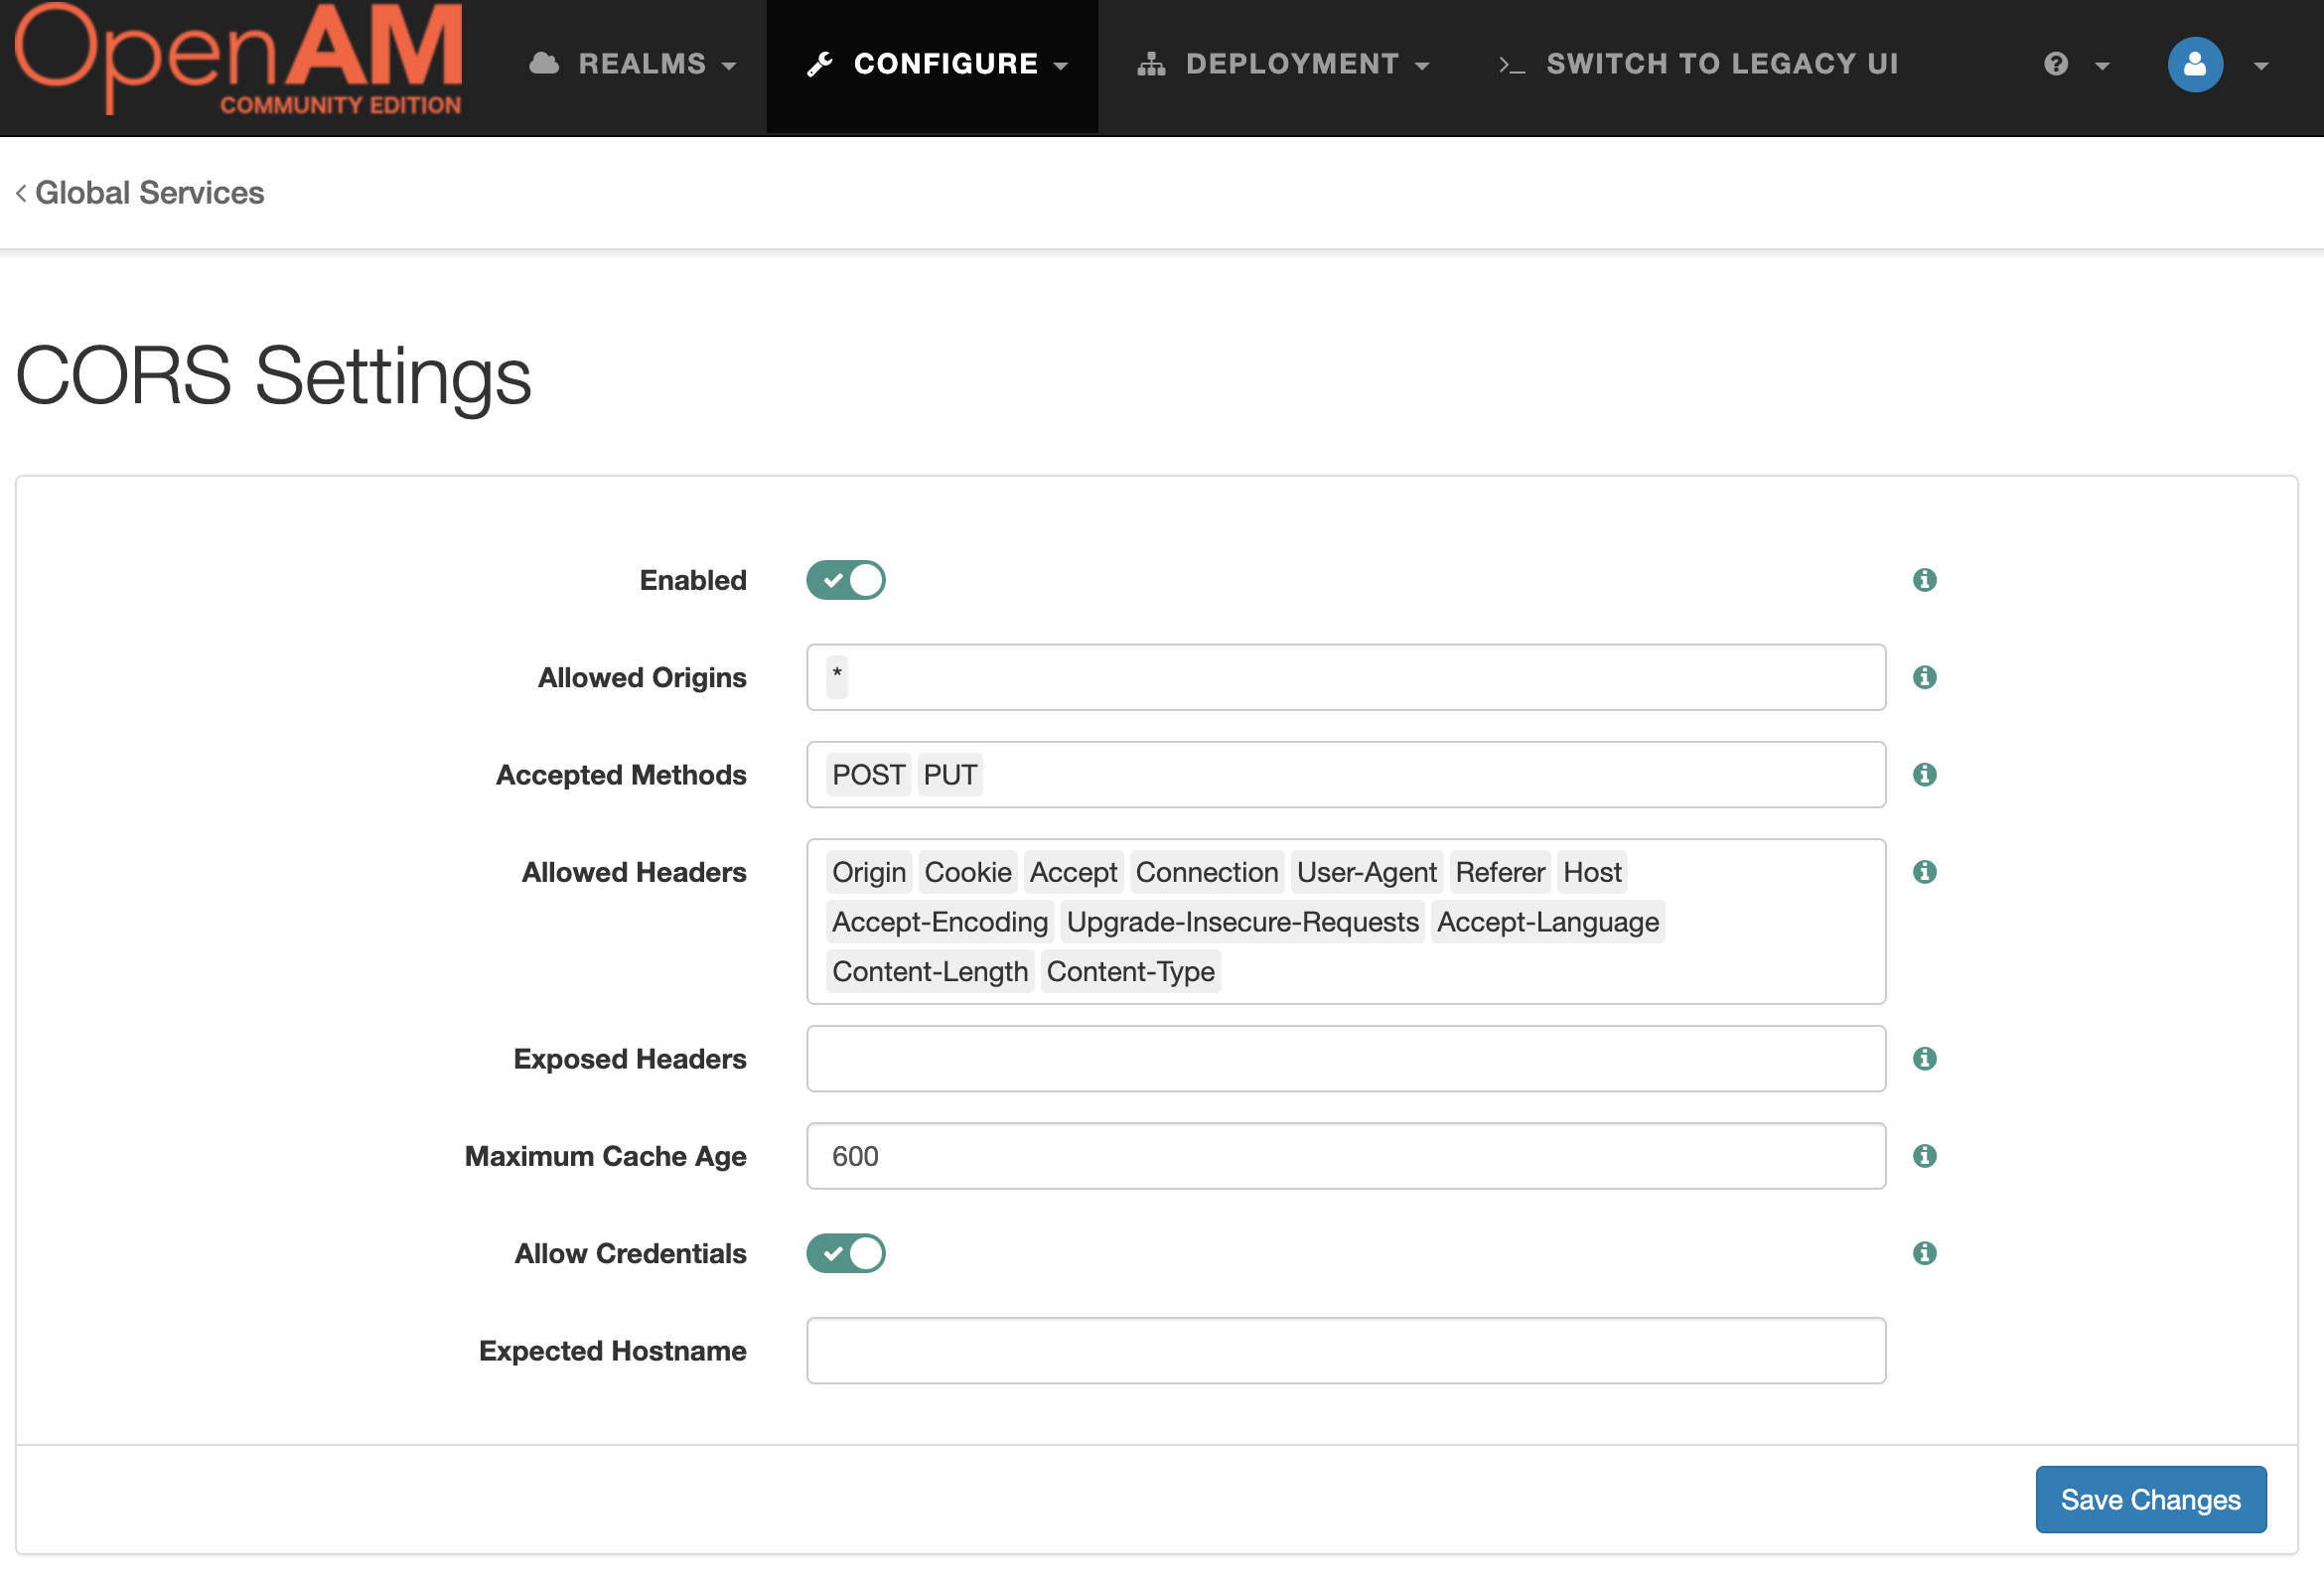
Pres the `Save Changes` button.
# React-Based Example SPA Application
As an example, we will use a React application. For simplicity, we will not validate the state parameter, verify the correctness of the signature of the returned id_token, and so on. However, in a production environment, we highly recommend doing so.
To create a new application, execute the following command in the console:
Open the application in your browser by URL http://localhost:5173/

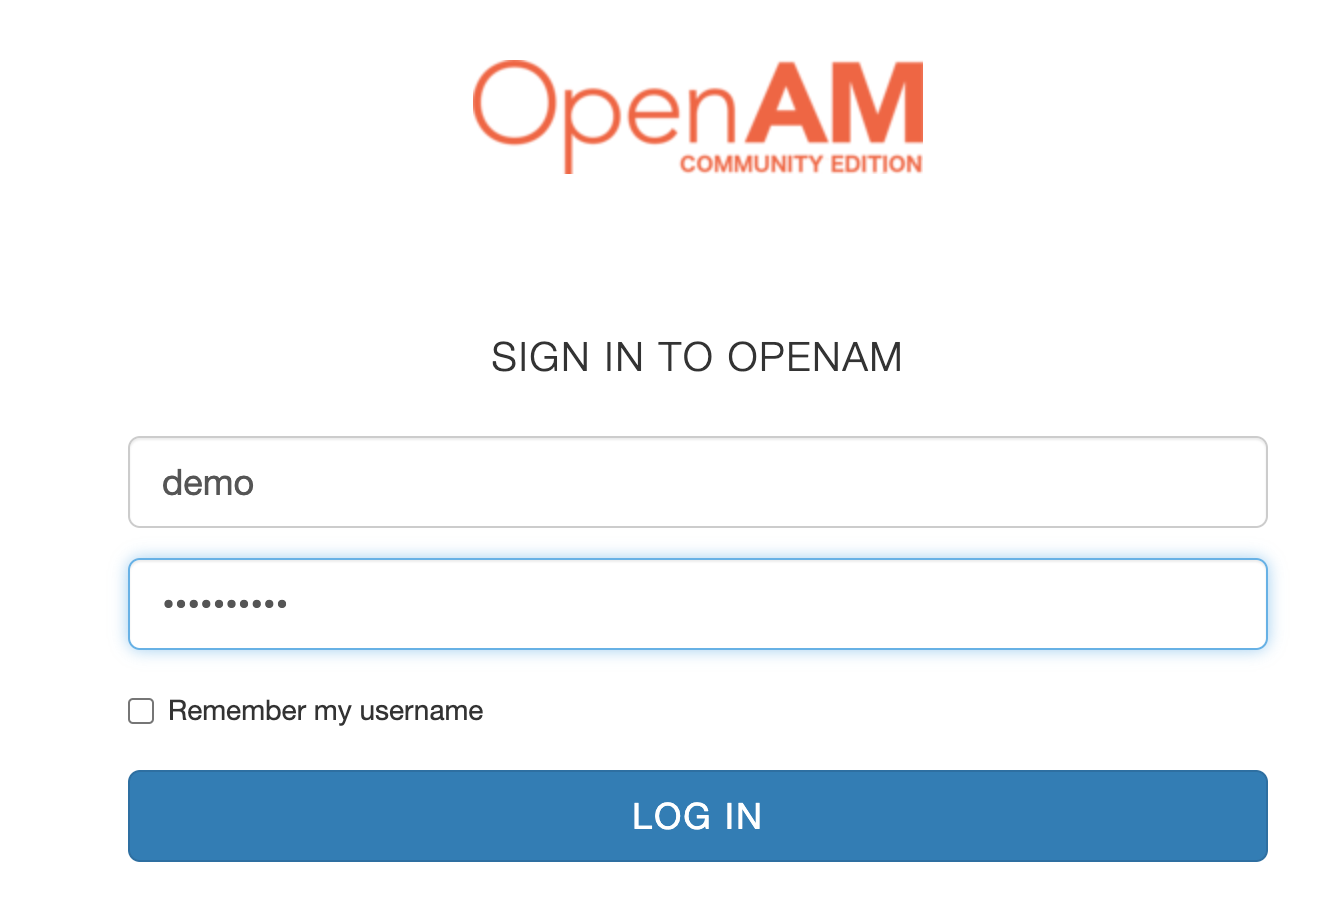
Click the `Login` button. You will be redirected to OpenAM authentication. Enter the user login `demo` and password `changeit`.
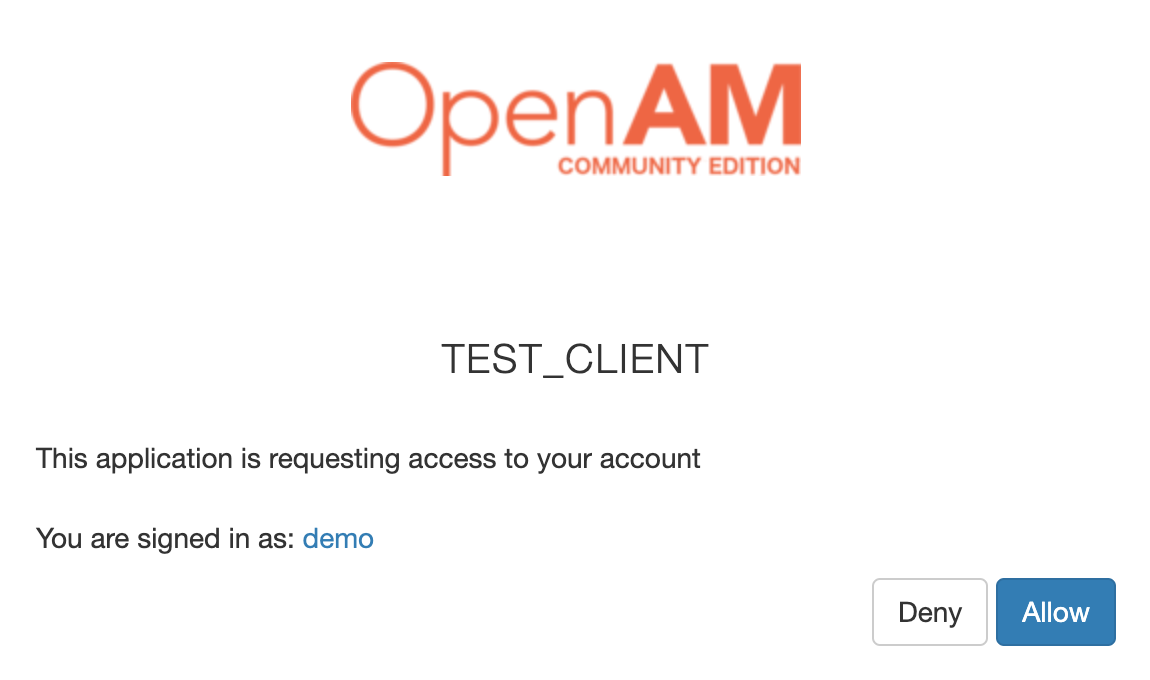
Confirm consent to access the data
After that, the browser will redirect back to the SPA application and successfully authenticate the user. If everything is configured correctly, the SPA application will display a message about successful authentication:

This file contains hidden or bidirectional Unicode text that may be interpreted or compiled differently than what appears below. To review, open the file in an editor that reveals hidden Unicode characters.
Learn more about bidirectional Unicode characters
This file contains hidden or bidirectional Unicode text that may be interpreted or compiled differently than what appears below. To review, open the file in an editor that reveals hidden Unicode characters.
Learn more about bidirectional Unicode characters
This file contains hidden or bidirectional Unicode text that may be interpreted or compiled differently than what appears below. To review, open the file in an editor that reveals hidden Unicode characters.
Learn more about bidirectional Unicode characters
This file contains hidden or bidirectional Unicode text that may be interpreted or compiled differently than what appears below. To review, open the file in an editor that reveals hidden Unicode characters.
Learn more about bidirectional Unicode characters
This article has moved to the Open Identity Platform documentation site:
## Introduction
[Configuring authentication in OpenAM via Yandex Cloud using the SAML protocol](https://doc.openidentityplatform.org/openam/how-to/configuring-authentication-in-openam-via-yandex-cloud-using-the-saml-protocol).
In this article, we will configure authentication in OpenAM using user accounts via Yandex Cloud. This will allow you to configure authentication in your corporate applications via OpenAM using Yandex Cloud as the Identity Provider (IdP) and OpenAM as the Service Provider (SP).
Please use the documentation site for the current version.
## Configuring Yandex Cloud
<aname="introduction"></a>
1. Go to the [Yandex Cloud Organization](https://org.cloud.yandex.ru/) service.
2. Open the **Identity Hub** tab.
3. In the left pane, select the [Applications](https://center.yandex.cloud/organization/apps) section.
4. Click the **Create Application** button
5. Select the SAML (Security Assertion Markup Language) application type
6. Enter the application name, for example, **openam-saml**

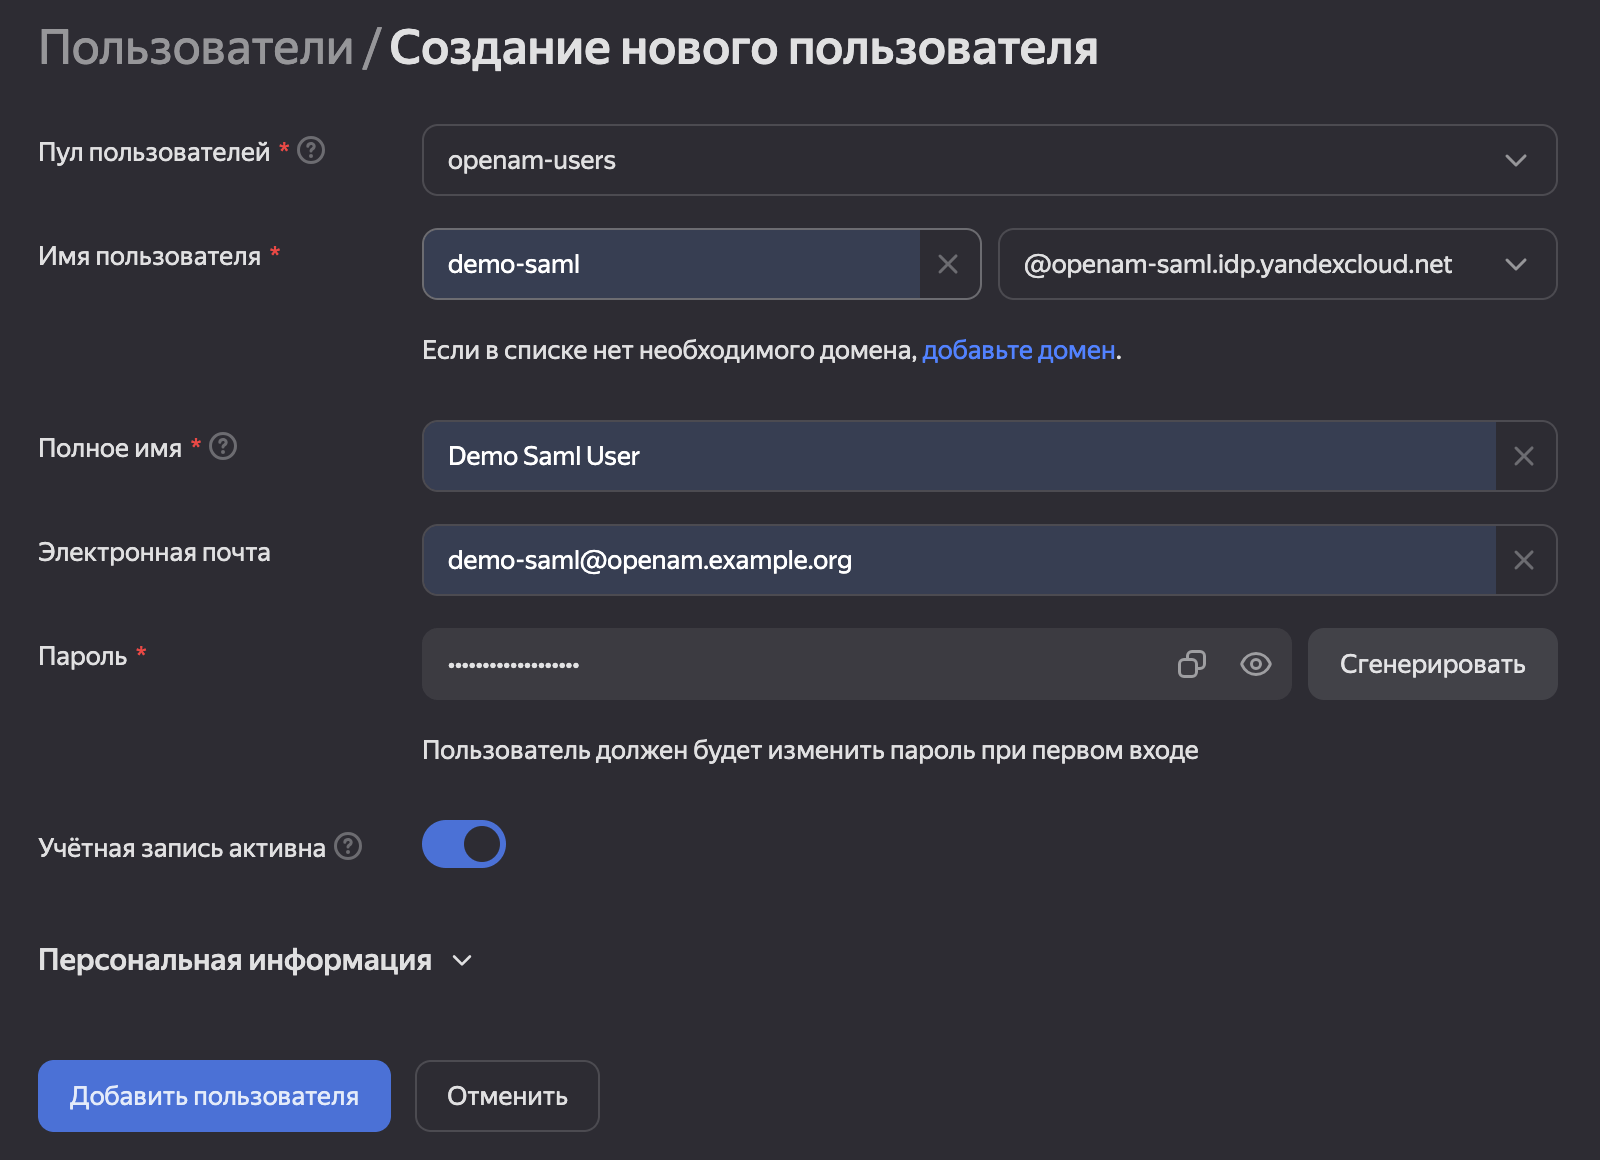
1. In the **Identity Hub** section, select **User Pools** from the menu on the left.
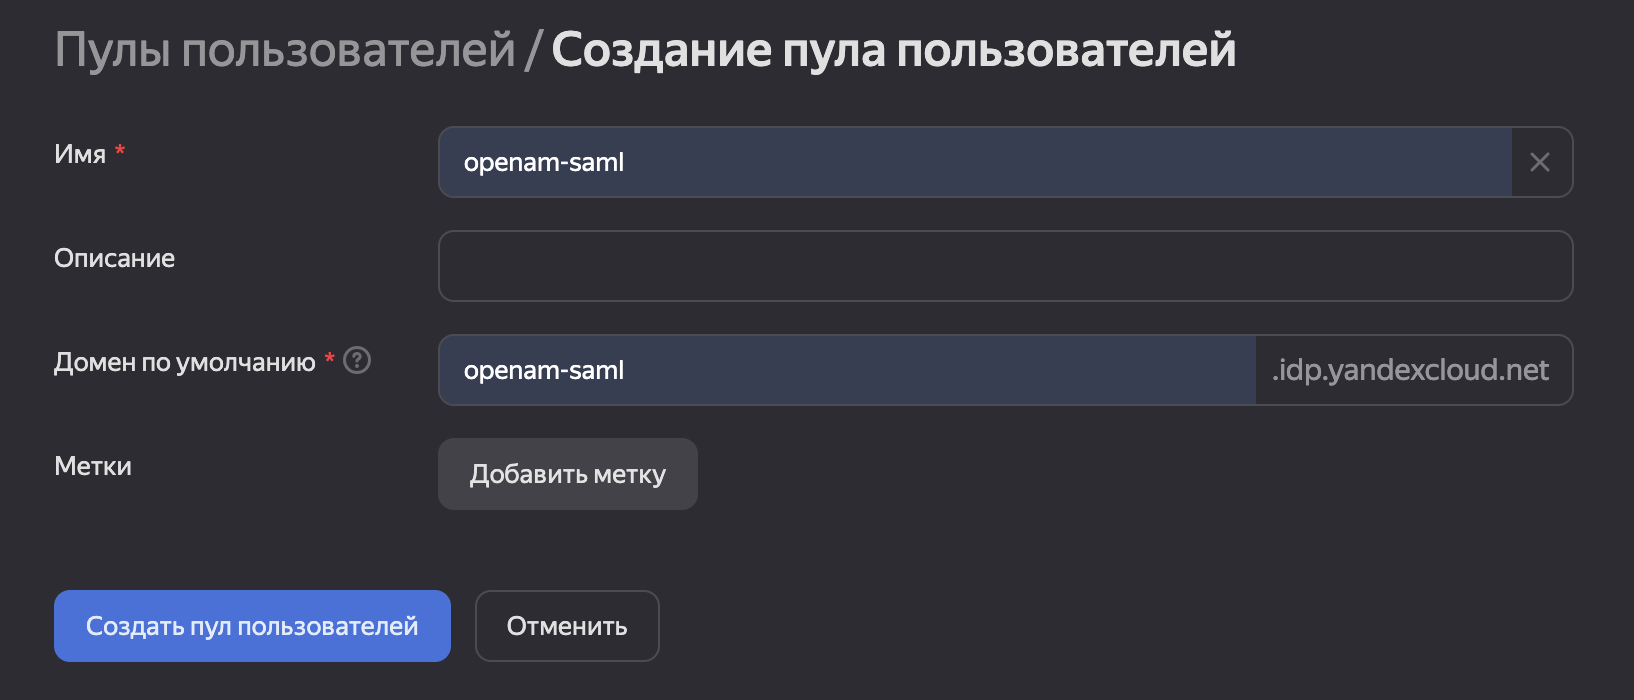
2. Click the **Create User Pool** button.
3. Enter the pool details and click **Create User Pool**.
<aname="installing-openam"></a>
<aname="configuring-the-service-provider"></a>
## Configuring OpenAM
**[Configuring the Service Provider](https://doc.openidentityplatform.org/openam/how-to/configuring-authentication-in-openam-via-yandex-cloud-using-the-saml-protocol#configuring-authentication-in-openam-via-yandex-cloud-using-the-saml-protocol-configuring-the-service-provider)**
### Installing OpenAM
<aname="configuring-the-identity-provider"></a>
For simplicity, deploy OpenAM in a Docker container with the command
**[Configuring the Identity Provider](https://doc.openidentityplatform.org/openam/how-to/configuring-authentication-in-openam-via-yandex-cloud-using-the-saml-protocol#configuring-authentication-in-openam-via-yandex-cloud-using-the-saml-protocol-configuring-the-identity-provider)**
```bash
docker run -p 8080:8080 --name openam openidentityplatform/openam
```
<aname="verifying-the-solution"></a>
And perform the initial setup
**[Verifying the solution](https://doc.openidentityplatform.org/openam/how-to/configuring-authentication-in-openam-via-yandex-cloud-using-the-saml-protocol#configuring-authentication-in-openam-via-yandex-cloud-using-the-saml-protocol-verifying-the-solution)**
Enter the password and confirm that the certificate is trusted.
Restart the OpenAM container.
```bash
docker restart openam
```
### Realm Configuration
Log in to the administrator console at [http://localhost:8080/openam](http://localhost:8080/openam/). Use the login `amadmin` and password `passw0rd` respectively.
1. Open **Top Level Realm.**
2. In the menu on the left, go to **Authentication → Settings**.
3. Go to the **User Profile** tab and set the **User Profile** setting to **Ignore**.
1. In the administrator console, select **Top Level Realm**
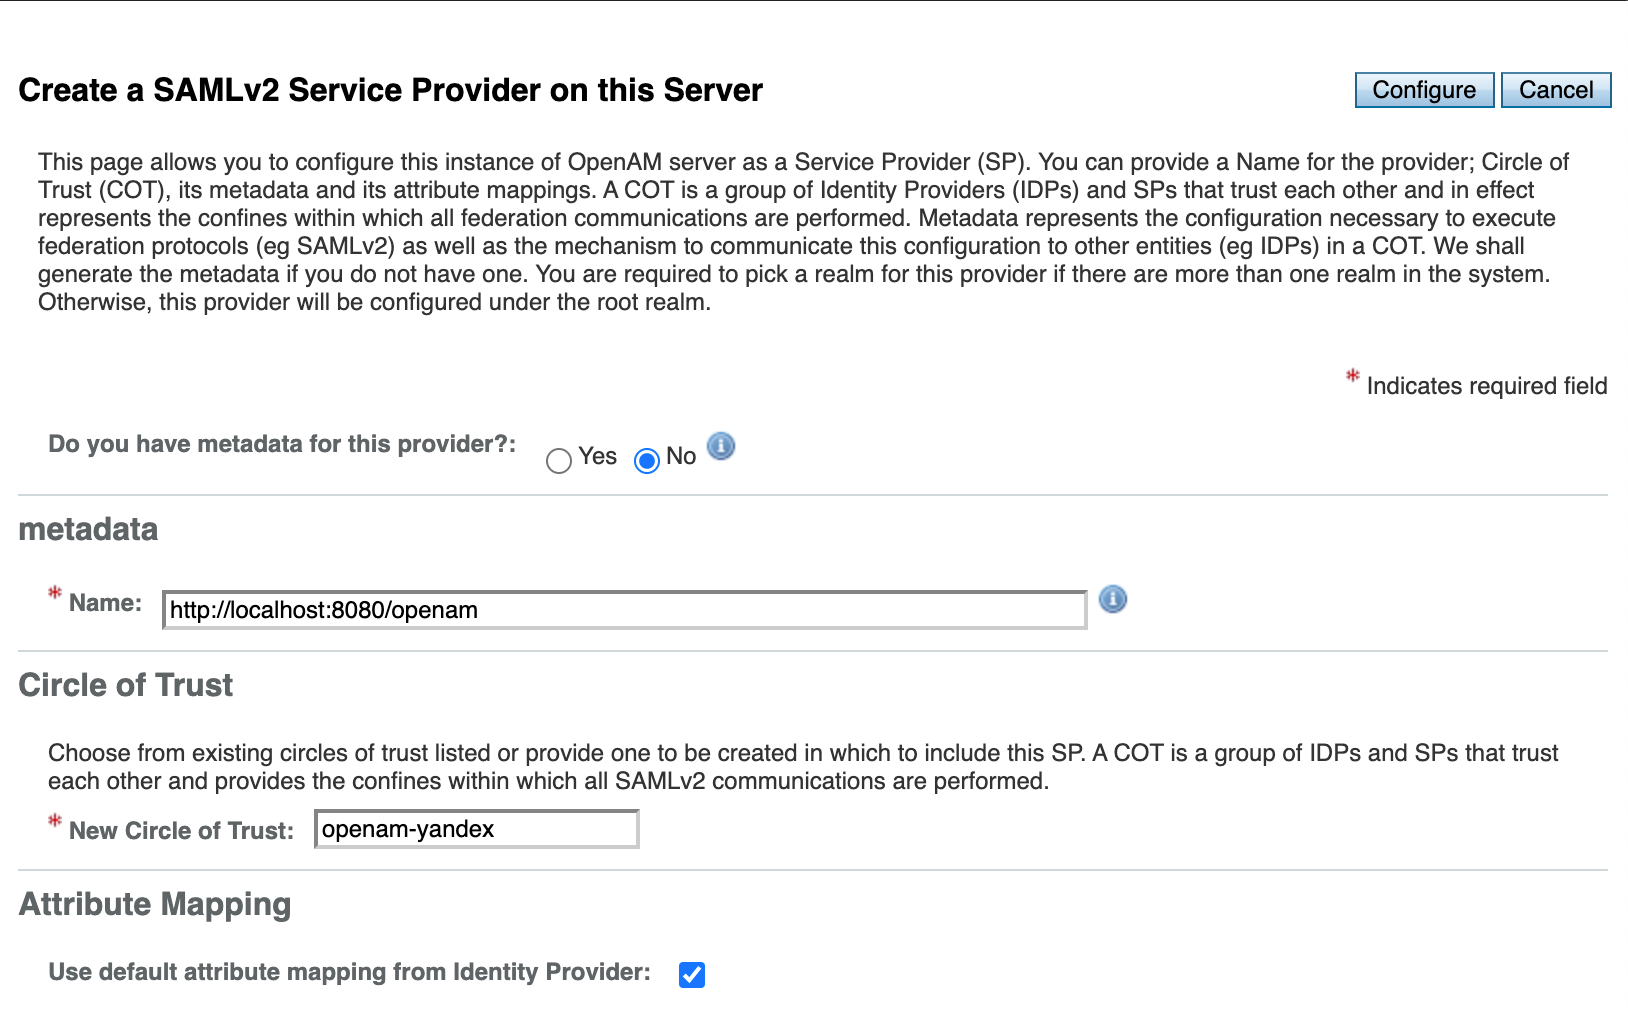
2. On the **Common Tasks** panel, click **Configure SAMLv2 Provider**
3. Next, click **Create Hosted Service Provider**
4. Enter any name for **Circle Of Trust**, for example, `openam-yandex`, and click **Configure.**
5. OpenAM will prompt you to configure Remote Identity Provider. Click Yes.
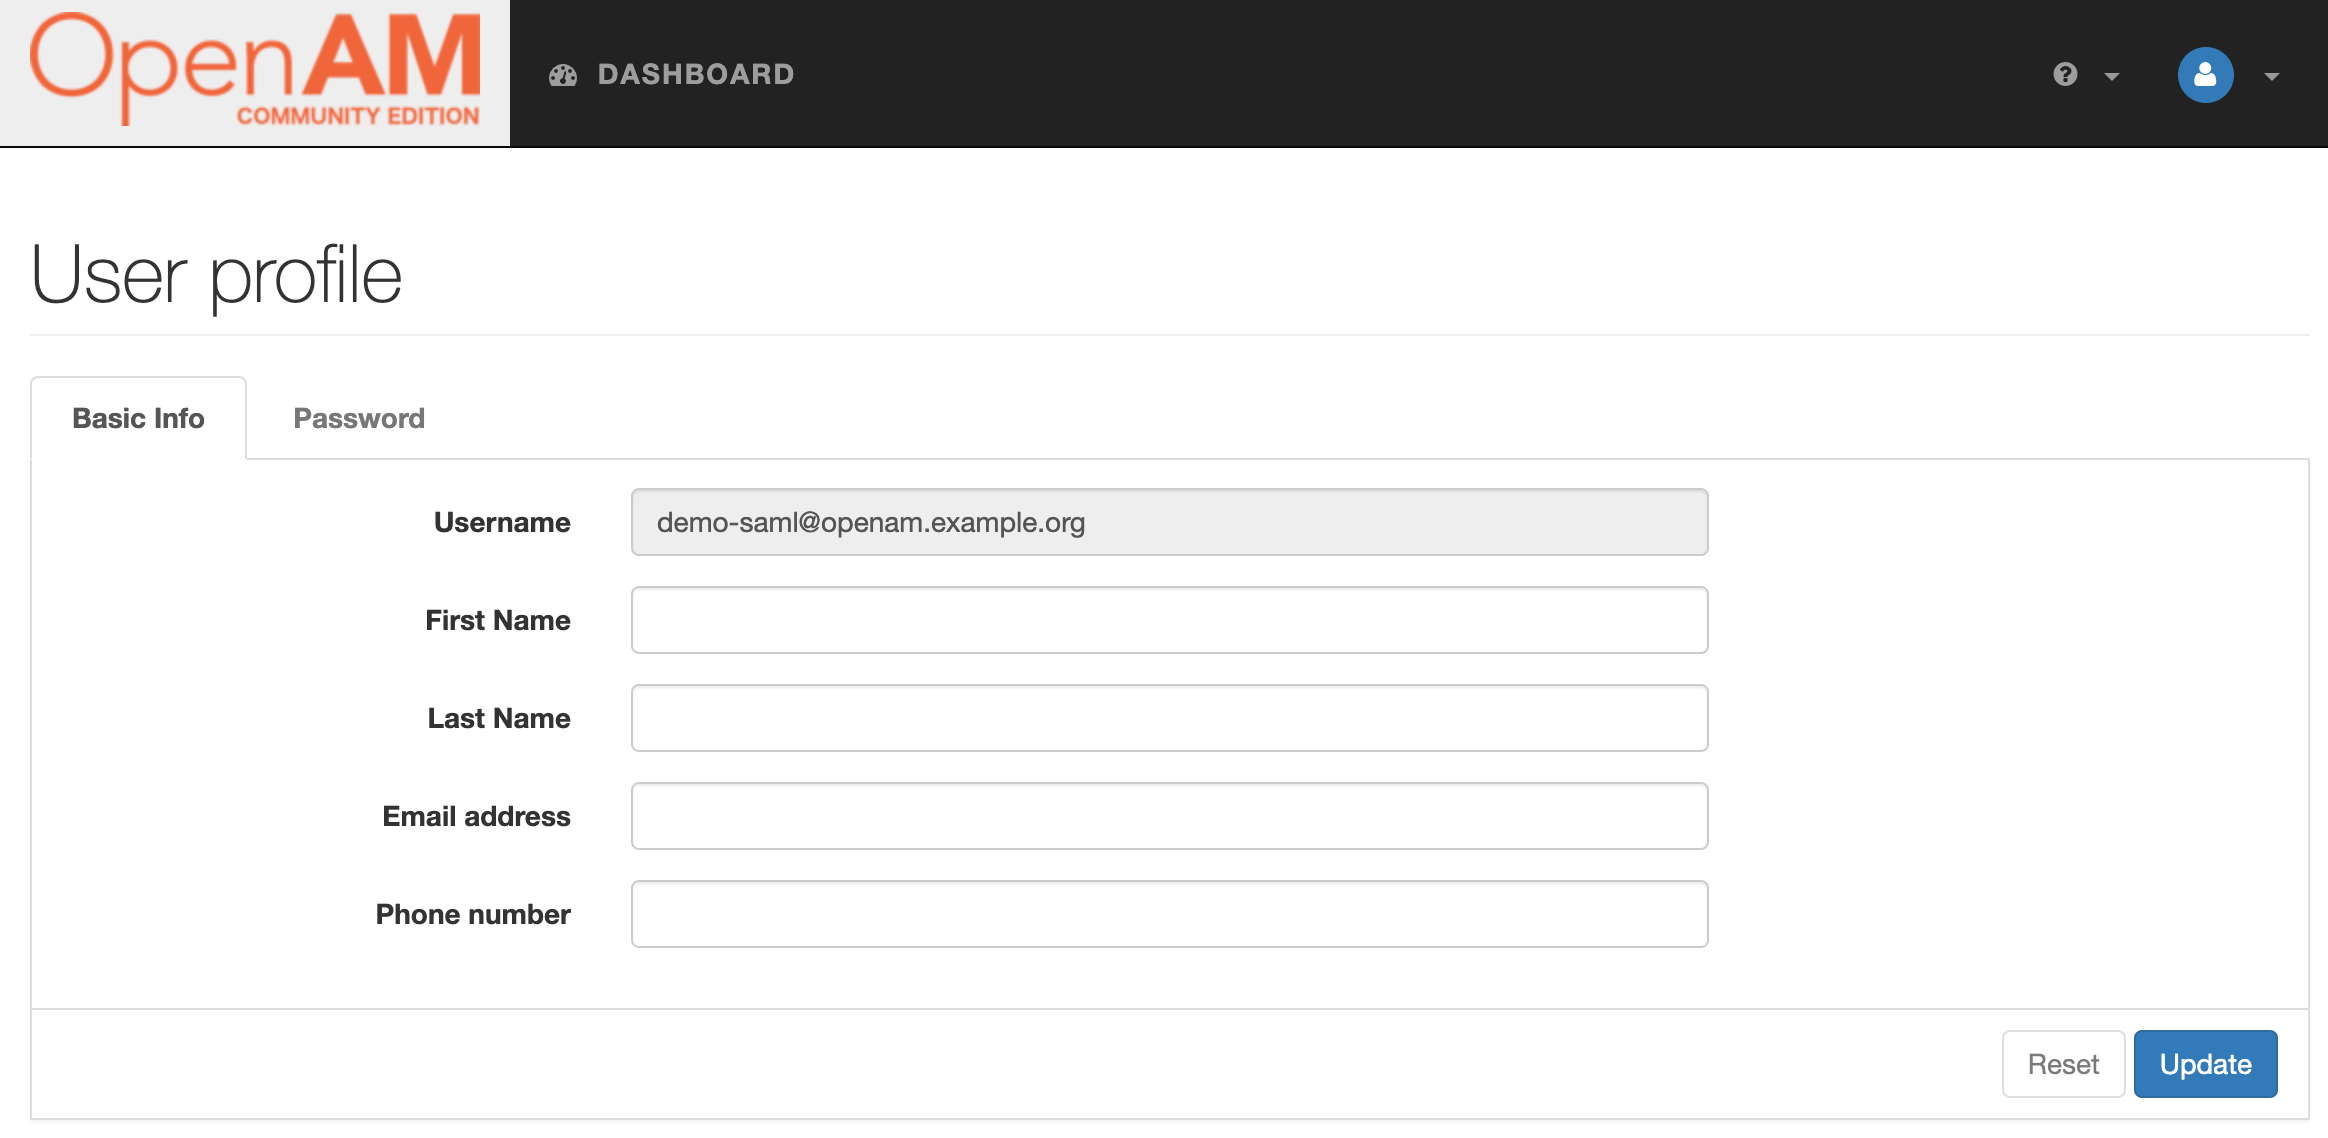
7. After successful authentication, you will be redirected to the OpenAM console with your Yandex Cloud credentials.
## What's next
For production use, OpenAM must be deployed using a secure SSL connection, for example on a host and using an FQDN, such as https://openam.example.org/openam.
Next, you can use the OpenIG authorization gateway to set up single sign-on (SSO) for your applications.
For more details on configuring OpenAM and OpenIG, please refer to the documentation at [https://doc.openidentityplatform.org/openam](https://doc.openidentityplatform.org/openam) and [https://doc.openidentityplatform.org/openig](https://doc.openidentityplatform.org/openig).
This file contains hidden or bidirectional Unicode text that may be interpreted or compiled differently than what appears below. To review, open the file in an editor that reveals hidden Unicode characters.
Learn more about bidirectional Unicode characters
*[.Net SDK and IIS policy agent](https://github.com/OpenIdentityPlatform/OpenAM-.Net-Agent/blob/master/README.md)
### HowTo Guides
*[[How OpenAM Works Simple Explanation]]
*[[What is Single Sign On and How does it Work]]
*[[Login and Password Authentication]]
*[[Passwordless Authenticaion Methods]]
*[[Stateful vs Stateless Authentication]]
*[[Adaptive-Authentication: How to Improve Security Without Annoying Users]]
*[How to Add Authorization and Protect Your Application With OpenAM and OpenIG Stack](https://github.com/OpenIdentityPlatform/OpenAM/wiki/How-to-Add-Authorization-and-Protect-Your-Application-With-OpenAM-and-OpenIG-Stack)
*[[How to Setup OAuth2 OIDC Federation in OpenAM]]
*[[How to Setup SAMLv2 Federation in OpenAM]]
*[[How to Setup 2FA with Google Authenticator in OpenAM]]
*[[How to Setup Two Factor Authentication in OpenAM]]
*[Config OpenAM as OAuth2 Service Provider](https://github.com/OpenIdentityPlatform/OpenAM/wiki/Config-OpenAM-as-OAuth2-Service-Provider)
*[[Authentication in a Single‐Page Application via OpenAM using OAuth2 OIDC Protocol]]
*[How To Setup Active Directory Authentication In OpenAM](https://github.com/OpenIdentityPlatform/OpenAM/wiki/How-To-Setup-Active-Directory-Authentication-In-OpenAM)
*[How to setup Kerberos Authentication with OpenAM](https://github.com/OpenIdentityPlatform/OpenAM/wiki/How-to-setup-Kerberos-Authentication-with-OpenAM)
*[How to Setup WebAuthn Authentication in OpenAM](https://github.com/OpenIdentityPlatform/OpenAM/wiki/How-to-Setup-WebAuthn-Authentication-in-OpenAM)
*[[SAML Authentication in Yandex Cloud via OpenAM]]
*[Stateful vs Stateless Authentication](https://doc.openidentityplatform.org/openam/how-to/stateful-vs-stateless-authentication)
*[AdaptiveAuthentication: How to Improve Security Without Annoying Users](https://doc.openidentityplatform.org/openam/how-to/adaptive-authentication-how-to-improve-security-without-annoying-users)
*[How to Add Authorization and Protect Your Application With OpenAM and OpenIG Stack](https://doc.openidentityplatform.org/openam/how-to/how-to-add-authorization-and-protect-your-application-with-openam-and-openig-stack)
*[How to Setup OAuth2 OIDC Federation in OpenAM](https://doc.openidentityplatform.org/openam/how-to/how-to-setup-oauth2-oidc-federation-in-openam)
*[How to Setup SAMLv2 Federation in OpenAM](https://doc.openidentityplatform.org/openam/how-to/how-to-setup-samlv2-federation-in-openam)
*[How to Setup 2FA with Google Authenticator in OpenAM](https://doc.openidentityplatform.org/openam/how-to/how-to-setup-2fa-with-google-authenticator-in-openam)
*[How to Setup Two Factor Authentication in OpenAM](https://doc.openidentityplatform.org/openam/how-to/how-to-setup-two-factor-authentication-in-openam)
*[Config OpenAM as OAuth2 Service Provider](https://doc.openidentityplatform.org/openam/how-to/config-openam-as-oauth2-service-provider)
*[Authentication in a Single‐Page Application via OpenAM using OAuth2 OIDC Protocol](https://doc.openidentityplatform.org/openam/how-to/authentication-in-a-single-page-application-via-openam-using-oauth2-oidc-protocol)
*[How To Setup Active Directory Authentication In OpenAM](https://doc.openidentityplatform.org/openam/how-to/how-to-setup-active-directory-authentication-in-openam)
*[How to setup Kerberos Authentication with OpenAM](https://doc.openidentityplatform.org/openam/how-to/how-to-setup-kerberos-authentication-with-openam)
*[How to Setup WebAuthn Authentication in OpenAM](https://doc.openidentityplatform.org/openam/how-to/how-to-setup-webauthn-authentication-in-openam)
*[SAML Authentication in Yandex Cloud via OpenAM](https://doc.openidentityplatform.org/openam/how-to/saml-authentication-in-yandex-cloud-via-openam)
*[SAML Authentication in WordPress via OpenAM](https://doc.openidentityplatform.org/openam/how-to/saml-authentication-in-wordpress-via-openam)
*[Build OpenAM from source](https://github.com/OpenIdentityPlatform/OpenAM#how-to-build-openam-from-source)
*[[How to Customise OpenAM]]
*[How to disable XUI by default](https://github.com/OpenIdentityPlatform/OpenAM/wiki/How-to-disable-XUI-by-default)
*[How to make OpenAM log more verbose](https://github.com/OpenIdentityPlatform/OpenAM/wiki/How-to-make-OpenAM-log-more-verbose)
*[How to Start OpenAM and OpenDJ in Separate Docker Contaners](https://github.com/OpenIdentityPlatform/OpenAM/wiki/How-to-Start-OpenAM-and-OpenDJ-in-Separate-Docker-Contaners)
*[How To Run OpenAM in Kubernetes](https://github.com/OpenIdentityPlatform/OpenAM/wiki/How-To-Run-OpenAM-in-Kubernetes)
*[How to Pass Additional System Property to CATALINA_OPTS to OpenAM Docker Container](https://github.com/OpenIdentityPlatform/OpenAM/wiki/TIP%3A-How-to-Pass-Additional-System-Property-to-CATALINA_OPTS-to-OpenAM-Docker-Container)
*[Quick OpenAM Docker Configuration From a Command Line](https://github.com/OpenIdentityPlatform/OpenAM/wiki/TIP%3A-Quick-OpenAM-Docker-Configuration-From-a-Command-Line)
*[How to Persist OpenAM Docker Container Data Between Restarts](https://github.com/OpenIdentityPlatform/OpenAM/wiki/TIP%3A-How-to-Persist-OpenAM-Docker-Container-Data-Between-Restarts)
*[How to Enable CORS](https://github.com/OpenIdentityPlatform/OpenAM/wiki/TIP%3A-How-to-Enable-CORS)
*[Migrate OpenAM to Apache Cassandra without Single Point of Failure](https://github.com/OpenIdentityPlatform/OpenAM/wiki/Migrate-OpenAM-to-Apache-Cassandra-without-Single-Point-of-Failure)
*[[How to Use Apache Cassandra as User and Session DataStore in OpenAM]]
*[[How to Devleop a Custom Authentication Module]]
*[[How to Create Custom OpenAM DataStore Integration]]
*[OpenAM Monitoring Using Prometheus](https://github.com/OpenIdentityPlatform/OpenAM/wiki/OpenAM-Monitoring-Using-Prometheus)
*[Setup Tracing with OpenTelemetry and Jaeger](https://github.com/OpenIdentityPlatform/OpenAM/wiki/Setup-Tracing-with--OpenTelemetry-and-Jaeger)
*[How to Customise OpenAM](https://doc.openidentityplatform.org/openam/how-to/how-to-customise-openam)
*[How to disable XUI by default](https://doc.openidentityplatform.org/openam/how-to/how-to-disable-xui-by-default)
*[How to make OpenAM log more verbose](https://doc.openidentityplatform.org/openam/how-to/how-to-make-openam-log-more-verbose)
*[How to Start OpenAM and OpenDJ in Separate Docker Containers](https://doc.openidentityplatform.org/openam/how-to/how-to-start-openam-and-opendj-in-separate-docker-containers)
*[How To Run OpenAM in Kubernetes](https://doc.openidentityplatform.org/openam/how-to/how-to-run-openam-in-kubernetes)
*[How to Pass Additional System Property to CATALINA_OPTS to OpenAM Docker Container](https://doc.openidentityplatform.org/openam/how-to/how-to-pass-additional-system-property-to-catalina-opts-to-openam-docker-container)
*[Quick OpenAM Docker Configuration From a Command Line](https://doc.openidentityplatform.org/openam/how-to/quick-openam-docker-configuration-from-a-command-line)
*[How to Persist OpenAM Docker Container Data Between Restarts](https://doc.openidentityplatform.org/openam/how-to/how-to-persist-openam-docker-container-data-between-restarts)
*[How to Enable CORS](https://doc.openidentityplatform.org/openam/how-to/how-to-enable-cors)
*[Migrate OpenAM to Apache Cassandra without Single Point of Failure](https://doc.openidentityplatform.org/openam/how-to/migrate-openam-to-apache-cassandra-without-single-point-of-failure)
*[How to Use Apache Cassandra as User and Session DataStore in OpenAM](https://doc.openidentityplatform.org/openam/how-to/how-to-use-apache-cassandra-as-user-and-session-datastore-in-openam)
*[Creating a Custom Authentication Module](https://doc.openidentityplatform.org/openam/how-to/how-to-develop-a-custom-authentication-module)
*[How to Create Custom OpenAM DataStore Integration](https://doc.openidentityplatform.org/openam/how-to/how-to-create-custom-openam-datastore-integration)
*[OpenAM QR Authentication Module](https://doc.openidentityplatform.org/openam/how-to/openam-qr-authentication-module)
*[OpenAM Monitoring Using Prometheus](https://doc.openidentityplatform.org/openam/how-to/openam-monitoring-using-prometheus)
*[Setup Tracing with OpenTelemetry and Jaeger](https://doc.openidentityplatform.org/openam/how-to/setup-tracing-with-opentelemetry-and-jaeger)
*[IAM Benchmark: OpenAM vs WSO2 vs SimpleSAMLphp vs Shibboleth](https://thehftguy.com/2015/10/14/iam-benchmarks-openam-vs-wso2-vs-simplesamlphp-vs-shibboleth-2/)
*[LDAP Benchmark: 10 million users with OpenAM](https://thehftguy.com/2015/10/23/10-millions-users-accounts-with-ldap-yes-we-can/)
### Spring Boot Integraion Examples
*[[How to Setup Active Directory Authentication in a Spring Boot Application]]
*[[OpenAM and Spring Boot 3 Integration via OIDC OAuth2 Protocol]]
*[[OpenAM and Spring Boot 3 Integration via SAMLv2 Protocol]]
*[[OpenAM and Spring Boot 3 Integration via OpenAM Cookie]]
*[How to Setup Active Directory Authentication in a Spring Boot Application](https://doc.openidentityplatform.org/openam/how-to/how-to-setup-active-directory-authentication-in-a-spring-boot-application)
*[OpenAM and Spring Boot 3 Integration via OIDC OAuth2 Protocol](https://doc.openidentityplatform.org/openam/how-to/openam-and-spring-boot-3-integration-via-oidc-oauth2-protocol)
*[OpenAM and Spring Boot 3 Integration via SAMLv2 Protocol](https://doc.openidentityplatform.org/openam/how-to/openam-and-spring-boot-3-integration-via-samlv2-protocol)
*[OpenAM and Spring Boot 3 Integration via OpenAM Cookie](https://doc.openidentityplatform.org/openam/how-to/openam-and-spring-boot-3-integration-via-openam-cookie)
This file contains hidden or bidirectional Unicode text that may be interpreted or compiled differently than what appears below. To review, open the file in an editor that reveals hidden Unicode characters.
Learn more about bidirectional Unicode characters
-[How User Authentication Works](#how-user-authentication-works)
-[Conclusion](#conclusion)
This article has moved to the Open Identity Platform documentation site:
## Introduction
It’s not obvious to understand how to setup Access Management and (Single Sign On) SSO with OpenAM at glance. There’s an explanation of how OpenAM SSO and authentication works in the article below.
[How OpenAM Works Simple Explanation](https://doc.openidentityplatform.org/openam/how-to/how-openam-works-simple-explanation).
## OpenAM Ecosystem
Please use the documentation site for the current version.
There are several components in the Open Identity Platform in addition to OpenAM to setup Access Management system.
### Components
#### OpenAM
The core component of the authentication management system. It is responsible for the authentication process, user management, session, and access policy management.
<aname="introduction"></a>
#### Configuration DataStore
Stores OpenAM configuration data - general settings, realms, authentication modules and so on. For storage, its configuration data OpenAM uses OpenDJ - open source directory server, the part of Open Identity Platform.
It could be a web server plugin or a standalone web application. Web agent works as PEP (Policy Enforcement Point). Web server plugin should be installed on the server, which process requests to protected resources. Web Agent decides whether an authenticated user could access to a certain resource or not.
<aname="openam-ecosystem"></a>
Open Identity Platform provides Web Agent as a standalone web application - OpenIG and some web server plugins - for Microsoft Internet Information Services, Apache Tomcat, and Apache HTTP Server.
Storage for the different kinds of identities, which OpenAM uses for authentication. By default, OpenAM uses OpenDJ as a user data store, but also could use Microsoft Active Directory, or any LDAP compatible server. OpenAM also supports any relational database via JDBC and Cassandra as a user data store.
<aname="components"></a>
#### Session Data Store
Persistent storage for session information. If OpenAM restarts or a request switch to another instance of OpenAM, then session information could be restored from the session data store.
If the request satisfies policy OpenAM returns session to Web Agent. Web Agent enriches the user request with session data and forwards request to the protected resource and proxies protected server response back to the user.
<aname="configuration-datastore"></a>
If the user is not authenticated or the user session violates a policy, Web Agent redirects the user to authentication to the OpenAM server for authentication or additional authorization.
While authentication OpenAM asks the user to provide his credentials. OpenAM checks if the user exists User Data Store and validates credentials.
<aname="user-data-store"></a>
If provided credentials are valid, OpenAM creates a new authenticated session in the Session Data Store and enriches the session with userdata and authentication process details.
**[User Data Store](https://doc.openidentityplatform.org/openam/how-to/how-openam-works-simple-explanation#how-openam-works-simple-explanation-user-data-store)**
If credentials are invalid, OpenAM denies authentication.
<aname="session-data-store"></a>
After successful authentication, the user is redirected to the protected resource.
This process is shown in the diagram below.
**[Session Data Store](https://doc.openidentityplatform.org/openam/how-to/how-openam-works-simple-explanation#how-openam-works-simple-explanation-session-data-store)**
Of course, this document does not fully cover all OpenAM functionality as Federation Authentication, adaptive authentication, how to organize high availability and many more other functionalities. Its purpose just is just to make a more familiar and basic understanding of how OpenAM works.
**[How User Authentication Works](https://doc.openidentityplatform.org/openam/how-to/how-openam-works-simple-explanation#how-openam-works-simple-explanation-how-user-authentication-works)**
This file contains hidden or bidirectional Unicode text that may be interpreted or compiled differently than what appears below. To review, open the file in an editor that reveals hidden Unicode characters.
Learn more about bidirectional Unicode characters
This file contains hidden or bidirectional Unicode text that may be interpreted or compiled differently than what appears below. To review, open the file in an editor that reveals hidden Unicode characters.
Learn more about bidirectional Unicode characters
This article has moved to the Open Identity Platform documentation site:
This article describes how to deploy [OpenAM](https://github.com/OpenIdentityPlatform/OpenAM) with embedded [OpenDJ](https://github.com/OpenIdentityPlatform/OpenDJ) on Kubernetes.
We will use OpenAM Docker image from Docker Hub Registry
Then create service in Kubernetes using `kubectl`:
```
kubectl apply -f openam-service.yaml
```
Make sure the service has been created:
<aname="openam-setup-and-configuration"></a>
```
kubectl get svc openam-service
**[OpenAM Setup and Configuration](https://doc.openidentityplatform.org/openam/how-to/how-to-run-openam-in-kubernetes#how-to-run-openam-in-kubernetes-openam-setup-and-configuration)**
NAME TYPE CLUSTER-IP EXTERNAL-IP PORT(S) AGE
openam-service ClusterIP None <none> 8080/TCP 7s
```
<aname="add-external-access-via-ingress"></a>
## Create OpenAM StatefulSet
**[Add External Access via Ingress](https://doc.openidentityplatform.org/openam/how-to/how-to-run-openam-in-kubernetes#how-to-run-openam-in-kubernetes-add-external-access-via-ingress)**
Create `openam-statefulset.yaml` file with the following contents:
Open [http://openam-0.openam.default.svc.cluster.local:8080/openam/](http://openam-0.openam.default.svc.cluster.local:8080/openam/) url in your browser.
You will be redirected to the configuration screen
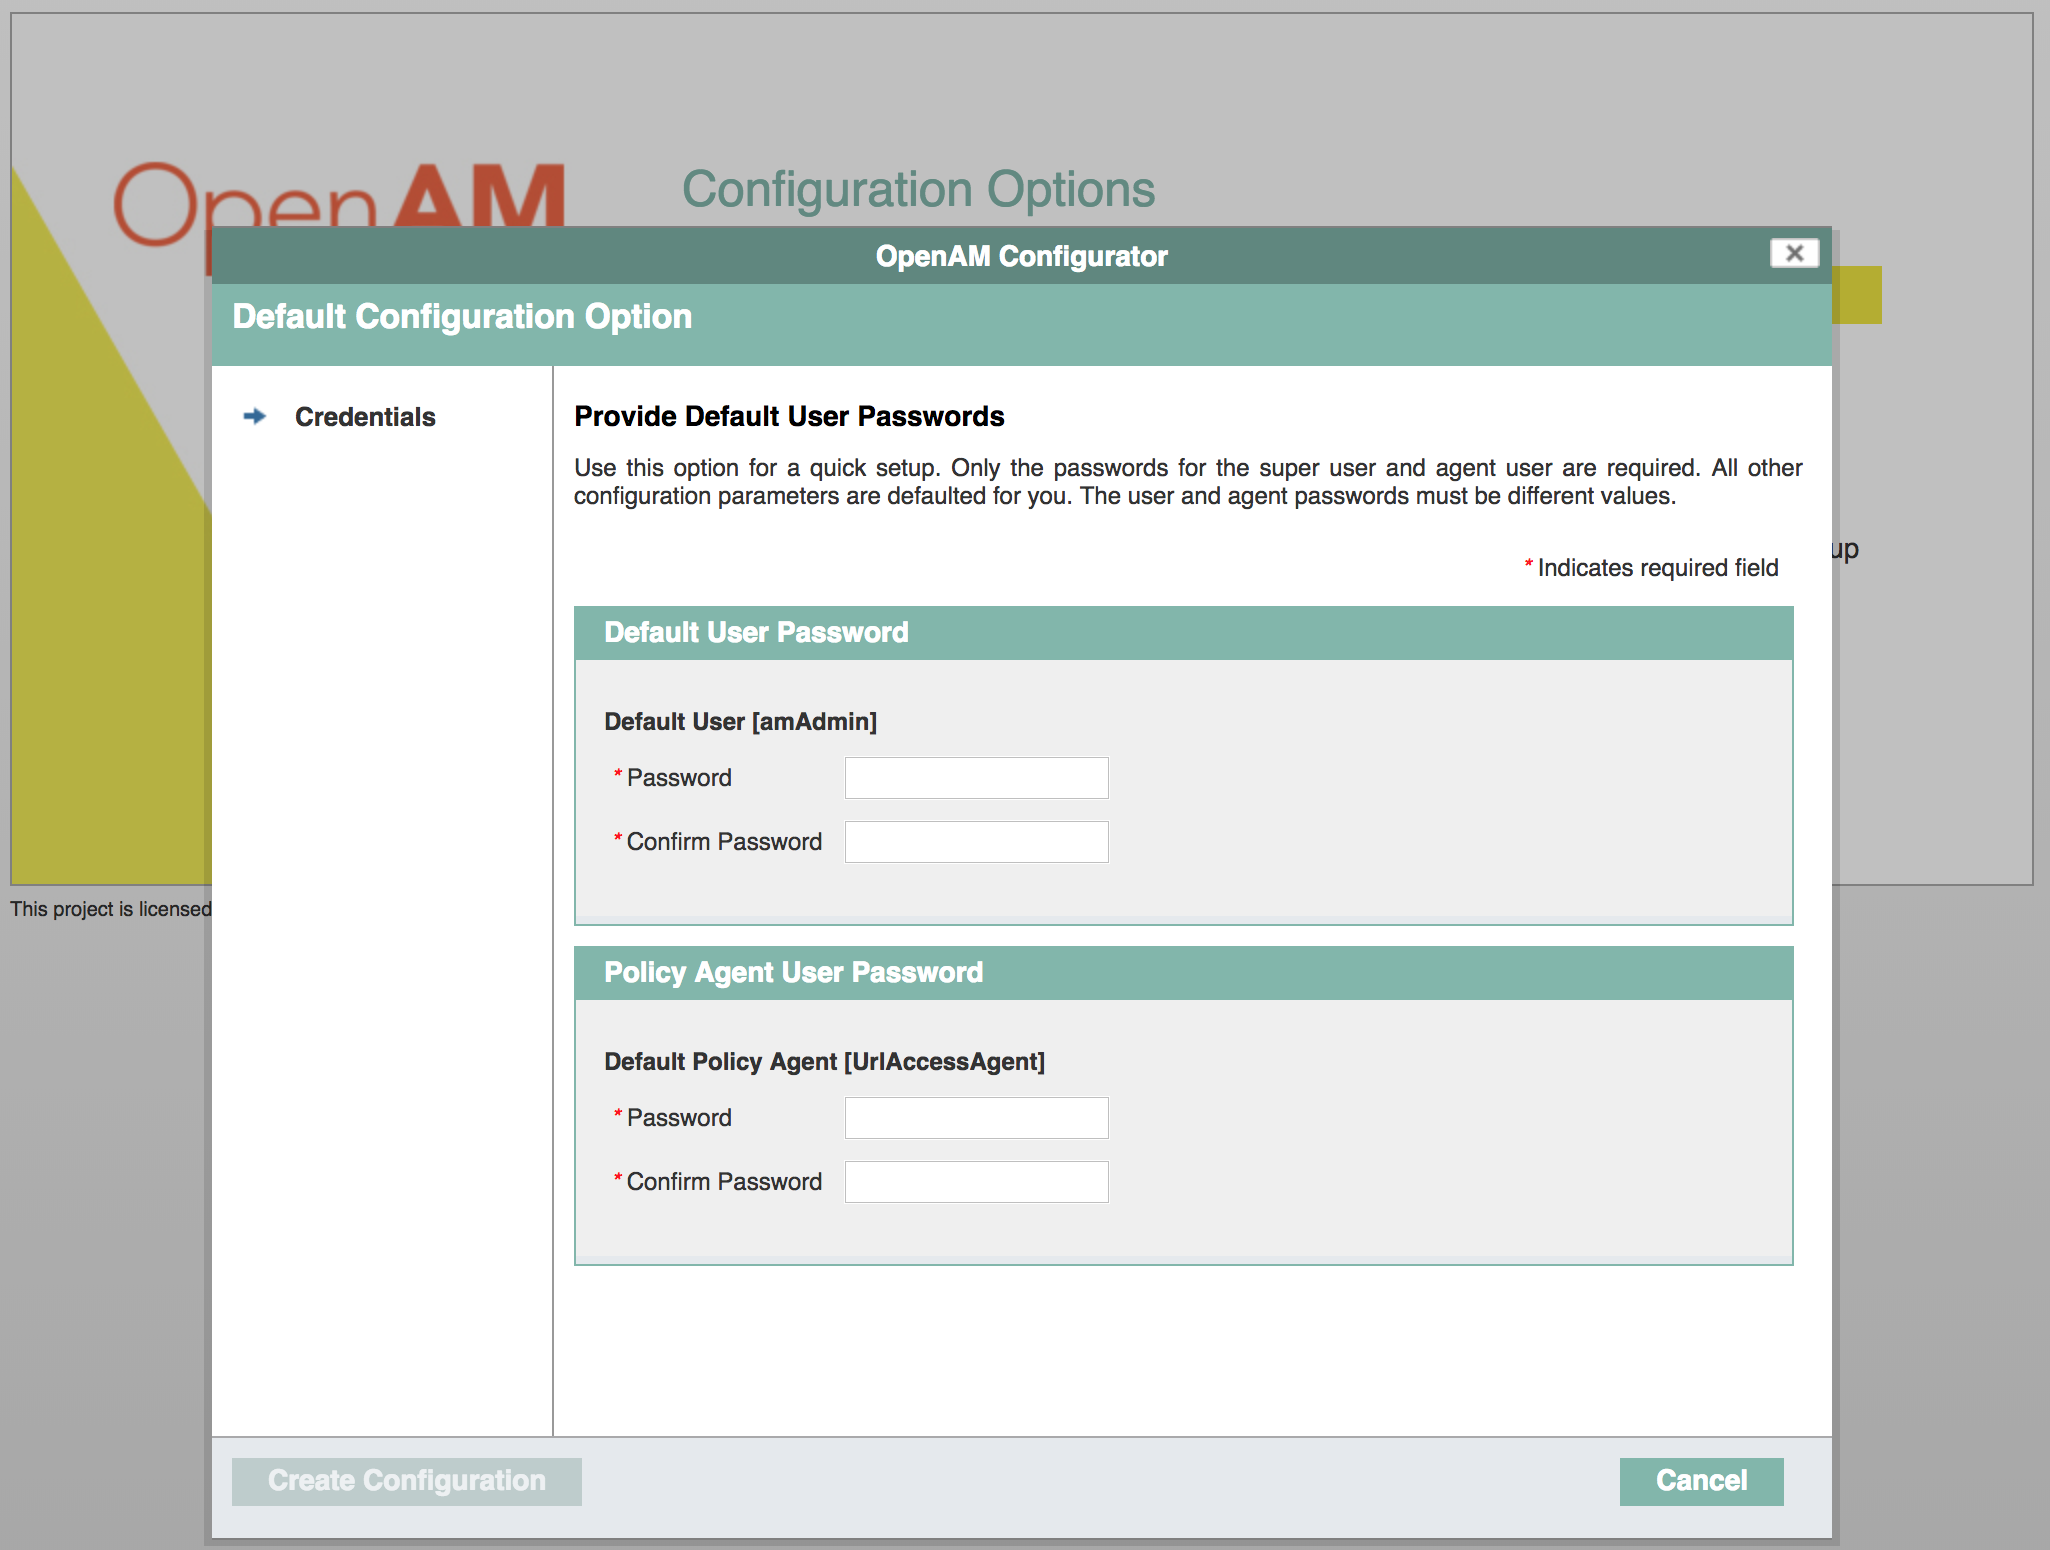
Set password for default admin user and policy agent
Press __Create Configuration__.
After configuration successfully created, press __Proceed to Login__ or open [http://openam-0.openam.default.svc.cluster.local:8080/openam/console](http://openam-0.openam.default.svc.cluster.local:8080/openam) link in browser.
## Add External Access via Ingress
### Preparation
For example you need OpenAM address be [http://openam.acme.org/openam](http://openam.acme.org/openam)
Goto OpenAM console, __Deployment__ -> __Sites__ and create new site, for example,
This file contains hidden or bidirectional Unicode text that may be interpreted or compiled differently than what appears below. To review, open the file in an editor that reveals hidden Unicode characters.
Learn more about bidirectional Unicode characters
This article has moved to the Open Identity Platform documentation site:
If your organization uses Microsoft Active Directory for user storage, it is a good practice to use Active Directory user accounts to authenticate in all your enterprise applications. OpenAM supports Microsoft Active Directory
[How To Setup Active Directory Authentication In OpenAM](https://doc.openidentityplatform.org/openam/how-to/how-to-setup-active-directory-authentication-in-openam).
But setting up Microsoft Active Directory as a user data store could be tricky. In this article, we'll help you to set up user data store in OpenAM
Please use the documentation site for the current version.
**[Setup Active Directory User Data Store](https://doc.openidentityplatform.org/openam/how-to/how-to-setup-active-directory-authentication-in-openam#how-to-setup-active-directory-authentication-in-openam-setup-active-directory-user-data-store)**
*Of course, you can use an existing realm or even use different data stores in a single realm in OpenAM. But in this manual, we will create a separate realm and a sigle data store for employees*
---
So login in OpenAM console as amadmin and create realm `/staff`. Delete default user Data Store in `/staff` realm.
Then create Active Directory data store with type Active Directory.
There are the most important settings in a table below:
| Setting | Value|
|-|-|
|**Ldap Server**| AD host and port, for example: ad.example.com:389 |
|**LDAP Bind DN**| Bund DN or user name for AD, for example `EXAMPLE\Administrator`|
|**LDAP Bind Password**| Bind DN password|
|**LDAP Organization DN**| DN where users are located DC=ad,DC=example,DC=com|
|**LDAP Connection Pool Maximum Size**| 128|
|**Attribute Name Mapping**| uid=sAMAccountName <br> userPassword=unicodePwd|
Enter your Active Directory credentials, and you should be successfully authenticated
<aname="test-data-store-and-authentication"></a>
**[Test Data Store and Authentication](https://doc.openidentityplatform.org/openam/how-to/how-to-setup-active-directory-authentication-in-openam#how-to-setup-active-directory-authentication-in-openam-test-data-store-and-authentication)**
This file contains hidden or bidirectional Unicode text that may be interpreted or compiled differently than what appears below. To review, open the file in an editor that reveals hidden Unicode characters.
Learn more about bidirectional Unicode characters
This article has moved to the Open Identity Platform documentation site:
In the following article, we will set up centralized authentication with OpenAM and set up gateway access to a test application with OpenIG. OpenIG will use an authentication session issued by OpenAM for authorization.
We will use an application developed using Spring Boot and Spring Security as the protected application.
The source code of the application is located on [GitHub](https://github.com/OpenIdentityPlatform/openam-openig-springboot-example).
For the demonstration purposes, we will run services in Docker containers with the `docker compose` tool.
[How to Add Authorization and Protect Your Application With OpenAM and OpenIG Stack](https://doc.openidentityplatform.org/openam/how-to/how-to-add-authorization-and-protect-your-application-with-openam-and-openig-stack).
The authorization diagram is in the picture below:
Please use the documentation site for the current version.
**[Run the Test Application](https://doc.openidentityplatform.org/openam/how-to/how-to-add-authorization-and-protect-your-application-with-openam-and-openig-stack#how-to-add-authorization-and-protect-your-application-with-openam-and-openig-stack-run-the-test-application)**
networks:
openam_network:
driver: bridge
```
<aname="openam-setup"></a>
Once the application is running, let's check access to the API for which we need to add authentication.
For successful authentication, a valid JWT must be passed to the API in the Authorization HTTP header. This is what the OpenAM and OpenIG stack will be responsible for. Shut down the test service with the `docker compose down` command for now.
Let's configure the OpenAM authentication service. It will be responsible for authentication and converting the authentication token to JWT (see below).
<aname="setting-up-a-test-user"></a>
Add the OpenAM and OpenIG hostnames to the `hosts` file, for example `127.0.0.1 openam.example.org openig.example.org`.
On Windows systems, the hosts file is located at `C:\Windows\System32\drivers\etc\hosts`, on Linux and Mac it is located at `/etc/hosts`.
Add the OpenAM service to the `docker-compose.yaml` file:
**[Setting up a test user](https://doc.openidentityplatform.org/openam/how-to/how-to-add-authorization-and-protect-your-application-with-openam-and-openig-stack#how-to-add-authorization-and-protect-your-application-with-openam-and-openig-stack-setting-up-a-test-user)**
```yaml
...
openam:
image: openidentityplatform/openam:latest
container_name: openam
ports:
- "8080:8080"
networks:
openam_network:
aliases:
- openam.example.org
...
```
<aname="openig-setup"></a>
Start OpenAM with the `docker compose up openam` command. Once OpenAM is running, configure using the following command:
STS (Security Token Service) converts an OpenAM token to a JWT. After authentication, OpenAM returns an authentication token, which is a randomly generated sequence of characters. The STS service is responsible for converting the authentication token into a JWT, which contains information about the authenticated user. OpenIG will use STS for authorization.
To configure STS, go to the administrator console URL
In the login field enter the `amadmin` value, in the password field enter the value from the `ADMIN_PWD` parameter of the setup command, in this case, `passw0rd`.
**[Test the Solution](https://doc.openidentityplatform.org/openam/how-to/how-to-add-authorization-and-protect-your-application-with-openam-and-openig-stack#how-to-add-authorization-and-protect-your-application-with-openam-and-openig-stack-test-the-solution)**
In the left menu click **STS** and create a new **STS Instance** with the following settings:
**[Test the API Authorization](https://doc.openidentityplatform.org/openam/how-to/how-to-add-authorization-and-protect-your-application-with-openam-and-openig-stack#how-to-add-authorization-and-protect-your-application-with-openam-and-openig-stack-test-the-api-authorization)**
|The id of the OpenID Connect Token Provider|https://openam.example.org/openam|
|Client secret | changeme|
|Confirm client secret | changeme |
|The audience for issued tokens |https://openam.example.org/openam|
<aname="test-the-ui-authorization"></a>
Then press the **Create** button
## Setting up a test user
In the OpenAM admin console, navigate to the root realm and select `Subjects` from the left menu. Set the password for the `demo` user. To do this, select it in the list of users, and click the `Edit` link under Password. Enter and save the new password. Next, log out of the administrator console.
# OpenIG Setup
OpenIG is responsible for authorization policies for back-end services. It converts the authentication token to a JWT in the OpenAM service and after successful authorization, passes the JWT to the back-end services in the HTTP Authorization header.
Create an `openig-config` folder and add two files to it: `admin.json`
```json
{
"prefix" : "openig",
"mode": "PRODUCTION"
}
```
and `config.json`:
```json
{
"heap": [
],
"handler": {
"type": "Chain",
"config": {
"filters": [
],
"handler": {
"type": "Router",
"name": "_router",
"capture": "all"
}
}
}
}
```
Next, add a route that will proxy user requests to the test application, enriching the request with an Authorization header with a JWT token obtained from OpenAM.
Create a folder `openig-config/routes/` and add the `10-protected.json` file to the folder.
This route authorizes two endpoints: API - `/api/protected-jwt` and UI - `/protected-jwt`.
Add the OpenIG service to the `docker-compose.yaml` file and remove the port mapping from the `spring-service`. Now this service is available only through OpenIG.
OpenIG, via OpenAM, converted the authentication token passed in the `iPlanetDirectoryPro` cookie into a JWT and passed this JWT to the `spring-service` test application. The test application retrieved the user information from the JWT and returned a successful response.
## Test the UI Authorization
Log out of the OpenAM administrator console or open the browser in Incognito mode
Open the [http://openig.example.org:8081/protected-jwt](http://openig.example.org:8081/protected-jwt) URL in your browser. OpenIG will not find the authentication token cookie and will redirect the browser to OpenAM authentication. Enter the login `demo`, and password and click the `Log In` button.
After successful authentication, the gateway will redirect the request to the Spring Boot application. It will receive a cookie with an authentication token from the http request, convert the token in OpenAM in STS service to JWT, and pass the received JWT to the demo application. The demo application will verify the JWT and return a successful response.
The source code for the demo application is available at [https://github.com/OpenIdentityPlatform/spring-security-openam-example](https://github.com/OpenIdentityPlatform/spring-security-openam-example).
The source code for the docker compose configuration and OpenIG routes for the article can be found at [https://github.com/OpenIdentityPlatform/openam-openig-springboot-example](https://github.com/OpenIdentityPlatform/openam-openig-springboot-example).
**[Test the UI Authorization](https://doc.openidentityplatform.org/openam/how-to/how-to-add-authorization-and-protect-your-application-with-openam-and-openig-stack#how-to-add-authorization-and-protect-your-application-with-openam-and-openig-stack-test-the-ui-authorization)**
This file contains hidden or bidirectional Unicode text that may be interpreted or compiled differently than what appears below. To review, open the file in an editor that reveals hidden Unicode characters.
Learn more about bidirectional Unicode characters
-[Add Schema to OpenAM Distribution](#add-schema-to-openam-distribution)
-[Add Schema to an Exististing OpenAM Deployment](#add-schema-to-an-exististing-openam-deployment)
-[IdRepo Plugin in Action](#idrepo-plugin-in-action)
-[Conclusion](#conclusion)
[How to Create Custom OpenAM DataStore Integration](https://doc.openidentityplatform.org/openam/how-to/how-to-create-custom-openam-datastore-integration).
## Introduction
Please use the documentation site for the current version.
OpenAM already have implementations for variuos user data sources - LDAP, Active Directiry, relational databases via JDBC driver and Apache Cassandra. But there are databases that are not integratied into OpenAM. The following manual shows how to implement a custom data source to use for authentication.
We will write together MongoDB integration to authenticate users in MongoDB datastore. The implementations will support only read users from the datastore and won't support write operation or groups, but it would be enough for get the point.
To write your own integration with a custom data source you should extend [com.sun.identity.idm.IdRepo](https://github.com/OpenIdentityPlatform/OpenAM/blob/master/openam-core/src/main/java/com/sun/identity/idm/IdRepo.java) abstract class.
<aname="custom-idrepo-implementation"></a>
To simplify the example our repository will be only able to show users, and authenticate against database.
**[Add Schema to OpenAM Distribution](https://doc.openidentityplatform.org/openam/how-to/how-to-create-custom-openam-datastore-integration#how-to-create-custom-openam-datastore-integration-add-schema-to-openam-distribution)**
**[Add Schema to an Exististing OpenAM Deployment](https://doc.openidentityplatform.org/openam/how-to/how-to-create-custom-openam-datastore-integration#how-to-create-custom-openam-datastore-integration-add-schema-to-an-exististing-openam-deployment)**
<aname="idrepo-plugin-in-action"></a>
}
```
**[IdRepo Plugin in Action](https://doc.openidentityplatform.org/openam/how-to/how-to-create-custom-openam-datastore-integration#how-to-create-custom-openam-datastore-integration-idrepo-plugin-in-action)**
Then add MongoDB connection settings and override the `initialize` function.
Then implement authenticate function, which is responsible to authenticate users against a database. Password hashing is not supported, but should be implemented for production.
Build the class and include it into classpath of OpenAM war file as desctibed in [How to Customise OpenAM](https://github.com/OpenIdentityPlatform/OpenAM/wiki/How-to-Customise-OpenAM) article. Dependencies for the maven project
```xml
<dependency>
<groupId>org.mongodb</groupId>
<artifactId>mongodb-driver-sync</artifactId>
<version>4.9.1</version>
</dependency>
<dependency>
<groupId>org.apache.commons</groupId>
<artifactId>commons-lang3</artifactId>
<version>3.11</version>
</dependency>
```
## Service Schema
OpenAM MongoDM service sub-schema will look like this.
To let OpenAM know about the new Data Source, the subschema should be added to OpenAM `sunIdentityRepositoryService` service configuration.
If you plan to add the repository plugin to OpenAM distribution and/or make a contribution to [OpenAM](https://github.com/OpenIdentityPlatform/OpenAM).
Add MongoDB subschema to subschema list to [openam-server-only/src/main/resources/services/idRepoService.xml](https://github.com/OpenIdentityPlatform/OpenAM/blob/master/openam-server-only/src/main/resources/services/idRepoService.xml) file.
## Add Schema to an Exististing OpenAM Deployment
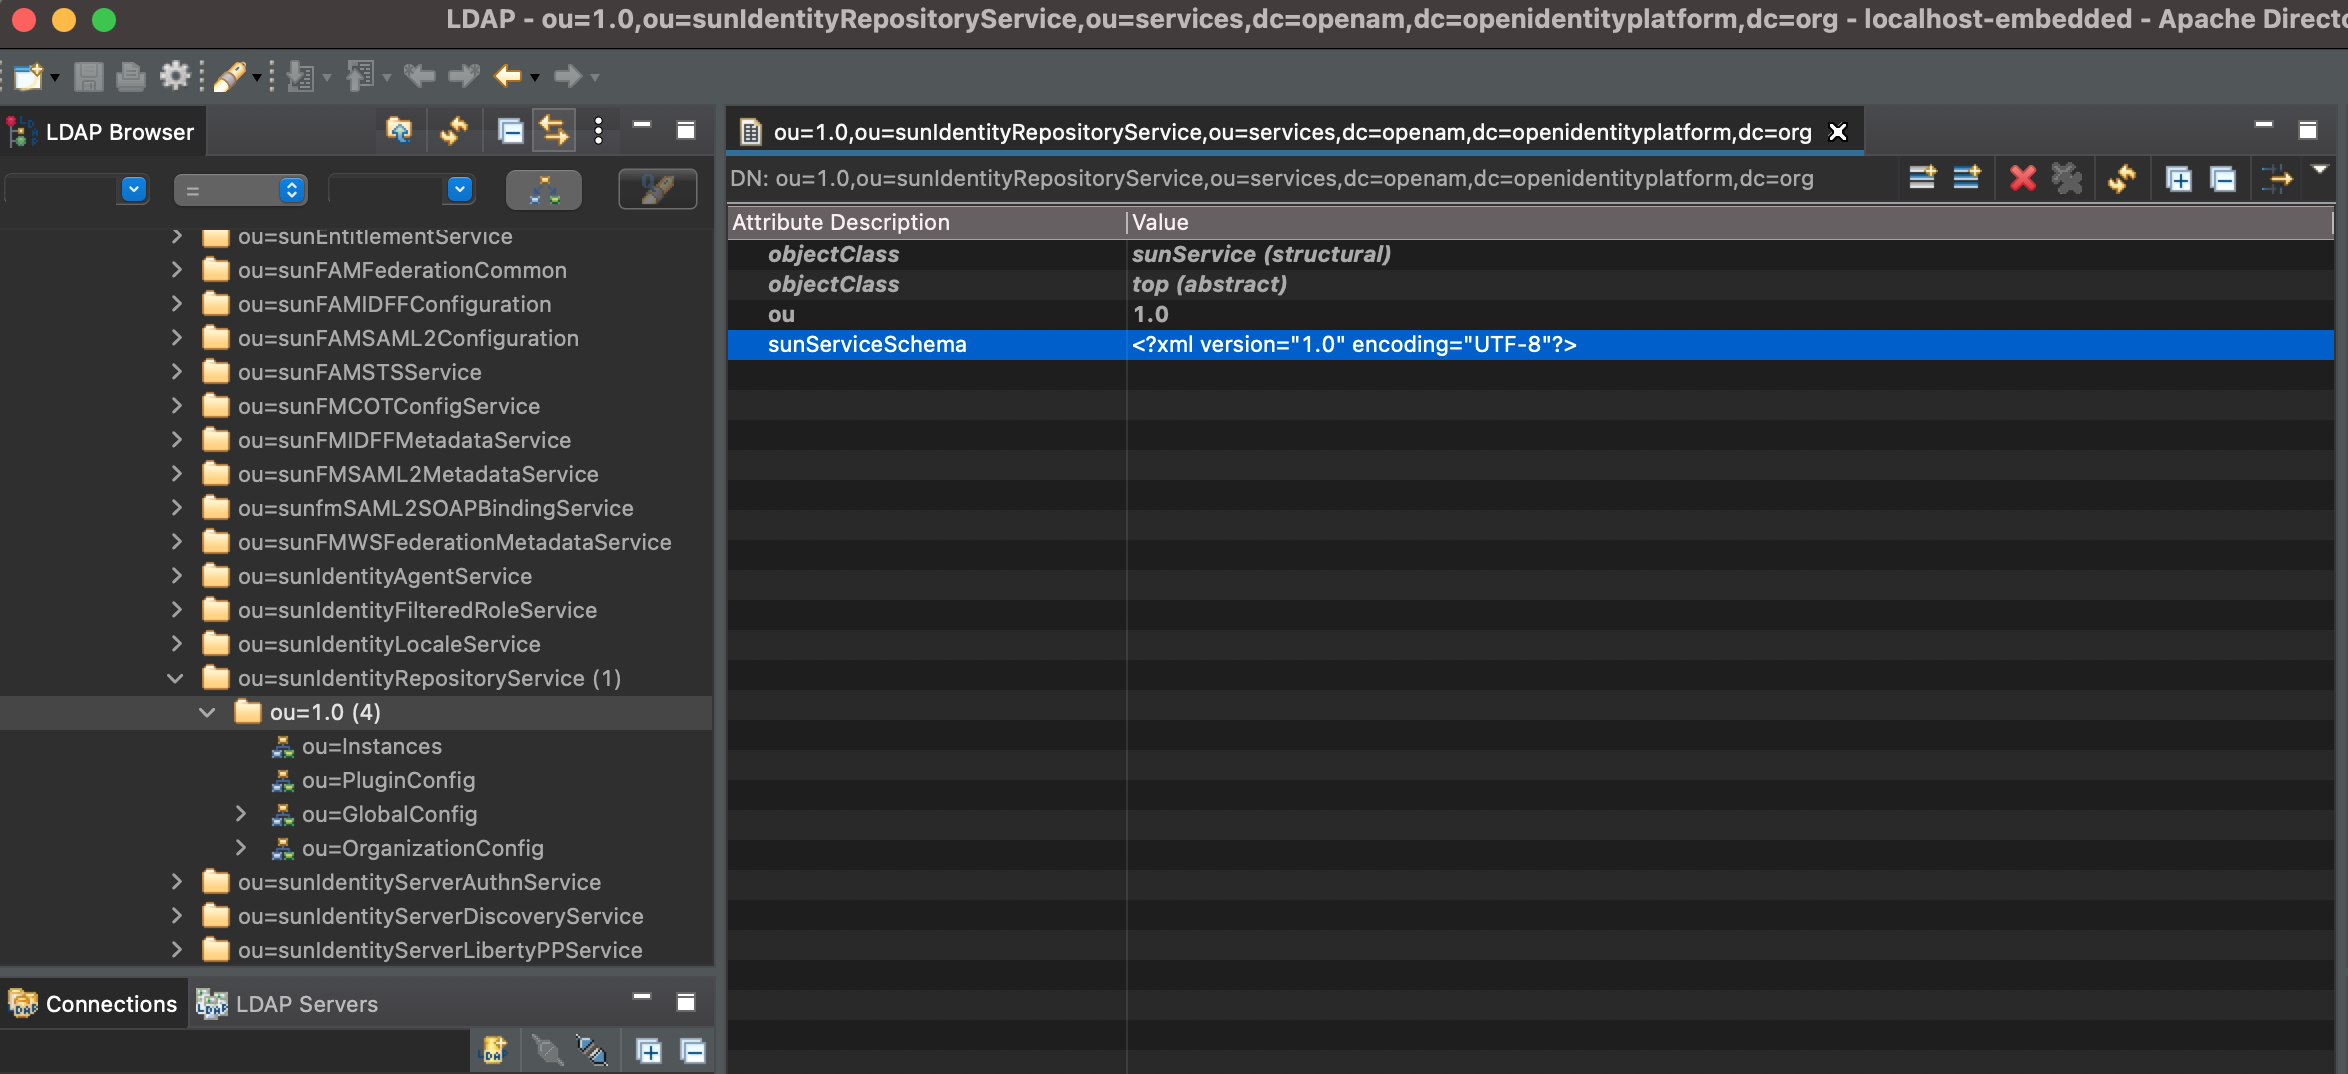
If you have an existing OpenAM deployment, connect to OpenDJ instance for OpenAM configuration in any LDAP client Application, for example, Apache Directory Studio, and add sub schema to `sunIdentityRepositoryService` xml configuration as shown in the picture below. Then restart OpenAM instance.
## IdRepo Plugin in Action
After we have added a new datastore to the schema, create a new MongoDB Data Store in OpenAM and see it in action.
Run MongoDB in docker container in a local environment:
```bash
docker run -p 27017:27017 --name test-mongo mongo:latest
```
Add a couple of users to the MongoDB with the following script:
```javascript
db =connect( 'mongodb://localhost:27017/authentication');
db.users.insertMany([
{
cn:'John Doe',
sunidentitymsisdnnumber:"123-456-78-90",
userpassword:'passw0rd',
},
{
cn:'Jane Doe',
sunidentitymsisdnnumber:"123-456-78-91",
userpassword:'passw0rd',
},
])
```
Open the OpenAM console, create a new realm `/clients`, remove the existing DataStore, and add a new MongoDB DataStore to the realm.
In the following article, we have developed a very simple User Data Store without any modification, just to understand how it works. For a production environment password hashing connection pooling etc, should be implemented.
This file contains hidden or bidirectional Unicode text that may be interpreted or compiled differently than what appears below. To review, open the file in an editor that reveals hidden Unicode characters.
Learn more about bidirectional Unicode characters
-[Run and Debug War File Locally](#run-and-debug-war-file-locally)
-[Customisation Example](#customisation-example)
-[Conclusion](#conclusion)
This article has moved to the Open Identity Platform documentation site:
# Introduction
[How to Customise OpenAM](https://doc.openidentityplatform.org/openam/how-to/how-to-customise-openam).
OpenAM is a reliable and mature product itself out of the box, have rich functionality and a good extension potential. But there is always a question - how to develop and debug the extensions? In the following article we will create a maven project and do simple OpenAM customisation.
Please use the documentation site for the current version.
# Create Maven Project
<aname="introduction"></a>
Create a maven project with the following `pom.xml` file:
Project packaging should be war, as we build a web application that extends OpenAM server application.
<aname="run-and-debug-war-file-locally"></a>
To override OpenAM server add `org.openidentityplatform.openam:openam-server` dependency to the build section and overlay to `maven-war-plugin`
**[Run and Debug War File Locally](https://doc.openidentityplatform.org/openam/how-to/how-to-customise-openam#how-to-customise-openam-run-and-debug-war-file-locally)**
Run `mvn package` command and after a successful build, you can see `openam-extended-14.7.1.war` file. This file you can use this instead of the default OpenAM server war file.
<aname="conclusion"></a>
# Run and Debug War File Locally
Add to the maven pom to the plugins section `cargo-maven2-plugin`:
Add desired OpenAM FQDN to your hosts file like this:
```
127.0.0.1 openam.example.com
```
To repackage and run war file execute the following command: `mvn package cargo:run`
You should see in the console something like this
```
[INFO] [beddedLocalContainer] Tomcat 9.x Embedded started on port [8080]
[INFO] Press Ctrl-C to stop the container...
```
Open OpenAM console in the browser with the following link [http://openam.example.com:8080/openam](http://openam.example.com:8080/openam) and OpenAM will prompt you to configure a new instance. How to configure a new OpenAM instance is described in [Quick Start Guide](https://github.com/OpenIdentityPlatform/OpenAM/wiki/Quick-Start-Guide). After OpenAM configuration you will be able to use OpenAM locally within your development environment.
OpenAM configuration and log files will be stored in your project in `/config` directory
# Customisation Example
After configuring OpenAM, let’s do something simple to demonstrate customisation. We will modify the default OpenAM login page. We will add Acme corp logo instead of standard OpenAM logo.
The header template is in `XUI/templates/common/LoginHeaderTemplate.html` file. Create `src/main/webapp/XUI/templates/common/LoginHeaderTemplate.html` file in the project root folder. Then add the following contents:
```html
<h1>ACME corp.</h1>
```
Start OpenAM and navigate to the login page.
We can see that OpenAM uses the custom header. You can deploy the custom war file on your production web server
# Conclusion
This article has only shown a simple setup in order to demonstrate the overall approach. In future articles we will show a more complex setup, such as developing a custom authentication module.
This file contains hidden or bidirectional Unicode text that may be interpreted or compiled differently than what appears below. To review, open the file in an editor that reveals hidden Unicode characters.
Learn more about bidirectional Unicode characters
[Creating a Custom Authentication Module](https://doc.openidentityplatform.org/openam/how-to/how-to-develop-a-custom-authentication-module).
OpenAM comes complete with a wide variety of built-in custom [[authentication modules]], but sometimes customer requirements step outside the functionality provided by the built-in modules. In these instances, it is time to consider writing your own custom authentication module. The OpenAM developer can use the source of the built-in modules as their starting point or start from scratch. If the customer requirement is a very close match to existing functionality then using a built-in module as a starting point will be a good idea. The OpenAM developer should start from scratch if the customer requirements does not match any of the built-in modules.
In this HowTo we look at how to create and configure custom authentication modules.
Please use the documentation site for the current version.
Our sample authentication module takes username and password as input from the user. This data along with a service specific attribute and the program logic is used to authenticate the user. During this process some errors can occur which will be shown to user in detail. All texts displayed during the authentication must be easily configurable and translatable.
**[Creating a Custom Authentication Module](https://doc.openidentityplatform.org/openam/how-to/how-to-develop-a-custom-authentication-module)**
In short - we have following requirements
* User will be asked for name and password
* Module has one specific attribute which needs to be configured via OpenAM web-interface
* The authentication UI is configurable and translatable
* Some errors have to be displayed to user in detail
**[Requirements for Sample Authentication module](https://doc.openidentityplatform.org/openam/how-to/how-to-develop-a-custom-authentication-module#how-to-develop-a-custom-authentication-module-requirements-for-sample-authentication-module)**
We will stick with using the basic complier in this HowTo to keep things simple. In order to compile your custom authentication module either on the command line or in your favourite IDE you will need the following OpenAM jar files.
In addition you will also require the J2EE Servlet API, you can obtain these from within your favourite container or here.
If you use tomcat then you can find the Servlet API files in the TOMCAT_HOME/lib/servlet-api.jar file.
**[Prepare your development environment](https://doc.openidentityplatform.org/openam/how-to/how-to-develop-a-custom-authentication-module#how-to-develop-a-custom-authentication-module-prepare-your-development-environment)**
First important decision is to pick a name for our authentication module. We decide to call our module SampleAuth.
An OpenAM custom authentication module is comprised of the following components:
**[Design your custom authentication module](https://doc.openidentityplatform.org/openam/how-to/how-to-develop-a-custom-authentication-module#how-to-develop-a-custom-authentication-module-design-your-custom-authentication-module)**
* Authentication logic (SampleAuth.java) which extends the com.sun.identity.authentication.spi.AMLoginModule abstract class
* Principal (SampleAuthPrincipal.java) which implements the java.security.Principal interface
* Callbacks XML file (SampleAuth.xml) which describes the states of authentication logic and the user input needed during those states
* Service configuration XML file (amAuthSampleAuth.xml) which defines how service is configured on OpenAM side
**[The Callbacks XML file](https://doc.openidentityplatform.org/openam/how-to/how-to-develop-a-custom-authentication-module#how-to-develop-a-custom-authentication-module-the-callbacks-xml-file)**
The customauthenticationmodule is designed to ask the user a series of questions in order assert their identity. The order and detail of these questions is set out in the Callbacks XML file. The structure of the XML file is defined in the OPENAM_WAR/WEB-INF/Auth_Module_Properties.dtd file.
<aname="the-custom-authentication-module"></a>
All of the built-in modules XML files are located in the OPENAM_WAR/config/auth/default directory. The OpenAM developer can use these as a starting point for their own callback XML file.
All custom authentication modules must extend from the com.sun.identity.authentication.spi.AMLoginModule abstract class. The abstract methods that must be implemented in the customauthenticationmodule are listed below and the OpenAM Javadoc provides useful reference information.
**[OpenAM Service and Properties file](https://doc.openidentityplatform.org/openam/how-to/how-to-develop-a-custom-authentication-module#how-to-develop-a-custom-authentication-module-openam-service-and-properties-file)**
publicint process(Callback[] callbacks, int state)
throws LoginException
**[Implement your custom authentication module](https://doc.openidentityplatform.org/openam/how-to/how-to-develop-a-custom-authentication-module#how-to-develop-a-custom-authentication-module-implement-your-custom-authentication-module)**
publicPrincipal getPrincipal()
```
<aname="sample-callback-xml-file"></a>
The init method is called once by OpenAM when the module is created. The process method is called into when the user submits callbacks back via the Authentication interface. The process method determines what happens next in the authentication process; success, failure or the next state (order) in the XML file. The getPrincipal method is called by OpenAM and must return an implementation of the java.security.Principal interface.
**[Sample Callback XML file](https://doc.openidentityplatform.org/openam/how-to/how-to-develop-a-custom-authentication-module#how-to-develop-a-custom-authentication-module-sample-callback-xml-file)**
OpenAM does not reuse authentication module instances. This means that we can store information specific to the authentication process in the instance.
The OpenAM administration will require a way to configure any custom authentication modules. OpenAM mandates that all authentication modules; built-in or custom are configured in the same way by means of an OpenAM service. At the bare minimum the service should contain an authentication level attribute.
<aname="service-configuration-xml"></a>
The module can find the value of these attributes in the options Map passed as a parameter to the init method.
The properties file is a standard Java properties file that contains the description of the attributes that will be displayed in the console.
**[Compile your custom authentication module](https://doc.openidentityplatform.org/openam/how-to/how-to-develop-a-custom-authentication-module#how-to-develop-a-custom-authentication-module-compile-your-custom-authentication-module)**
This file defines authentication module SampleAuth with one possible state (order 1) in which 2 pieces of information are asked from the user. All strings that are used to draw the UI are typed into this file.
**[Install your custom authentication module](https://doc.openidentityplatform.org/openam/how-to/how-to-develop-a-custom-authentication-module#how-to-develop-a-custom-authentication-module-install-your-custom-authentication-module)**
According to our requirements we need a little-bit more sophisticated callbacks file. We need dynamic text and we need error state. Following callbacks file achieves this:
<aname="copy-the-service-properties-file"></a>
```xml
<?xml version="1.0" encoding="UTF-8"?>
<!DOCTYPEModuleProperties PUBLIC "=//iPlanet//Authentication Module Properties XML Interface 1.0 DTD//EN"
**[Copy the service properties file](https://doc.openidentityplatform.org/openam/how-to/how-to-develop-a-custom-authentication-module#how-to-develop-a-custom-authentication-module-copy-the-service-properties-file)**
* We need order 1 with 0 callbacks to change all UI strings for following orders. The trial-and-error shows that this dummy state is necessary to achieve dynamic UI-strings.
* The placeholders '#FOO BAR#' have no real meaning, this is just to show that those texts get replaced.
* The order 3 has attribute error set to "true". If the authentication module state machine reaches this order then the authentication has failed. The NameCallback is actually not used and not displayed to user, but the callbacks with length at least 1 is necessary, otherwise the OpenAM won't let us to substitute the header. So it's yet another hack forced upon us.
**[Copy the authentication module XML file](https://doc.openidentityplatform.org/openam/how-to/how-to-develop-a-custom-authentication-module#how-to-develop-a-custom-authentication-module-copy-the-authentication-module-xml-file)**
**[Register the module and the service with OpenAM](https://doc.openidentityplatform.org/openam/how-to/how-to-develop-a-custom-authentication-module#how-to-develop-a-custom-authentication-module-register-the-module-and-the-service-with-openam)**
You will notice the code above allows the user "test" to log in with a password of "password". In order for this to work you will need to create a user called test in the OpenAM administration pages. This is because the code goes on to retrieve the user profile for the user, and if one doesn't exist, it will be this subsequent step that will fail and prevent you from logging in.
In the OpenAM console, logged in as amadmin, select "Access Control", Top Level Realm, "Subjects" and click "New…"
* The service must have a name: **'iPlanetAMAuth' + modulename + 'Service'**
* The service must have a description
* i18nFileName refers to the properties file and i18nKey to the key in the properties file
* sampleauth-service-specific-attribute configurable via OpenAM is defined here
The 'iplanet-am-auth-sampleauth-auth-level' is the obligatory authentication level attribute. Here naming is very important. The name of the attribute must be: 'iplanet-am-auth-' + lowercase(modulename) + '-auth-level'. If the attribute name does not follow the pattern your authentication module will not function the way you want it to. (There is also a second naming convention - please refer to the source code (wink) )
**[Configure your custom Authentication module](https://doc.openidentityplatform.org/openam/how-to/how-to-develop-a-custom-authentication-module#how-to-develop-a-custom-authentication-module-configure-your-custom-authentication-module)**
This will create our class file that we need to install into OpenAM. Next we should package the classes files up into a jar file.
<aname="test-your-custom-module"></a>
```bash
$ cd classes
$ jar cf ../sampleauth.jar .
```
## Install your custom authentication module
###Copy the jar file
We copy the jar file into the WEB-INF/lib directory within the openam web application deployed into Tomcat.
$ ssoadm register-auth-module -u amadmin -f pwdfile -a com.forgerock.openam.examples.SampleAuth
```
Note the service definition file is only needed for creating the service. When calling ssoadm create-svc, be sure to pass the full path to your service definition file.
Also following subcommands might be useful to you during the testing: [[delete-auth-cfgs]], [[delete-auth-instances]], [[delete-svc]], [[list-auth-cfgs]], [[list-auth-instances]], [[remove-svc-realm]], [[show-auth-modules]], [[show-realm-svcs]], [[unregister-auth-module]], [[update-svc]]
It is a good idea at this point to restart Tomcat (or whatever container you are using) to ensure the Authentication Module and service definition can be loaded.
## Configure your custom Authentication module
Log into the Console and navigate to Access Control >> Realm >> Authentication and click New under [[Authentication modules]]. Name your module and select the custom authentication module type from the list. Click OK. You should now see your custom module listed, you can select it and configure it as appropriate.
## Test your custom module
The final step is to test out your custom authentication module. To do this you just need to login successfully to the realm where the custom authentication module is configured. This URL should do the trick:
You should be presented with the login screen and asked for the credentials required by your custom authentication module.
**[Test your custom module](https://doc.openidentityplatform.org/openam/how-to/how-to-develop-a-custom-authentication-module#how-to-develop-a-custom-authentication-module-test-your-custom-module)**
This file contains hidden or bidirectional Unicode text that may be interpreted or compiled differently than what appears below. To review, open the file in an editor that reveals hidden Unicode characters.
Learn more about bidirectional Unicode characters
This article has moved to the Open Identity Platform documentation site:
Large language model (LLM) agents can perform various tasks, from writing code or texts to booking airline tickets. Agents consist of a client that interacts with the user and a server that performs the required tasks. The interaction between the client, server, and LLM occurs via the Model Context Protocol [MCP](https://modelcontextprotocol.io/docs/getting-started/intro).
[How to Protect Model Context Protocol (MCP) Servers with OpenAM and OpenIG](https://doc.openidentityplatform.org/openam/how-to/how-to-protect-model-context-protocol-mcp-servers-with-openam-and-openig).
MCP servers often have access to sensitive information, such as an internal source code repository or a customer database. Of course, not all users should have access to this data, even through an agent. To protect against unauthorized access, the Model Context Protocol specification describes the possibility of authorization based on OAuth 2.1: [https://modelcontextprotocol.io/specification/2025-06-18/basic/authorization](https://modelcontextprotocol.io/specification/2025-06-18/basic/authorization).
Please use the documentation site for the current version.
In this article, we will deploy a simple MCP server developed based on [Spring AI](https://spring.io/projects/spring-ai) and close it with the [OpenIG](https://github.com/OpenIdentityPlatform/OpenIG) authorization gateway. The [OpenAM](https://github.com/OpenIdentityPlatform/OpenAM) authentication service will be responsible for authentication.
<aname="introduction"></a>
We will use VS Code with the Copilot extension as the MCP client.
The source code for the OpenAM, OpenIG, and MCP server configuration is available at: [https://github.com/OpenIdentityPlatform/openam-openig-mcp-example](https://github.com/OpenIdentityPlatform/openam-openig-mcp-example)
**[Preparing for launch](https://doc.openidentityplatform.org/openam/how-to/how-to-protect-model-context-protocol-mcp-servers-with-openam-and-openig#how-to-protect-model-context-protocol-mcp-servers-with-openam-and-openig-preparing-for-launch)**
For example, the host name for OpenAM will be `openam.example.org`, and for OpenIG it will be `openig.example.org`. Open the `hosts` file and add the host names and IP addresses to it, for example
On Windows systems, the hosts file is located in the `C:\Windows/System32/drivers/etc/hosts` directory, and on Linux or Mac OS in `/etc/hosts`.
<aname="configuring-oauth-2-in-openam"></a>
## MCP Server
**[Configuring OAuth 2 in OpenAM](https://doc.openidentityplatform.org/openam/how-to/how-to-protect-model-context-protocol-mcp-servers-with-openam-and-openig#how-to-protect-model-context-protocol-mcp-servers-with-openam-and-openig-configuring-oauth-2-in-openam)**
The MCP server has a method for returning the current time in ISO 8601 format.
@Tool(name = "current_time_service", description = "Returns current time in ISO 8601 format")
public String getTime() {
return Instant.now().toString();
}
}
```
<aname="proxying-requests-to-the-mcp-server"></a>
For more details on creating an MCP server, please refer to the [documentation](https://docs.spring.io/spring-ai/reference/api/mcp/mcp-server-boot-starter-docs.html) or in the Spring AI [blog](https://spring.io/blog/2025/09/16/spring-ai-mcp-intro-blog).
**[Proxying requests to the MCP server.](https://doc.openidentityplatform.org/openam/how-to/how-to-protect-model-context-protocol-mcp-servers-with-openam-and-openig#how-to-protect-model-context-protocol-mcp-servers-with-openam-and-openig-proxying-requests-to-the-mcp-server)**
Start the OpenAM, OpenIG, and MCP server Docker containers with the command:
<aname="conclusion"></a>
```bash
docker compose up --build
```
Check the availability of the running MCP server with the command:
```bash
curl -X POST --location "http://localhost:8082/mcp" \
Open the OpenAM console at [http://openam.example.org:8080/openam/console](http://openam.example.org:8080/openam/console). Enter the administrator login and password in the `User Name` and `Password` fields. In this case, they will be `amadmin` and `passw0rd`, respectively.
Add the value `profile` to the `Scopes` and `Default Clients Scopes` settings. This scope will allow you to obtain basic information about the user. Enable the `Issue Refresh Tokens` and `Issue Refresh Tokens on Refreshing Access Tokens` options. Also, allow dynamic client registration by enabling the `Allow Open Dynamic Client Registration` option. This will allow the MCP client (VS Code) to automatically register with OpenAM without requiring any additional action from the user.
For more information on configuring OpenAM, please refer to the [documentation](https://doc.openidentityplatform.org/openam/).
## Configuring OpenIG
OpenIG will be responsible for authorizing requests. It will check the validity of `access_token` issued by OpenAM and proxy requests to OpenAM and the MCP server.
Now let's check the OpenIG route configuration for proxying requests.
### Proxying requests to the MCP server.
The route will receive the `access_token` issued by OpenAM, passed in the `Authorization` header. If the `access_token` is valid, it will pass the request to the MCP server and return a response. If the `access_token` is invalid, OpenIG will return HTTP status 401.
The route consists of two filters. The first filter, `OAuth2ResourceServerFilter`, validates the `access_token` and, if successful, writes the data received from the `access_token` to the request context. The second filter, `ConditionEnforcementFilter`, checks the context and, if successful, forwards the request to the MCP server. Otherwise, it returns HTTP status 401.
Let's make an unauthorized request to the MCP server and verify that OpenIG requires authorization.
```bash
curl -v http://openig.example.org:8081/mcp
* Trying 127.0.0.1:8081...
* Connected to openig.example.org (127.0.0.1) port 8081 (#0)
> GET /mcp HTTP/1.1
> Host: openig.example.org:8081
> User-Agent: curl/8.1.2
> Accept: */*
>
< HTTP/1.1 401
< WWW-Authenticate: Bearer realm="OpenIG"
< Content-Length: 0
< Date: Mon, 22 Sep 2025 08:00:48 GMT
```
Proxying to `.well-known` endpoints
According to the MCP specification, the client obtains data about the authorization server from endpoints located at the URL `<MCP server host>/.well-known/*`. The endpoints are located on OpenAM at the URL `<OpenAM host>/openam/.well-known`. The route for forwarding HTTP requests to MCP on OpenAM is as follows:
The `HeaderFilter` filter adds the OpenAM Host HTTP header specified in the `openam` system parameter in the `docker-compose.yaml` file, and the `EndpointHandler` handler forwards the request to the `/openam/.well-known/openid-configuration` endpoint deployed in the `openam` Docker container.
For more details on configuring OpenIG, please refer to the documentation.
Configuring VS Code to work with the MCP server
You must have the extensions for working with Copilot, GitHub Copilot, and GitHub Copilot Chat installed and configured. Instructions on how to do this are available at: [https://code.visualstudio.com/docs/copilot/setup](https://code.visualstudio.com/docs/copilot/setup).
Add the MCP server to VS Code.
For example, to add MCP to your workspace, create a file named `mcp.json`in the `.vscode` directory of your workspace:
`mcp.json`:
```json
{
"servers": {
"time-mcp-server": {
"type": "http",
"url": "http://openig.example.org:8081/mcp"
}
}
}
```
Other ways to add an MCP server are described at: [https://code.visualstudio.com/docs/copilot/customization/mcp-servers#_add-an-mcp-server](https://code.visualstudio.com/docs/copilot/customization/mcp-servers#_add-an-mcp-server)
In the VS Code extensions list, click on the settings for the added MCP server and select`Start Server` from the menu that appears.
Enter the login and password for the test user: `demo` and `changeit`, respectively
Confirm access to data forthe Visual Studio Code application. If you want to disable the data access confirmation dialog, enable `Allow clients to skip consent`in the OAuth2 Provider settings in OpenAM.
After confirming, you will be redirected back to VS Code.
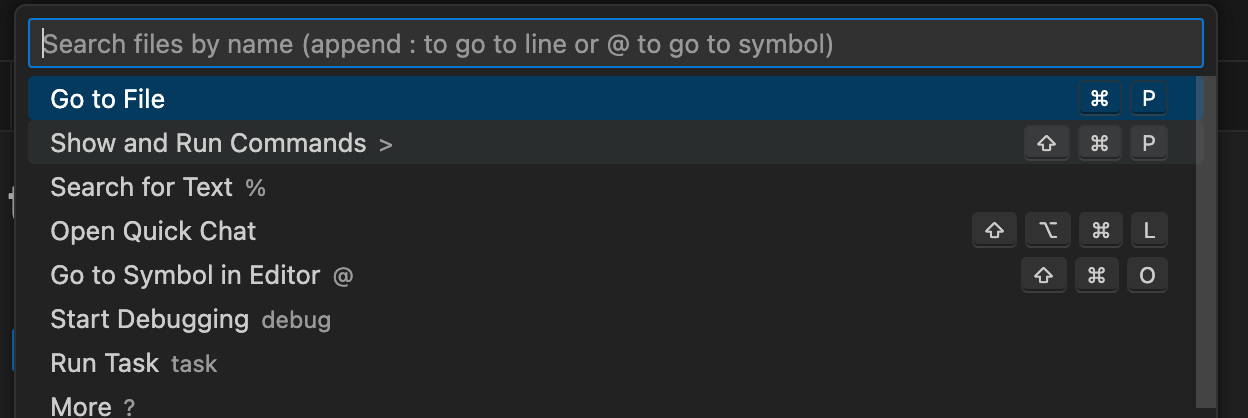
Open the chat with GitHub Copilot. To do this, select**Show and Run Commands** from the command menu:
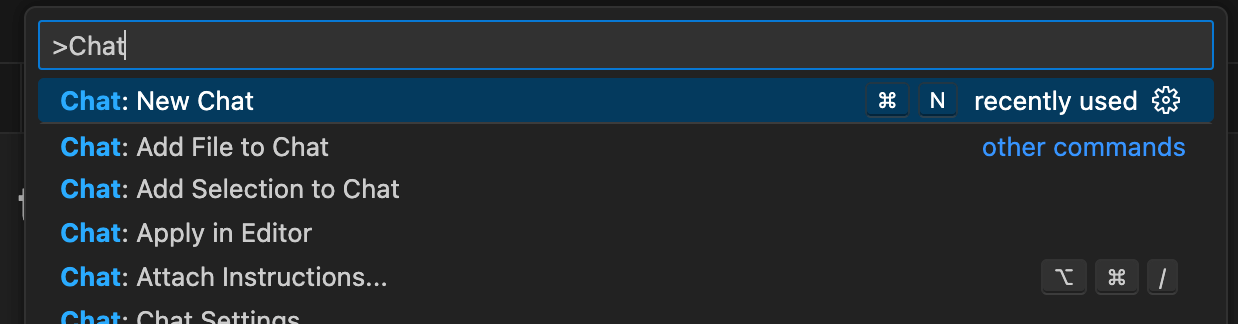
Then select**Chat: New Chat**:
In the chat window that opens, enter the question: `What is the current time?`. Copilot will respond that it does not have access to the current time:
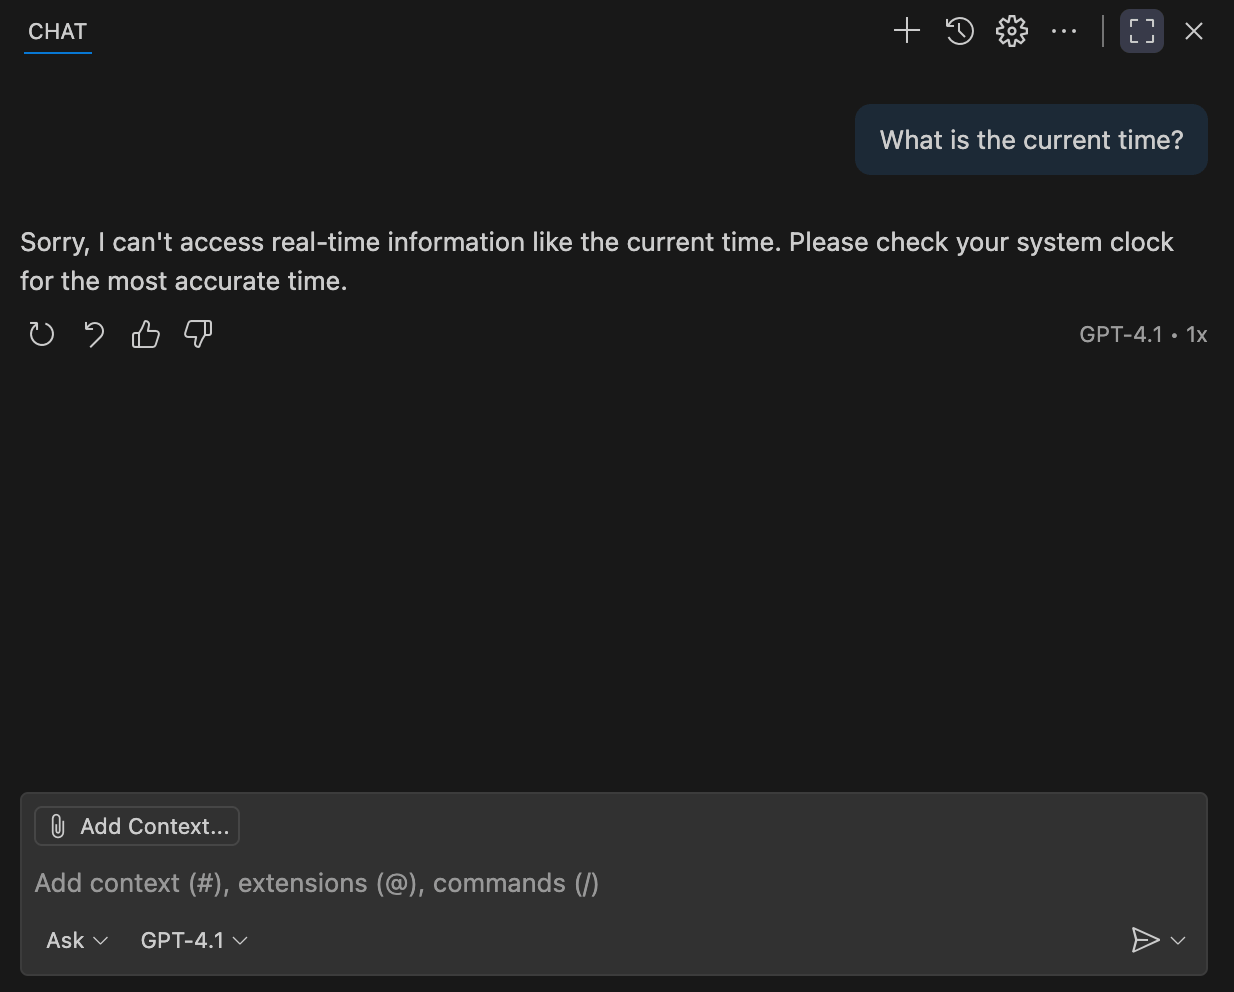
Now switch the chat to Agent mode at the bottom and ask the question again:
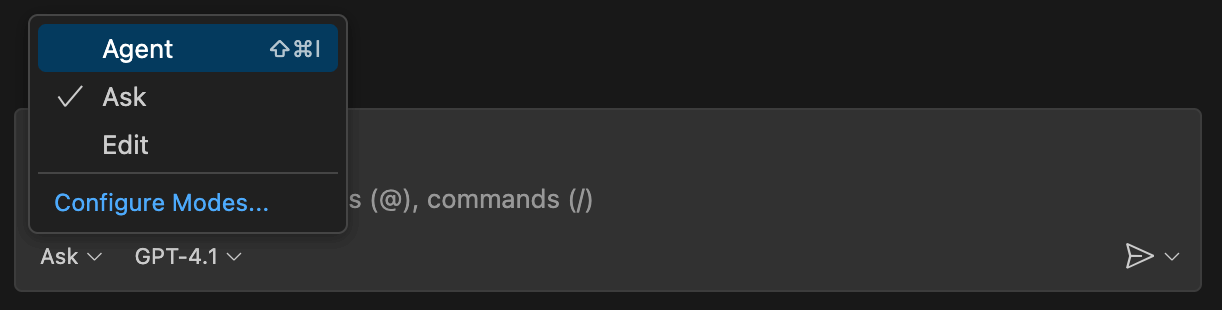
Allow access to the functionfor obtaining the current timein the MCP server:
In this article, we demonstrated the practical integration of OpenAM and OpenIG to provide secure access to the MCP server based on OAuth 2.1. OpenAM acts as a reliable authentication and authorization center, issuing and validating tokens, while OpenIG filters requests, blocking unauthorized access and proxying traffic to protected resources. This approach minimizes the risk of sensitive data leaks - from internal repositories to customer databases.
Download the source code from GitHub, test the configuration, and integrate it into your projects. For in-depth study, refer to the official documentation: [OpenAM](https://doc.openidentityplatform.org/openam/) and [OpenIG](https://doc.openidentityplatform.org/openig/).
This file contains hidden or bidirectional Unicode text that may be interpreted or compiled differently than what appears below. To review, open the file in an editor that reveals hidden Unicode characters.
Learn more about bidirectional Unicode characters
This article has moved to the Open Identity Platform documentation site:
# Introduction
Google Authenticator is one of the most commonly used applications for two-factor authentication (2FA). It runs both on Android and iOS devices. In the following article, we will describe how to set up 2FA in OpenAM with Google Authenticator.
[How to Setup 2FA with Google Authenticator in OpenAM](https://doc.openidentityplatform.org/openam/how-to/how-to-setup-2fa-with-google-authenticator-in-openam).
# OpenAM Setup
## Setup Authentication Module
For example, we have realm `staff` where we want to set up 2FA with Google Authenticator. Login into admin console as `amadmin` user, go to realm `staff`, and create new `OATH` module `google-authenticator` with the following settings:
Please use the documentation site for the current version.

By default, there is `ldapService` authentication chain, which uses only `DataStore` authentication module. Add `google-authenticator` module in the chain.
The next part would be a little bit tricky. To authenticate in Google Authenticator we need to set up user accounts first. Then generate for each user account shared secret. As an example, we will take `test` account and for this account shared secret will be `s3cr3tw0rd`.
<aname="setup-authentication-chain"></a>
Encode into Base16. You can or use online service [https://simplycalc.com/base16-encode.php](https://simplycalc.com/base16-encode.php) either use the following Java function:
Open User account properties in Apache Directory Studio (or any other LDAP client application) and add `sunIdentityServerPPEncryptKey` value `73336372337477307264` as shown on the picture below.
**[Setup User Accounts](https://doc.openidentityplatform.org/openam/how-to/how-to-setup-2fa-with-google-authenticator-in-openam#how-to-setup-2fa-with-google-authenticator-in-openam-setup-user-accounts)**

Then generate a QR code to register the user in the Google Authenticator application. QR for Google Authenticator is URI in the following format `otpauth://totp/<account id>@<issuer>?secret=<base32 encoded secret>&issuer=<Issuer Name>`
Encode secret as Base32. You can use or online service [https://simplycalc.com/base32-encode.php](https://simplycalc.com/base32-encode.php), ether following Java function:
This file contains hidden or bidirectional Unicode text that may be interpreted or compiled differently than what appears below. To review, open the file in an editor that reveals hidden Unicode characters.
Learn more about bidirectional Unicode characters
This article has moved to the Open Identity Platform documentation site:
Almost every organization uses [Active Directory](https://ru.wikipedia.org/wiki/Active_Directory) to manage employee accounts. And using existing accounts to access corporate applications is a recommendend practice. In this article, we will configure authentication in the [demo Spring Boot application](https://github.com/OpenIdentityPlatform/spring-security-openam-example) via an Active Directory server in [OpenAM](https://github.com/OpenIdentityPlatform/OpenAM).
[How to Setup Active Directory Authentication in a Spring Boot Application](https://doc.openidentityplatform.org/openam/how-to/how-to-setup-active-directory-authentication-in-a-spring-boot-application).
Please use the documentation site for the current version.
Let OpenAM hostname is `openam.example.org`, and the Spring Boot application hostname is `app.example.org`.
<aname="openam-configuration"></a>
If you already have OpenAM installed, you can skip this step. The easiest way to deploy OpenAM is in a Docker container. Before starting, add the hostname and IP address to the `hosts` file, for example `127.0.0.0.1 app.example.org openam.example.org` .
In the login field enter the value `amadmin`, in the password field enter the value from the `ADMIN_PWD` parameter of the setup command, in this case `passw0rd`.
Select the root realm and select Authentication → Modules from the menu. Create a new Active Directory authentication module.
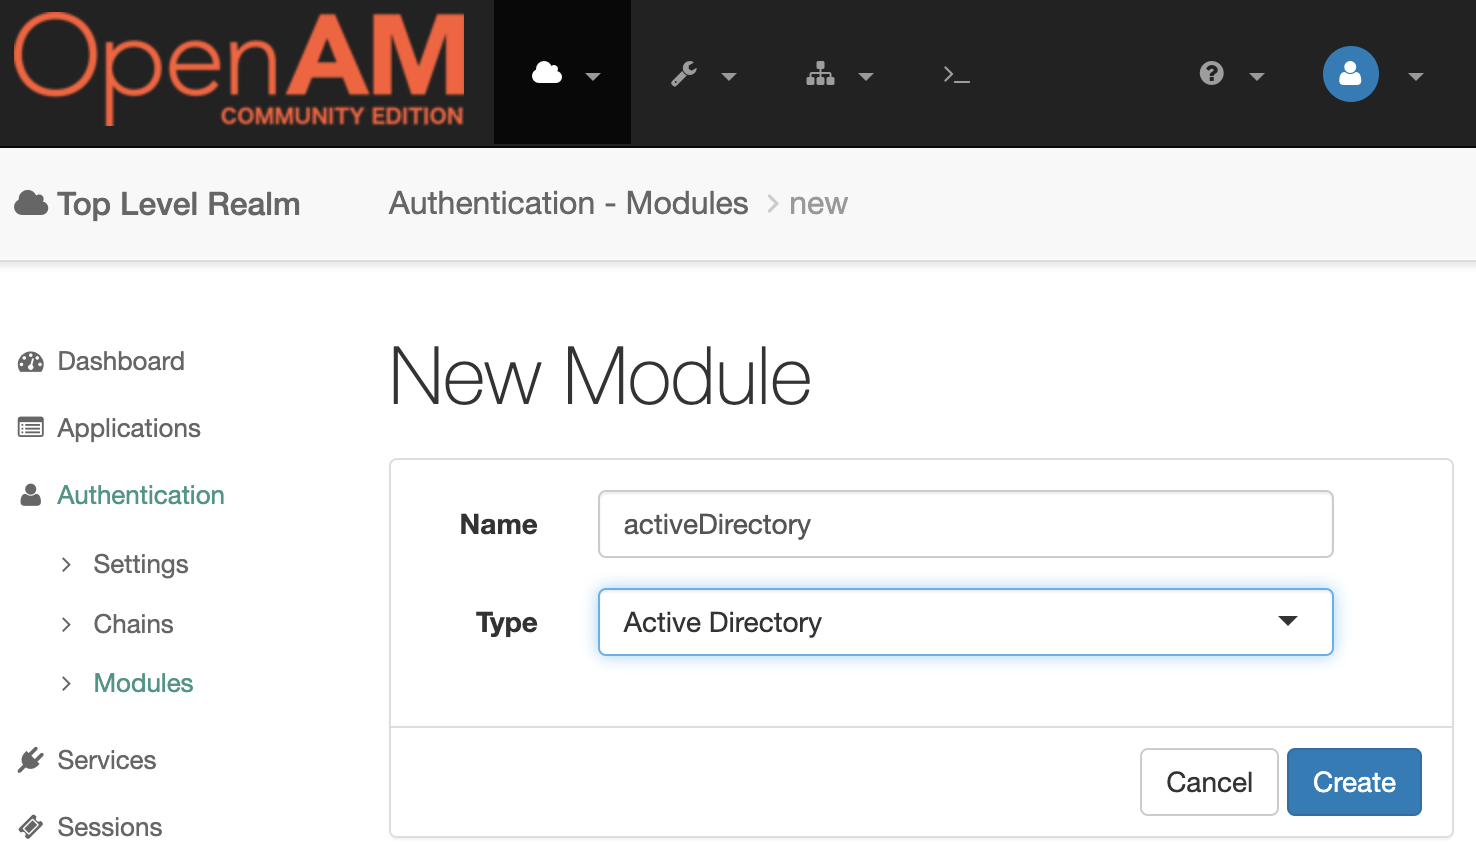
Set the module settings according to the table
| Setting | Description |
| --- | --- |
| Primary Active Directory Server | AD host and port number, for example: ad.example.org:389 |
| Users Domain | | Active Directory domain for user authentication, for example, example.org. You need to fill this property so that users do not enter a name like user@example.org | to authenticate.
| Bind User DN | Leave blank. If empty, binding authentication is used and you do not need to specify Bind user password, User Search Filter, and DN to Start User Search. | Bind user password.
You can leave other settings unchanged.
## Authentication Chain Configuration
Go to the admin console, select the root realm and select Authentication → Chains from the menu. Create an `activeDirectory` authentication chain with the recently created `activeDirectory` module.
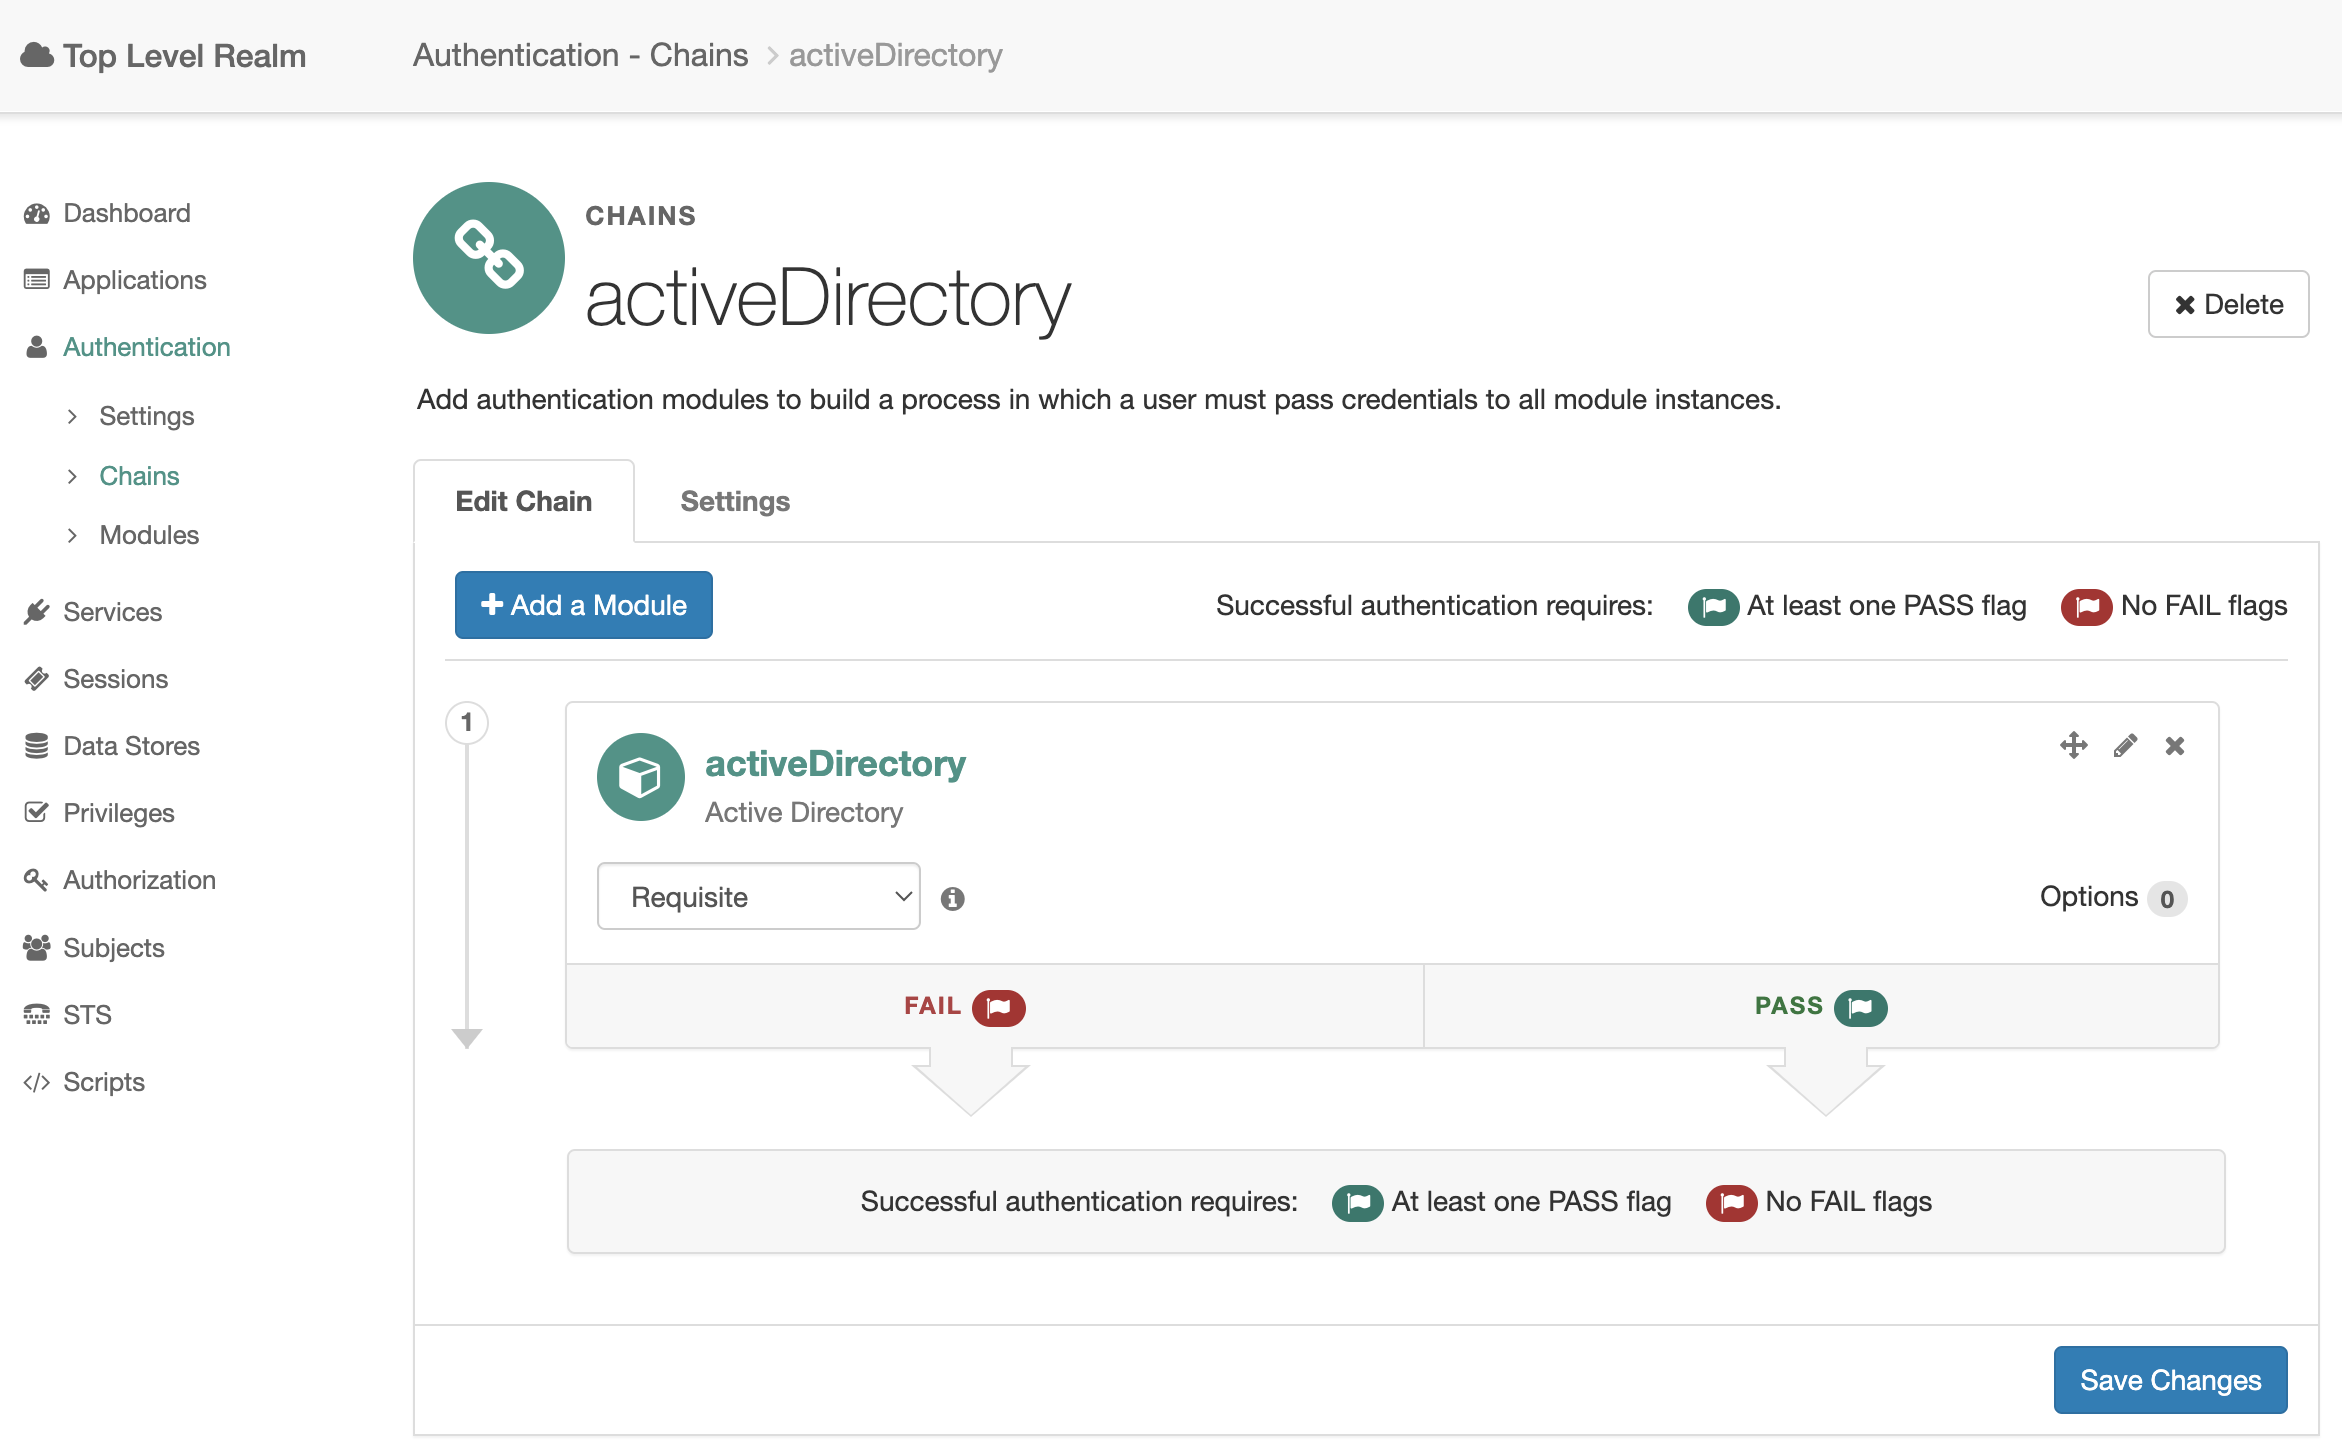
## Configure realm
Go to Authentication → Chains for realm and on the User Profile tab, set the `User Profile` setting to `Ignore`.
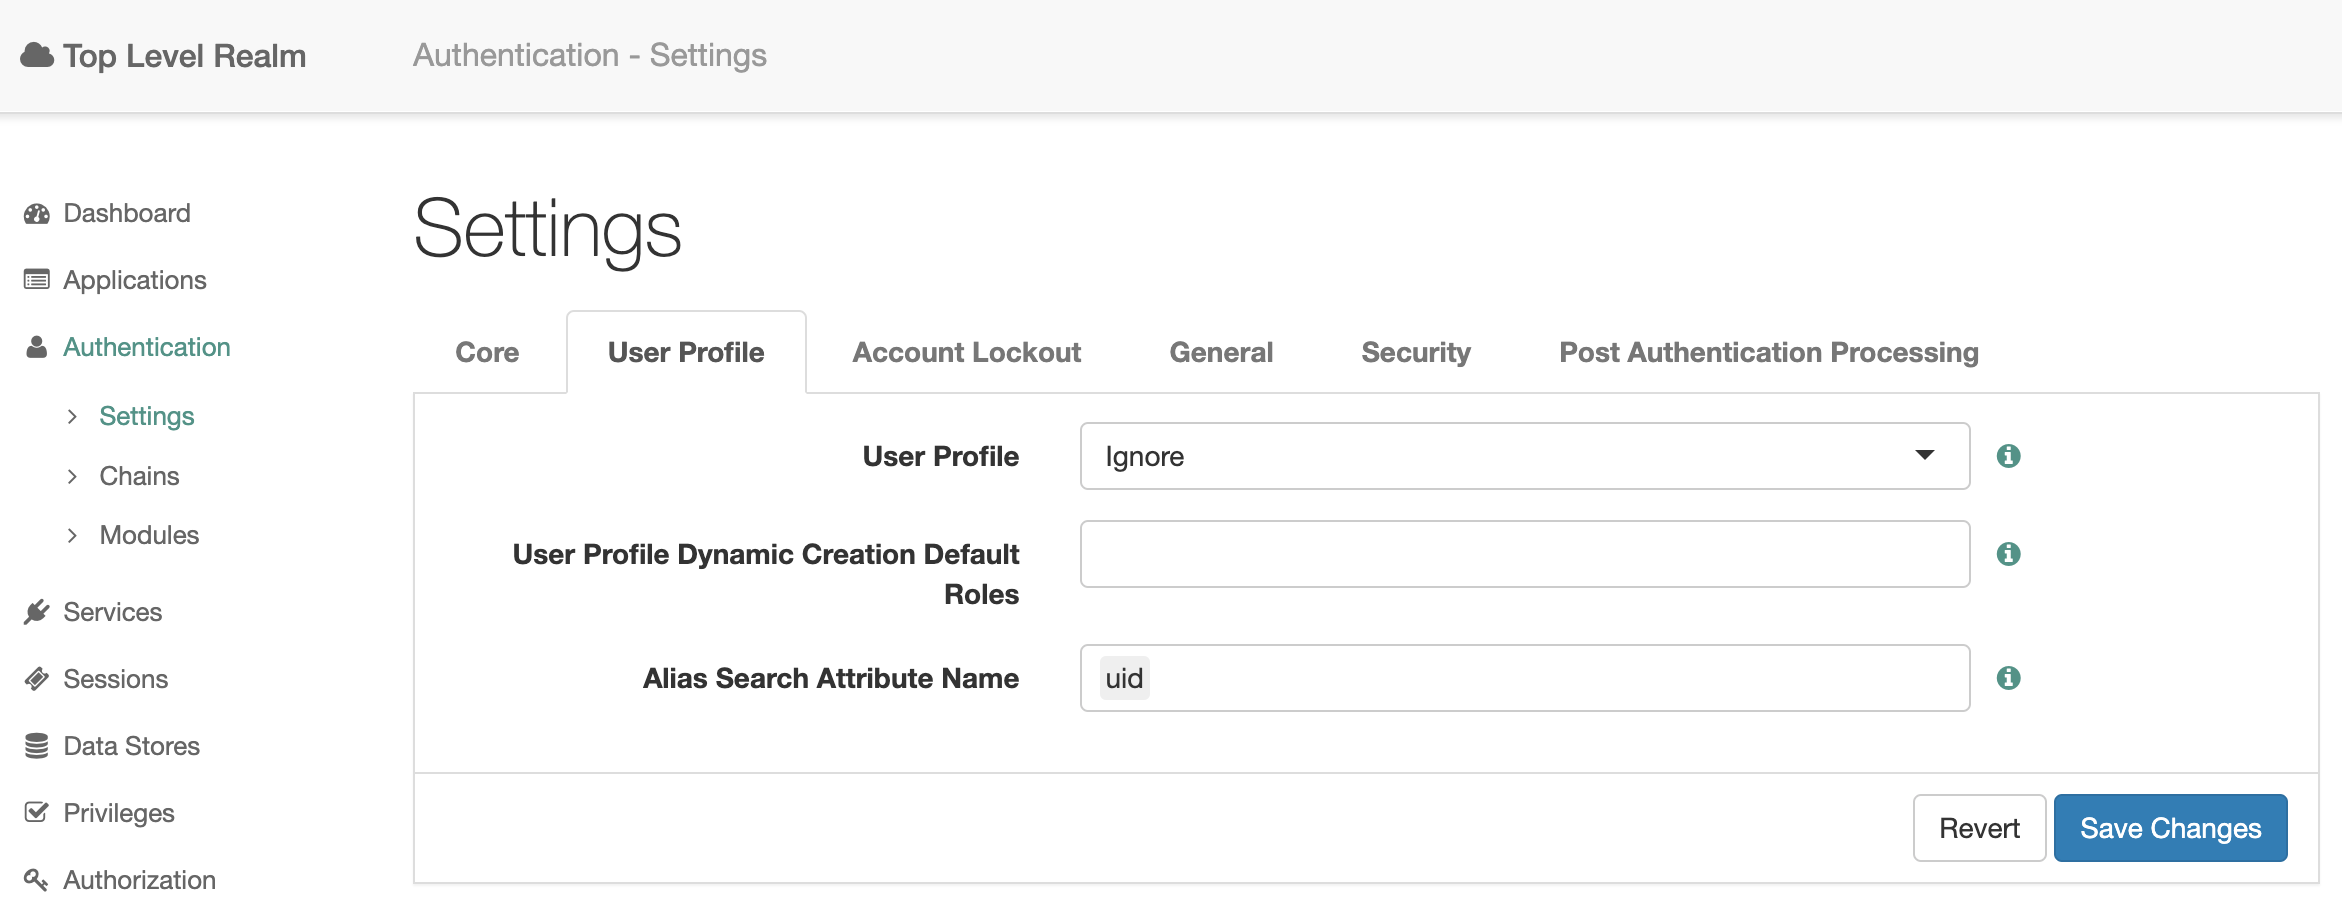
So, you can authenticate to Active Directory without setting up Active Directory as a User Data Store in OpenAM.
# Spring Boot Application Setup
The recommended way is to integrate through Spring Security.
The application uses a filter that can be attached to a Spring REST or a Web Controller.
The filter receives a Cookie with the authentication session ID set by OpenAM on successful authentication from the HttpServletRequest. Then the filter calls the OpenAM API to retrieve the user from the session. If the cookie does not exist or the session retrieved from the cookie is not valid, the user is redirected to authentication.
Exit the console and open the demo application link in your browser. http://app.example.org:8081/ Click the `OpenAM Cookie` link.
The filter will not find a valid session and will redirect to OpenAM authentication. Enter the user's credentials from Active Directory.
After successful authentication, the user will be redirected back to the application. The `openam.userId` attribute of the HttpServletRequest object will be set to the user ID from Active Directory.
-[OpenAM and Spring Boot 3 Integration via OIDC OAuth2 Protocol](https://github.com/OpenIdentityPlatform/OpenAM/wiki/OpenAM-and-Spring-Boot-3-Integration-via-OIDC-OAuth2-Protocol)
-[OpenAM and Spring Boot 3 Integration via SAMLv2 Protocol](https://github.com/OpenIdentityPlatform/OpenAM/wiki/OpenAM-and-Spring-Boot-3-Integration-via-SAMLv2-Protocol)
-[OpenAM and Spring Boot 3 Integration via OpenAM Cookie](https://github.com/OpenIdentityPlatform/OpenAM/wiki/OpenAM-and-Spring-Boot-3-Integration-via-OpenAM-Cookie)
-[How to Add Authorization and Protect Your Application With OpenAM and OpenIG Stack](https://github.com/OpenIdentityPlatform/OpenAM/wiki/How-to-Add-Authorization-and-Protect-Your-Application-With-OpenAM-and-OpenIG-Stack)
This file contains hidden or bidirectional Unicode text that may be interpreted or compiled differently than what appears below. To review, open the file in an editor that reveals hidden Unicode characters.
Learn more about bidirectional Unicode characters
In the following manual, we will set up a federation between two OpenAM instances via OAuth2/OIDC protocol. One OpenAM instance we will set up as OAuth2/OIDC Server - Identity Provider (IdP), and another instance OAuth2/OIDC client - Service Provider (SP).Thus, you can authenticate to an OpenAM client instance (SP) using OpenAM instance credentials (IdP) using the OAuth2/OIDC protocol.
# OpenAM Instances Installation
This article has moved to the Open Identity Platform documentation site:
If you already have OpenAM instances installed, you can skip this section.
For demonstration purposes, we will install OpenAM IdP and SP in Docker containers.
[How to Setup OAuth2 OIDC Federation in OpenAM](https://doc.openidentityplatform.org/openam/how-to/how-to-setup-oauth2-oidc-federation-in-openam).
## Network Setup
Please use the documentation site for the current version.
**[OAuth2/OIDC Server Setup](https://doc.openidentityplatform.org/openam/how-to/how-to-setup-oauth2-oidc-federation-in-openam#how-to-setup-oauth2-oidc-federation-in-openam-oauth2oidc-server-setup)**
Once the OpenAM server is running, perform the initial configuration by running the following command and wait for the configuration to complete.
**[Create a Client Application](https://doc.openidentityplatform.org/openam/how-to/how-to-setup-oauth2-oidc-federation-in-openam#how-to-setup-oauth2-oidc-federation-in-openam-create-a-client-application)**
Open the OpenAM console, which will be in the role of the OAuth2/OIDC server at [http://idp.acme.org:8080/openam](http://idp.acme.org:8080/openam). In the login field enter the `amadmin` value. In the password field enter the value from `ADMIN_PWD` option, in this case `passw0rd`.
Open the console of OpenAM, which will be in the role of OAuth2/OIDC client at [http://openam-sp.example.org:8081/openam](http://openam-sp.example.org:8081/openam). In the login field enter the value `amadmin`, in the password field enter the value specified in the `ADMIN_PWD` setting, in this case `passw0rd`.
Open the realm and select `Authentication` → `Modules` from the left menu. Click the `Add Module` button.
Go to the OpenAM SP administrator console. In the left menu, go to `Authentication` → `Settings`. On the `User Profile` tab, select `Ignore`. Save the changes.
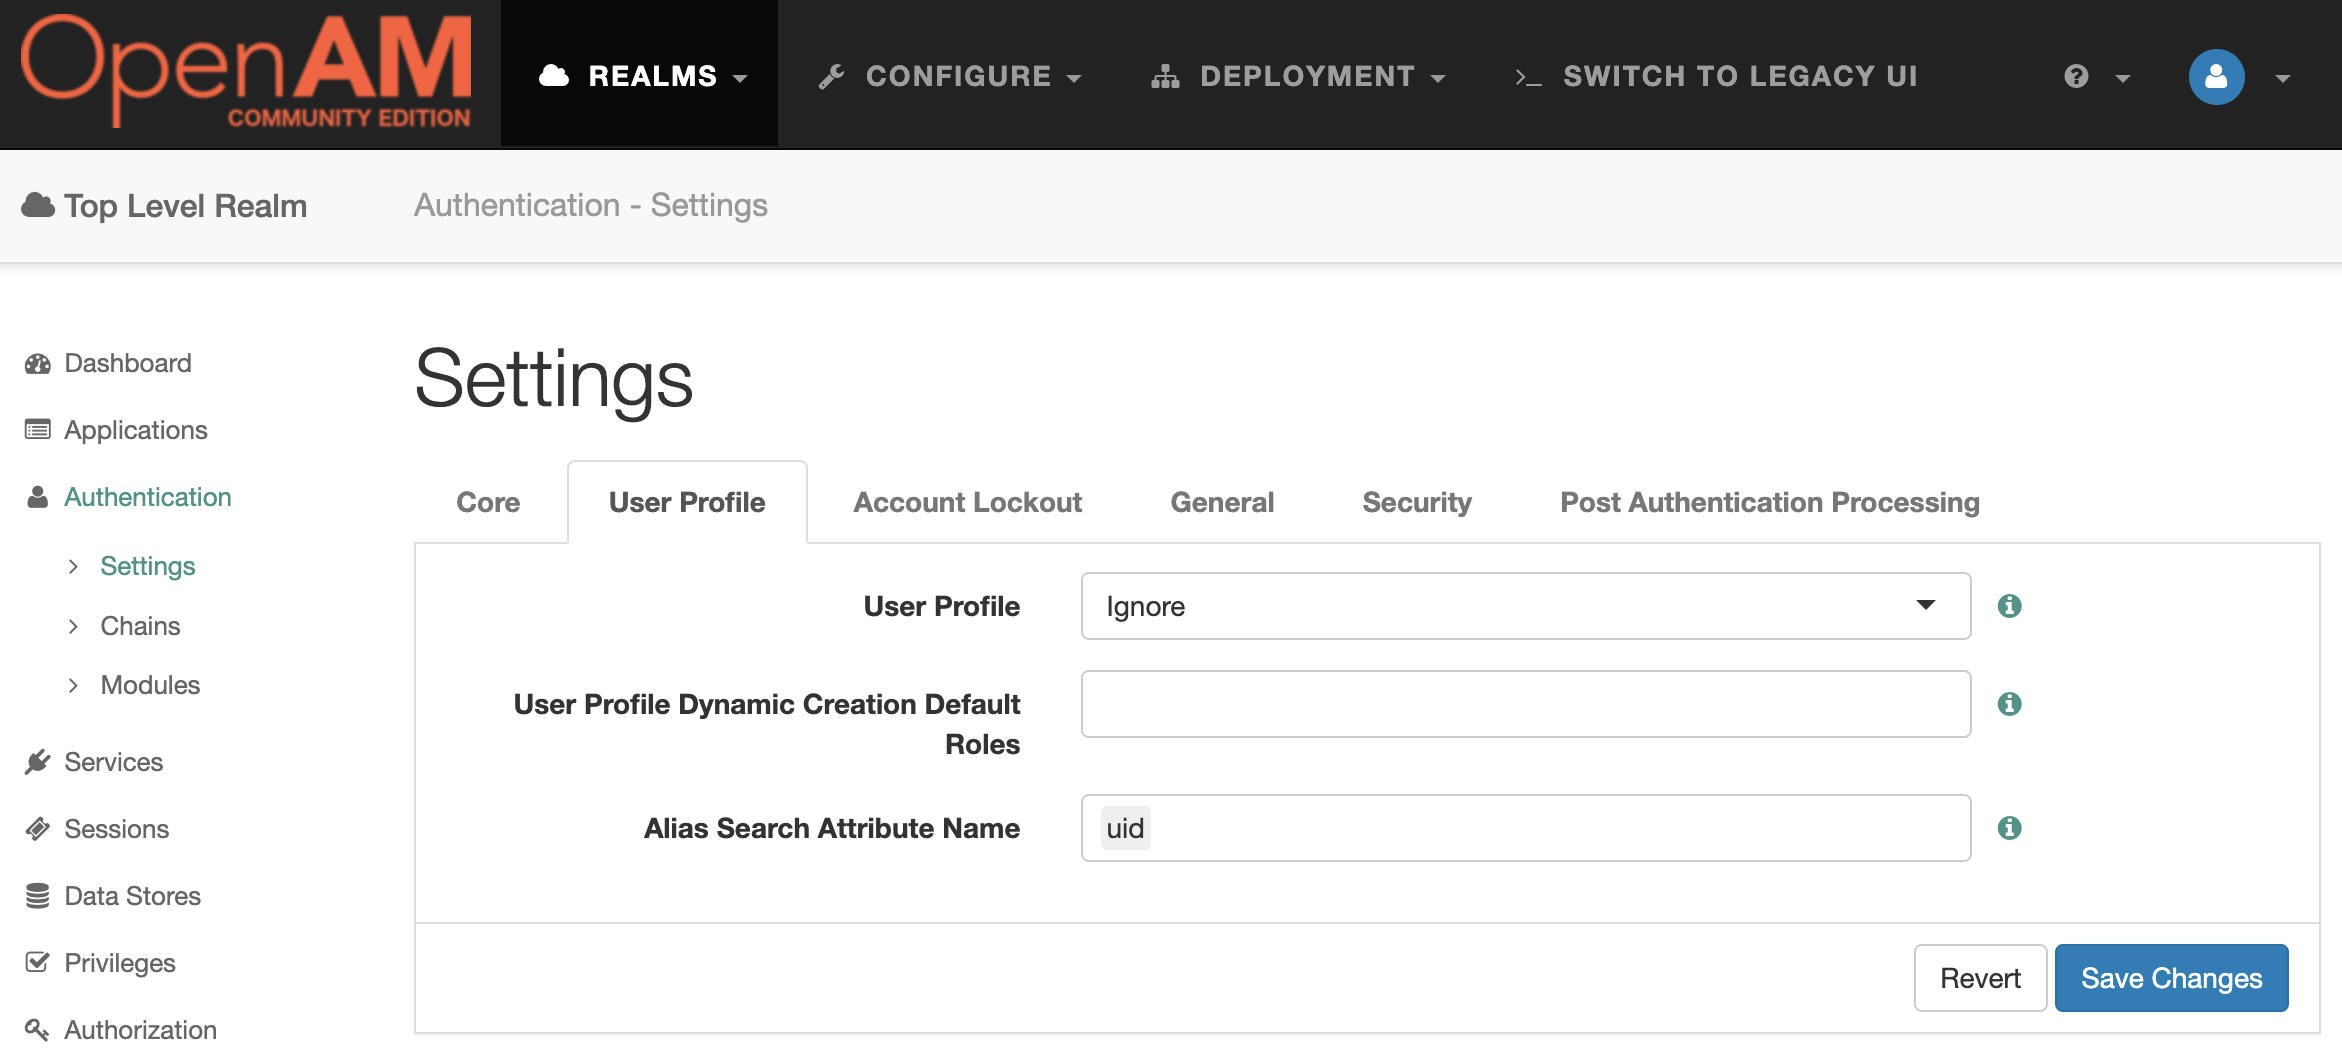
# Test the Solution
Go to the OpenAM OAuth2/OIDC Server admin console, select realm, under Dashboard in the left menu select `Subjects`.
This will open a list of users. Create a new `testIdp` account
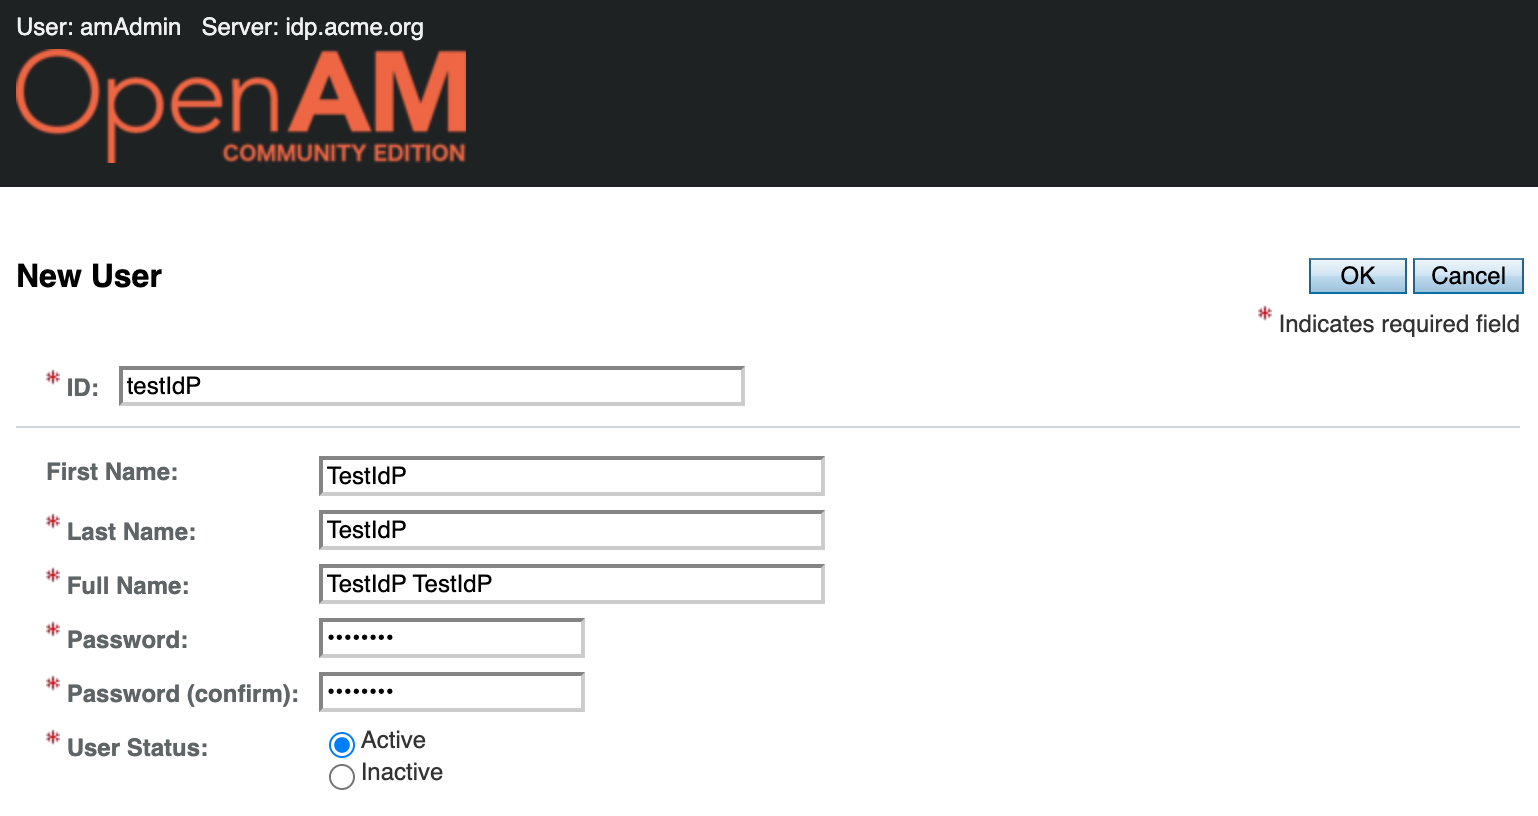
Log out of the OpenAM OAuth2/OIDC Server administration console and the OpenAM OAuth2/OIDC Client administration console or open a browser in incognito mode.
Open the OAuth2/OIDC Client authentication URL of the `oauth` chain [http://sp.mycompany.org:8081/openam/XUI/?service=oauth](http://sp.mycompany.org:8081/openam/XUI/?service=oauth)
You will be redirected to authenticate to the OAuth2/OIDC Server. Enter the users testIdP credentials.
Confirm consent to access the `test_client` application user data
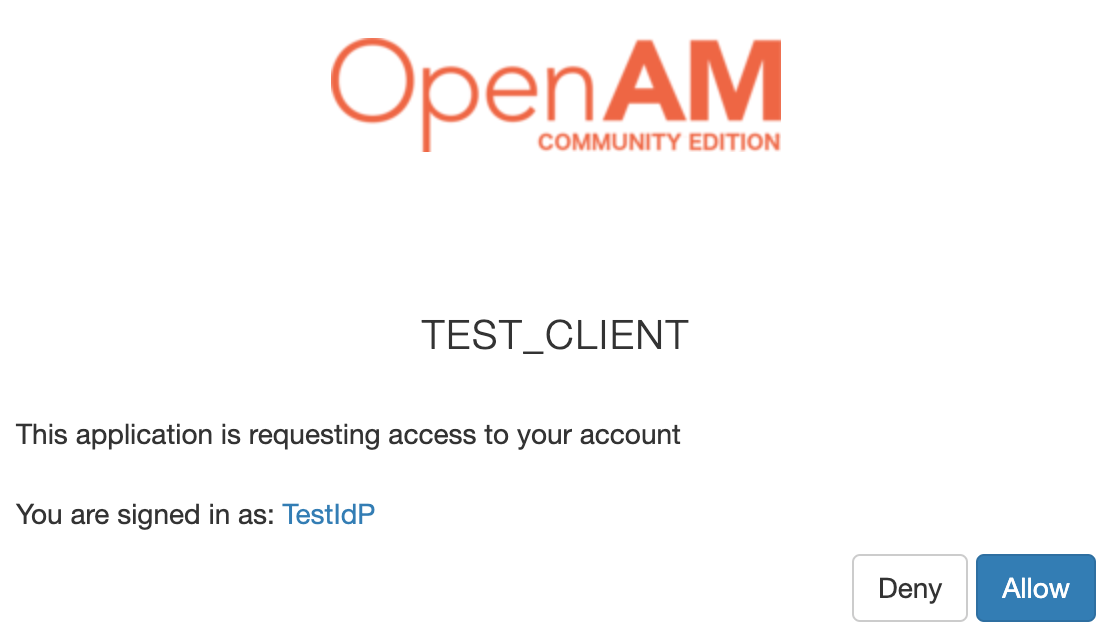
After accepting the consent, you well be redirected to OpenAM OAuth2/OIDC Client console with the OpenAM OAuth2/OIDC Server user credentials.
**[Test the Solution](https://doc.openidentityplatform.org/openam/how-to/how-to-setup-oauth2-oidc-federation-in-openam#how-to-setup-oauth2-oidc-federation-in-openam-test-the-solution)**
This file contains hidden or bidirectional Unicode text that may be interpreted or compiled differently than what appears below. To review, open the file in an editor that reveals hidden Unicode characters.
Learn more about bidirectional Unicode characters
In the following manual, we will set up a federation between two OpenAM instances. One instance will act as an Identity Provider (IdP), and another as a Service Provider (SP). Therefore, you will be able to authenticate in OpenAM SP with OpenAM IdP credentials.
# OpenAM Instances Installation
This article has moved to the Open Identity Platform documentation site:
If you already have OpenAM instances installed, you can skip this section.
For demonstration purposes, we will install OpenAM IdP and SP in Docker containers.
[How to Setup SAMLv2 Federation in OpenAM](https://doc.openidentityplatform.org/openam/how-to/how-to-setup-samlv2-federation-in-openam).
## Network Setup
Please use the documentation site for the current version.
**[Identity Provider и Service Provider Configuration](https://doc.openidentityplatform.org/openam/how-to/how-to-setup-samlv2-federation-in-openam#how-to-setup-samlv2-federation-in-openam-identity-provider-и-service-provider-configuration)**
# Identity Provider и Service Provider Configuration
**[Hosted Service Provider Configuration](https://doc.openidentityplatform.org/openam/how-to/how-to-setup-samlv2-federation-in-openam#how-to-setup-samlv2-federation-in-openam-hosted-service-provider-configuration)**
## Hosted Identity Provider Configuration
<aname="remote-identity-provider-setup"></a>
Open the OpenAM Identity provider administartion console at [http://idp.acme.org:8080/openam](http://idp.acme.org:8080/openam). In the login field enter the `amadmin` value. In the password field enter the value from `ADMIN_PWD` option, in this case `passw0rd`.
**[Configure Realm for Service Provider](https://doc.openidentityplatform.org/openam/how-to/how-to-setup-samlv2-federation-in-openam#how-to-setup-samlv2-federation-in-openam-configure-realm-for-service-provider)**
In the `Signing Key` setting for the demonstration purposes select the `test` value, then enter any `Circle of Trust` value. Then add `uid` in the `Attribute Mapping` setting.
**[Remote Service Provider Setup](https://doc.openidentityplatform.org/openam/how-to/how-to-setup-samlv2-federation-in-openam#how-to-setup-samlv2-federation-in-openam-remote-service-provider-setup)**
Press the `Configure` button. Next, OpenAM will prompt you to configure the Remote Service Provider. Since we do not have it configured yet, click the `Finish` button
Open the OpenAM Service Provider administarion console at [http://sp.mycompany.org:8081/openam](http://sp.mycompany.org:8081/openam). In the login field enter the `amadmin` value. In the password field enter the value from `ADMIN_PWD` option, in this case `passw0rd`.
Go to the root realm and in the Dashboard select `Configure SAMLv2 Provider`. Next `Create Hosted Service Provider`.
<aname="test-the-solution"></a>
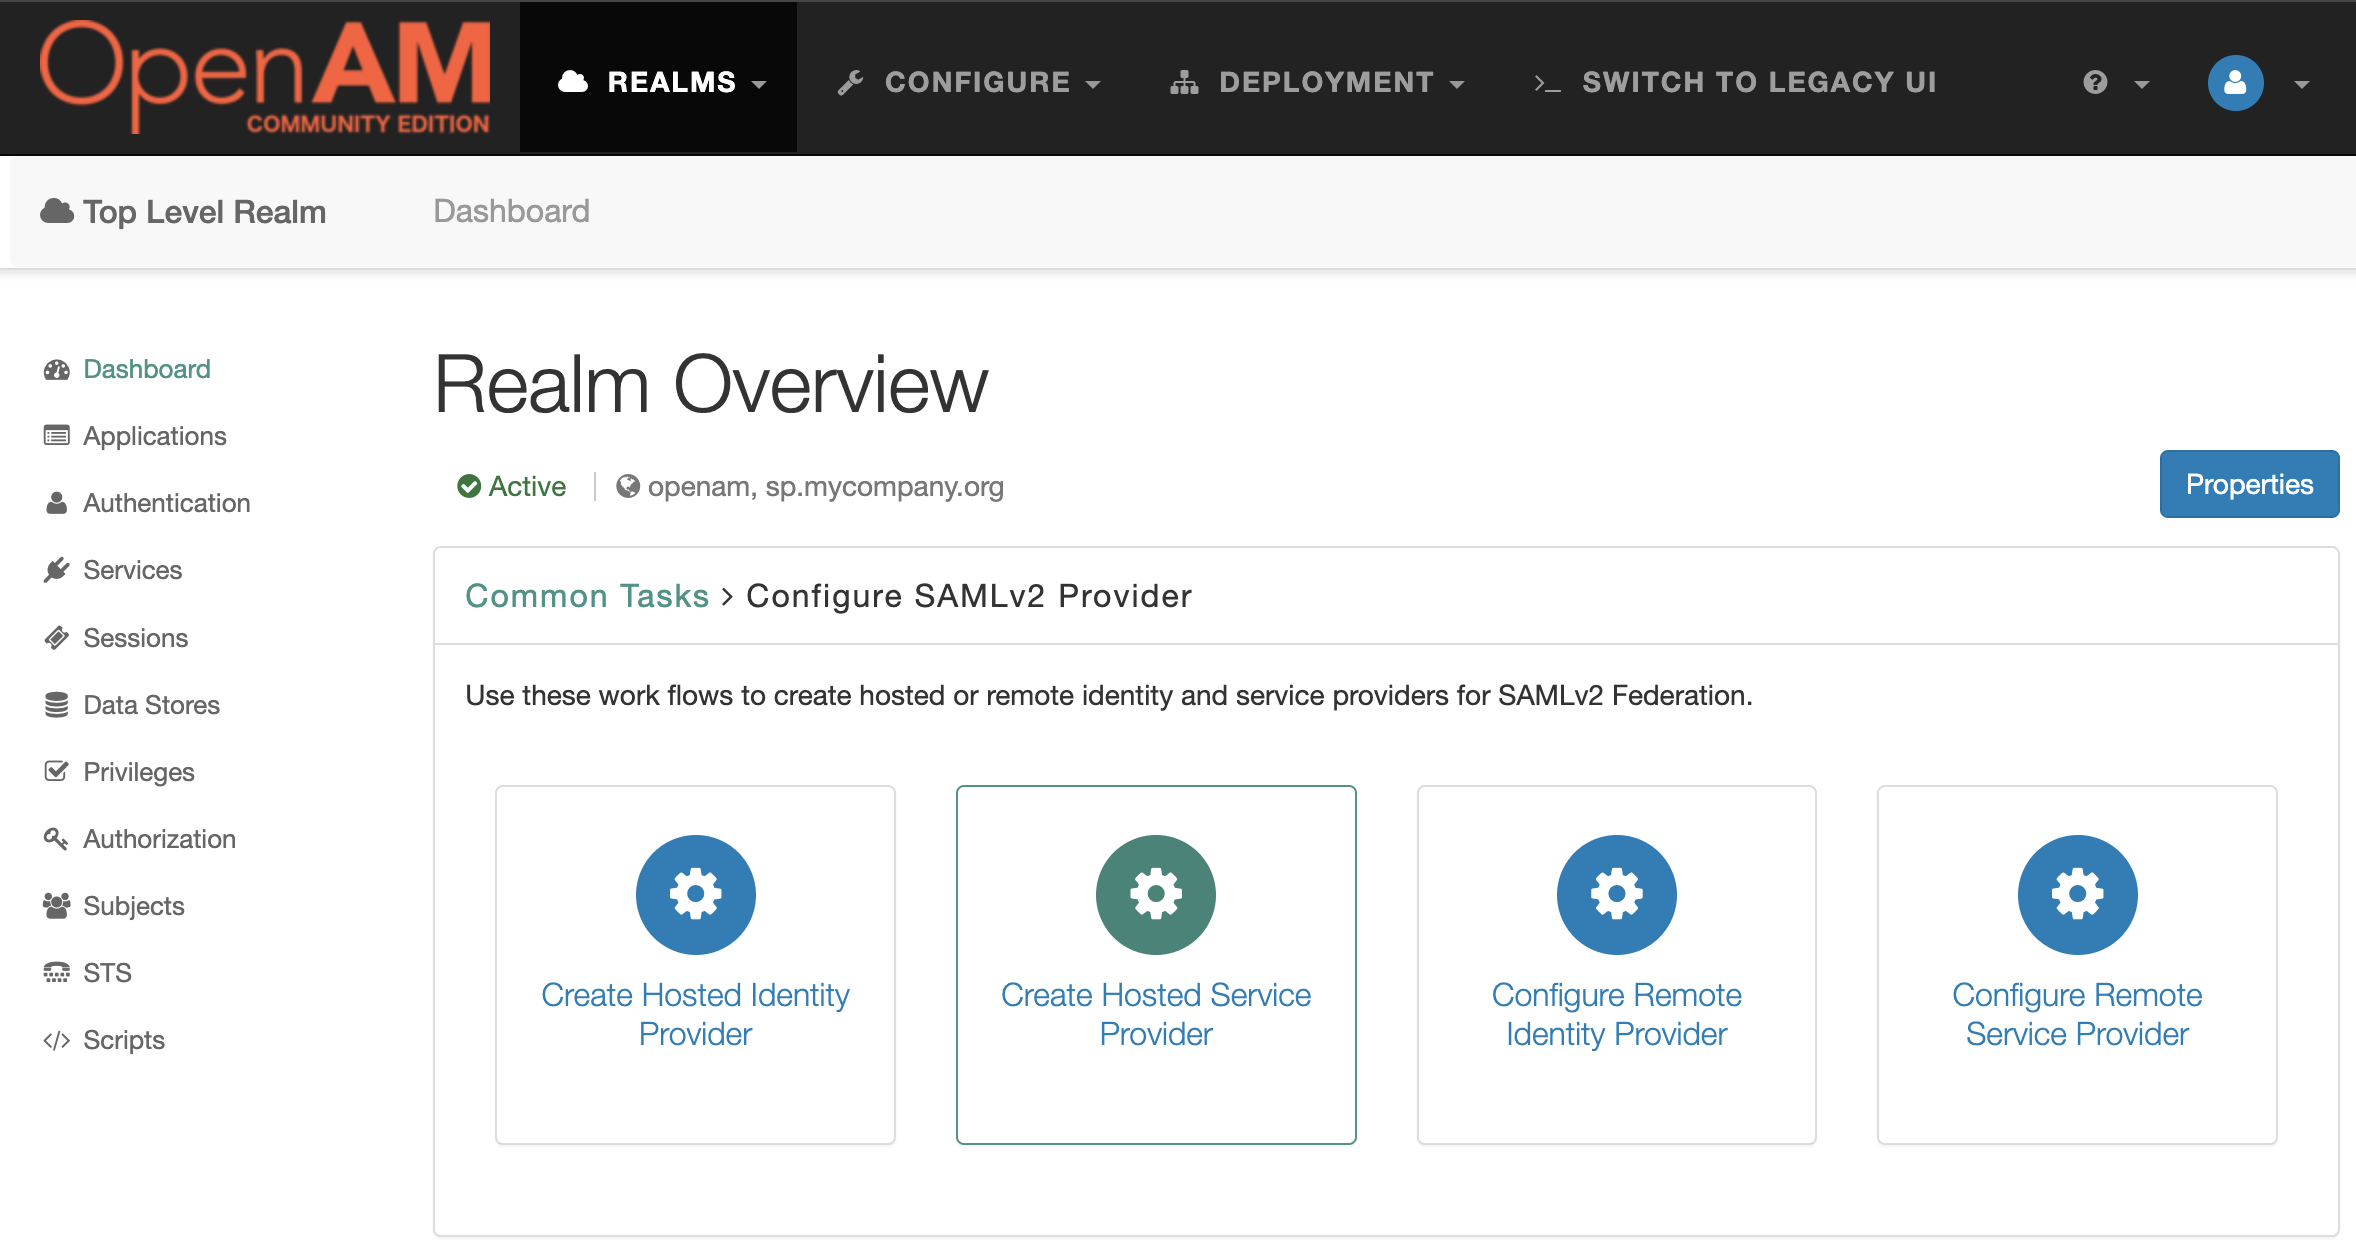
Enter the circle of trust name, you can leave the other settings unchanged.
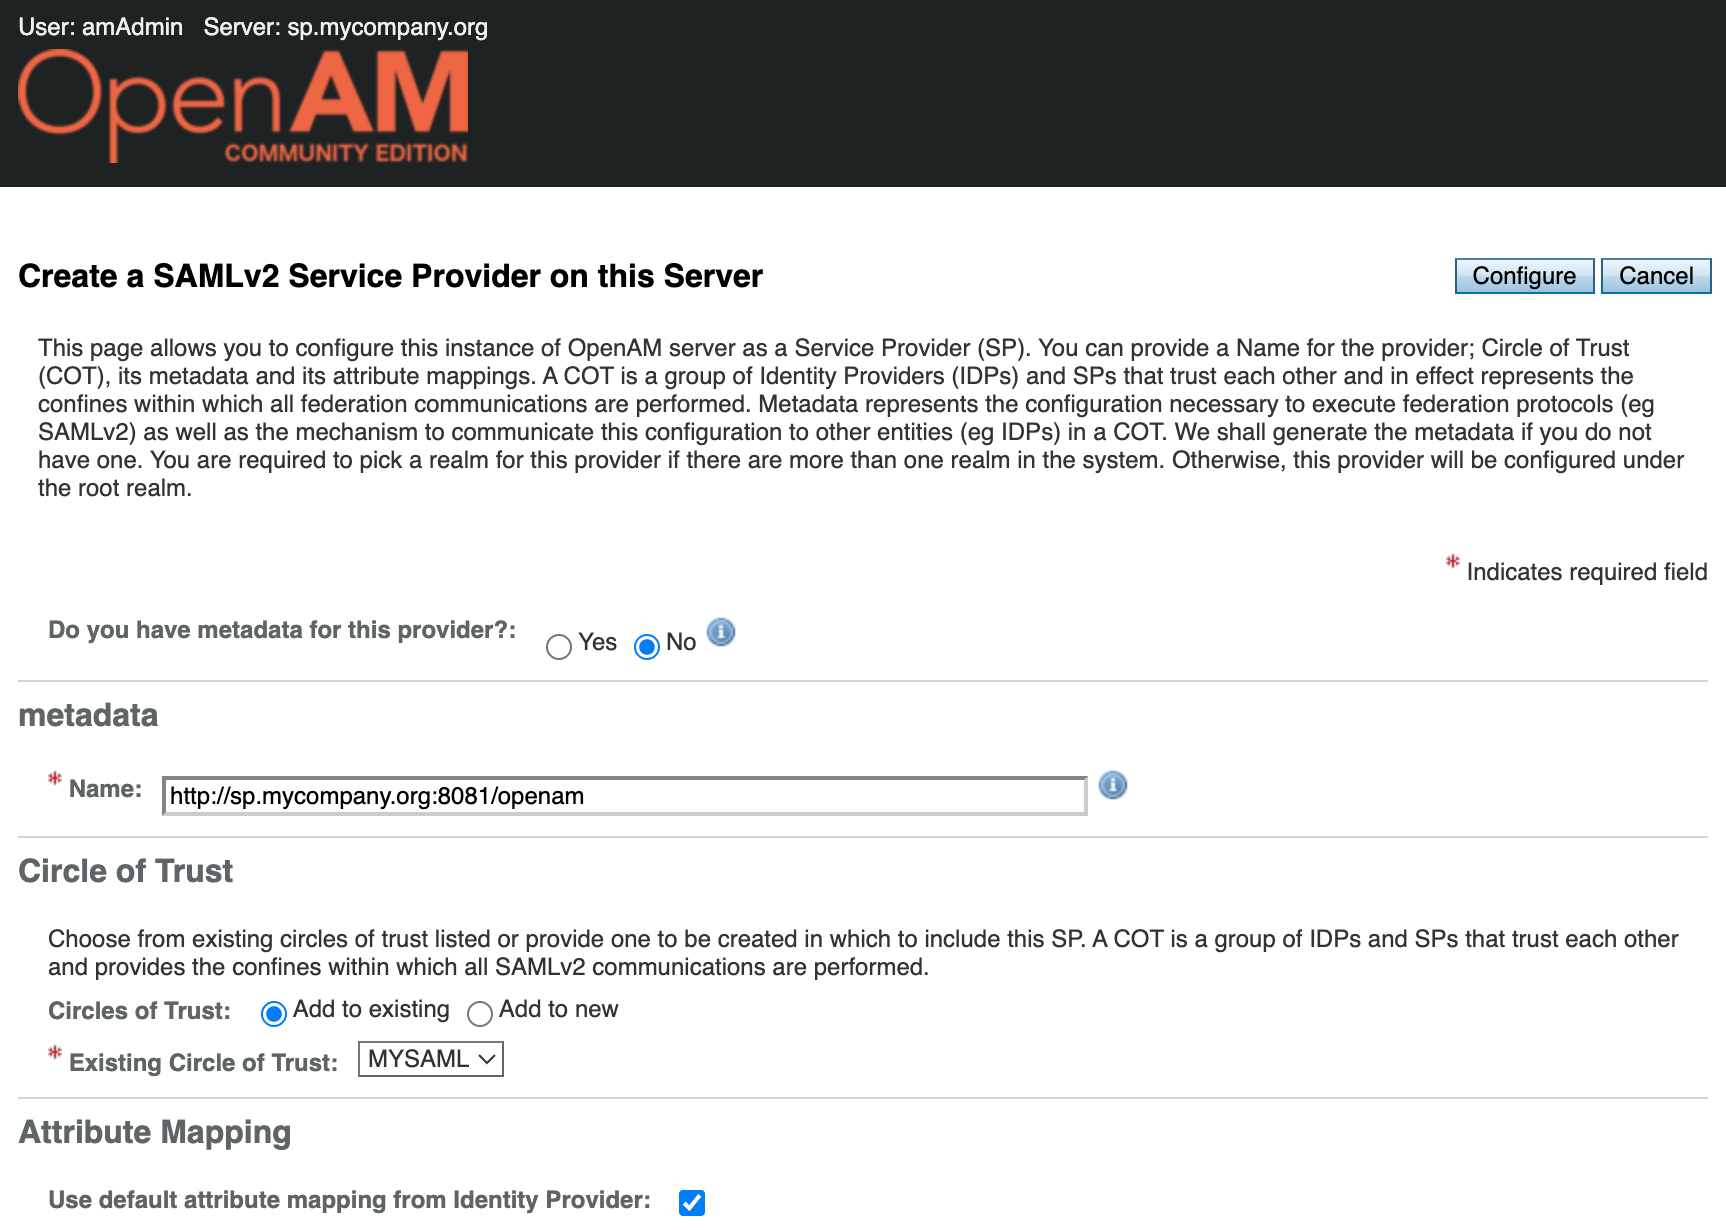
You will be prompted to configure the remote identity provider. Since we have already configured the Identity Provider in the previous step, you can click `Yes`. This will open the remote identity provider configuration window.
## Remote Identity Provider Setup
Select the identity provider metadata location - URL. Enter the identity provider metadata URL in the field.
This will open the SAML federation configuration window. Navigate to `Entity Providers` → [`http://sp.mycompany.org:8081/openam`](http://sp.mycompany.org:8081/openam)
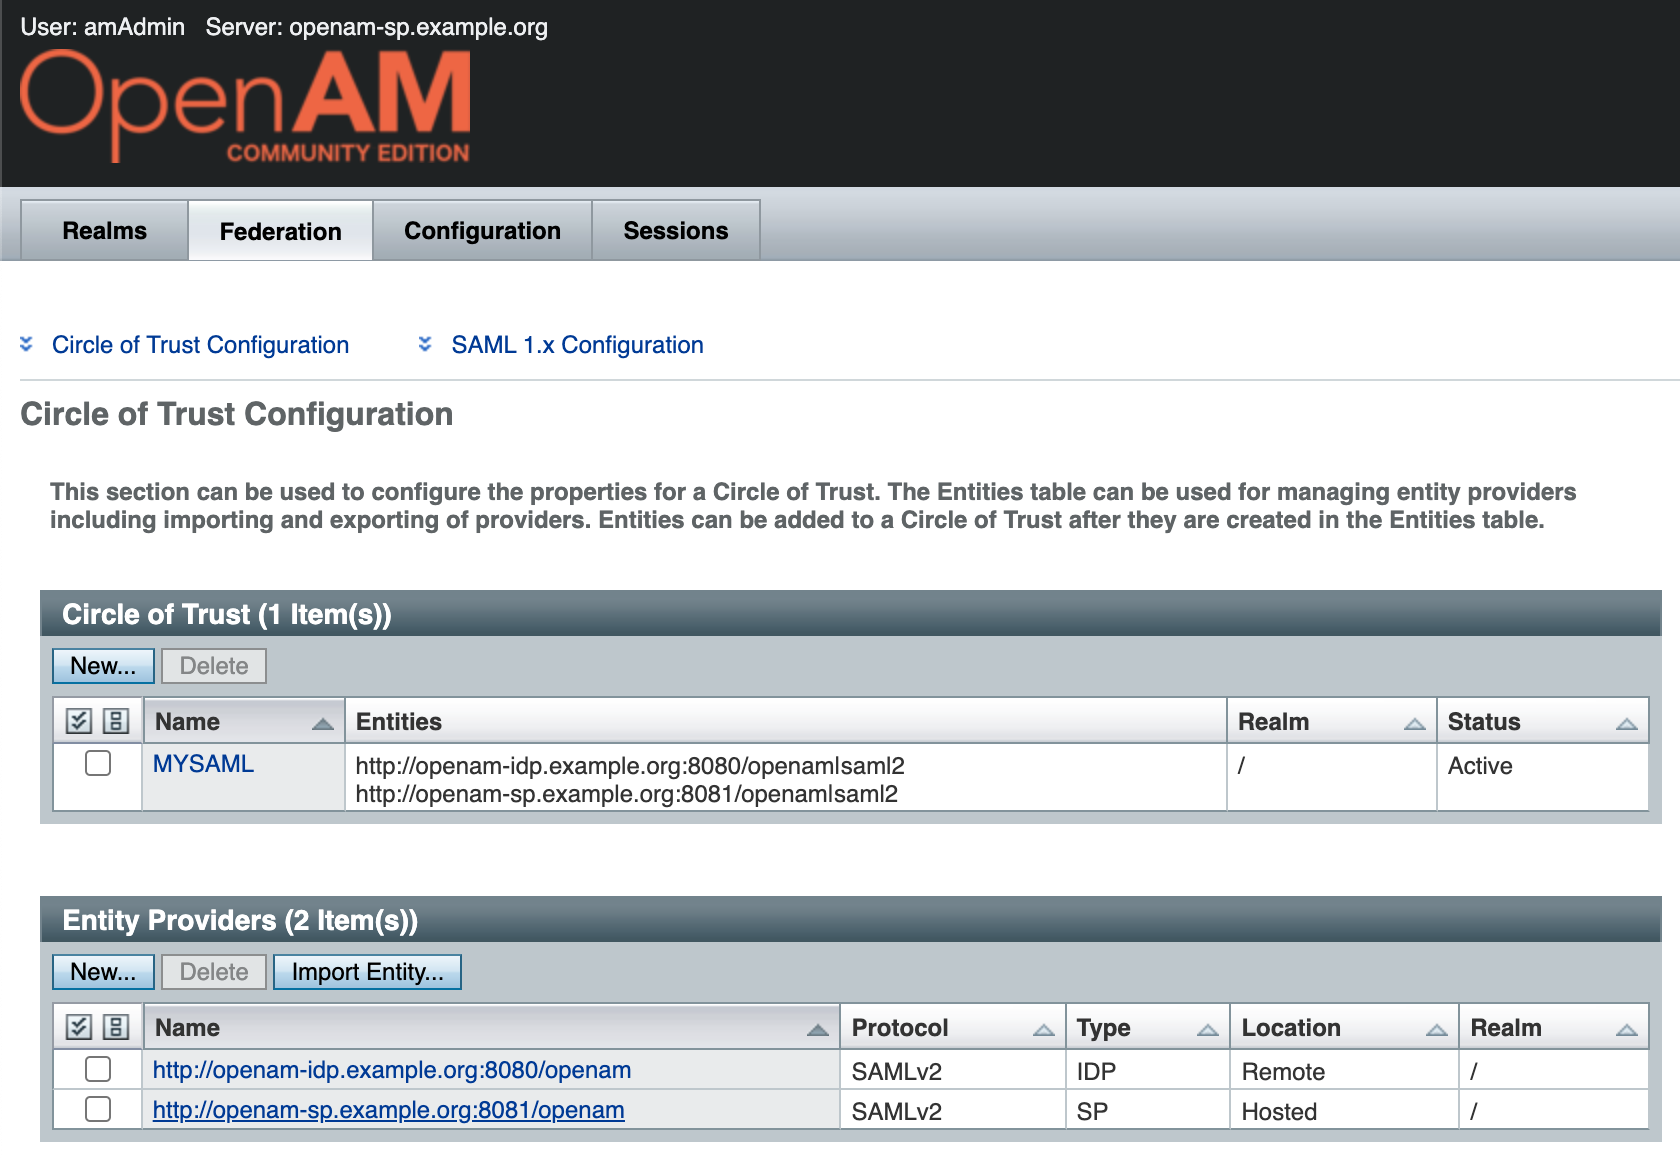
Next, click the `Assertions Processing` tab. Enable automatic federation by the `uid` attribute.
Go to the OpenAM SP administrator console. In the left menu, go to `Authentication` → `Settings` . On the `User Profile` tab, select `Ignore` . Save the changes.
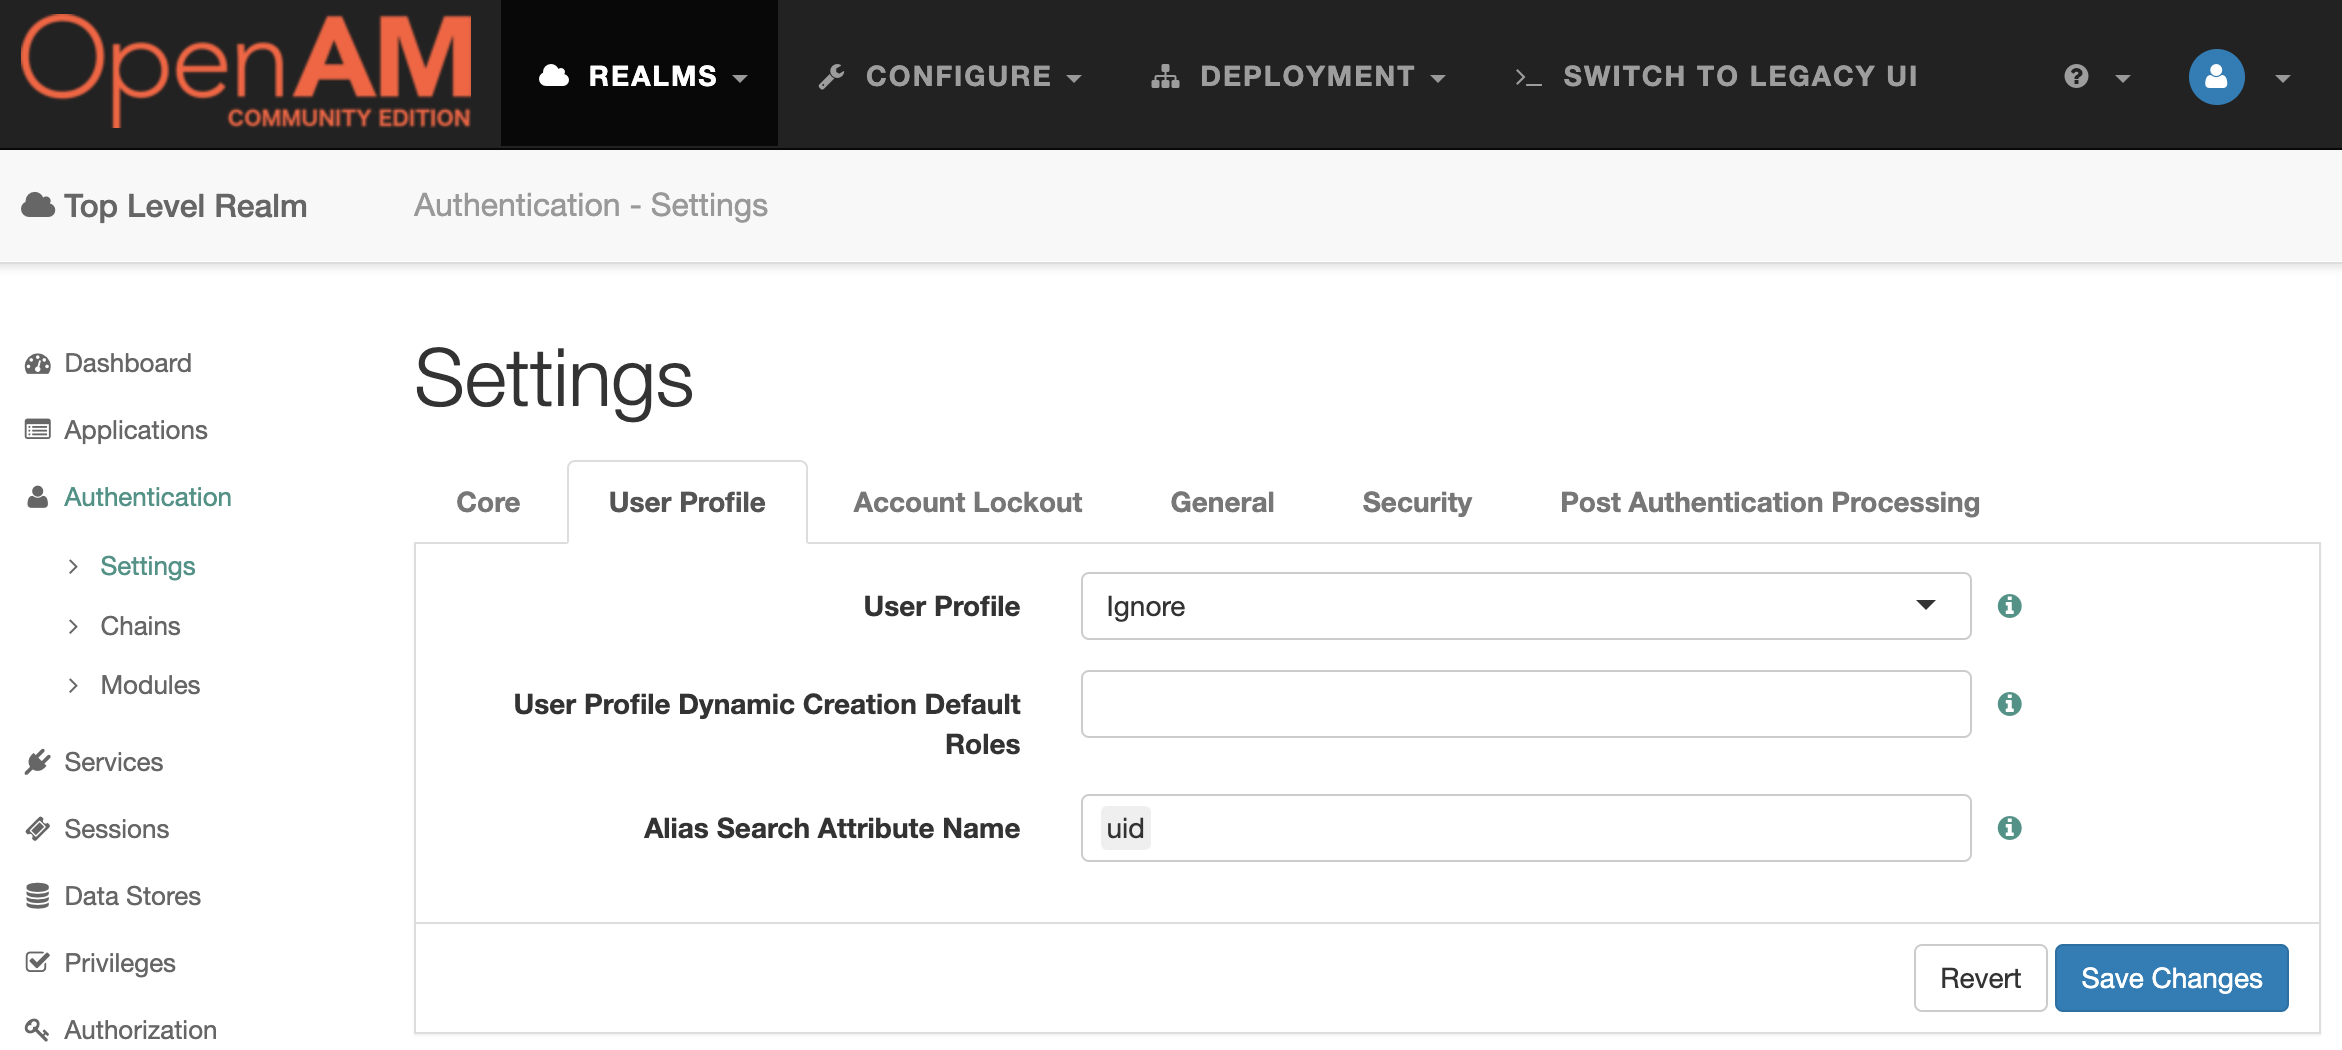
## Remote Service Provider Setup
Go to OpenAM IdP administration console at [`http://openam-idp.example.org:8080/openam`](http://openam-idp.example.org:8080/openam). Open the root realm and in the Dashboard select `Configure SAMLv2 Provider`, then `Configure Remote Service Provider`.
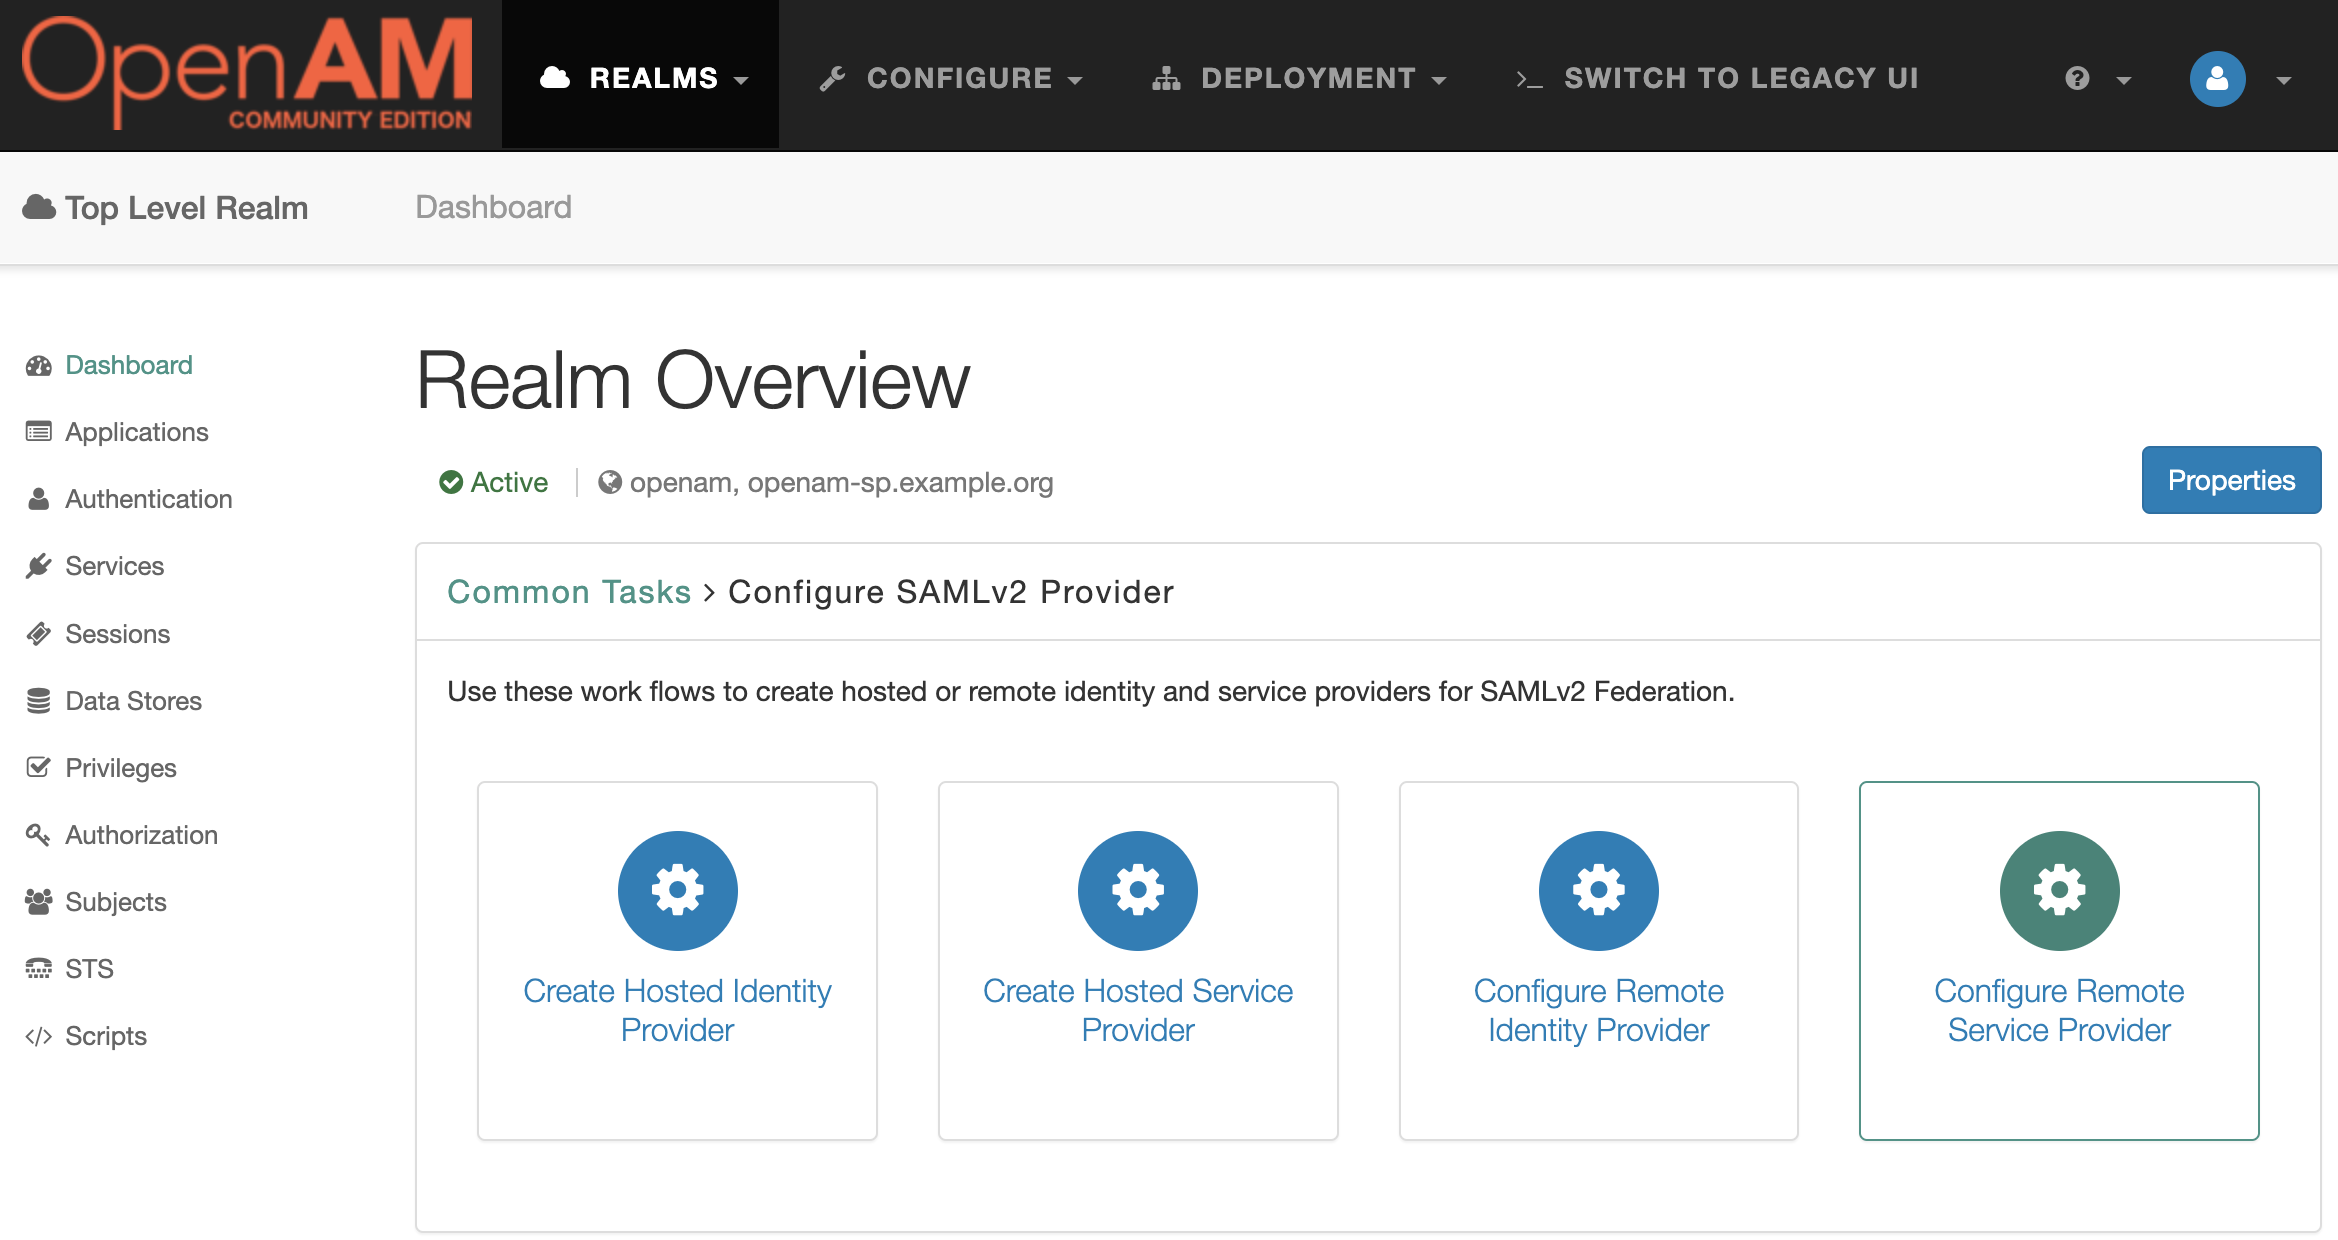
Add the service provider metadata URL [http://sp.mycompany.org:8080/openam/saml2/jsp/exportmetadata.jsp](http://openam-sp.example.org:8080/openam/saml2/jsp/exportmetadata.jsp). Note that the OpenAM Service Provider port is `8080` since the OpenAM instances are on the same network OpenAM IdP connects to the SP container on port `8080`.
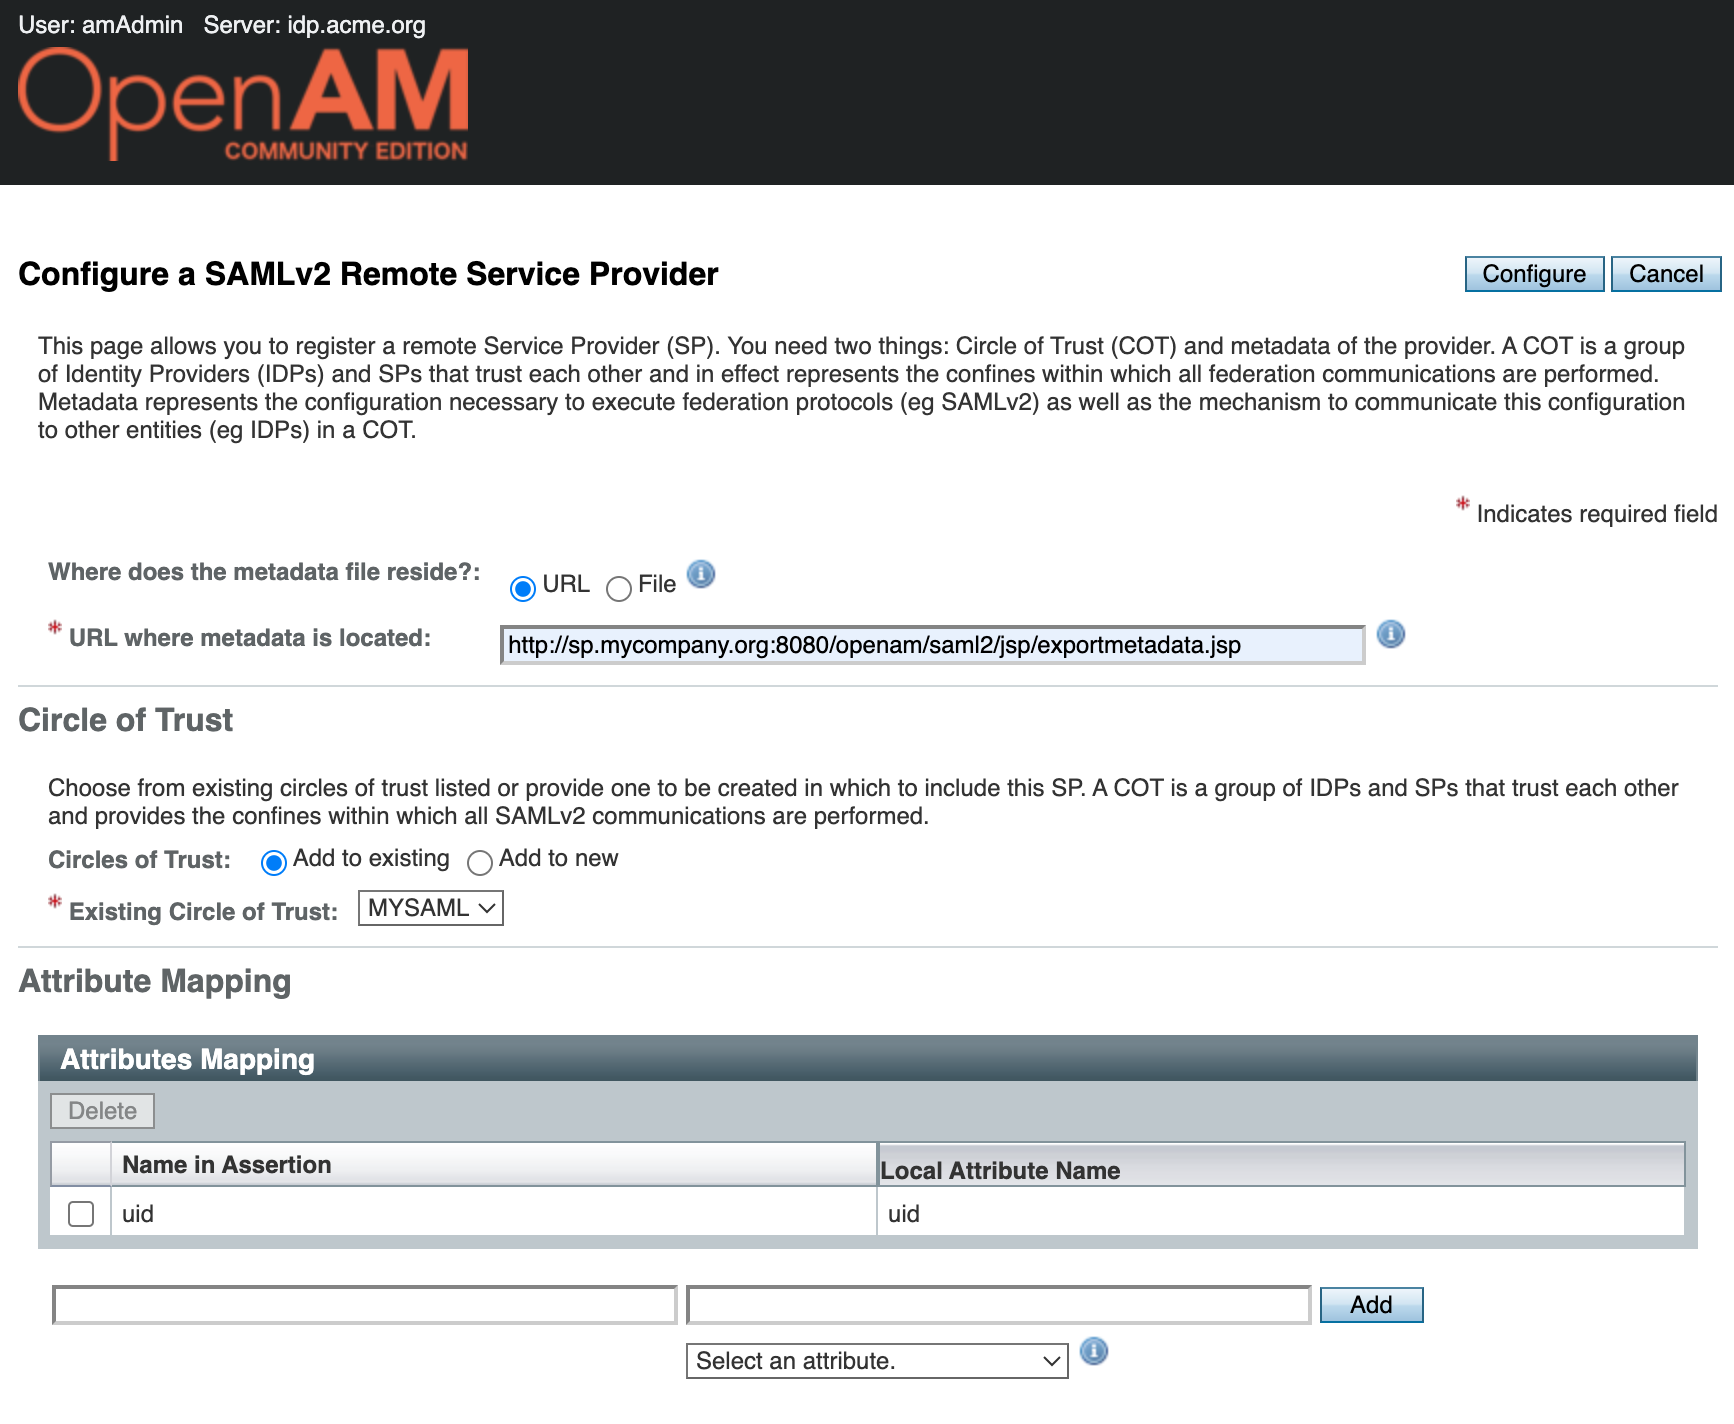
Click the `Configure` button. A message indicating that the remote service provider has been successfully created will be displayed.
# Test Account Creation
Go to the OpenAM IdP admin console, select realm, in the Dashboard in the left hand menu select `Subjects`.
A list of users will open. Create a new `testIdp` account
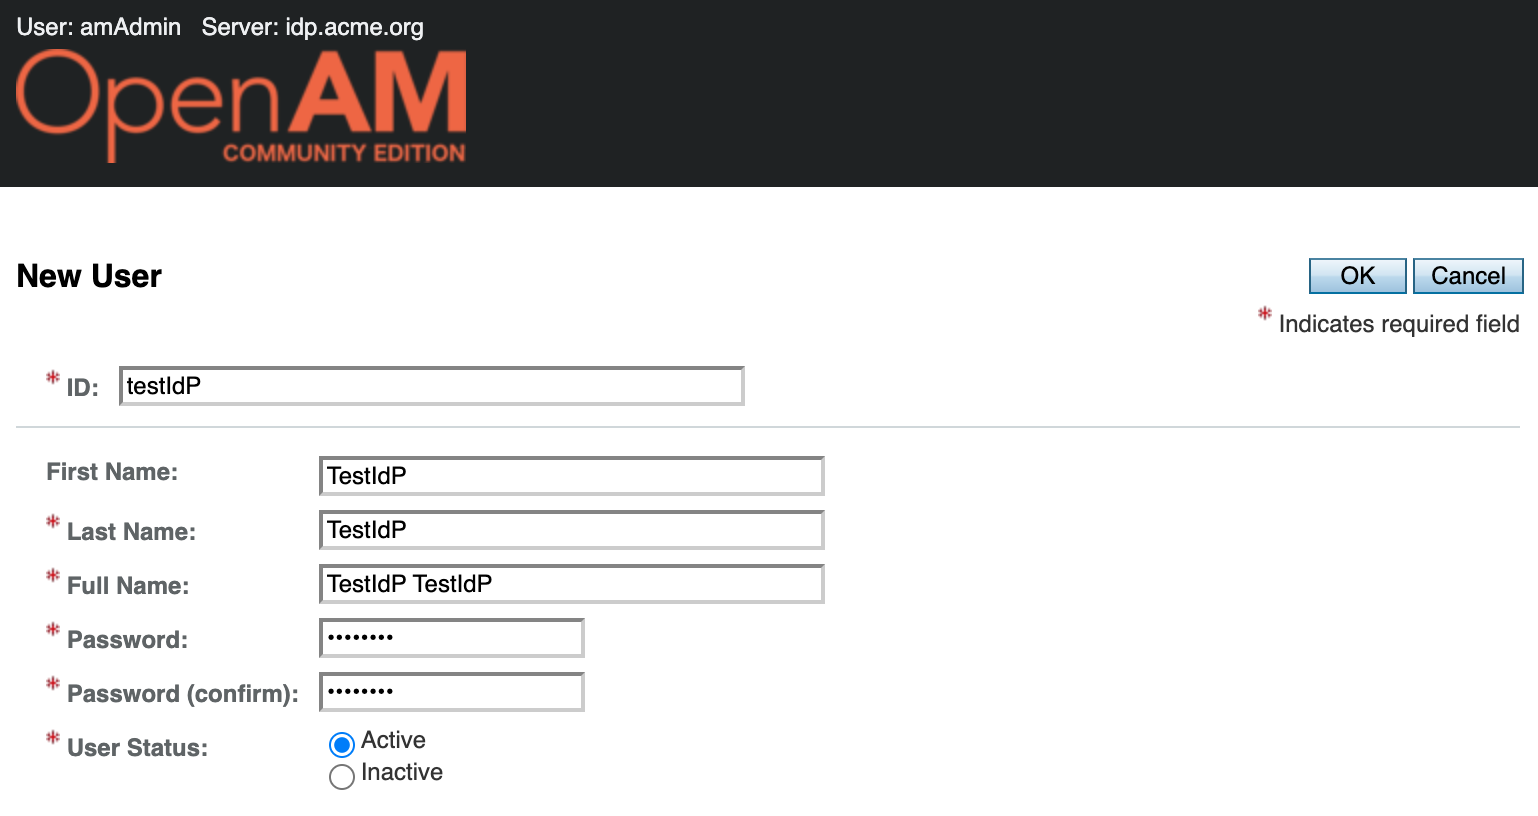
# Test the Solution
Log out of both OpenAM consoles and open the Service Provider authentication initialization link in your browser. [http://sp.mycompany.org:8081/openam/spssoinit?metaAlias=/sp&idpEntityID=http%3A//idp.acme.org%3A8080/openam&RelayState=http%3A//sp.mycompany.org%3A8081/openam](http://sp.mycompany.org:8081/openam/spssoinit?metaAlias=/sp&idpEntityID=http%3A//idp.acme.org%3A8080/openam&RelayState=http%3A//sp.mycompany.org%3A8081/openam)
As an alternative, you can use the Identity Provider authentication initalization link [http://idp.acme.org:8080/openam/idpssoinit?metaAlias=/idp&spEntityID=http%3A//sp.mycompany.org%3A8081/openam&RelayState=http%3A//sp.mycompany.org%3A8081/openam](http://idp.acme.org:8080/openam/idpssoinit?metaAlias=/idp&spEntityID=http%3A//sp.mycompany.org%3A8081/openam&RelayState=http%3A//sp.mycompany.org%3A8081/openam)
You will be redirected to the Identity Provider authentication. Enter the credentials for the user `testIdP`.
**[Test the Solution](https://doc.openidentityplatform.org/openam/how-to/how-to-setup-samlv2-federation-in-openam#how-to-setup-samlv2-federation-in-openam-test-the-solution)**
This file contains hidden or bidirectional Unicode text that may be interpreted or compiled differently than what appears below. To review, open the file in an editor that reveals hidden Unicode characters.
Learn more about bidirectional Unicode characters
This article has moved to the Open Identity Platform documentation site:
In the following article, we will set up OpenAM authentication with a Time-Based One-Time Password (TOTP, [RFC 6238](https://tools.ietf.org/html/rfc6238)).
[How to Setup Two Factor Authentication in OpenAM](https://doc.openidentityplatform.org/openam/how-to/how-to-setup-two-factor-authentication-in-openam).
# OpenAM Setup
Please use the documentation site for the current version.
## OpenAM Installation
<aname="introduction"></a>
If you have not already had OpenAM installed, you can do it as described [here](https://github.com/OpenIdentityPlatform/OpenAM/wiki/TIP:-Quick-OpenAM-Docker-Configuration-From-a-Command-Line).
Open the OpenAM administration console using the link [http://openam.example.org:8080/openam/console](http://openam.example.org:8080/openam/console). In the login field enter the `amadmin` value, in the password field enter the value from the `ADMIN_PWD` parameter of the setup command, in this case, `passw0rd`.
Open the root realm, in the left menu, select Authentication → Modules, and press the `Add Module` button. In the form enter the name of the module, for example, `totp` and choose the module type `Authenticator (OATH)`. Press the `Create` button.
<aname="openam-installation"></a>
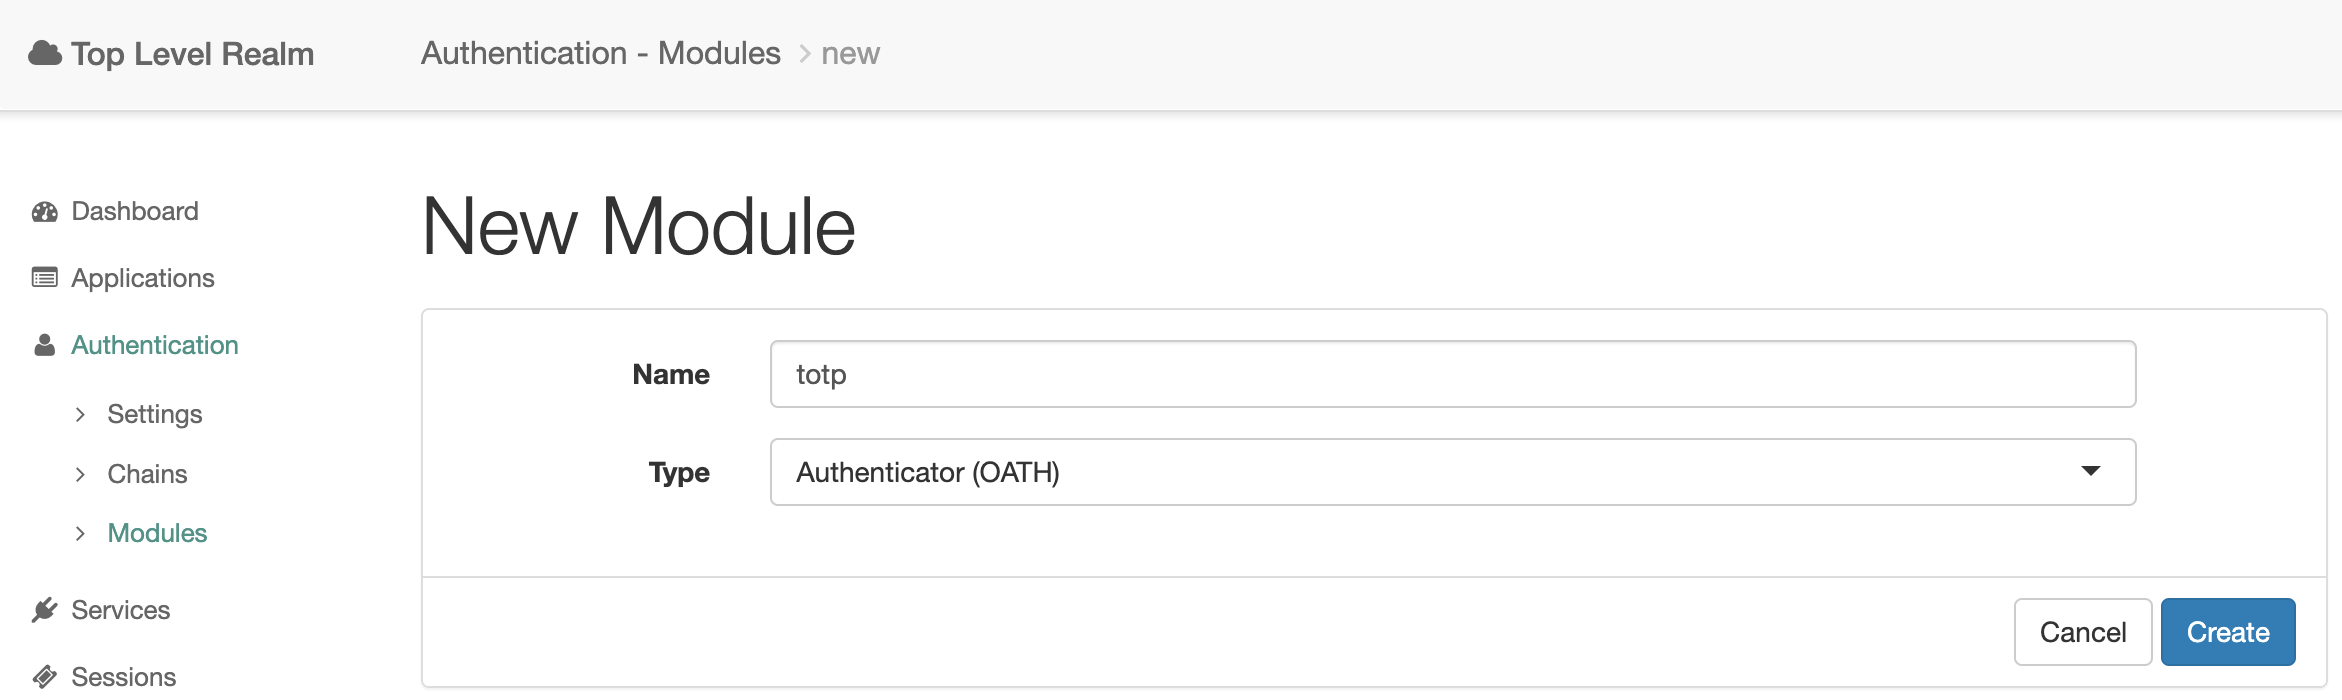
Set the `OATH Algorithm to Use` setting to `TOTP`, set the `Name of the Issuer` field to any non-empty value, for example, `OpenAM` and click the `Save Changes` button.
In the administration console in the realm settings in the left menu select Authentication → Chains and in the chain list press the `Add Chain` button.
Enter the authentication chain name `totp-register` and press the `Create` button. In the chain settings press the `Add a Module` button and add the `totp` authentication module as shown in the picture below. Press the `OK` button and next `Save Changes`.
**[Test the Solution](https://doc.openidentityplatform.org/openam/how-to/how-to-setup-two-factor-authentication-in-openam#how-to-setup-two-factor-authentication-in-openam-test-the-solution)**
In the administration console in the realm settings in the left menu select Authentication → Chains and in the chain list press the `Add Chain` button.
Enter the authentication chain name `totp-login` and press the `Create` button. Add the login and password `DataStore` authentication module. Next, add the one-time password `totp` authentication module. Press the `Save Changes` button.
**[Setting Up a Test User](https://doc.openidentityplatform.org/openam/how-to/how-to-setup-two-factor-authentication-in-openam#how-to-setup-two-factor-authentication-in-openam-setting-up-a-test-user)**
# Test the Solution
<aname="device-registration"></a>
Download on your mobile device Microsoft Authenticator or Google Authenticator application.
In the OpenAM admin console, navigate to the root realm and select `Subjects` from the left menu. Set the password for the `demo` user. To do this, select it in the list of users, and click the `Edit` link under Password. Enter and save the new password. Next, log out of the administrator console.
## Device Registration
Log in to the console with the `demo` user account. To do this, log out of the administrator console or open a browser in Incognito mode. Go to the URL [http://openam.example.org:8080/openam/XUI/#login/](http://openam.example.org:8080/openam/XUI/#login/) and log in to OpenAM with the `demo` user credentials. After successful authentication, open the registration chain link in the browser [http://openam.example.org:8080/openam/XUI/#login&service=totp-register](http://openam.example.org:8080/openam/XUI/#login&service=totp-register).
Press the `Register Device` button. There will be a QR code in the browser. Open the authenticator application on your mobile device and tap the add account button. Scan the QR code from the browser. A `demo` user account for OpenAM will be added to the authenticator mobile app.
Log out of the OpenAM console or open your browser in Incognito mode. Open the [http://openam.example.org:8080/openam/XUI/#login&service=totp-login](http://openam.example.org:8080/openam/XUI/#login&service=totp-login) link in the browser.
Enter the username and password for the user `demo`. After entering the username and password, OpenAM will prompt for a one-time password from the mobile app. Open the mobile app, select the `demo` user account, enter the one-time password from the mobile app in the browser, and press the `Submit` button. After entering the correct one-time password, authentication will be completed successfully.
This file contains hidden or bidirectional Unicode text that may be interpreted or compiled differently than what appears below. To review, open the file in an editor that reveals hidden Unicode characters.
Learn more about bidirectional Unicode characters
This article has moved to the Open Identity Platform documentation site:
# Introduction
[How to Setup WebAuthn Authentication in OpenAM](https://doc.openidentityplatform.org/openam/how-to/how-to-setup-webauthn-authentication-in-openam).
[WebAuthn](https://en.wikipedia.org/wiki/WebAuthn) is a
[W3C](https://www.w3.org/) and [FIDO](https://fidoalliance.org/) standard
that describes Web public key authentication.
For authentication, a client can use Hardware USB, Bluetooth, or NFC tokens,
or mobile or laptop biometric authentication, such as fingerprint or FaceID.
Please use the documentation site for the current version.
In short, WebAuthn uses mutual authentication, utilizing an asymmetric encryption algorithm and exchange of credential messages encrypted with public keys (passkeys). Therefore, WebAuthn is resistant to phishing.
More details about the standard can be found at [https://www.w3.org/TR/webauthn-3/](https://www.w3.org/TR/webauthn-3/)
**[How to Setup WebAuthn Authentication in OpenAM](https://doc.openidentityplatform.org/openam/how-to/how-to-setup-webauthn-authentication-in-openam)**
## Browsers Support
<aname="introduction"></a>
WebAuthn is supported by most modern browsers, including Google Chrome, Mozilla Firefox (with partial support), Apple Safari, and Microsoft Edge, including their mobile versions. For up-to-date information about browsers and devices supporting WebAuthn, visit [https://caniuse.com/?search=webauthn](https://caniuse.com/?search=webauthn).
Passkeys created on iPhone, iPad, or Mac can be used on the same device or another iPhone, iPad, or Mac with the same Apple ID. The passkeys are synchronized automatically.
Since WebAuthn in a browser only works over HTTPS or on the localhost domain, for demonstration purposes we will deploy OpenAM in a Docker container on localhost.
Open the OpenAM administration console at [http://localhost:8080/openam/XUI/#login/](http://localhost:8080/openam/XUI/#login/)
In the login field enter the `amadmin` value, in the password field enter the value from the `ADMIN_PWD` parameter of the setup command, in this case, `passw0rd`.
Select the root realm and then goto Authentication → Modules in the left menu. Create a new authentication module `WebAuthn Registration`
**[Test the Solution](https://doc.openidentityplatform.org/openam/how-to/how-to-setup-webauthn-authentication-in-openam#how-to-setup-webauthn-authentication-in-openam-test-the-solution)**
Go to the admin console, select the root realm and select Authentication → Chains from the menu. Create a `webauthn-registration` authentication chain with the created `webauthn-registration` module.
Open the OpenAM administration console. Select the root realm and then goto Authentication → Modules in the left menu. Create a new authentication module `WebAuthn Authentication`
Go to the admin console, select the root realm and select Authentication → Chains from the menu. Create a `webauthn-authentication` authentication chain with the created `webauthn-authentication` module.
Log out of the OpenAM admin console or open a browser in Incognito mode and log in at http://localhost:8080/openam/XUI/#login with the user credentials `demo`. In the login field enter `demo` in the password field enter `changeit`.
## Registration
For demonstration purposes, we will use the WebAuthn emulator built into the browser. How to enable it is described at [https://developer.chrome.com/docs/devtools/webauthn](https://developer.chrome.com/docs/devtools/webauthn).
Add a virtual authenticator with Supports resident keys and Supports user verification settings enabled.
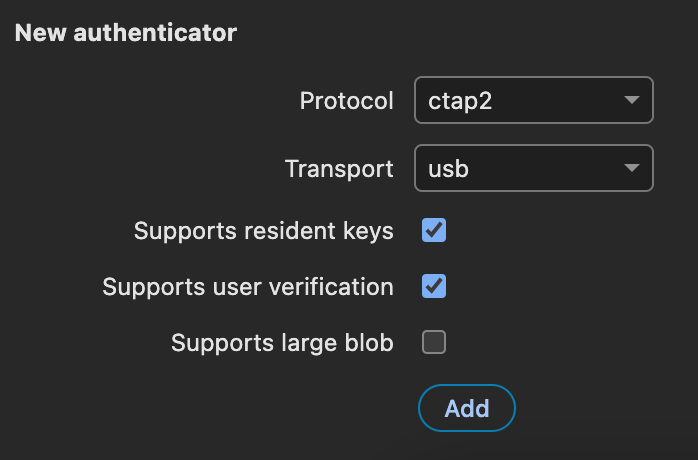
Open the registration authentication chain at [http://localhost:8080/openam/XUI/#login&service=webauthn-registration](http://localhost:8080/openam/XUI/#login&service=webauthn-registration) and click the `Register` button.

You will be immediately redirected back to the console with the `demo` account, and in the developer tools for the authenticator you will see the registered credentials for the demo user.
Go to [http://localhost:8080/openam/XUI/#login&service=webauthn-authentication](http://localhost:8080/openam/XUI/#login&service=webauthn-authentication) and click the `Log In` button. An account selection window will pop up.
This file contains hidden or bidirectional Unicode text that may be interpreted or compiled differently than what appears below. To review, open the file in an editor that reveals hidden Unicode characters.
Learn more about bidirectional Unicode characters
This article has moved to the Open Identity Platform documentation site:
To reproduce steps in the following article, Docker and Docker Compose should be installed.
[How to Start OpenAM and OpenDJ in Separate Docker Containers](https://doc.openidentityplatform.org/openam/how-to/how-to-start-openam-and-opendj-in-separate-docker-containers).
The sample configuration used in the following article could be found [here](https://github.com/maximthomas/openidentityplatform-docker)
Please use the documentation site for the current version.
## OpenAM Perparation
<aname="requeirements"></a>
Create `docker-compose.yml` file and add OpenAM service:
In the `persistence/openam` folder OpenAM will store its configuration data
<aname="start-and-configuration"></a>
# OpenDJ Preparation
**[Start and Configuration](https://doc.openidentityplatform.org/openam/how-to/how-to-start-openam-and-opendj-in-separate-docker-containers#how-to-start-openam-and-opendj-in-separate-docker-containers-start-and-configuration)**
Add OpenDJ service to `docker-compose.yml` file:
<aname="start-services"></a>
```yml
opendj:
image: openidentityplatform/opendj:latest
hostname: opendj.example.com
ports:
- "1389:1389"
- "1636:1636"
- "4444:4444"
volumes:
- ./opendj/bootstrap/data/:/opt/opendj/bootstrap/data #initial data
`opendj/boststrap` directory should exist on the host machine and contain two subfolders: `data` - for initial data и `schema` - schema files.
<aname="openam-configuration"></a>
The files could be found [here](https://github.com/maximthomas/openidentityplatform-docker/tree/master/opendj/bootstrap)
If base DN id different from `dc=openam,dc=openidentityplatform,dc=org` it should be changed in `opendj/boststrap/data/samlple.ldif` file as well
## Start and Configuration
### Start Services
Start OpenAM and OpenDJ with the following command:
```bash
docker-compose up
```
You shoudl see the following lines in the logs:
```
openidentityplatform-docker-openam-1 | 15-Jun-2022 10:09:46.063 INFO [main] org.apache.coyote.AbstractProtocol.start Starting ProtocolHandler ["http-nio-8080"]
openidentityplatform-docker-openam-1 | 15-Jun-2022 10:09:46.133 INFO [main] org.apache.catalina.startup.Catalina.start Server startup in [36437] milliseconds
openidentityplatform-docker-opendj-1 | OpenDJ is started
```
### OpenAM Configuration
After OpenAM and OpenDJ are started, open OpenAM URL in the browser, for example [http://auth.example.com:8080/openam](http://auth.example.com:8080/openam)
Leave server settings unchanged and press the Next button.

On the Configuration Data Store Settings step set the following settings:
***Configuration Data Store** radiobutton to **OpenDJ**,
* Set **Host Name** to **opendj**, as OpenDJ Docker internal hostname
* Set **Port** to 1389 as specified for OpenDJ Docker container
* Set OpenDJ password as specified for OpenDJ Docker container as well (`password` by default).
If you changed base DN for OpenDJ, set the required Root Suffix as well.
Then press the Next button.

On the User datastore settings set OpenDJ password as it has been set in the previous step and press the Next button.

If this instance is behind a load balancer, set the site configuration settings. If it's not, just press the Next button.
On the Step 6: Default Policy Agent User, enter and confirm default policy agent password and press the Next button.
Review configuration summary and press the Create Configuration button.
This file contains hidden or bidirectional Unicode text that may be interpreted or compiled differently than what appears below. To review, open the file in an editor that reveals hidden Unicode characters.
Learn more about bidirectional Unicode characters
# How to Use Apache Cassandra as User and Session DataStore in OpenAM
This article has moved to the Open Identity Platform documentation site:
## Introduction
One of the performance bottlenecks of authentication is User DataStore. This becomes noticeable when the total number of user accounts exceeds `4 000 000`.
[How to Use Apache Cassandra as User and Session DataStore in OpenAM](https://doc.openidentityplatform.org/openam/how-to/how-to-use-apache-cassandra-as-user-and-session-datastore-in-openam).
To maintain acceptable performance, the most obvious solution is to scale User DataStore horizontally or vertically. But with an increasing amount of data, DataStore scaling does not affect performance.
Please use the documentation site for the current version.
With the increasing load on the authentication system, the most obvious solution is to scale horizontally or vertically the number of user repository nodes.
Another alternative solution is to use storage specifically designed for working with large amounts of data. One of such storages is [Apache Cassandra](https://cassandra.apache.org/). It has proved itself as a high-availability and high-performance datastore.
**[How to Use Apache Cassandra as User and Session DataStore in OpenAM](https://doc.openidentityplatform.org/openam/how-to/how-to-use-apache-cassandra-as-user-and-session-datastore-in-openam)**
# Prepare Apache Cassandra
<aname="introduction"></a>
Allow materialized views for Cassandra 4+ (in version 3 enabled by default) in conf/cassandra.yaml:
```yaml
# Enables materialized view creation on this node.
# Materialized views are considered experimental and are not recommended for production use.
## Prepare Apache Cassandra to use as User DataStore
<aname="prepare-apache-cassandra"></a>
Сreate the corresponding Keyspaces and tables, for each OpenAM realm, from template [import.cql](https://raw.githubusercontent.com/OpenIdentityPlatform/OpenAM/master/openam-cassandra/openam-cassandra-datastore/src/test/resources/cassandra/import.cql)
Сreate the corresponding Keyspaces and tables, for OpenAM CTS, from template [schema.cqlsh](https://raw.githubusercontent.com/OpenIdentityPlatform/OpenAM/master/openam-cassandra/openam-cassandra-cts/src/test/resources/schema.cqlsh)
**[Prepare Apache Cassandra to use as User DataStore](https://doc.openidentityplatform.org/openam/how-to/how-to-use-apache-cassandra-as-user-and-session-datastore-in-openam#how-to-use-apache-cassandra-as-user-and-session-datastore-in-openam-prepare-apache-cassandra-to-use-as-user-datastore)**
**[Prepare Apache Cassandra to use as CTS](https://doc.openidentityplatform.org/openam/how-to/how-to-use-apache-cassandra-as-user-and-session-datastore-in-openam#how-to-use-apache-cassandra-as-user-and-session-datastore-in-openam-prepare-apache-cassandra-to-use-as-cts)**
## OpenAM create DataStore
<aname="openam-setup"></a>
Open OpenAM administration console, goto `Realms` select target realm, then goto `DataStores` and create new DataStore.
This file contains hidden or bidirectional Unicode text that may be interpreted or compiled differently than what appears below. To review, open the file in an editor that reveals hidden Unicode characters.
Learn more about bidirectional Unicode characters
**[For one instance in cluster](https://doc.openidentityplatform.org/openam/how-to/how-to-disable-xui-by-default#how-to-disable-xui-by-default-for-one-instance-in-cluster)**
Goto [[Configuration]] > [[Servers and Sites]] > Select server > [[Advanced]] and add:
<aname="for-all-instances-in-cluster"></a>
```
XUI.enable=false
```
**[For all instances in cluster](https://doc.openidentityplatform.org/openam/how-to/how-to-disable-xui-by-default#how-to-disable-xui-by-default-for-all-instances-in-cluster)**
# XUI Interface
## For one instance in cluster
Goto [[Deployment]] > [[Servers]] > Choose server > [[Advanced]] and add:
```
XUI.enable=false
```
## For all instances in cluster
Goto [[Configure]] > [[Server Defaults]] > [[Advanced]] and add:
**[For one instance in cluster](https://doc.openidentityplatform.org/openam/how-to/how-to-disable-xui-by-default#how-to-disable-xui-by-default-for-one-instance-in-cluster-1)**
<aname="for-all-instances-in-cluster-1"></a>
**[For all instances in cluster](https://doc.openidentityplatform.org/openam/how-to/how-to-disable-xui-by-default#how-to-disable-xui-by-default-for-all-instances-in-cluster-1)**
This file contains hidden or bidirectional Unicode text that may be interpreted or compiled differently than what appears below. To review, open the file in an editor that reveals hidden Unicode characters.
Learn more about bidirectional Unicode characters
To make OpenAM log more verbose please add **-Dcom.iplanet.services.debug.level=message** to Tomcat's **setenv.sh** file. Hope this will help to figure out the cause of the problem
This article has moved to the Open Identity Platform documentation site:
[How to make OpenAM log more verbose](https://doc.openidentityplatform.org/openam/how-to/how-to-make-openam-log-more-verbose).
Please use the documentation site for the current version.
This file contains hidden or bidirectional Unicode text that may be interpreted or compiled differently than what appears below. To review, open the file in an editor that reveals hidden Unicode characters.
Learn more about bidirectional Unicode characters
There are several ways how enterprise users can authenticate in enterprise applications. If there are many enterprise applications users should authenticate into each application and enter login and password. Even if applications use the same user account, it is painful to enter credentials every time. A solution is to use a single sign (SSO) technology. For Windows users it is Kerberos. With Kerberos, users could authenticate to web applications seamlessly using their Active Directory accounts.
This article has moved to the Open Identity Platform documentation site:
# Prerequisites
You have Windows Server and user accounts stored in the Active directory. You must also have OpenAM installed. Here is how to [quickly install OpenAM](https://github.com/OpenIdentityPlatform/OpenAM/wiki/TIP:-Quick-OpenAM-Docker-Configuration-From-a-Command-Line).
[How to setup Kerberos Authentication with OpenAM](https://doc.openidentityplatform.org/openam/how-to/how-to-setup-kerberos-authentication-with-openam).
# Windows setup
Create an account for Kerberos authentication in the Active Directory. When creating an account, set checkboxes `User cannot change password` и `Password never expires enabled` as shown in the picture below.
Please use the documentation site for the current version.
On the domain controller create a keytab file openamKerberos.keytab in a current directory. To do this, execute the following command in the Windows terminal:
In this command in `-princ` parameter openam.example.com - is your OpenAM hostname and EXAMPLE.COM - your Active Directory domain name should be uppercase.
<aname="windows-setup"></a>
Copy openamKerberos.keytab file to a directory, where OpenAM can read the file.
In the login field enter the value `amadmin`, in the password field enter the value from the `ADMIN_PWD` parameter of the setup command, in this case, `passw0rd`.
<aname="setup-authentication-chain"></a>
Select the root realm and select Authentication → Modules from the menu. Create a new Active Directory authentication module.
Edit the created `sso` authentication module settings.
<aname="realm-configuration"></a>
Set `Service Principal`, as in `ktpass` command. `Keytab File Name` should be `openamKerberos.keytab` file location on the OpenAM server. Set `Kerberos Realm`, `Kerberos Server Name`, and `Trusted Kerberos realms` according to your environment.

## Setup Authentication Chain
Go to the admin console, select the root realm, and select Authentication → Chains from the menu. Create an `sso` authentication chain with the recently created `sso` module.
Go to Authentication → Chains for realm and on the User Profile tab, set the `User Profile` setting to `Ignore`.

So, you can authenticate with Kerberos without setting up Active Directory as a User Data Store in OpenAM.
# Test Solution
On a Windows machine, authenticate with your Active Directory account and go to [http://openam.example.com:8080/openam/XUI/#login/&realm=/&service=sso](http://openam.example.com:8080/openam/XUI/#login/&realm=/&service=sso)
You should be seamlessly authenticated with an Active Directory account without prompting credentials.
This file contains hidden or bidirectional Unicode text that may be interpreted or compiled differently than what appears below. To review, open the file in an editor that reveals hidden Unicode characters.
Learn more about bidirectional Unicode characters
This article has moved to the Open Identity Platform documentation site:
## Introduction
[Login and Password Authentication](https://doc.openidentityplatform.org/openam/how-to/login-and-password-authentication).
The following article is intended for newbies, who want to develop authentication for their services. In the article, we will look at the most common authentication method - login and password authentication, its implementation, advantages, and disadvantages.
Please use the documentation site for the current version.
**Authentication** is an identity verification process. For software, authentication is used for verifying the identities of users or client applications. The most common way to authenticate users is login and password authentication.
<aname="introduction"></a>
User login could be public but the password should be only in the user's memory (and not on a piece of paper under the keyboard or taped to the monitor!) and used for verification than login belongs to the only user who knows the password.
User identity data usually stored in a user database. And the only authentication system should have access to the database to minimize the risk of credentials leak.
Login in user database stored in plaintext to quick search for the user account. Password should be stored as its hash and never in plaintext. During authentication, the hash of the password entered by the user is calculated, compared with the value stored in the database and, if the values match, authentication is successful.
To store a password in a database relatively secure, not the password itself is stored in the database, but password hash. The hash is calculated by the formula: `password_hash = hash(password)`. To slow-down dictionary password attack, it is necessary to add so-called **salt** to password. **Salt** - is a random value, stored within the password hash. And password hash is calculated with function from password itself and hash `password_hash = hash(password, salt)`. More information about salt in Wikipedia: [Salt_(cryptography)](https://en.wikipedia.org/wiki/Salt_(cryptography)).
Some databases support internal authentication. In this case, the database itself is responsible for login and password authentication. Authentication service sends authentication request with login and password to the database, and the database returns authentication result: whether it is successful or not. For example, such an approach uses Microsoft Active Directory.
- If authentication was failed, do not tell users whether login exists or not
- Implement user account lock policy to prevent possible password brute force
- Use strong hashing function for example `[bcrypt](https://en.wikipedia.org/wiki/Bcrypt)`, `[scrypt](https://en.wikipedia.org/wiki/Scrypt)` or `[PBKDF2](https://en.wikipedia.org/wiki/PBKDF2)`to prevent hash passwords reverse engineering in case user credentials database was stolen
- Use salt when hashing a password
<aname="pros-and-cons"></a>
## Pros and Cons
**[Pros and Cons](https://doc.openidentityplatform.org/openam/how-to/login-and-password-authentication#login-and-password-authentication-pros-and-cons)**
Pros:
<aname="conclusion"></a>
- relatively simple implementation
Cons:
- the need for users to remember a password for each service.
- the need to implement additional service to recover/change password
- the security policy of some organizations requires periodic password changes, which impairs user experience
- the password could be stolen using fishing or social engineering
## Conclusion
Login and password authentication is the most common way to authenticate users, but it is also one of the most insecure, so it is recommended to use authentication without a password (login through social networks, biometrics, use of hardware security keys), or strengthen security by using the second authentication factor.
This file contains hidden or bidirectional Unicode text that may be interpreted or compiled differently than what appears below. To review, open the file in an editor that reveals hidden Unicode characters.
Learn more about bidirectional Unicode characters
This article has moved to the Open Identity Platform documentation site:
# Preparation
[Login via Gosuslugi OAuth2 Identity Provider](https://doc.openidentityplatform.org/openam/how-to/login-via-gosuslugi-oauth2-identity-provider).
## Register an Organization on the Gosuslugi Portal
Please use the documentation site for the current version.
In order to use authentication through the ESIA, you need to register your organization on the Gosuslugi portal. To do this, you need to have a confirmed account of the head of the organization on the portal.
<aname="preparation"></a>
Next, you need to register your information system on the ESIA technology portal. To do this, go to the link [https://esia.gosuslugi.ru/console/tech](https://esia.gosuslugi.ru/console/tech) and authenticate with the account of the head of the organization. On the "Информационные системы" tab, click "Добавить систему" and fill in the properties on the link. The main thing to pay attention to is the system mnemonic, i.e. client_id, system URL - a list of allowed URLs to which redirection will be performed after successful or unsuccessful authentication in ESIA, as well as the algorithm of electronic signature formation - must be GOST3410_2012_256.
The process is described in more detail in document [https://digital.gov.ru/ru/documents/6190/](https://digital.gov.ru/ru/documents/6190/) section 3.1.1
## Send System Registration Application to the Ministry of Digitization
**[Register an Organization on the Gosuslugi Portal](https://doc.openidentityplatform.org/openam/how-to/login-via-gosuslugi-oauth2-identity-provider#login-via-gosuslugi-oauth2-identity-provider-register-an-organization-on-the-gosuslugi-portal)**
After you have registered an information system, you must obtain a certificate from an accredited certification center (List of accredited certification centers at [https://digital.gov.ru/ru/activity/govservices/certification_authority/](https://digital.gov.ru/ru/activity/govservices/certification_authority/)).
The algorithm of electronic signature formation is GOST R 34.10-2012. The certificate must contain the OGRN of the legal entity that is the operator of the information system and can be issued for the employee of the legal entity or for the organization.
**[Send System Registration Application to the Ministry of Digitization](https://doc.openidentityplatform.org/openam/how-to/login-via-gosuslugi-oauth2-identity-provider#login-via-gosuslugi-oauth2-identity-provider-send-system-registration-application-to-the-ministry-of-digitization)**
Next, you need to fill an application to gain access to the test environment as described in [https://digital.gov.ru/ru/documents/4244/](https://digital.gov.ru/ru/documents/4244/) paragraph 9 and send it to the e-mail address of the Ministry of Digitization.
<aname="openam-installation"></a>
After your system is registered in the test environment, you can proceed to OpenAM configuration.
Add the OpenAM hostname and IP address to the `hosts` file
**[Install OpenAM in Docker](https://doc.openidentityplatform.org/openam/how-to/login-via-gosuslugi-oauth2-identity-provider#login-via-gosuslugi-oauth2-identity-provider-install-openam-in-docker)**
```bash
127.0.0.0.1 openam.example.org
```
<aname="openam-configuration"></a>
On Windows systems, the `hosts` file is located at `C:Windows/System32/drivers/etc/hosts`; on Linux and Mac it is located at `/etc/hosts`.
Once the OpenAM server is running, perform the initial configuration by running the following command and wait for the configuration to complete.
**[Configuring the ESIA Authentication Chain](https://doc.openidentityplatform.org/openam/how-to/login-via-gosuslugi-oauth2-identity-provider#login-via-gosuslugi-oauth2-identity-provider-configuring-the-esia-authentication-chain)**
Open the OpenAM administrator console at [http://openam.example.org:8080/openam](http://openam.example.org:8080/openam). In the login field enter the `amadmin` value, in the password field enter the value specified in the `ADMIN_PWD` setting, in this case `passw0rd`.
In the console, select the root realm and then select Authentication → Modules from the left menu. In the opened list, click the `Add Module` button.
Enter the module name, for example, `esia` and the module type - `OAuth 2.0 / OpenID Connect`.
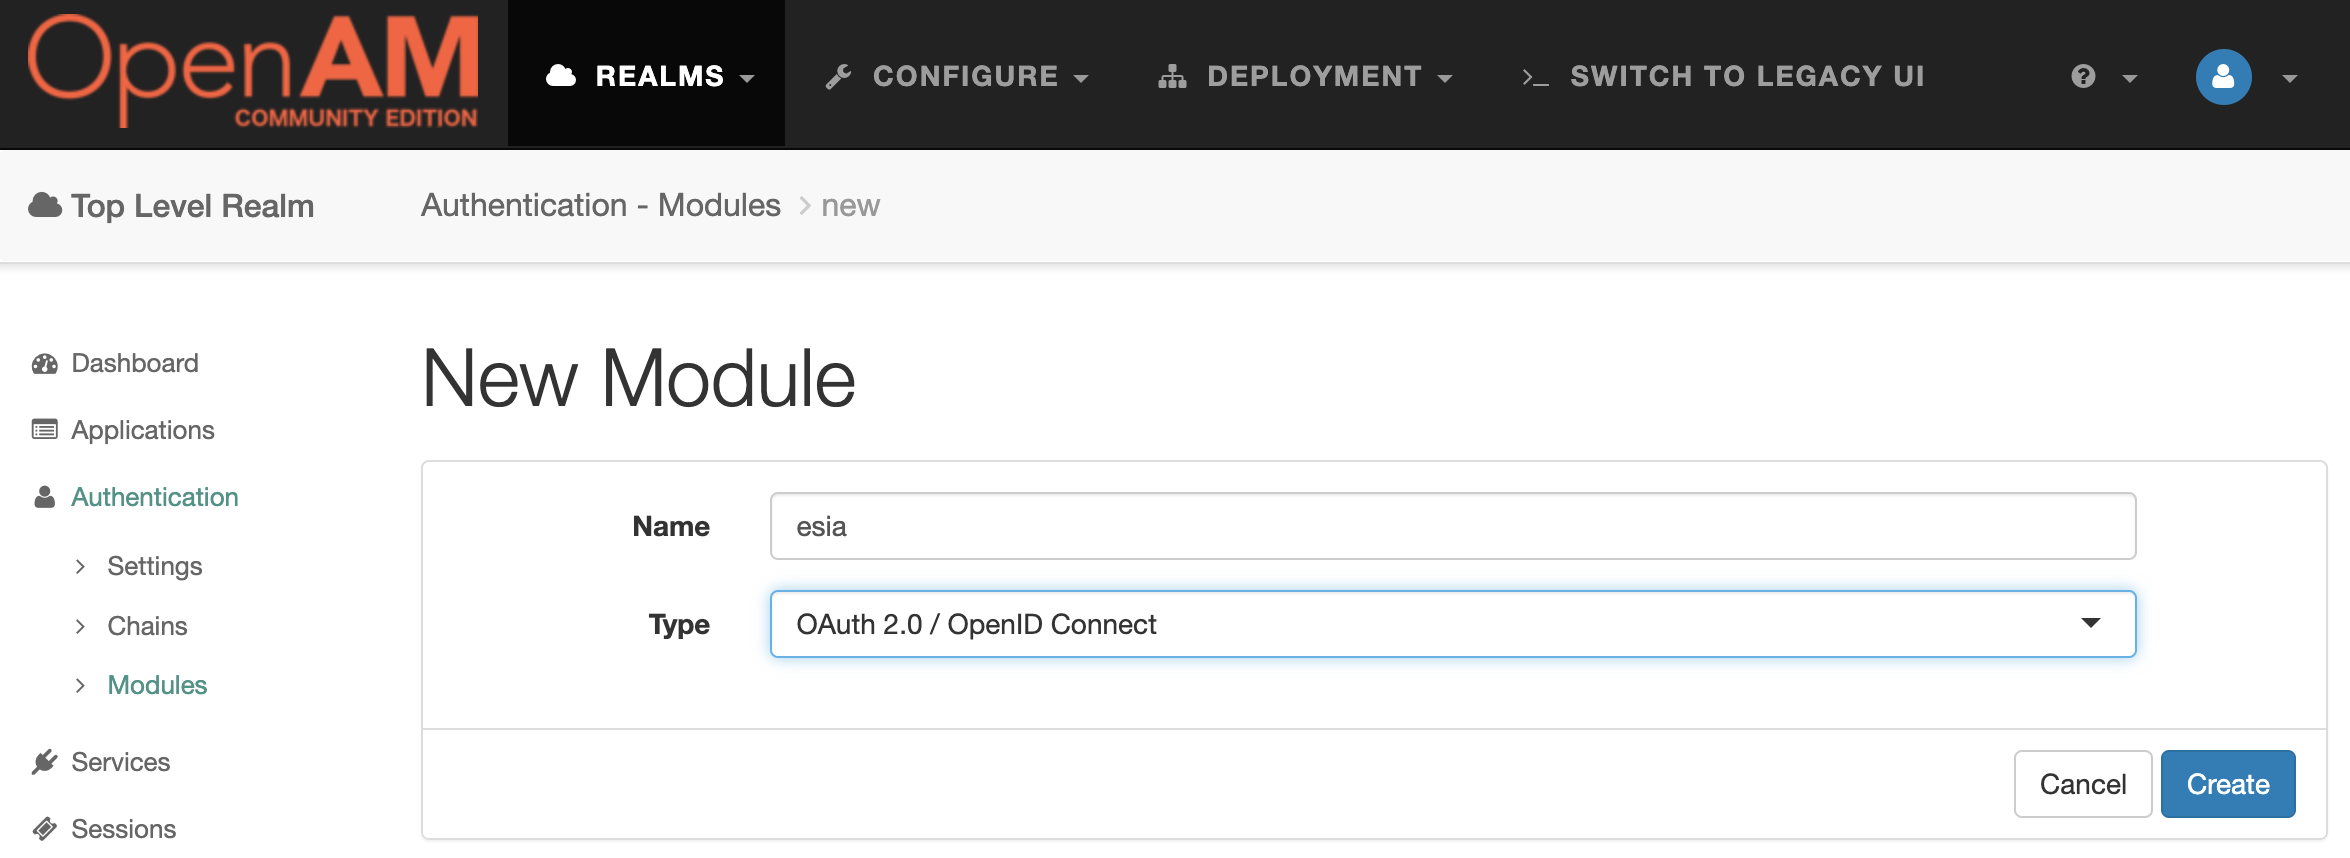
Press the `Create` button . Fill in the settings according to the table:
| Setting | Value |
| --- | --- |
| Client Id | Mnemonic of the information system specified in the ESIA technology portal |
| Client Secret | Not to be filled in, client secret is calculated dynamically for ESIA |
| User Profile Service URL |https://esia-portal1.test.gosuslugi.ru/rs/prns|
| Scope | Scope of the profile, for demonstration purposes we will specify fullname birthdate gender. You can read more about the scope description in the document at [https://digital.gov.ru/ru/documents/6186/](https://digital.gov.ru/ru/documents/6186/)|
| OAuth2 Access Token Profile Service Parameter name | access_token |
| esia-key-path | path to the private key file, e.g. /usr/openam/esia/openam-esia.key |
| esia-cert-path | the path to the certificate file, e.g. /usr/openam/esia/openam-esia.pem |
| esia-org-scope | organization scope if you want to get information about the organization of the ESIA user |
| esia-org-info-url | URL to retrieve organization information, e.g. https://esia-portal1.test.gosuslugi.ru/rs/orgs/ - for test ESIA |
## Configuring the ESIA Authentication Chain
Open the OpenAM admin console, select realm and from the left menu select `Authentication → Chains` . Click the `Add Chain` button and enter a name for the chain, for example `esia` . Click the `Create` button.
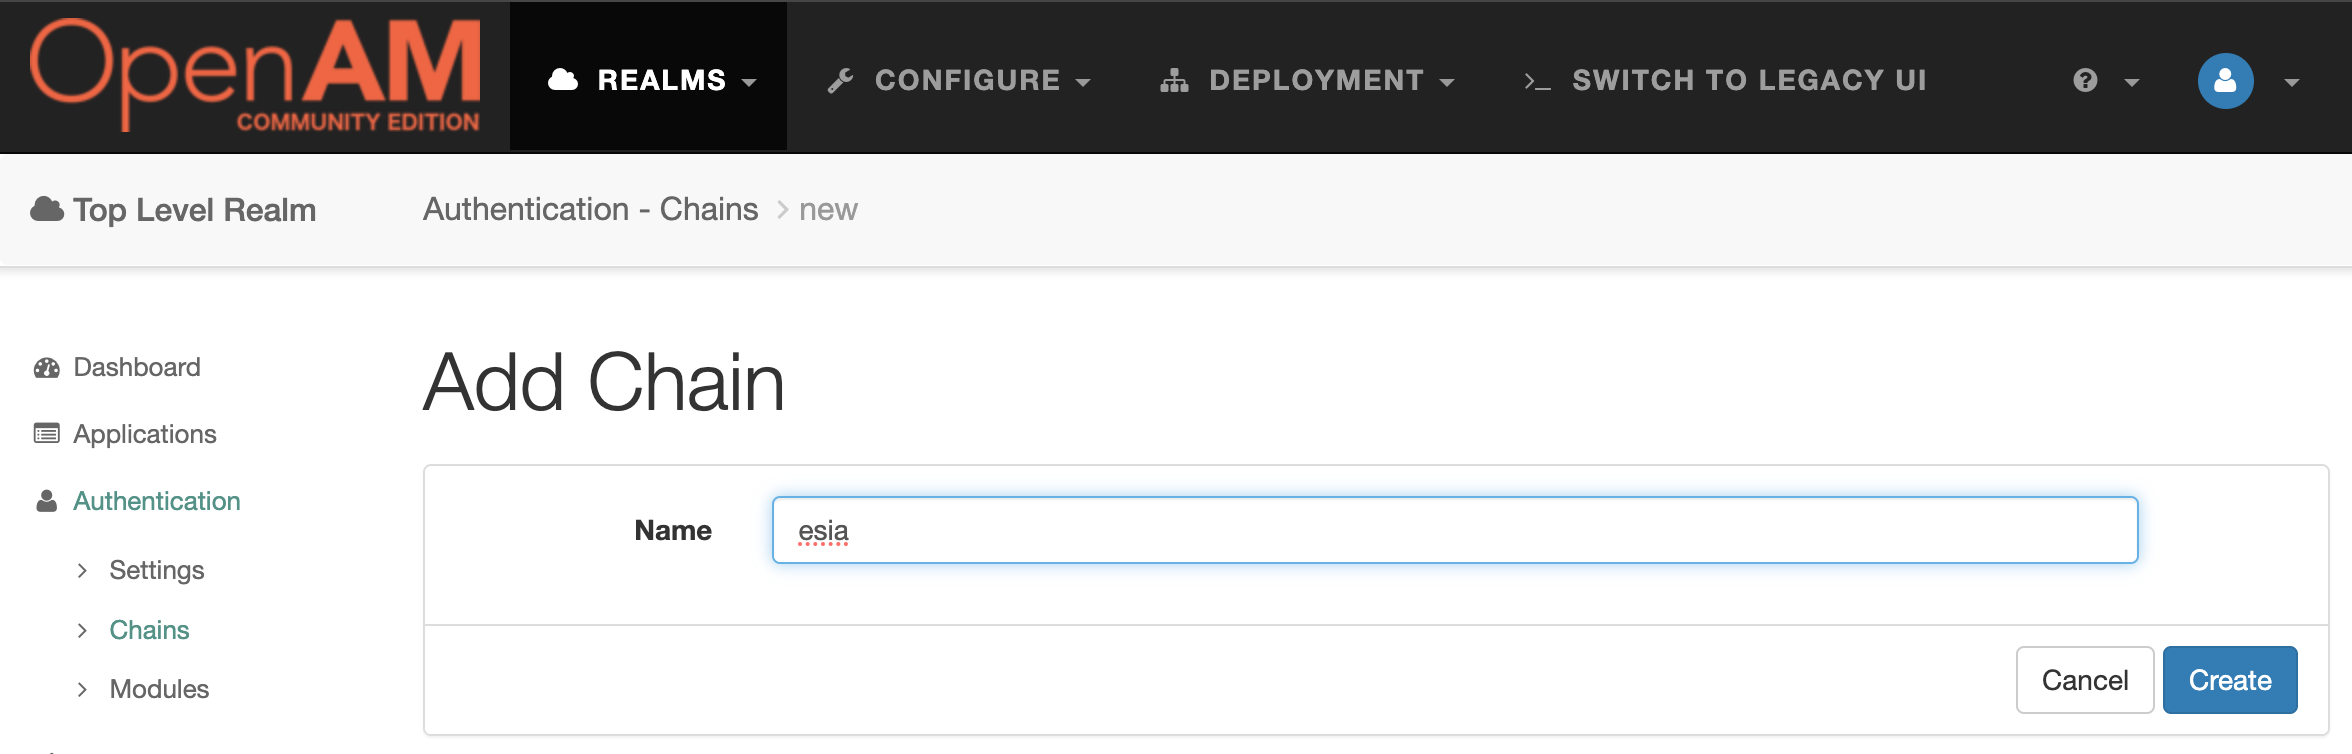
Add module `esia` , `Criteria` set to `Requisite`. Press the `OK button .
# Test the solution
Logout the OpenAM admin console, and open the ESUA authentication chain link: [http://openam.example.org:8080/openam/XUI/?service=esia](http://openam.example.org:8080/openam/XUI/?service=esia). If everything is configured correctly, you will be redirected to the ESIA authentication portal. Enter the user's credentials. After successful authentication to the ESIA, the ESIA will request consent to access the data passed in the scope parameter. After accepting the consent, you will be redirected to the OpenAM console with the user's ESIA credentials.
<aname="test-the-solution"></a>
**[Test the solution](https://doc.openidentityplatform.org/openam/how-to/login-via-gosuslugi-oauth2-identity-provider#login-via-gosuslugi-oauth2-identity-provider-test-the-solution)**
Goto https://developers.facebook.com/apps/ and create new Facebook Application Goto Application Dashboard. Then goto Settings -> Basic. There will be your app App Id and App Secret.
Setup OpenAM
Legacy UI
Login into console. Goto Access Control then select target realm. Goto Authentication
Create Authentication Module
Under section Module Instances create new Authentication Module. Enter new module instance name, for example facebook. Authentication module type is OAuth 2.0 / OpenID Connect
Then select module, you've just created from module list and enter following settings:
Attribute configuration that will be used to map the account of the user authenticated in the OAuth 2.0 Provider to the local data store in the OpenAM. Example: id=facebook-id email=mail
Attribute configuration that will be used to map the user info obtained from the OAuth 2.0 Provider to the local user data store in the OpenAM. Example: last_name=sn last_name=facebook-lname email=mail first_name=givenname first_name=facebook-fname name=cn email=facebook-email id=facebook-id
You can setup remaining attributes on your own, depending your authentication process requirement and press Save and then Back to Authentication
Create Authentication Chain
Under section Authentication Chaining create new Authentication Chain, enter its name, for example, facebook and add recently created module facebook
This file contains hidden or bidirectional Unicode text that may be interpreted or compiled differently than what appears below. To review, open the file in an editor that reveals hidden Unicode characters.
Learn more about bidirectional Unicode characters
|User Profile Service URL |https://graph.facebook.com/me|
|Scope |_Here you should enter scope, according to Facebook [documentation](https://developers.facebook.com/docs/facebook-login/permissions)_ for example __email__|
|OAuth2 Access Token Profile Service Parameter name| access_token|
|Proxy URL|_[Your OpenAM URL]/oauth2c/OAuthProxy.jsp_ for example: https://openam.example.com/openam/oauth2c/OAuthProxy.jsp|
|Account Mapper Configuration|Attribute configuration that will be used to map the account of the user authenticated in the OAuth 2.0 Provider to the local data store in the OpenAM. Example: <br>id=facebook-id <br> email=mail|
|Attribute Mapper Configuration| Attribute configuration that will be used to map the user info obtained from the OAuth 2.0 Provider to the local user data store in the OpenAM. Example: <br> last_name=sn<br>last_name=facebook-lname<br>email=mail<br>first_name=givenname<br>first_name=facebook-fname<br>name=cn<br>email=facebook-email<br>id=facebook-id |
You can setup remaining attributes on your own, depending your authentication process requirement and press __Save__ and then __Back to Authentication__
#### Create Authentication Chain
Under section __Authentication Chaining__ create new Authentication Chain, enter its name, for example, __facebook__ and add recently created module __facebook__
Your authentication chain should look like this:
|Instance|Criteria|Options|
|--------|--------|-------|
|facebook|Required| |
### Test your Authentication Chain
Goto [Your OpenAM URL]/UI/Login?org=[your org]&service=[facebook auth chain], for example, http://example.openam.com/openam/UI/Login?org=/&service=facebook and you should see facebook authentication dialog
This article has moved to the Open Identity Platform documentation site:
[Login via Facebook OAuth2 Identity Provider](https://doc.openidentityplatform.org/openam/how-to/login-via-facebook-oauth2-identity-provider).
Please use the documentation site for the current version.
**[Test your Authentication Chain](https://doc.openidentityplatform.org/openam/how-to/login-via-facebook-oauth2-identity-provider#login-via-facebook-oauth2-identity-provider-test-your-authentication-chain)**
This file contains hidden or bidirectional Unicode text that may be interpreted or compiled differently than what appears below. To review, open the file in an editor that reveals hidden Unicode characters.
Learn more about bidirectional Unicode characters
Create Odnoklassniki application as described here https://apiok.ru/dev/app/create. After you create application you'll receive: Application ID, Application Key and Aplication Secret.
## Setup OpenAM
### Legacy UI
Login into console. Goto __Access Control__ then select target realm. Goto __Authentication__
#### Create Authentication Module
Under section __Module Instances__ create new __Authentication Module__.
Enter new module instance name, for example __odnoklassniki__. Authentication module type is __OAuth 2.0 / OpenID Connect__
Then select module, you've just created from module list and enter following settings:
|Setting|Value|
|-------|-----|
|Client Id| Your Odnoklassniki Application Id |
|Client Secret| Your Odnoklassniki Application Secret |
|User Profile Service URL |https://api.ok.ru/api/users/getCurrentUser|
|Scope |_Here you should enter scope, according to Odnoklassniki [documentation](https://apiok.ru/ext/oauth/permissions)_ for example __VALUABLE_ACCESS;LONG_ACCESS_TOKEN__|
|OAuth2 Access Token Profile Service Parameter name| access_token|
|Proxy URL|_[Your OpenAM URL]/oauth2c/OAuthProxy.jsp_ for example: https://openam.example.com/openam/oauth2c/OAuthProxy.jsp|
|Account Mapper Configuration|Attribute configuration that will be used to map the account of the user authenticated in the OAuth 2.0 Provider to the local data store in the OpenAM. Example: <br>uid=uid|
|Attribute Mapper Configuration| Attribute configuration that will be used to map the user info obtained from the OAuth 2.0 Provider to the local user data store in the OpenAM. Example: <br> first_name=cn<br>last_name=givenName|
|Custom Properties| Add Oddnoklassniki Application Key as __ok-public-key__ property, for examplpe <br> __ok-public-key=AAAAAAAAAAAAAA__|
You can setup remaining attributes on your own, depending your authentication process requirement and press __Save__ and then __Back to Authentication__
#### Create Authentication Chain
Under section __Authentication Chaining__ create new Authentication Chain, enter its name, for example, __odnoklassniki__ and add recently created module __odnoklassniki__
Your authentication chain should look like this:
|Instance|Criteria|Options|
|--------|--------|-------|
|odnoklassniki|Required| |
### Test your Authentication Chain
Goto [Your OpenAM URL]/UI/Login?org=[your org]&service=[ok auth chain], for example, http://example.openam.com/openam/UI/Login?org=/&service=odnoklassniki and you should see Odnoklassniki authentication dialog
This article has moved to the Open Identity Platform documentation site:
[Login via Odnoklassniki OAuth2 Identity Provider](https://doc.openidentityplatform.org/openam/how-to/login-via-odnoklassniki-oauth2-identity-provider).
Please use the documentation site for the current version.
**[Test your Authentication Chain](https://doc.openidentityplatform.org/openam/how-to/login-via-odnoklassniki-oauth2-identity-provider#login-via-odnoklassniki-oauth2-identity-provider-test-your-authentication-chain)**
This file contains hidden or bidirectional Unicode text that may be interpreted or compiled differently than what appears below. To review, open the file in an editor that reveals hidden Unicode characters.
Learn more about bidirectional Unicode characters
|Account Mapper Configuration|Attribute configuration that will be used to map the account of the user authenticated in the OAuth 2.0 Provider to the local data store in the OpenAM. Example: <br>id=uid|
|Attribute Mapper Configuration| Attribute configuration that will be used to map the user info obtained from the OAuth 2.0 Provider to the local user data store in the OpenAM. Example: <br> last_name=givenName <br> id=uid |
You can setup remaining attributes on your own, depending your authentication process requirement and press __Save__ and then __Back to Authentication__
#### Create Authentication Chain
Under section __Authentication Chaining__ create new Authentication Chain, enter its name, for example, __vkontakte__ and add recently created module __vkontakte__
Your authentication chain should look like this:
|Instance|Criteria|Options|
|--------|--------|-------|
|vkontakte|Required| |
### Test your Authentication Chain
Goto [Your OpenAM URL]/UI/Login?org=[your org]&service=[facebook auth chain], for example, http://example.openam.com/openam/UI/Login?org=/&service=vkontakte and you should see facebook authentication dialog
This article has moved to the Open Identity Platform documentation site:
[Login via VK OAuth2 Identity Provider](https://doc.openidentityplatform.org/openam/how-to/login-via-vk-oauth2-identity-provider).
Please use the documentation site for the current version.
**[Test your Authentication Chain](https://doc.openidentityplatform.org/openam/how-to/login-via-vk-oauth2-identity-provider#login-via-vk-oauth2-identity-provider-test-your-authentication-chain)**
This file contains hidden or bidirectional Unicode text that may be interpreted or compiled differently than what appears below. To review, open the file in an editor that reveals hidden Unicode characters.
Learn more about bidirectional Unicode characters
<li>Increase the data center amount without service interruption</li>
<li>Increase the rack amount without service interruption</li>
<li>Increase the node amount without service interruption</li>
<li>Change the number of data copies inside the data center without service interruption</li></ul>
<h2>Hardware Requirements For a Single Node</h2>
<table>
<tbody>
<tr>
<thcolspan="1">Environment</th>
<th>CPU</th>
<th>RAM</th>
<th>Disk</th></tr>
<tr>
<tdcolspan="1">Test</td>
<td>>=2</td>
<td>>=8</td>
<td>16G HDD</td></tr>
<tr>
<tdcolspan="1">Production</td>
<td>>=8</td>
<td>>=32 ballon=off</td>
<td>64G SSD RAID</td></tr></tbody></table>
This article has moved to the Open Identity Platform documentation site:
[Migrate OpenAM to Apache Cassandra without Single Point of Failure](https://doc.openidentityplatform.org/openam/how-to/migrate-openam-to-apache-cassandra-without-single-point-of-failure).
Please use the documentation site for the current version.
<aname="initial-data-storage-scheme"></a>
**[Initial Data Storage Scheme](https://doc.openidentityplatform.org/openam/how-to/migrate-openam-to-apache-cassandra-without-single-point-of-failure#migrate-openam-to-apache-cassandra-without-single-point-of-failure-initial-data-storage-scheme)**
**[Data Storage Scheme for the Number of Credentials >5 Million](https://doc.openidentityplatform.org/openam/how-to/migrate-openam-to-apache-cassandra-without-single-point-of-failure#migrate-openam-to-apache-cassandra-without-single-point-of-failure-data-storage-scheme-for-the-number-of-credentials-5-million)**
**[An Example of a Recommended Minimum Configuration](https://doc.openidentityplatform.org/openam/how-to/migrate-openam-to-apache-cassandra-without-single-point-of-failure#migrate-openam-to-apache-cassandra-without-single-point-of-failure-an-example-of-a-recommended-minimum-configuration)**
**[Hardware Requirements For a Single Node](https://doc.openidentityplatform.org/openam/how-to/migrate-openam-to-apache-cassandra-without-single-point-of-failure#migrate-openam-to-apache-cassandra-without-single-point-of-failure-hardware-requirements-for-a-single-node)**
This file contains hidden or bidirectional Unicode text that may be interpreted or compiled differently than what appears below. To review, open the file in an editor that reveals hidden Unicode characters.
Learn more about bidirectional Unicode characters
This article has moved to the Open Identity Platform documentation site:
## Preface
[OpenAM Monitoring Using Prometheus](https://doc.openidentityplatform.org/openam/how-to/openam-monitoring-using-prometheus).
[OpenAM](https://github.com/OpenIdentityPlatform/OpenAM) can expose SNMP metrics. To expose these metrics to Prometheus we will use [snmp_exporter](https://github.com/prometheus/snmp_exporter) tool, provided by the Prometheus community.
Please use the documentation site for the current version.
To follow the current manual Docker and Docker Compose should be installed
<aname="openam-monitoring-using-prometheus"></a>
Configuration files located in this project [https://github.com/maximthomas/openam-prometheus](https://github.com/maximthomas/openam-prometheus)
**[OpenAM Monitoring Using Prometheus](https://doc.openidentityplatform.org/openam/how-to/openam-monitoring-using-prometheus)**
**[Setup OpenAM and SNMP Monitoring](https://doc.openidentityplatform.org/openam/how-to/openam-monitoring-using-prometheus#openam-monitoring-using-prometheus-setup-openam-and-snmp-monitoring)**
## Setup OpenAM and SNMP Monitoring
<aname="setup-snmp-exporter"></a>
Open OpenAM URL and create a basic configuration (see [OpenAM Quick Start Gude](https://github.com/OpenIdentityPlatform/OpenAM/wiki/Quick-Start-Guide))
This file contains hidden or bidirectional Unicode text that may be interpreted or compiled differently than what appears below. To review, open the file in an editor that reveals hidden Unicode characters.
Learn more about bidirectional Unicode characters
[OpenAM QR Authentication Module](https://doc.openidentityplatform.org/openam/how-to/openam-qr-authentication-module).
# Introduction
Please use the documentation site for the current version.
The most popular authentication method is also the most inconvenient. It is login and password authentication. A user must remember his login and password for each service, could forget the password, a password could be compromised, etc. The following article describes, how to login into the application in the browser on another device, if the user is already authenticated in a mobile application. The article contains step by step guide on how to set up the process in OpenAM.
Go to the desired realm, then on the left side of the Authentication → Modules menu. The list of modules opens. Press the Add Module button. Enter the name of the module qr and choose QR code confirm from other session module type.
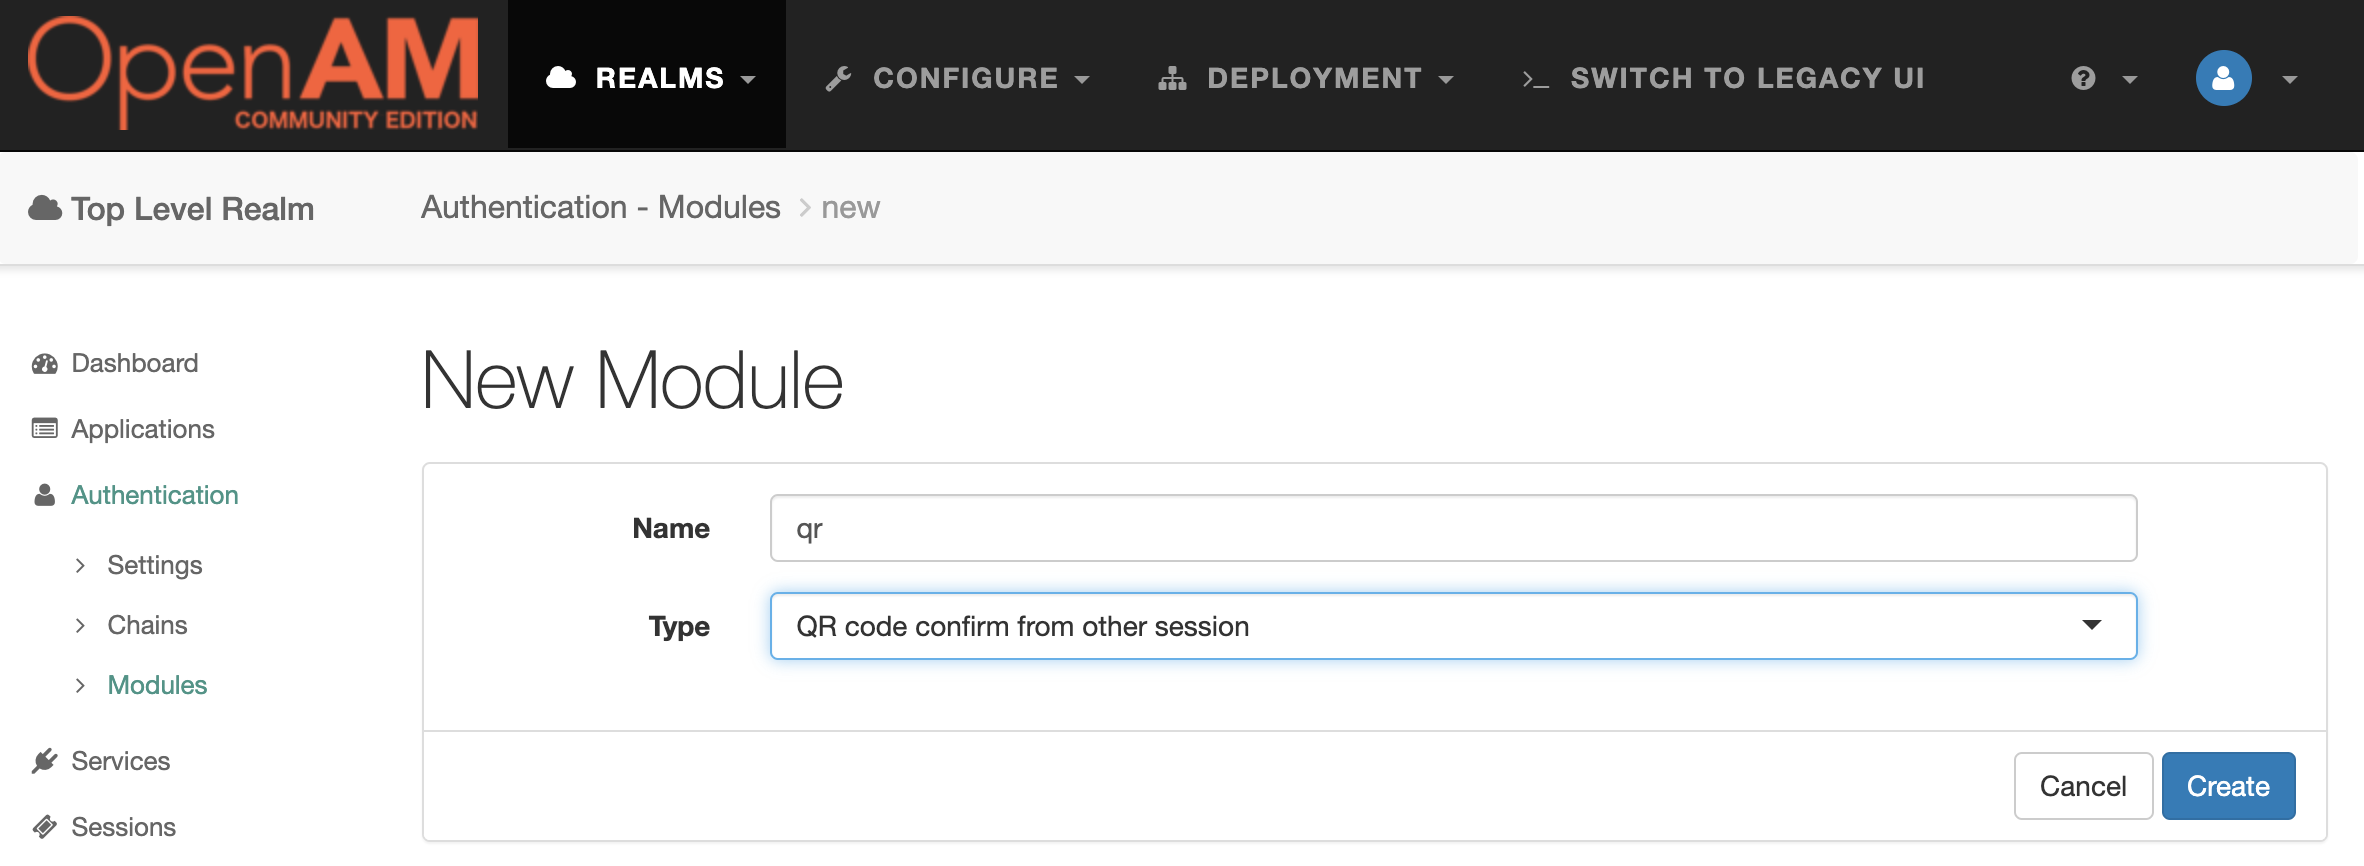
**[Create QR Authentication Module Instance](https://doc.openidentityplatform.org/openam/how-to/openam-qr-authentication-module#openam-qr-authentication-module-create-qr-authentication-module-instance)**
Press the Create button.
<aname="create-authentication-chain"></a>
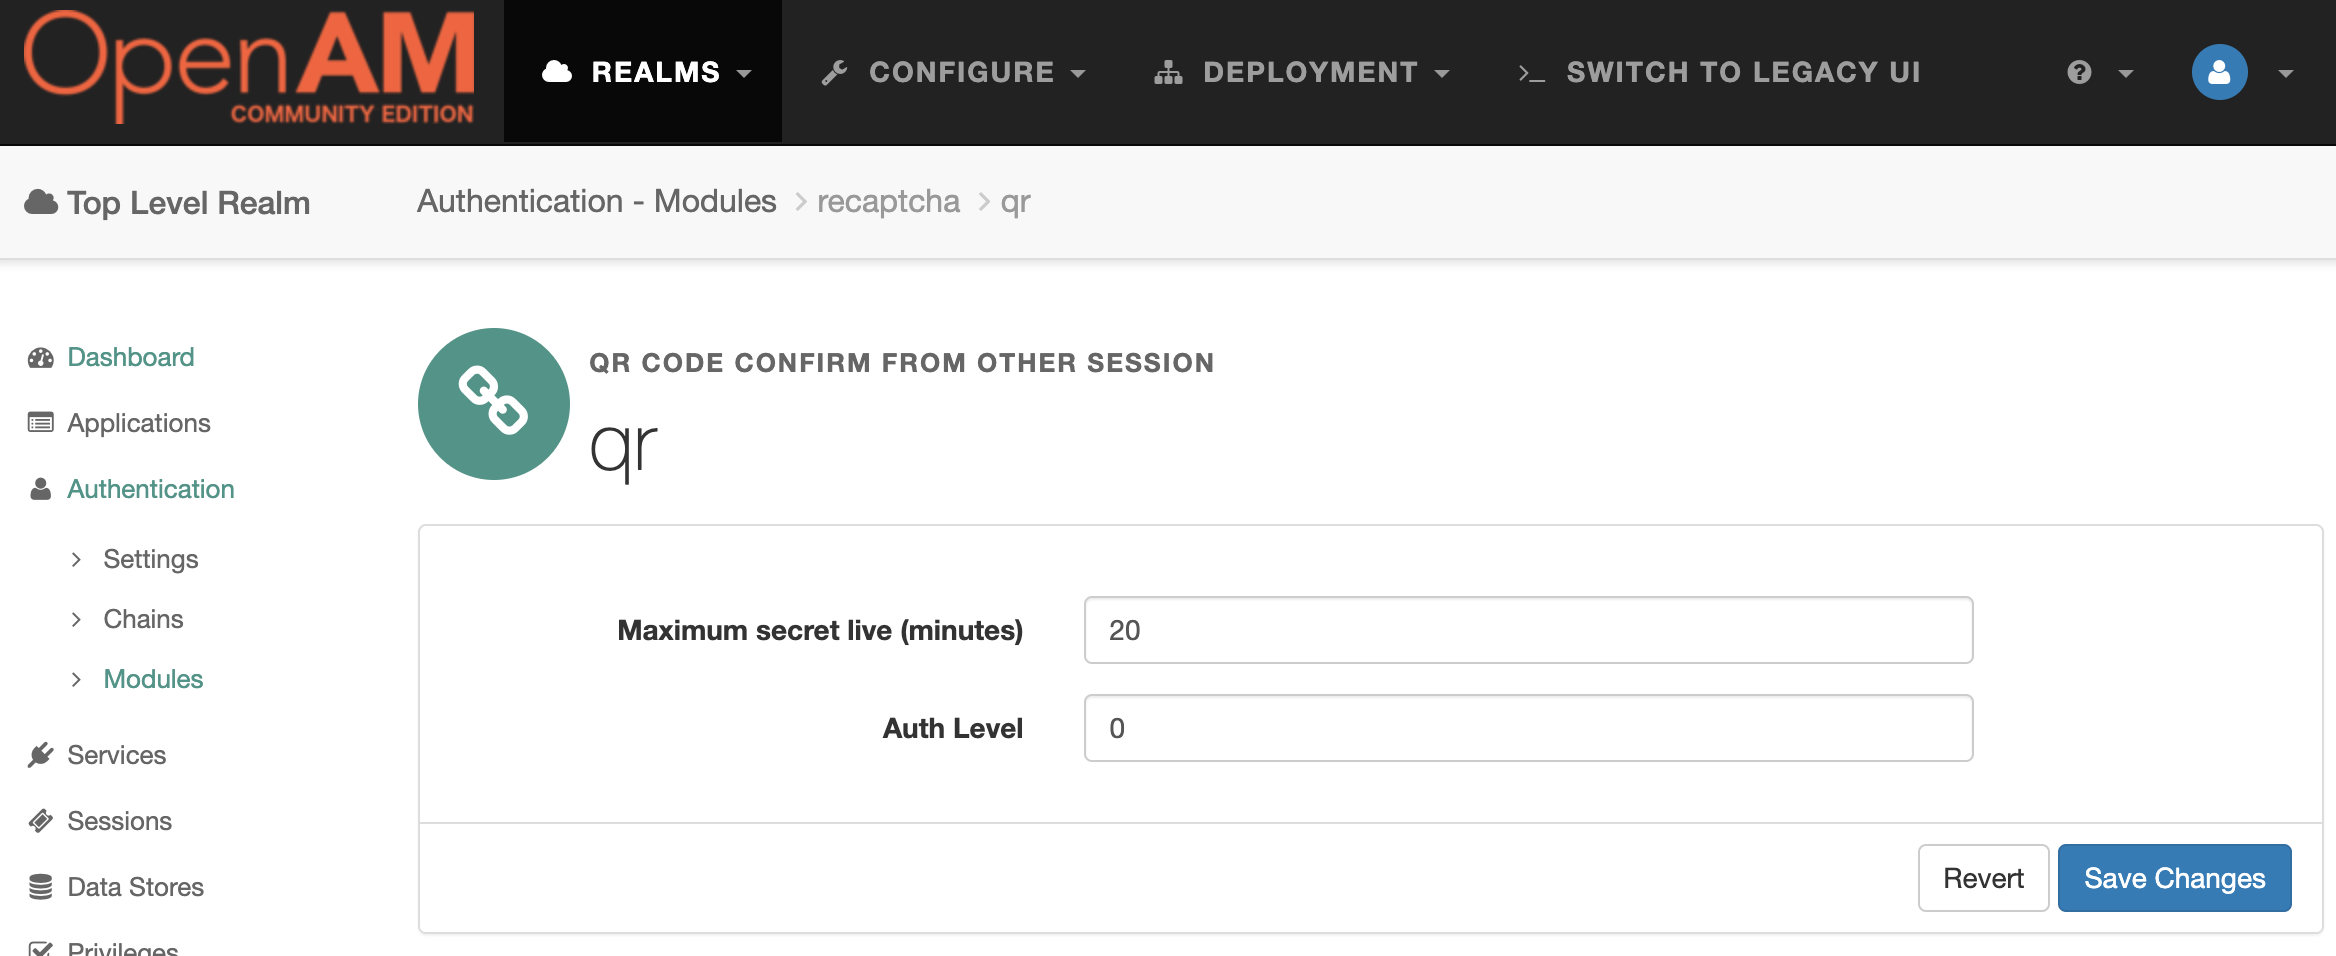
Let's install and configure the mobile application. The following mobile application is only for demonstration and is not intended for production usage. But you can use application source code to build your application or modify application source code for your tasks. The application was developed with [Flutter](https://flutter.dev/)
Mobile application source code: [https://github.com/OpenIdentityPlatform/openam_demo_authenticator](https://github.com/OpenIdentityPlatform/openam_demo_authenticator)
Run the mobile application:
```bash
flutter run
```
## Mobile Application Setup
Press the Settings icon in the upper-right corner of the application and go to the settings menu. Enter OpenAM URL, realm, OpenAM username and password. Press the Back button in the upper-left corner. Settings data will be stored in the device's secure storage.
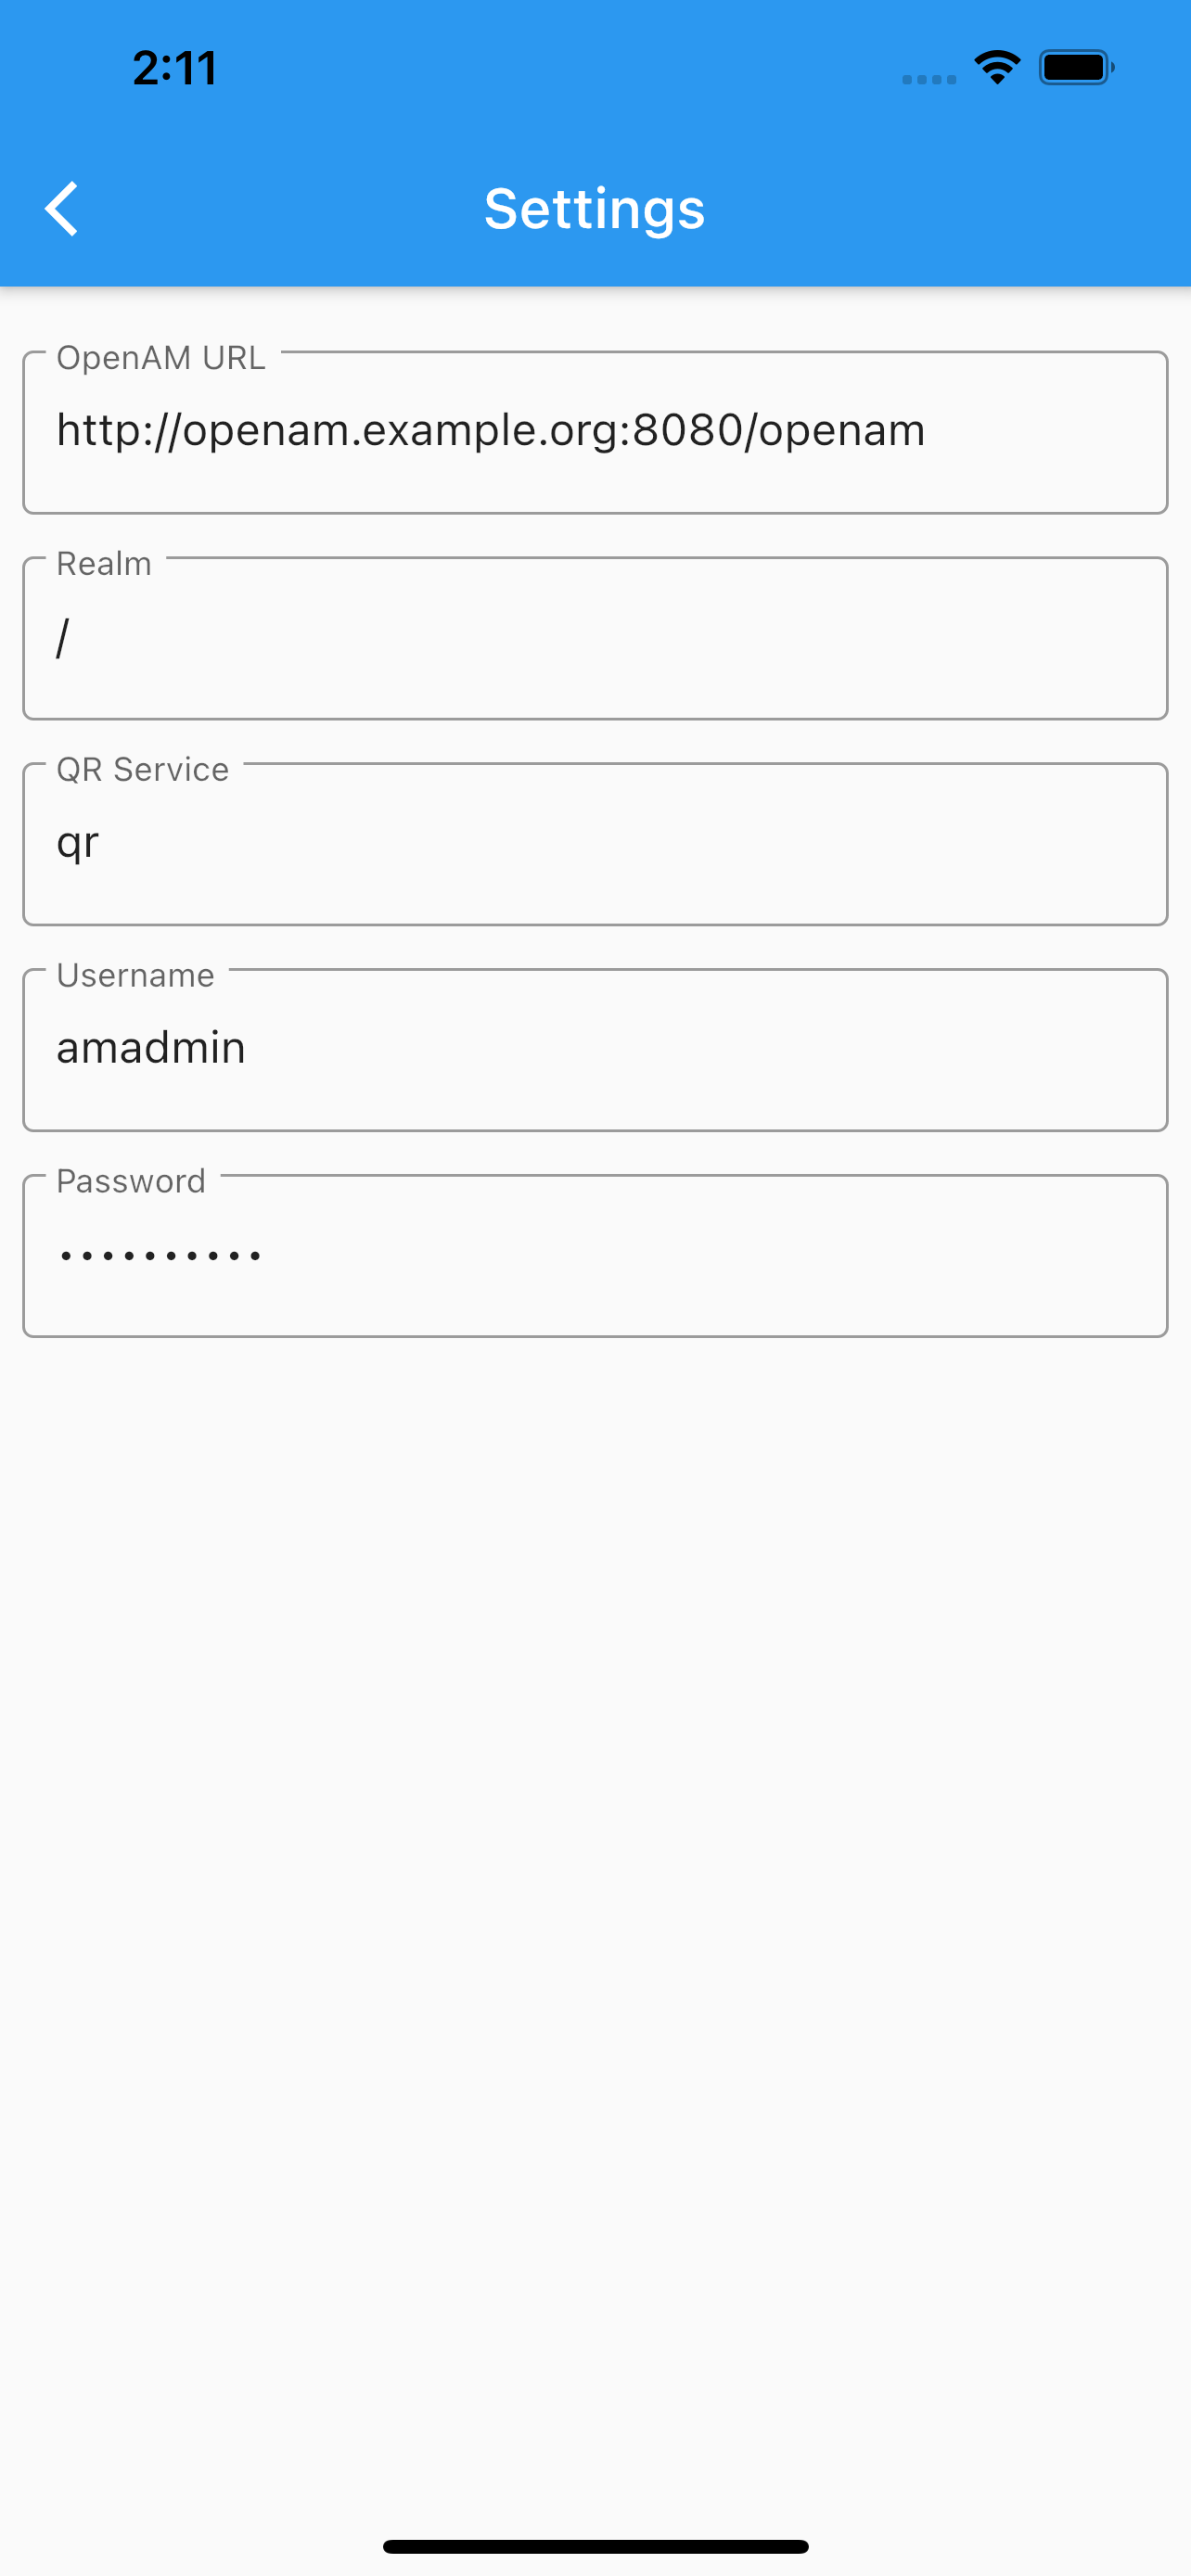
# Testing Solution
If you were logged in, log out from OpenAM. Open OpenAM URL with QR authentication chain. For example, [http://openam.example.org:8080/openam/XUI/#login/&realm=/&service=qr](http://openam.example.org:8080/openam/XUI/#login/&realm=/&service=qr) Replace [http://openam.example.org:8080/openam](http://openam.example.org:8080/openam) with your OpenAM URL. You will see a QR code that you need to scan. As well as the same code in the form of text as shown in the image below
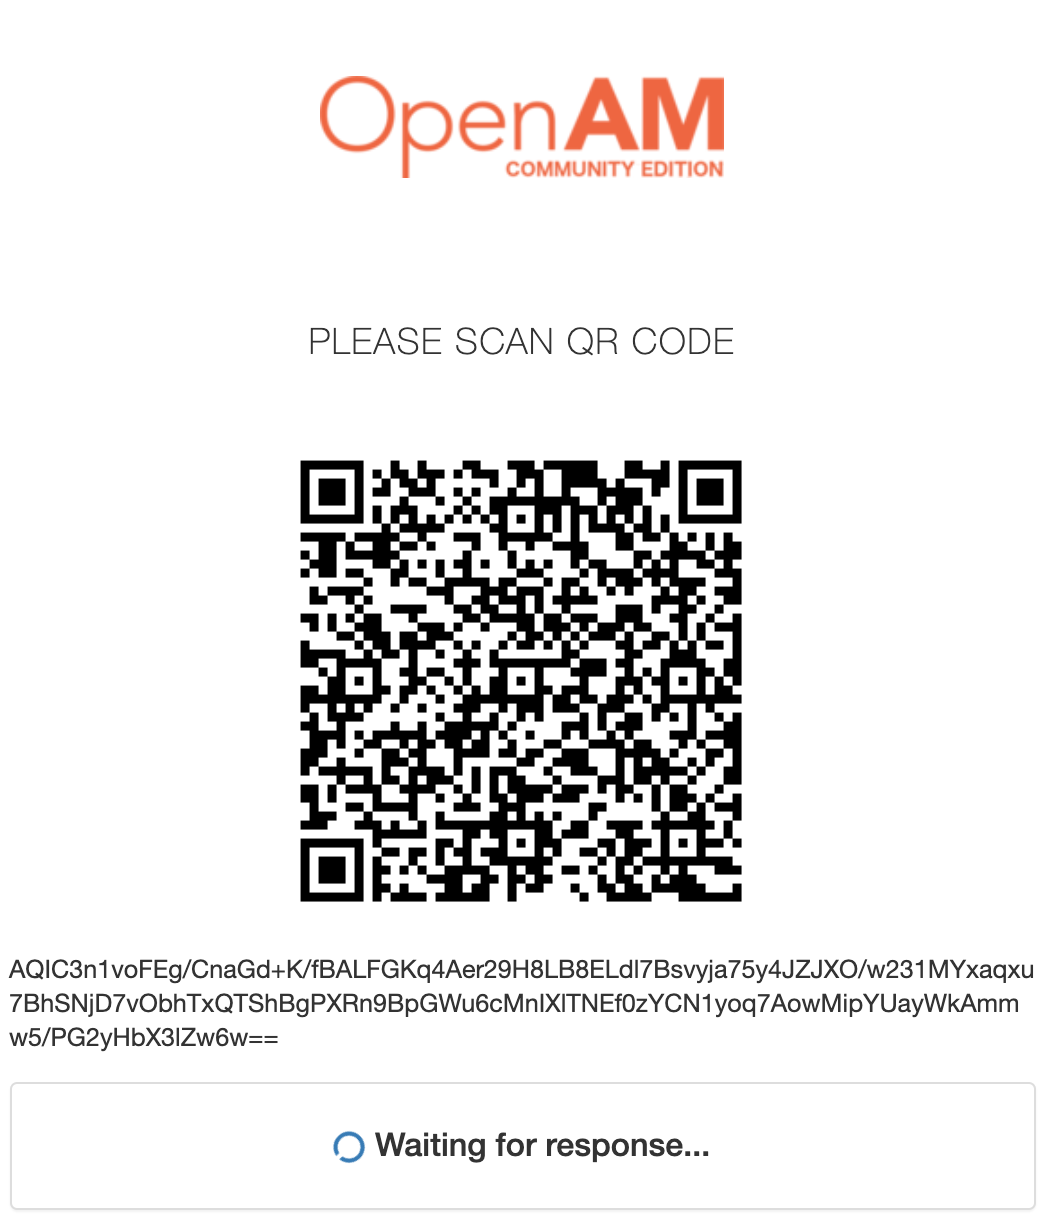
Open the mobile application, press the Login button. The application will authenticate in OpenAM in the specified realm with specified credentials. If authentication succeeds, you'll see the user name and first symbols of the OpenAM authentication token
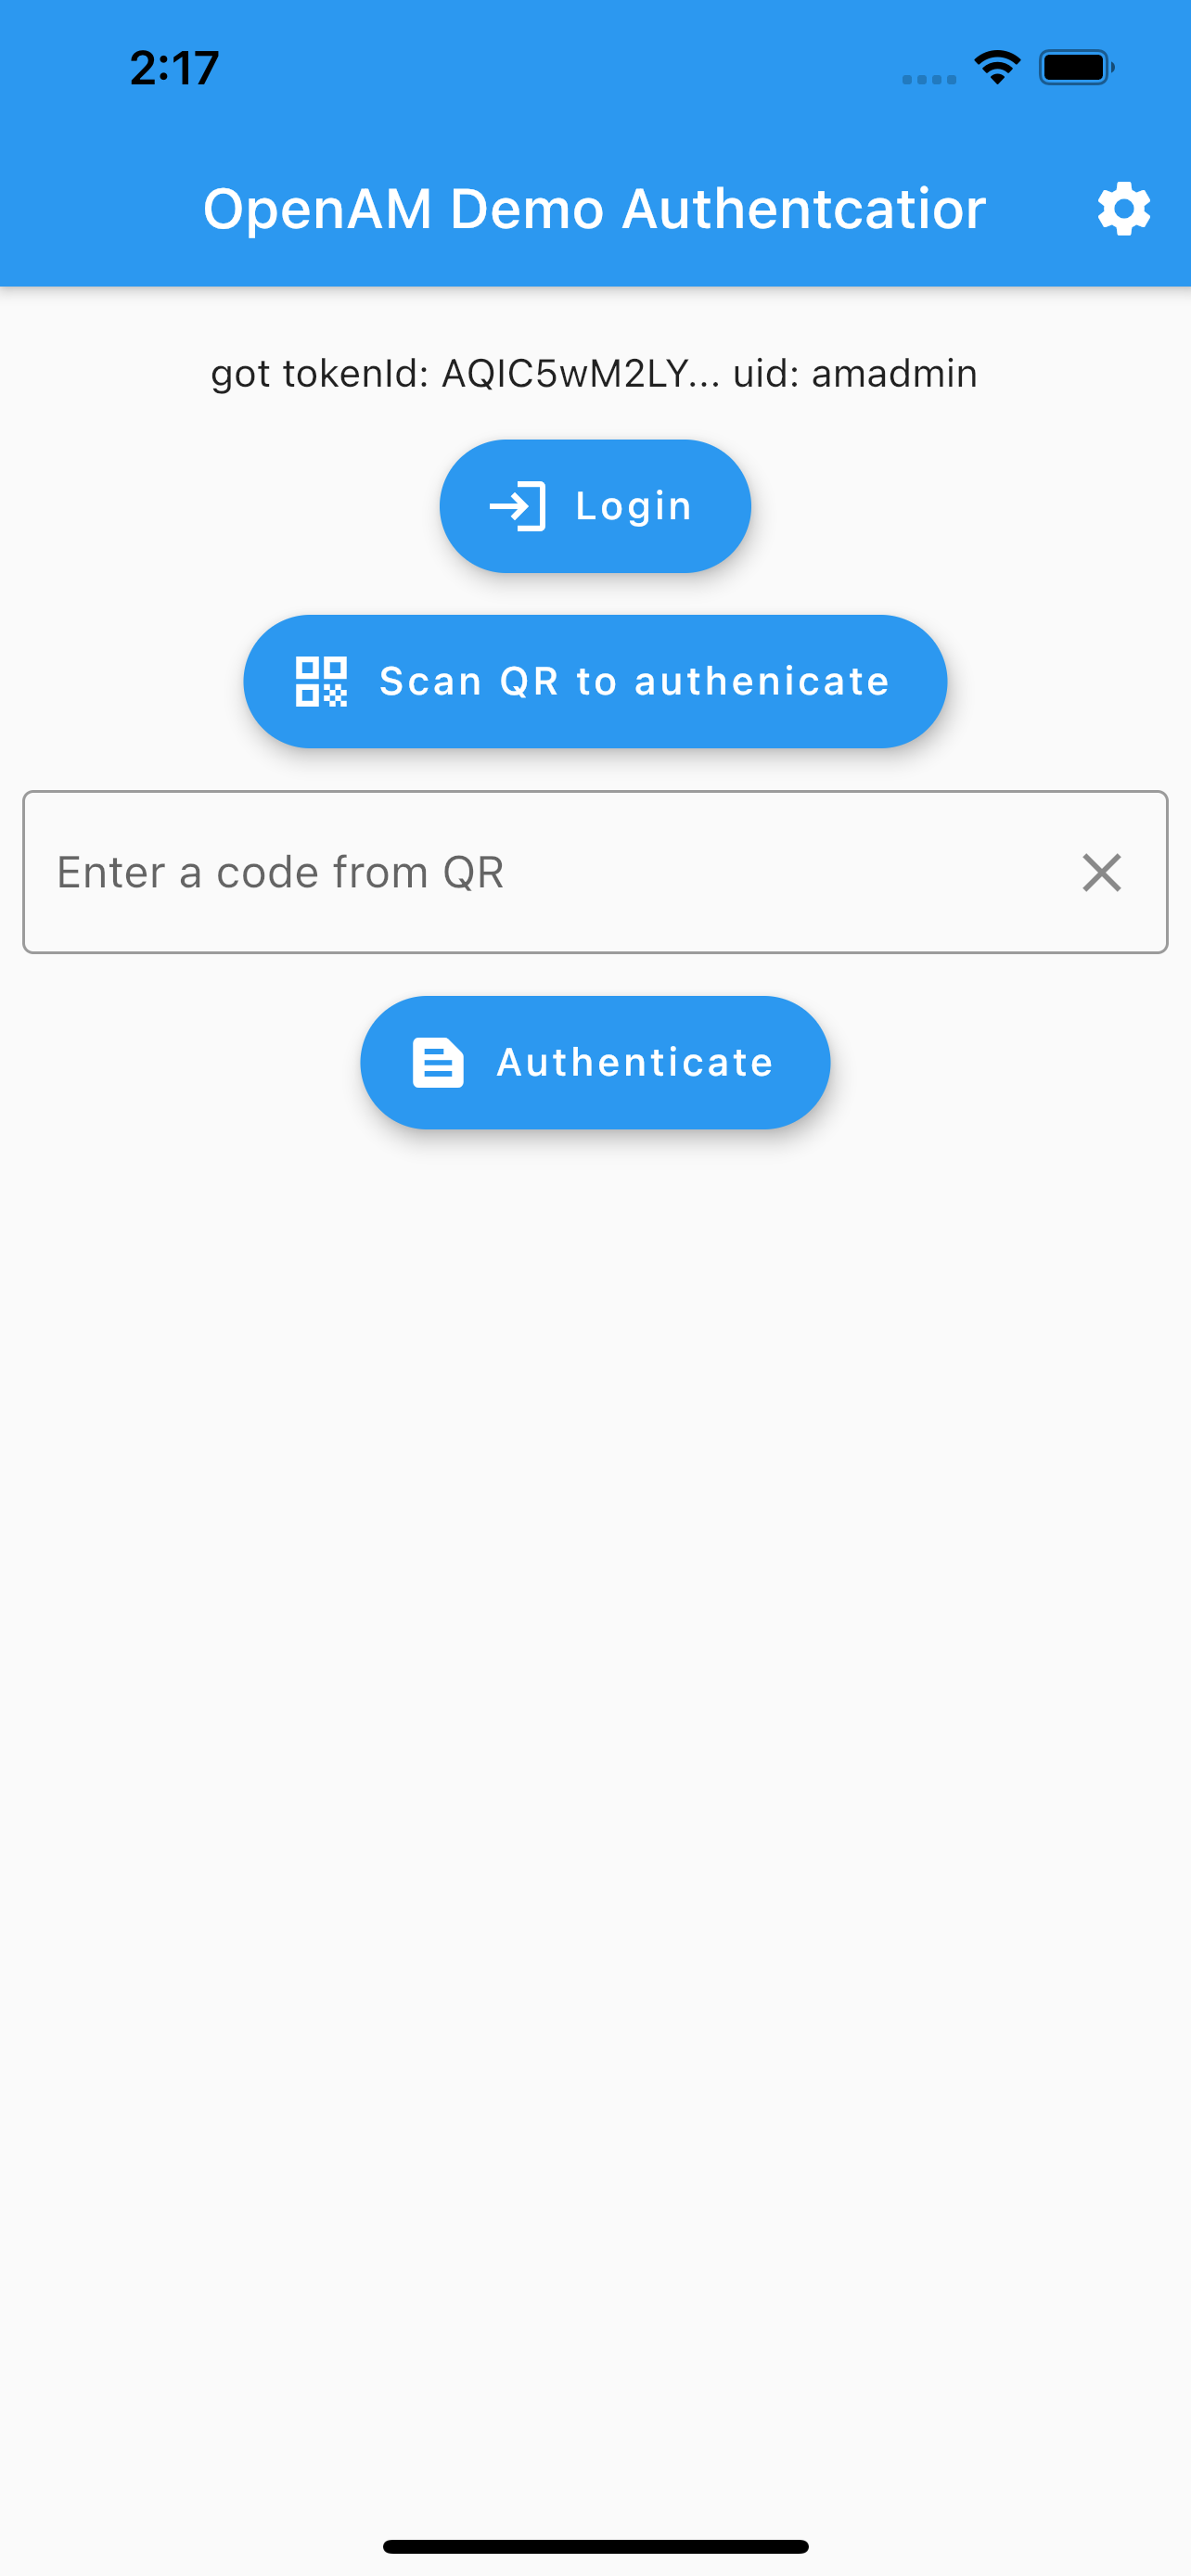
Then press the "Scan QR to authenticate" button, scan the QR code and you will a message about successful authentication. Meanwhile, the browser will authenticate the scanned QR code.
If it is not possible to scan a QR code, you can enter the code manually in the "Enter a code from QR" field and press Authenticate. If you entered the code correctly, you will also be authenticated.
This file contains hidden or bidirectional Unicode text that may be interpreted or compiled differently than what appears below. To review, open the file in an editor that reveals hidden Unicode characters.
Learn more about bidirectional Unicode characters
This article has moved to the Open Identity Platform documentation site:
There are several ways to integrate Spring application with OpenAM. In the following tutorial, we will integrate Spring Application with OpenAM using the OIDC/OAuth2 protocol.
[OpenAM and Spring Boot 3 Integration via OIDCOAuth2 Protocol](https://doc.openidentityplatform.org/openam/how-to/openam-and-spring-boot-3-integration-via-oidc-oauth2-protocol).
# OpenAM Configuration
Please use the documentation site for the current version.
If you have not installed OpenAM yet, you could run OpenAM as a [Docker image](https://hub.docker.com/r/openidentityplatform/openam/). Let’s assume the OpenAM instance URL is `http://openam.example.org:8080/openam`
<aname="introduction"></a>
Go to the target realm and in the Common Tasks section. Open OpenAM console in a browser and create OAuth2 Provider. Press the `Configure OAuth Provider` button, and then the `Configure OpenID Connect` button.
Create a new Agent, set name (client id) and password (client secret) and press the Next button. Go to the new created agent and set the following settings
- Add `http://localhost:8081/login/oauth2/code/openam` to **Redirection URIs** values (is will be our Spring Security application code endpoint)
- Add `profile` and `openid` values to **Scope(s)**
- Set **ID Token Signing Algorithm** setting to RS256.
# Spring Boot Application
Create a new Spring Boot application and add the following Maven dependencies.
Create a controller and two endpoints: `index` and `protected-oauth`. The `index` endpoint will be accessible for anyone and `protected-oauth` endpoint will be accessible for authenticated with OpenAM users via OIDC protocol.
**[Test the Solution](https://doc.openidentityplatform.org/openam/how-to/openam-and-spring-boot-3-integration-via-oidc-oauth2-protocol#openam-and-spring-boot-3-integration-via-oidc-oauth2-protocol-test-the-solution)**
This file contains hidden or bidirectional Unicode text that may be interpreted or compiled differently than what appears below. To review, open the file in an editor that reveals hidden Unicode characters.
Learn more about bidirectional Unicode characters
This article has moved to the Open Identity Platform documentation site:
In the following article, we will set up OpenAM as an Identity Provider for a Spring Boot Application. In the [previous article,](https://github.com/OpenIdentityPlatform/OpenAM/wiki/OpenAM-and-Spring-Boot-3-Integration-via-SAMLv2-Protocol) we set up a Spring Boot application authentication via OpenAM with SAMLv2 protocol. In the following article, we will set up authentication via OpenAM cookie.
[OpenAM and Spring Boot 3 Integration via OpenAM Cookie](https://doc.openidentityplatform.org/openam/how-to/openam-and-spring-boot-3-integration-via-openam-cookie).
# Prerequisites
Please use the documentation site for the current version.
OpenAM and Spring Boot applications should share same domain. In the following example, OpenAM host is `openam.example.org` and Spring Boot application host is `app.example.org`.
<aname="introduction"></a>
To test the example on the local machine, add the following lines to your hosts file:
Open OpenAM administration console. In the top menu go to Configure → Global Services → Platform. Set Cookie Domains as the common domain for the both applications: `example.org`
Add the following settings to the `application.yml` file
```yaml
server:
port: 8081
```
Create a controller and two endpoints: `index` and `protected-openam`. The `index` endpoint will be accessible for anyone and `protected-openam` endpoint will be accessible for OpenAM authenticated users.
```java
@Controller
public class SampleController {
@GetMapping
public String index() {
return "index";
}
@GetMapping("/protected-openam")
public String cookieProtected(Model model, @AuthenticationPrincipal String principal) {
Create the `demo` user for the top level realm for testing purposes. Open OpenAM console, open the top level realm. In the left menu click the `Subjects` element. In the list of subject click the `New` button.
Enter desired credentials and press the Log In button. After successful authentication you will be redirected to the Spring Boot application page as an authenticated user.
PS. Thanks to [https://www.tune-it.ru/web/adpashnin/blog/-/blogs/spring-security-i-openam](https://www.tune-it.ru/web/adpashnin/blog/-/blogs/spring-security-i-openam) for the idea for this manual.
This file contains hidden or bidirectional Unicode text that may be interpreted or compiled differently than what appears below. To review, open the file in an editor that reveals hidden Unicode characters.
Learn more about bidirectional Unicode characters
This article has moved to the Open Identity Platform documentation site:
In the following article, we will set up OpenAM as an Identity Provider for a Spring Boot Application. In the [previous article,](https://github.com/OpenIdentityPlatform/OpenAM/wiki/OpenAM-and-Spring-Boot-3-Integration-via-OIDC-OAuth2-Protocol) we set up a Spring Boot application authentication via OpenAM with OAuth2/OIDC protocol. In the following article, we will set up authentication via OpenAM as an Identity Provider and Spring Boot application as a service provider using [SAMLv2](https://en.wikipedia.org/wiki/SAML_2.0) protocol.
[OpenAM and Spring Boot 3 Integration via SAMLv2 Protocol](https://doc.openidentityplatform.org/openam/how-to/openam-and-spring-boot-3-integration-via-samlv2-protocol).
# OpenAM Configuration
Please use the documentation site for the current version.
## Create Hosted Identity Provider
<aname="introduction"></a>
If you have not installed OpenAM yet, you could run OpenAM as a [Docker image](https://hub.docker.com/r/openidentityplatform/openam/). Let’s assume the OpenAM instance URL is `http://openam.example.org:8080/openam`
Select a Signing Key (for demonstration purposes we will use **test**), enter the Circle of Trust name, and then map user's attributes to OpenAM. For demonstration the OpenAM users will be mapped by email.
Open the administration console, goto desired realm, from the menu on the left. Select the applications section and navigate to SAML 2.0. In the Entity Providers list select `http://openam.example.org:8080/openam` On the Assertion Content tab, under **NameID Format** in the **NameID Value Map** list, add the element `urn:oasis:names:tc:SAML:1.1:nameid-format:unspecified=mail` Press the Save button.
## Create OpenAM Users
Open the administration console, goto desired realm, create a new user and fill the Email Address attribute
# Spring Application Configuration
Create a new Spring Boot application and add the following Maven repositories and dependencies:
Create a controller and two endpoints: `index` and `protected-saml`. The `index` endpoint will be accessible for anyone and `protected-saml` endpoint will be accessible for authenticated with OpenAM users via SAMLv2 protocol.
<aname="create-hosted-identity-provider"></a>
```java
@Controller
public class SampleController {
@GetMapping
public String index() {
return "index";
}
@GetMapping("/protected-saml")
public String samlProtected(Model model, @AuthenticationPrincipal Saml2AuthenticatedPrincipal principal) {
Run the Spring Boot Project to import the SAML metadata file of the Spring Boot project.
Open the OpenAM administration console, goto desired realm, click **Configure SAMLv2 Provider** in the Common Tasks section, then click **Configure Remote Service Provider.**
Set the metadata URL: `http://localhost:8081/saml2/service-provider-metadata/openam`and select the existing circle of trust created in the Create Hosted Identity Provider Step.
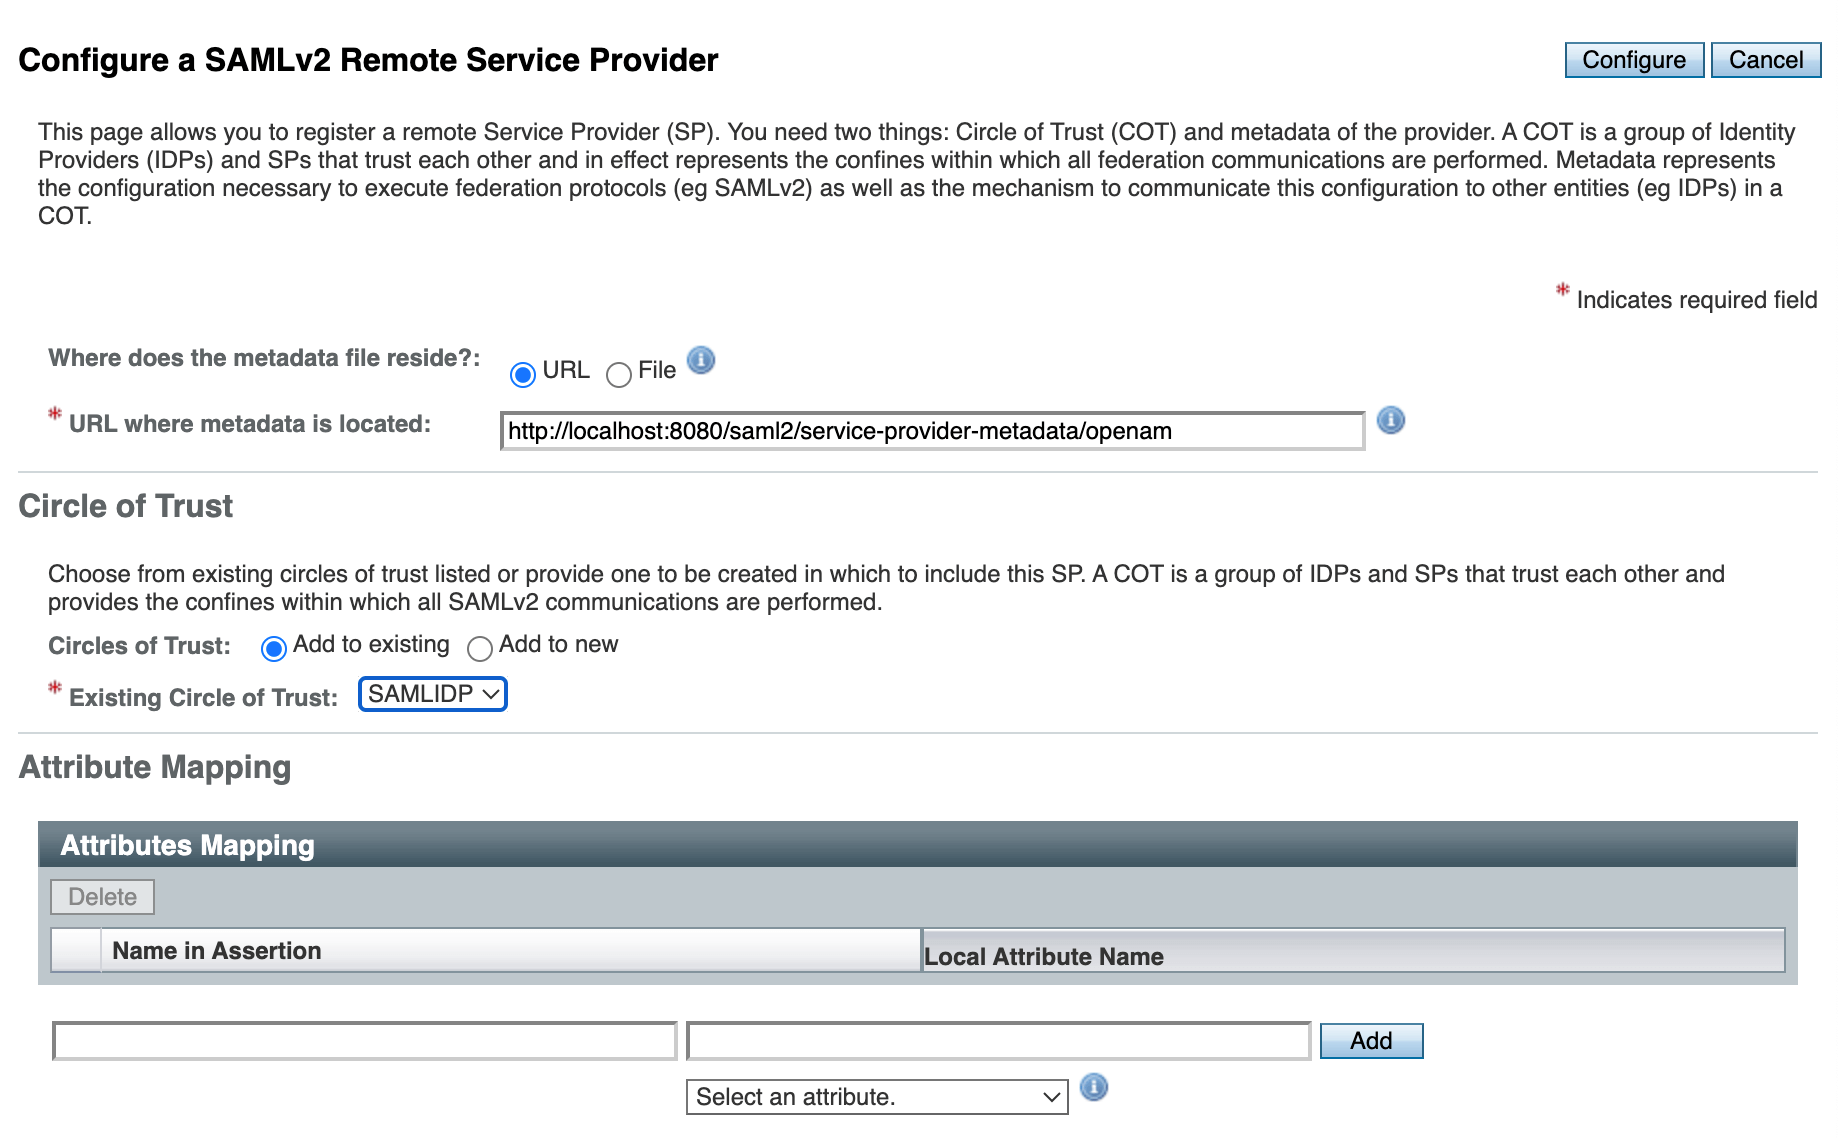
# Test the Solution
Logout form OpenAM if you are logged in.
Run the Spring application an open its URL in a browser: [http://localhost:8081](http://localhost:8081/)
**[Setup User Mapping in OpenAM](https://doc.openidentityplatform.org/openam/how-to/openam-and-spring-boot-3-integration-via-samlv2-protocol#openam-and-spring-boot-3-integration-via-samlv2-protocol-setup-user-mapping-in-openam)**
**[Setup Service Provider in OpenAM](https://doc.openidentityplatform.org/openam/how-to/openam-and-spring-boot-3-integration-via-samlv2-protocol#openam-and-spring-boot-3-integration-via-samlv2-protocol-setup-service-provider-in-openam)**
<aname="test-the-solution"></a>
**[Test the Solution](https://doc.openidentityplatform.org/openam/how-to/openam-and-spring-boot-3-integration-via-samlv2-protocol#openam-and-spring-boot-3-integration-via-samlv2-protocol-test-the-solution)**
This file contains hidden or bidirectional Unicode text that may be interpreted or compiled differently than what appears below. To review, open the file in an editor that reveals hidden Unicode characters.
Learn more about bidirectional Unicode characters
This article has moved to the Open Identity Platform documentation site:
One of the principles of Zero Trust states: *Never trust, always verify*. In this article, we will explore how to implement this principle in an authentication system using open-source products [OpenAM](https://github.com/OpenIdentityPlatform/OpenAM) and [OpenIG](https://github.com/OpenIdentityPlatform/OpenIG).
[OpenAM and Zero Trust: Confirming Critical Operations](https://doc.openidentityplatform.org/openam/how-to/openam-and-zero-trust-confirming-critical-operations).
A practical example of this principle can be seen in banking applications. When confirming a payment, banks almost always want to ensure that it is *you* conducting the transaction, not a malicious actor. To verify this, they send a one-time code to a trusted device via push notification or SMS.
Please use the documentation site for the current version.
Alternatively, the user may be asked to confirm their biometric data, such as a fingerprint, use a hardware token, or rely on a specialized application like Microsoft Authenticator or Google Authenticator.
-**Protected Application**: Any application (in this case, a simple Node.js application) where users authenticate. It includes two pages: a profile page and a page with sensitive data.
-**Authentication Service (OpenAM)**: Handles user authentication and authorization.
-**Authorization Gateway (OpenIG)**: Sends a request to OpenAM to verify policy compliance. If successful, it grants access to the protected application; otherwise, it redirects the user for authentication. When attempting to access sensitive information, OpenAM will check whether the user has authenticated using a one-time code, ensuring no more than 20 seconds have passed since the last authentication.
As a second authentication factor, one-time passwords generated using the [TOTP algorithm](https://en.wikipedia.org/wiki/Time-based_one-time_password) will be used, along with mobile applications like [Microsoft Authenticator](https://support.microsoft.com/en-us/account-billing/download-microsoft-authenticator-351498fc-850a-45da-b7b6-27e523b8702a) or [Google Authenticator](https://support.google.com/accounts/answer/1066447).
The complete solution code is available at this link: [https://github.com/OpenIdentityPlatform/openam-openig-otp-example](https://github.com/OpenIdentityPlatform/openam-openig-otp-example).
<aname="preparing-the-hosts-file"></a>
### Preparing the Hosts File
**[Preparing the Hosts File](https://doc.openidentityplatform.org/openam/how-to/openam-and-zero-trust-confirming-critical-operations#openam-and-zero-trust-confirming-critical-operations-preparing-the-hosts-file)**
Let’s assume the hostname for the authentication service will be `openam.example.org` and for the gateway `openig.example.org`. Before running the setup, add these hostnames and IP addresses to the `hosts` file, for example:
`127.0.0.1 openam.example.org openig.example.org`
<aname="authenticator-application"></a>
- On **Windows**, the `hosts` file is located at: `C:\Windows\System32\drivers\etc\hosts`
- On **Linux** and **Mac**, it is located at: `/etc/hosts`
Install the mobile application [Microsoft Authenticator](https://support.microsoft.com/en-us/account-billing/download-microsoft-authenticator-351498fc-850a-45da-b7b6-27e523b8702a) or [Google Authenticator](https://support.google.com/accounts/answer/1066447) on your device.
**[OpenAM Authentication Service Configuration](https://doc.openidentityplatform.org/openam/how-to/openam-and-zero-trust-confirming-critical-operations#openam-and-zero-trust-confirming-critical-operations-openam-authentication-service-configuration)**
## Demo Application
<aname="configuring-mfa-in-openam"></a>
For demonstration purposes, we will use a simple Node.js application with two URLs:
- **Profile Page (`/`)** – Displays user profile information
- **Sensitive Data Page (`/sensitive`)** – Contains protected sensitive information
**[Configuring MFA in OpenAM](https://doc.openidentityplatform.org/openam/how-to/openam-and-zero-trust-confirming-critical-operations#openam-and-zero-trust-confirming-critical-operations-configuring-mfa-in-openam)**
The application code can be found at [this link](https://github.com/OpenIdentityPlatform/openam-openig-otp-example/tree/master/demo-app).
**[OpenAM User Setup](https://doc.openidentityplatform.org/openam/how-to/openam-and-zero-trust-confirming-critical-operations#openam-and-zero-trust-confirming-critical-operations-openam-user-setup)**
app.listen(port, () => console.log(`Server running at http://localhost:${port}`));
```
**[Configure the OpenIG authorization gateway](https://doc.openidentityplatform.org/openam/how-to/openam-and-zero-trust-confirming-critical-operations#openam-and-zero-trust-confirming-critical-operations-configure-the-openig-authorization-gateway)**
Add a demo application to the `docker-compose.yml` file in the `services` object
**[Configure Routes to the Demo Application](https://doc.openidentityplatform.org/openam/how-to/openam-and-zero-trust-confirming-critical-operations#openam-and-zero-trust-confirming-critical-operations-configure-routes-to-the-demo-application)**
Add the OpenAM seris to the `docker-compose.yml` file in the `services` object:
<aname="test-the-solution"></a>
```yaml
services:
...
openam:
image: openidentityplatform/openam:latest
container_name: openam
hostname: openam.example.org
ports:
- "8080:8080"
```
Start the OpenAM container with the command `docker compose up openam`. Wait for the container to start and perform the initial installation with the command:
Open the OpenAM administrator console at [http://openam.example.org:8080/openam](http://openam.example.org:8080/openam).
Enter the administrator login and password. In this case, it is `amadmin` and `passw0rd` respectively.
In the console, select **Top Level Realm**. In the left menu, select **Authentication** → **Modules** and create a new module `totp` with type `Authenticator (OATH)`.
In the settings, select **OATH Algorithm to Use: TOTP**, also specify **Name of the Issuer**, e.g. **OpenAM**. The rest of the settings can be left unchanged. Save the `totp` module settings.
In the administrator console, open the Top Level Realm, then go to **Authentication** → **Chains** in the left menu and create a new authentication chain `totp`.
Now let's move on to configuring the authorization policy in OpenAM for the `/sensitive` endpoint of the demo application. The policy will be configured so that the user is required to authenticate with a one-time code in the `totp` authentication chain, but the authentication will only be valid for 20 seconds.
Open the OpenAM administrator console. Open Top Level Realm. From the menu on the left, select **Authorization** → **Policy Sets**. Select the **Default Policy Set**. Create a new `demo-sensitive` policy.
Select URL as the resource type and specify the resource as shown in the example in the figure below. Click **Add** and then **Create**.
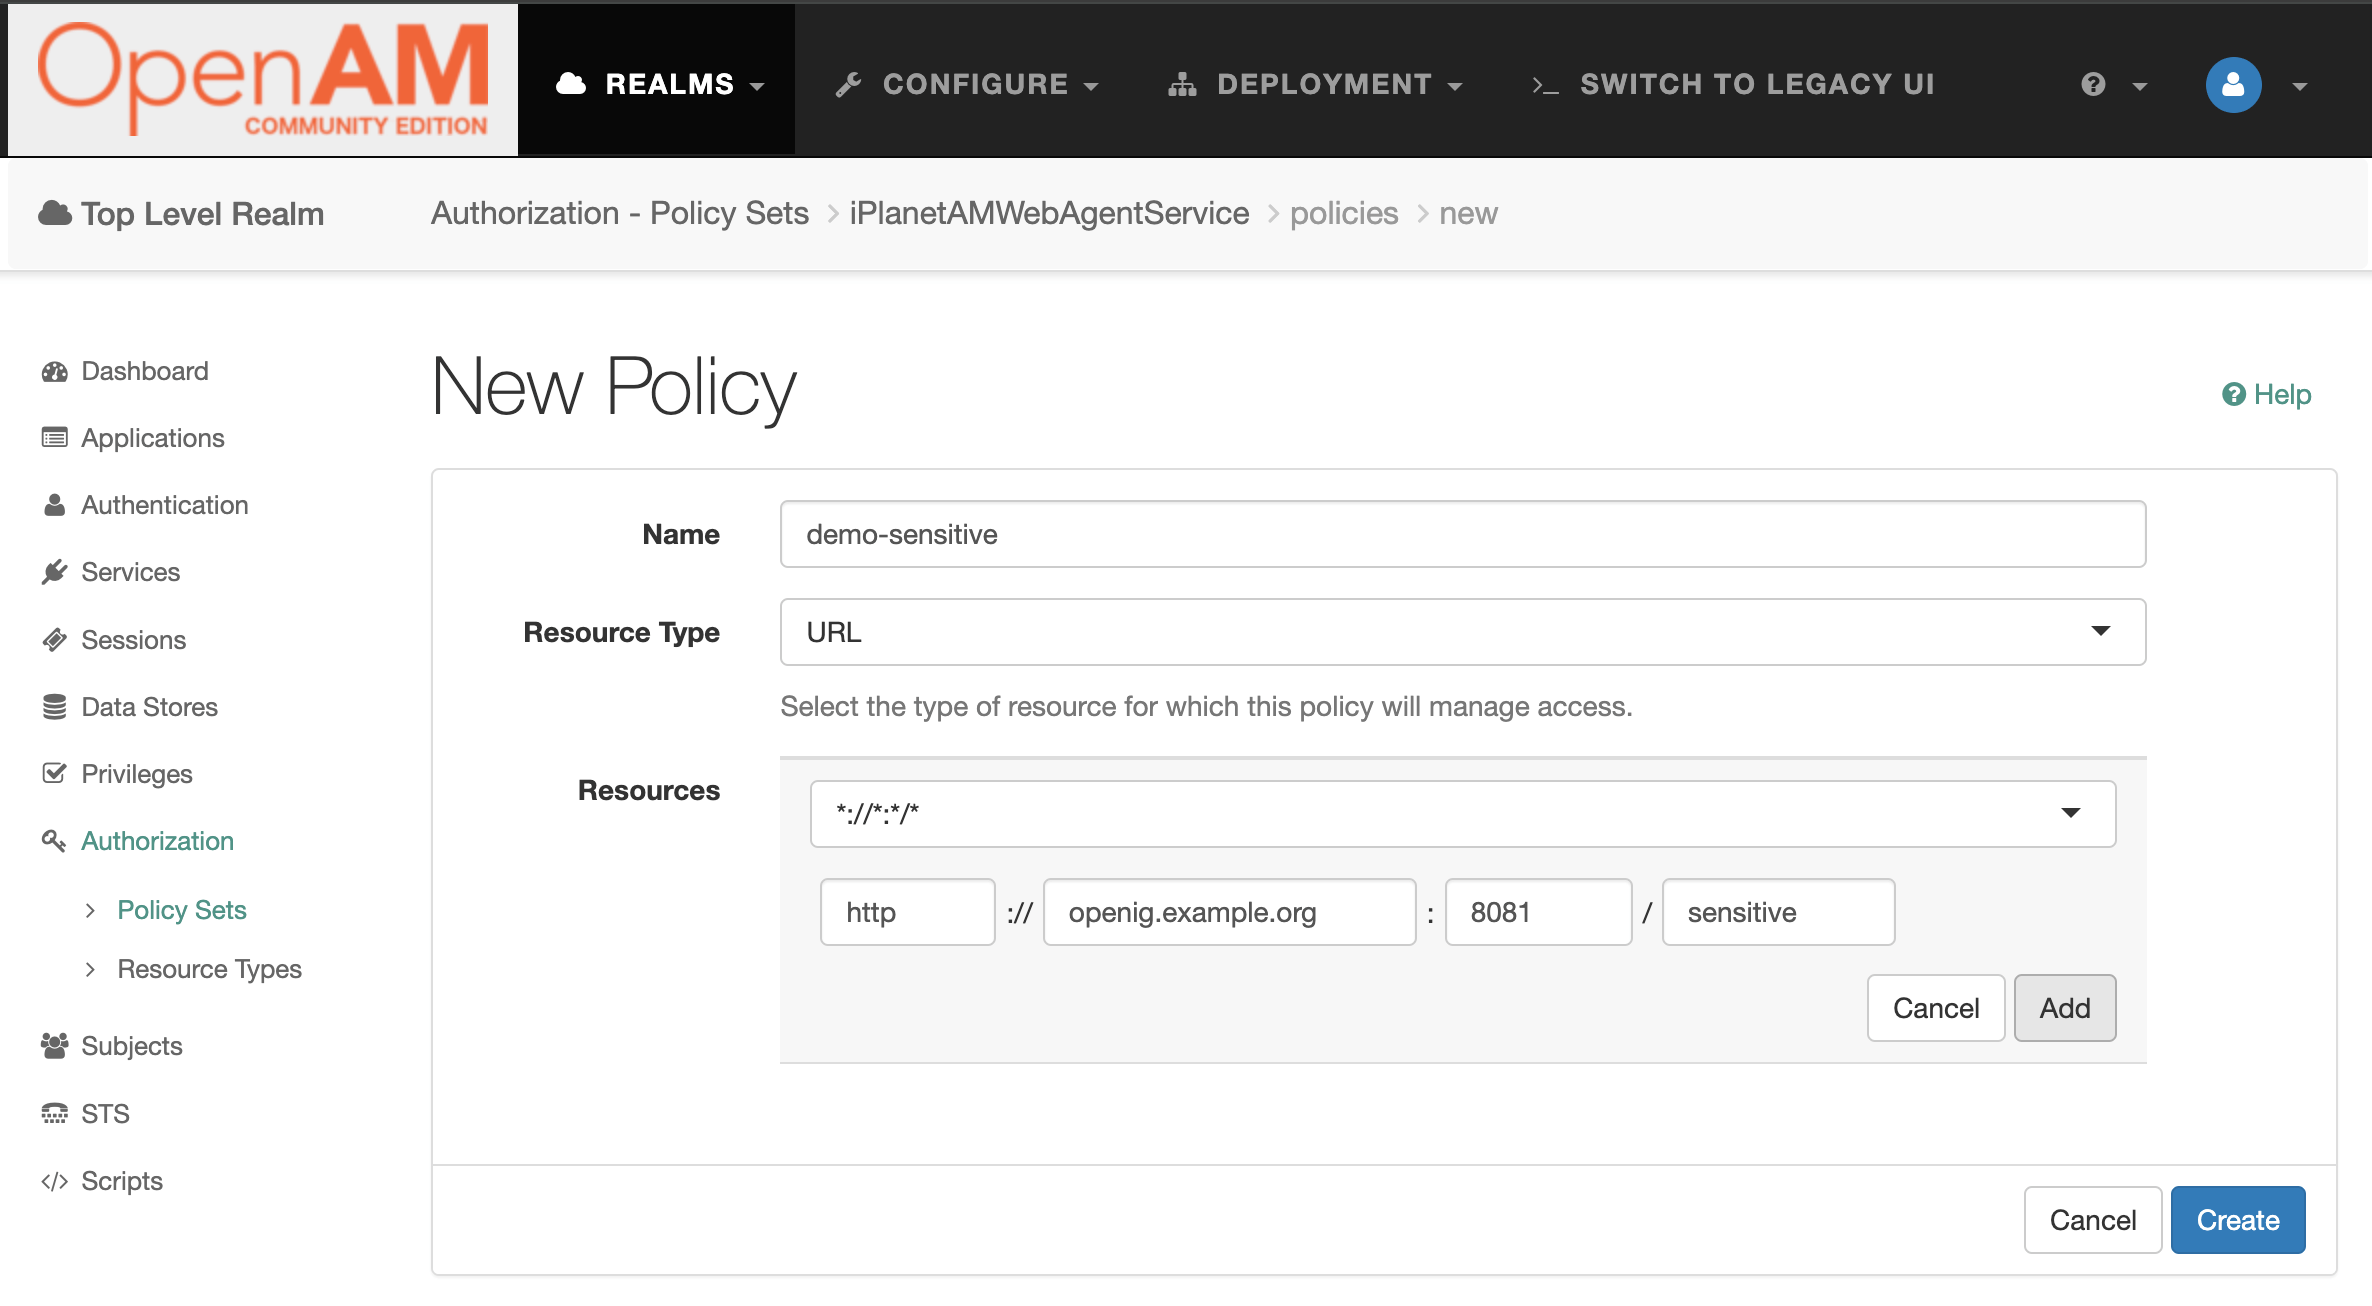
For the created policy, on the Resources tab, allow GET and POST requests.
Save the changes. This policy will authorize requests authenticated by the `totp` chain.
Now configure the policy so that access is only valid for 20 seconds. OpenAM doesn't have such a policy out of the box, so we'll configure a policy script. But first let's prepare OpenAM to work with the time from the script. In the top menu, go to Configure → Global Services. In the list that opens, select Scripting. Click the Secondary Configuration tab.
In the **Java class whitelist**, add `java.time.*` to allow Groovy scripts to work with time and date.
Save the changes. From the console's top menu, select Realms → Top Level Realm and select Scripts from the menu on the left. Create a new script Auth Time Policy Condition.
Script type - POLICY_CONDITION. Language - Groovy.
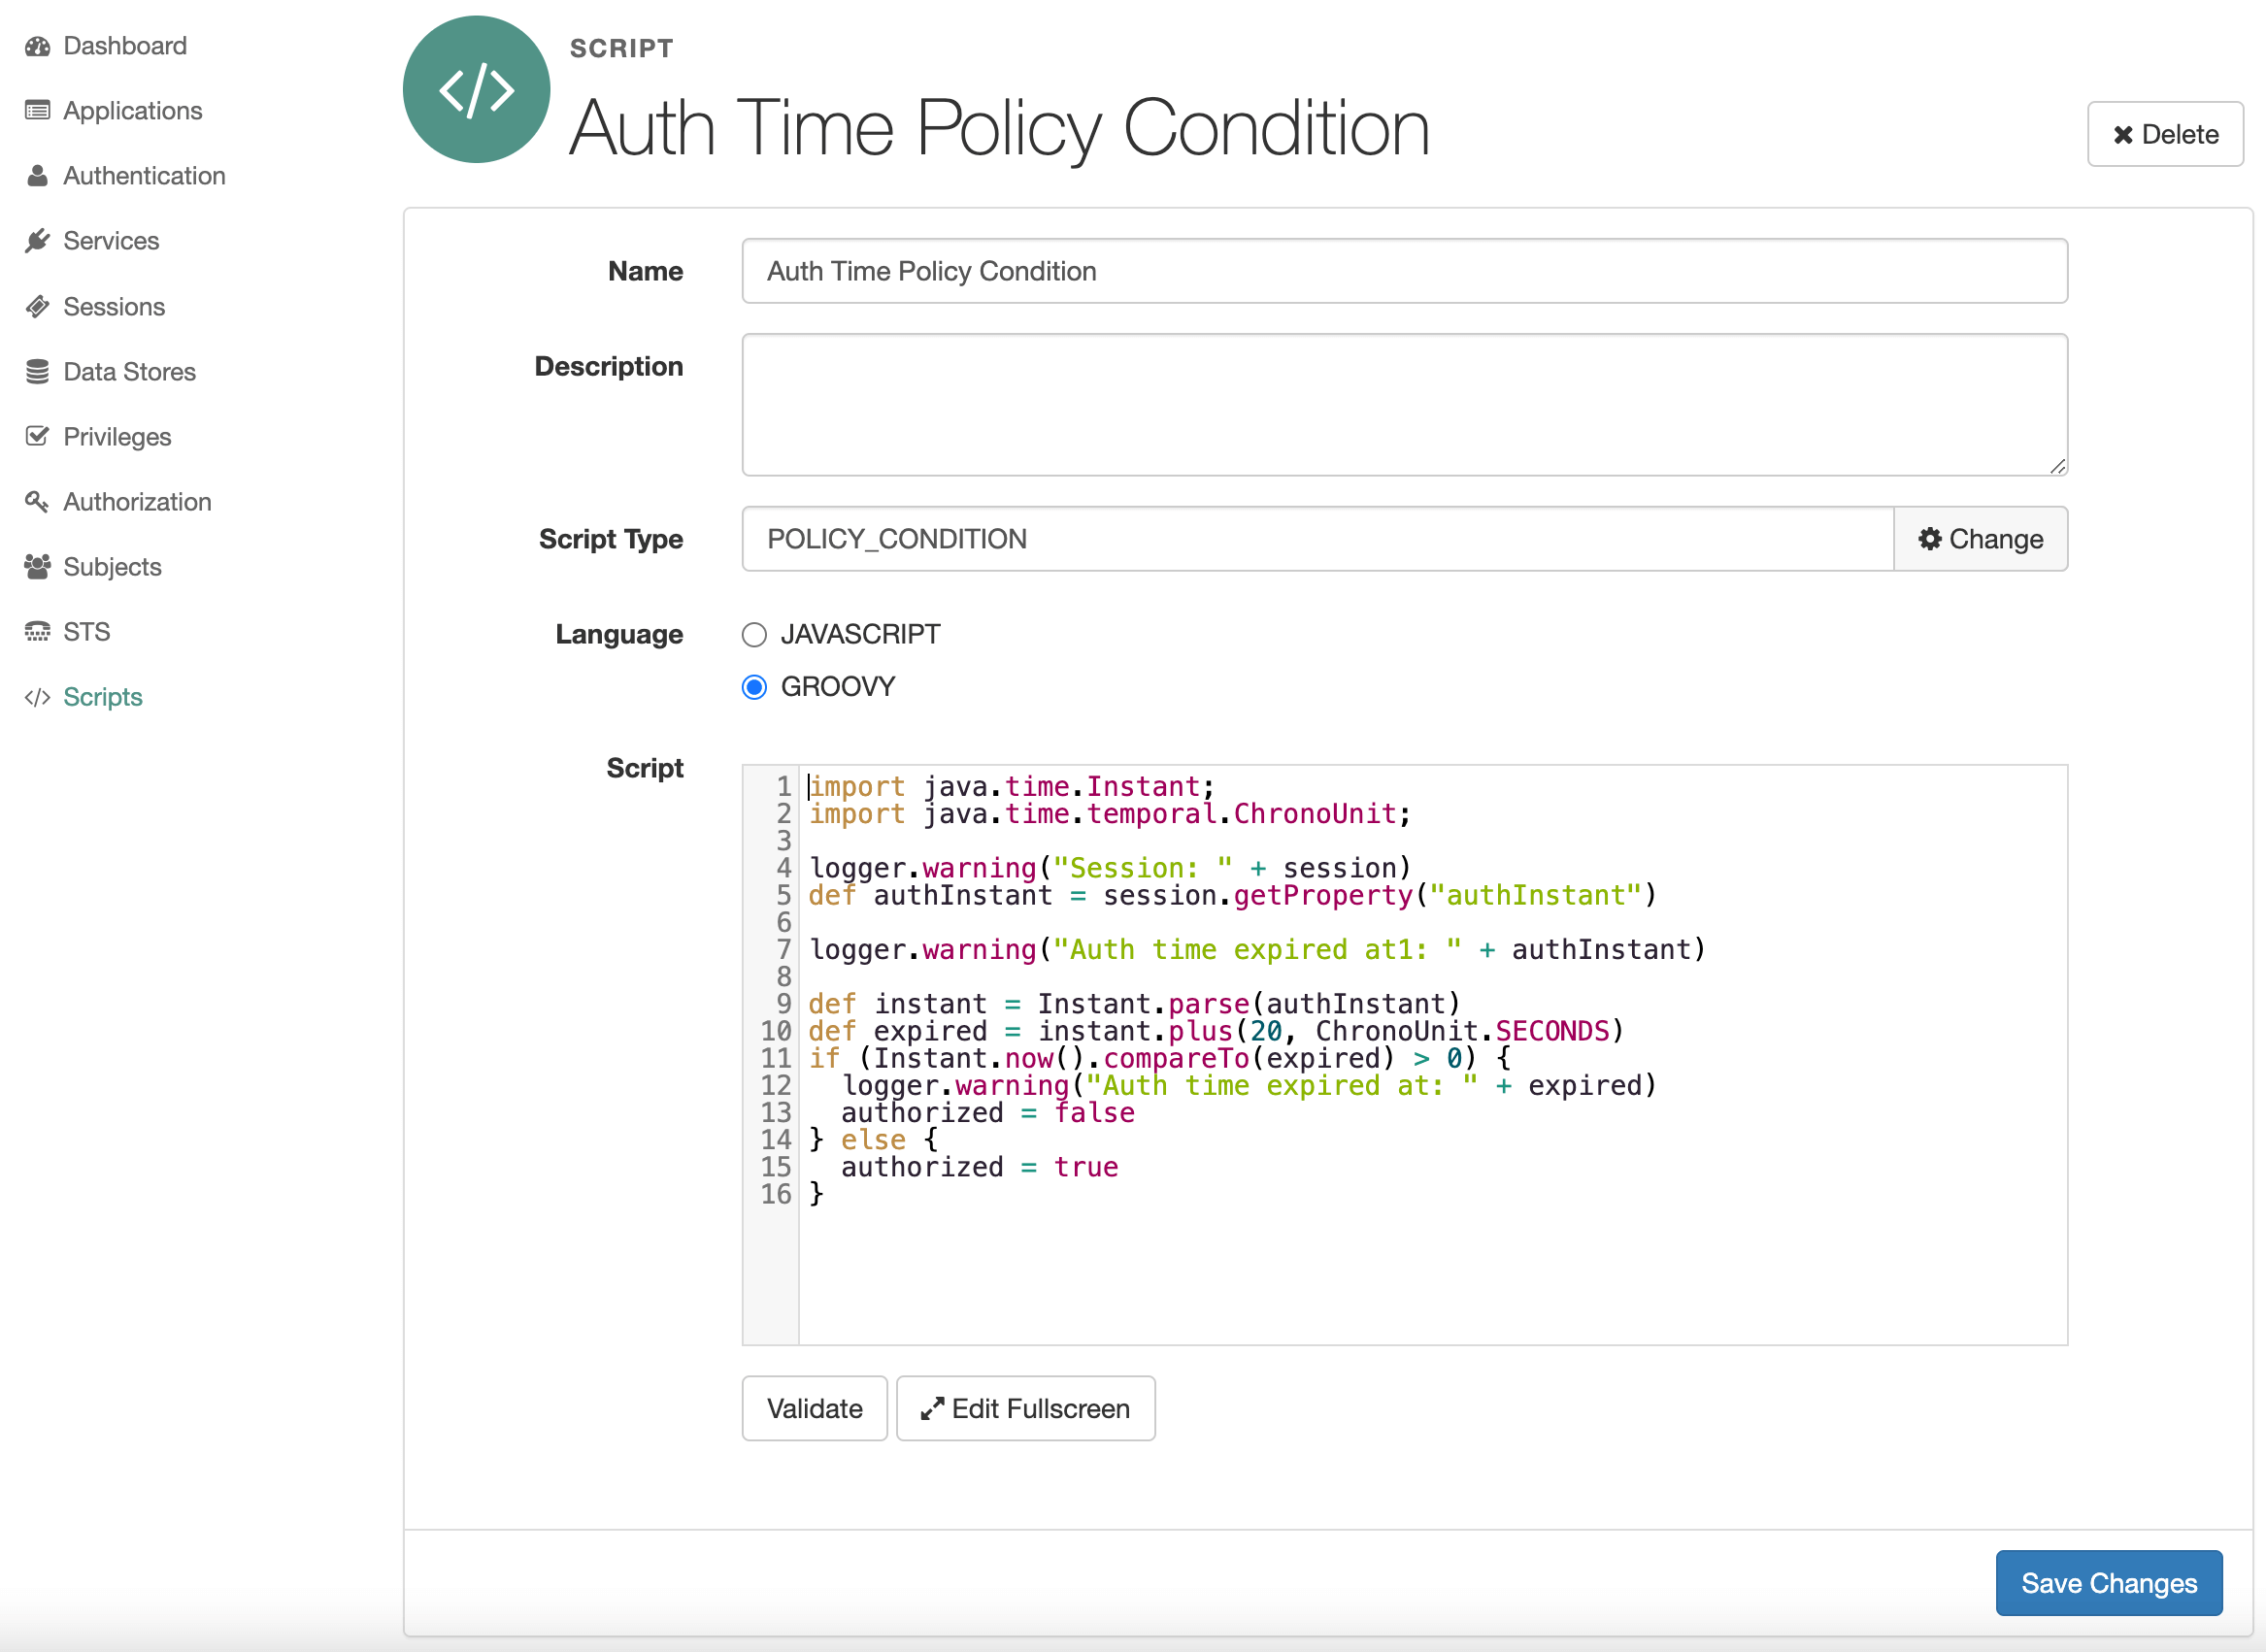
logger.warning("Auth time expired at: " + expired)
authorized = false
} else {
authorized = true
}
```
Save the policy changes.
Now let's configure the use of the script in the authorization policy. In the left menu, go to **Authorization** → **Policy Sets** → **Default Policy Set** → **demo-sensitive**.
On the Environments tab, add a condition with the Script type and the value Auth Time Policy Condition.
Now let's configure the use of MFA for the `demo` user. This account was created when OpenAM was installed.
### OpenAM User Setup
Log out of the admin console, or open a browser in Incognito mode and go to [http://openam.example.org:8080/openam/XUI/#login](http://openam.example.org:8080/openam/XUI/#login)
In the login and password fields, enter `demo` and `changeit` respectively. This will open the user profile.
Now, start the authentication process on the `totp` chain. For this, open the link [http://openam.example.org:8080/openam/XUI/#login/&service=totp&ForceAuth=true](http://openam.example.org:8080/openam/XUI/#login/&service=totp&ForceAuth=true)
A window will open asking you to register a new device
### Configuring Authentication Token Conversion to JWT
After successful authentication, OpenAM creates a session and writes the session ID, which is a random character set, in a cookie to the browser. We will configure OpenAM so that third-party applications, such as OpenIG, can exchange the authentication token to the JWT to make it easier for third-party applications to work with.
Open the OpenAM admin console as described earlier. Select **Top Level Realm**. From the menu on the left, select **STS**. In the list that opens, create a new **Rest STS** instance. Fill in the settings
| The id of the OpenID Connect Token Provider | [https://openam.example.org/openam](https://openam.example.org/openam) |
| Client secret | changeme |
| Confirm client secret | changeme |
| The audience for issued tokens | [https://openam.example.org/openam](https://openam.example.org/openam) |
Save the Rest STS instance conversion settings.
You can read more about installing and configuring OpenAM in the documentation: [https://doc.openidentityplatform.org/openam/](https://doc.openidentityplatform.org/openam/)
## Configure the OpenIG authorization gateway
Add the OpenIG service to the `docker-compose.yml` file
The `config.json` file defines a filter chain for each request to the demo application:
- `STSFilter`- if the HTTP request contains a cookie from OpenAM, the filter gets a JWT from this cookie, which is written to the context for further use
- `AuthorizationHeaderFilter`- adds the JWT received from OpenAM to the request in the `Authorization` header for use in the protected application
- `AuthenticationRedirectionFilter`- if the JWT is not present in the request context, redirects the user to authenticate with OpenAM.
An `EndpointHandler` handler is defined in the `heap` object that proxies requests in OpenIG to the demo application.
### Configure Routes to the Demo Application
In the `config` folder, create a `routes` folder and add a `10-home.json` route
The route simply proxies requests to the demo application using the `EndpointHandler` defined in the `config.json` configuration file.
We will add the route to a URL with sensitive information of the demo application. We will then configure a filter for the route so that it uses the authorization policy from OpenAM.
Add the `20-sensitive.json` route to the `routes` folder
The route uses `MFAPEPFilter` to get the result of the authorization policy from OpenAM. And, if the policy check fails, redirects to authentication with a one-time code.
You can read more about installing and configuring OpenIG in the documentation: [https://doc.openidentityplatform.org/openig/](https://doc.openidentityplatform.org/openig/)
## Test the Solution
Start OpenIG with the `docker compose ui openig` command.
Log out of OpenAM if you are still authenticated.
Open the URL of the OpenIG protected demo application: [http://openig.example.org:8081/](http://openig.example.org:8081/). You will be redirected to authenticate to OpenAM. Enter the test user login and password: `demo` and `changeit`.
After authentication, you will be redirected to the main screen of the demo application
Wait 30 seconds and reload the page. You will be redirected to authentication with a one-time code again.
**[Test the Solution](https://doc.openidentityplatform.org/openam/how-to/openam-and-zero-trust-confirming-critical-operations#openam-and-zero-trust-confirming-critical-operations-test-the-solution)**
This file contains hidden or bidirectional Unicode text that may be interpreted or compiled differently than what appears below. To review, open the file in an editor that reveals hidden Unicode characters.
Learn more about bidirectional Unicode characters
| API gateway control | ✅ [doc](https://github.com/OpenIdentityPlatform/OpenAM/wiki/How-to-Add-Authorization-and-Protect-Your-Application-With-OpenAM-and-OpenIG-Stack)| ⛔️ |
| Apache Web Server Policy Agent | ✅ [doc](https://doc.openidentityplatform.org/openam/web-users-guide/chap-apache)| ⛔️ |
| Login and password authentication | ✅ [doc](https://doc.openidentityplatform.org/openam/reference/chap-auth-modules#data-store-module-ref)| ✅ [doc](https://www.keycloak.org/docs/latest/server_admin/index.html#_authentication-flows)|
| Microsoft Active Directory authentication | ✅ [doc](https://doc.openidentityplatform.org/openam/reference/chap-auth-modules#active-directory-module-ref)| ✅ [doc](https://www.keycloak.org/docs/latest/server_admin/index.html#_user-storage-federation)|
| Authentication for demo access | ✅ [doc](https://doc.openidentityplatform.org/openam/reference/chap-auth-modules#anonymous-module-ref)| ⛔️ |
| HOTP via SMS or email | ✅ [doc](https://doc.openidentityplatform.org/openam/reference/chap-auth-modules#hotp-module-ref)| ⛔️ |
| One time password with HOTP or TOTP authentication | ✅ [doc](https://doc.openidentityplatform.org/openam/reference/chap-auth-modules#oath-module-ref)| ✅ [doc](https://www.keycloak.org/docs/latest/server_admin/index.html#one-time-password-otp-policies)|
**[Single Sign On (SSO) and Federation](https://doc.openidentityplatform.org/openam/how-to/openam-vs-keycloak#openam-vs-keycloak-single-sign-on-sso-and-federation)**
**[Audit logging and Monitoring](https://doc.openidentityplatform.org/openam/how-to/openam-vs-keycloak#openam-vs-keycloak-audit-logging-and-monitoring)**
This file contains hidden or bidirectional Unicode text that may be interpreted or compiled differently than what appears below. To review, open the file in an editor that reveals hidden Unicode characters.
Learn more about bidirectional Unicode characters
This article has moved to the Open Identity Platform documentation site:
# Intro
Nowadays, people use more and more different online services in everyday life, and each service requires authentication. So, for each service, you need to remember your username and password. And, even the login for each service can be the same (for example, the email), then the password must be unique for each service. It is much better to have a complex password, i.e: have a length of 8 characters and more, contain uppercase and lowercase letters, numbers, and special characters.
Of course, it is impossible to remember the complex password for each service, so users either use simple passwords or use the same password for each service. Some users even write their own passwords on a piece of paper and put it under the keyboard (sic!). Of course, it compromises user accounts.
Please use the documentation site for the current version.
Passwordless authentication could solve this problem. In the following article, I will try to consider main passwordless authentication methods, as well as their advantages and disadvantages.
<aname="intro"></a>
There are the following passwordlessauthenticationmethods:
During authentication, the user enters his email, the service generates a one-timelink and sends it to the specified email. Then the user must open the mail application, receive an email from the service, and follow the link.
**[One-time Authentication Link Sent to the E-mail](https://doc.openidentityplatform.org/openam/how-to/passwordless-authentication-methods#passwordless-authentication-methods-one-time-authentication-link-sent-to-the-e-mail)**
Pros:
* Low cost - sending e-mail is almost free
<aname="one-time-password-via-sms-or-push"></a>
Cons:
* The need for the user to open an additional email client application
* If the attacker has access to the user's e-mail, then authentication can be compromised.
* There is a risk of receiving an email with a phishing link to enter a malicious resource
**[One-time password via SMS or Push](https://doc.openidentityplatform.org/openam/how-to/passwordless-authentication-methods#passwordless-authentication-methods-one-time-password-via-sms-or-push)**
## One-time password via SMS or Push
The most widely used passwordless authentication method. During authentication, the user enters his phone number, then he receives an SMS or pushes notification with a one-time confirmation code, which has a limited validity period. The user enters the received one-time code in the service and authenticates.
* Relative reliability - to fake a SIM card or steal a phone seems to be a rather non-trivial task for an attacker. In addition, the mobile phone can determine the location of the attacker.
**[HMAC and Time-based one-time password](https://doc.openidentityplatform.org/openam/how-to/passwordless-authentication-methods#passwordless-authentication-methods-hmac-and-time-based-one-time-password)**
Cons:
* Users must manually enter the code from an SMS, every time they authenticate, which can be annoying.
* For receiving a push notification users should install a mobile application.
<aname="persistent-cookie"></a>
## HMAC and Time-based one-time password
HMAC-based one-time password (HOTP) is generating a one-time password algorithm based on authentication attempts and a shared secret between user server and client. A time-based one-time password - is an improvement of HOTP and generates passwords based on system time. These algorithms generate passwords on both a server and a client each time user authenticates the system.
* For TOTP there is a need to synchronize time between server and client
* The shared secret can be stolen and attackers can generate their own TOTP values to authenticate
**[Using third-party Identity Provides (via Social Networks)](https://doc.openidentityplatform.org/openam/how-to/passwordless-authentication-methods#passwordless-authentication-methods-using-third-party-identity-provides-via-social-networks)**
## Persistent Cookie
<aname="usb-token-device"></a>
One of the simplest and widely used way to authenticate without a password. After authentication, a special cookie is set in the user's browser, which is then used to authenticate the user.
## Using third-party Identity Provides (via Social Networks)
During authentication, the user is prompted to authenticate using an existing account of a third-party Identity Provider (Google, Facebook, LinkedIn)
<aname="conclusion"></a>
Pros:
* Very easy to use, if the user has already authenticated to the identity provider.
Cons:
* If the user lost his Identity Provider account, access to the service can also be lost.
* Users may not have profiles in the Identity Providers list supported by the service.
## USB Token Device
Users can be authenticated using a USB token device. There is a cryptographic key, that uniquely identifies the device holder.
Pros:
* High security - it is almost not possible to forge the token
Cons:
* The user need to carry an extra device
* Sometimes, there is a need to install special software to authenticate
* The token device can be lost or stolen
## Mobile Phone Biometrics
While authenticating, the user receives notifications on his mobile phone application, asking for confirmation via fingerprint, face recognition, and so on.
Pros:
* High security, because mobile phone manufacturers are focusing on mobile phone security and protecting them from unauthorized access.
* Almost everyone has a mobile phone
Cons:
* User need to install and setup additional application on his phone
# Conclusion
All of the methods above have advantages and disadvantages. But for better user experience, is the usage of a combination of several methods. For example, to provide the ability to authenticate using OAuth or OpenID and a saved cookie. Also, a promising and secure approach is authentication using mobile phone biometrics, such as fingerprint or face recognition authentication.
This file contains hidden or bidirectional Unicode text that may be interpreted or compiled differently than what appears below. To review, open the file in an editor that reveals hidden Unicode characters.
Learn more about bidirectional Unicode characters
Тhe [[Persistent Cookie module]] supports the configuration of cookie lifetimes based on requests and a maximum time. Note that by default, the persistent cookie is called **session-jwt**.
This article has moved to the Open Identity Platform documentation site:
> If Secure Cookie is enabled [[Configuration]] > [[Servers and Sites]] > [[Default Server Settings]] > **Security** > **Cookie**, the [[Persistent Cookie module]] only works over HTTPS.
>
>
Before you begin, make sure a public key alias is defined in AM. The [[Persistent Cookie module]] encrypts a [[JSON Web Token (JWT)]] using a public key from the AM keystore. The keystore must be configured under [[Realms]] > **Realm Name** > [[Authentication]] > [[All Core Settings]] > [[Security]] > **Persistent Cookie Encryption Certificate Alias**. If the keystore changes and the default test key is no longer present, the public key alias must be updated to reflect the change, otherwise the module will fail. Similarly, in multi-instance deployments, the keypair must be available on all AM instances.
Please use the documentation site for the current version.
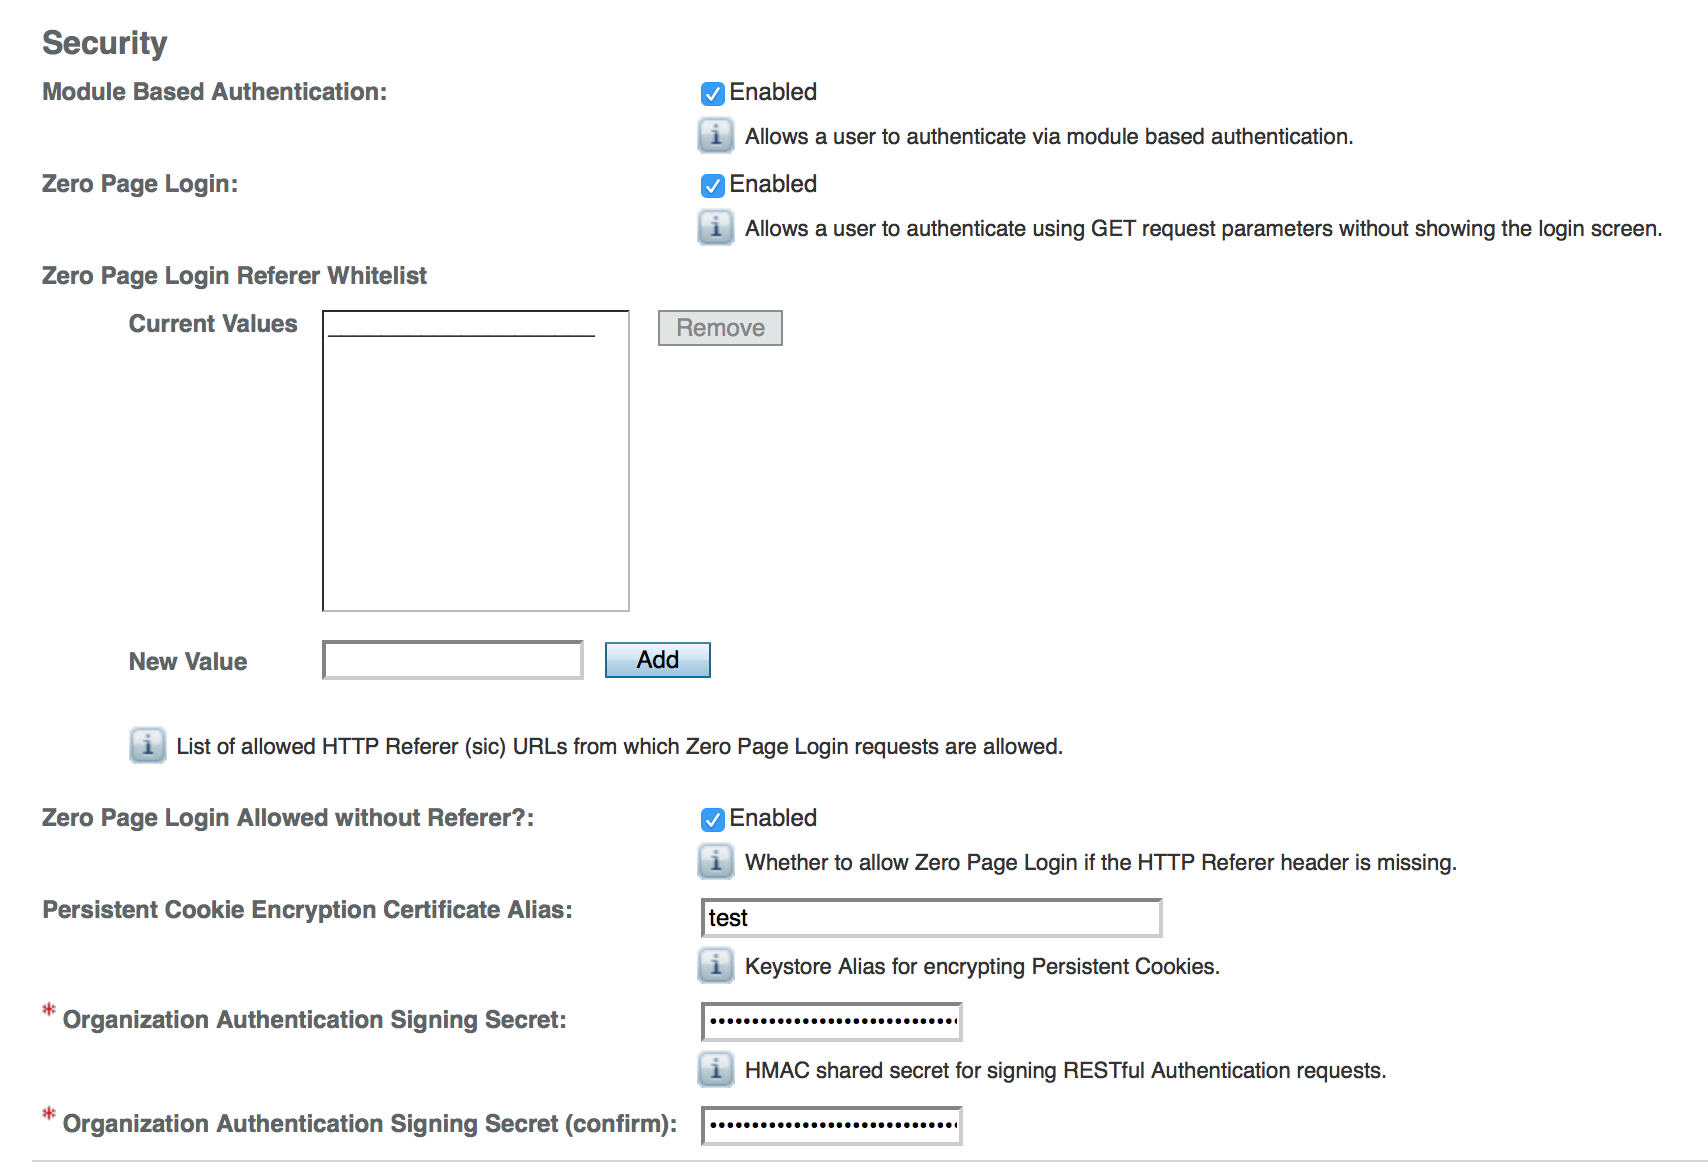
To configure the [[Persistent Cookie module]] globally in the AM console, navigate to [[Configuration]] > [[Authentication]], and then click **Persistent Cookie**. In the window that appears you should see the following attributes:
**[
ssoadm service name: iPlanetAMAuthPersistentCookieService
When the [[Persistent Cookie module]] enforces the client IP address, and AM lies behind a load balancer or proxy layer, configure the load balancer or proxy to send the address by using the **X-Forwarded-For** header, and configure OpenAM to consume and forward the header as necessary. For details, see [[Handling HTTP Request Headers]] in the [[Installation Guide]].
<aname="max-life"></a>
The [[Persistent Cookie module]] belongs with a second module in an [[Authentication Chaining]]. To see how this works, navigate to [[Realms]] >**Realm Name**> [[Authentication]] > [[Authentication Chaining]]. Create a new chain and add modules as shown in the figure. The following example shows how a [[Persistent Cookie module]] is sufficient. If the persistentcookie does not yet exist, authentication relies on LDAP:
This file contains hidden or bidirectional Unicode text that may be interpreted or compiled differently than what appears below. To review, open the file in an editor that reveals hidden Unicode characters.
Learn more about bidirectional Unicode characters
Change apache_agent to httpd in the above command.
apache_agent is not available on docker hub.
Open in browser link http://example.org, and you will be redirected to OpenAM Authentication. After authentication you should see default Apache HTTP Server page
**[Apache HTTP Server Configuration](https://doc.openidentityplatform.org/openam/how-to/quick-start-guide#quick-start-guide-apache-http-server-configuration)**
This file contains hidden or bidirectional Unicode text that may be interpreted or compiled differently than what appears below. To review, open the file in an editor that reveals hidden Unicode characters.
Learn more about bidirectional Unicode characters
[SAMLv2](https://en.wikipedia.org/wiki/SAML_2.0), despite its venerable age, is the de facto standard for [SSO (Single Sign On)](https://en.wikipedia.org/wiki/Single_sign-on) in an enterprise environment. And in the following article, we will set up a SAML login to WordPress using [OpenAM](http://github.com/OpenIdentityPlatform/OpenAM) authentication. That is, when authenticating to WordPress, users will be redirected to OpenAM and, after authenticating to OpenAM will be automatically authenticated to WordPress. Given OpenAM's flexibility in customizing authentication methods, you can customize WordPress login not only by login and password but also, for example, using built-in Windows authentication (NTLMv2 or Kerberos), adding a second authentication factor (biometrics or one-time password) or even by scanning a QR code in a special mobile app.
Instead of WordPress, it can be almost any application that supports SAMLv2. The OpenAM configuration will be nearly identical. Only the settings for the application itself will differ.
## Some terminology
**Service Provider (SP)** - The application whose services users will use after authentication.
**Identity Provider (IdP)** - the application that authenticates users and provides the Service Provider with information about the authenticated accounts.
In our case, the Identity Provider is OpenAM and the Service Provider is WordPress.
## Test environment
For demonstration purposes, all applications will be run in Docker containers via the Docker Compose utility.
Add the OpenAM and WordPress hostnames `127.0.0.0.1 openam.example.org wordpress.example.org` to the `hosts` file.
On systems running Windows, the `hosts` file is `C:\Windows\System32\drivers\etc\hosts`. On Linux and Mac systems, `/etc/hosts`.
Create a `docker-compose.yml` file with the following contents:
If you already have WordPress configured, you can skip this section. If not, open the[http://wordpress.example.org:8081/wp-admin/install.php](http://wordpress.example.org:8081/wp-admin/install.php) link in your browser. Select the language and go to settings. Fill in the settings and be sure to remember the generated password. You will need it to log in to the administrator console.
<aname="install-the-samlv2-plugin"></a>
**[Install the SAMLv2 Plugin](https://doc.openidentityplatform.org/openam/how-to/saml-authentication-in-wordpress-via-openam#saml-authentication-in-wordpress-via-openam-install-the-samlv2-plugin)**
After completing the configuration, navigate to the login form and enter the administrator username and password specified during installation. The administrator console will open.
<aname="create-a-hosted-identity-provider"></a>
### Install the SAMLv2 Plugin
**[Create a Hosted Identity Provider](https://doc.openidentityplatform.org/openam/how-to/saml-authentication-in-wordpress-via-openam#saml-authentication-in-wordpress-via-openam-create-a-hosted-identity-provider)**
In the administrator console, select Plugins. Click the `Add New Plugin` button and install the miniOrange SAML Single Sign On - SSO Login plugin.
<aname="configure-remote-service-provider"></a>
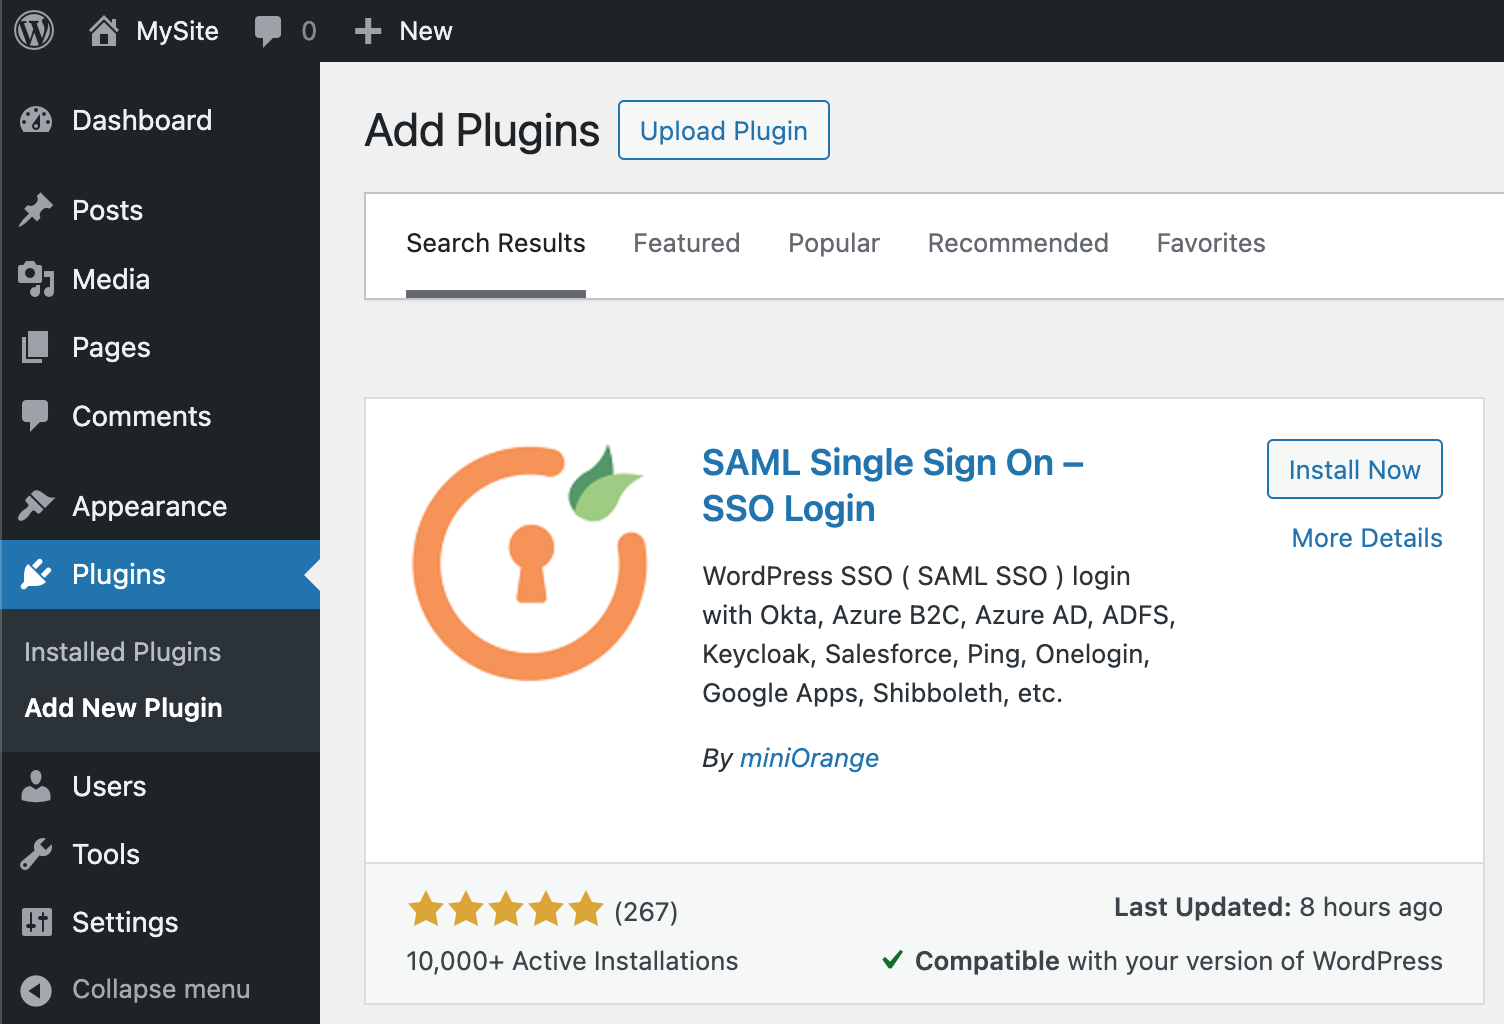
**[Configure Remote Service Provider](https://doc.openidentityplatform.org/openam/how-to/saml-authentication-in-wordpress-via-openam#saml-authentication-in-wordpress-via-openam-configure-remote-service-provider)**
Once installed, activate the plugin by clicking the Activate button in the plugin window. In the left panel, you will see the settings item for the installed plugin.
Go to the `Service Provider Metadata` section in the plugin settings panel and copy the Metadata URL. Change the port from 8081 to 80 because OpenAM will load metadata from the WordPress Docker container, available on port 80 within the Docker environment: `http://wordpress.example.org:80/?option=mosaml_metadata`.
In the `Entity Providers` section, open the settings for Identity Provider `http://openam.example.org:8080/openam`. On the `Assertion Content` tab, go to `Name ID Format` → `NameID Value Map` and add the value `urn:oasis:names:tc:SAML:1.1:nameid-format:unspecified=uid`
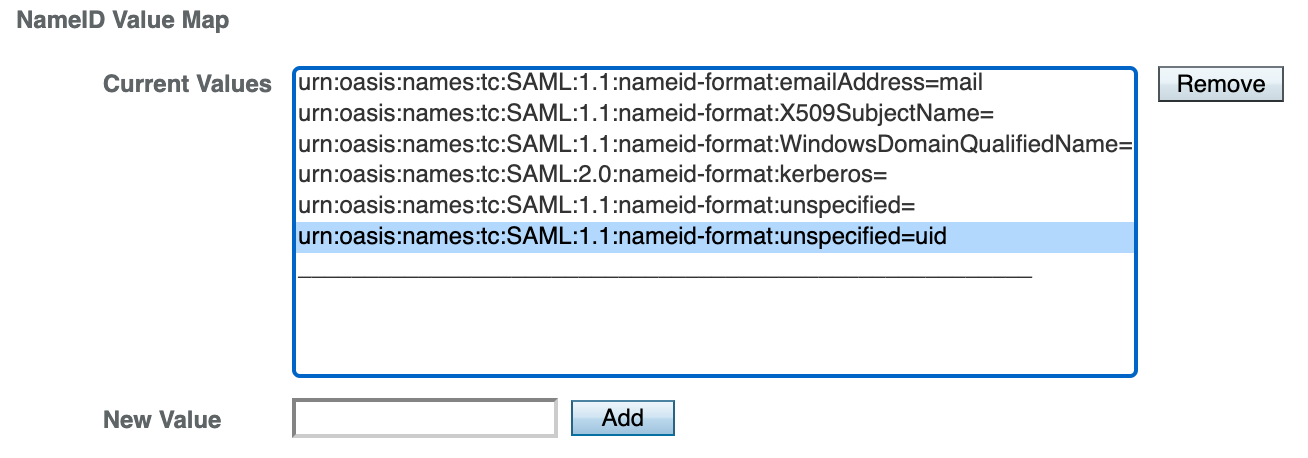
Press the `Save` button.
### Configure Remote Service Provider
Next, register WordPress as a remote service provider. In the OpenAM administrator console, select `Top Level Realm`, then `Configure SAMLv2 Provider` → `Configure Remote Service Provider`.
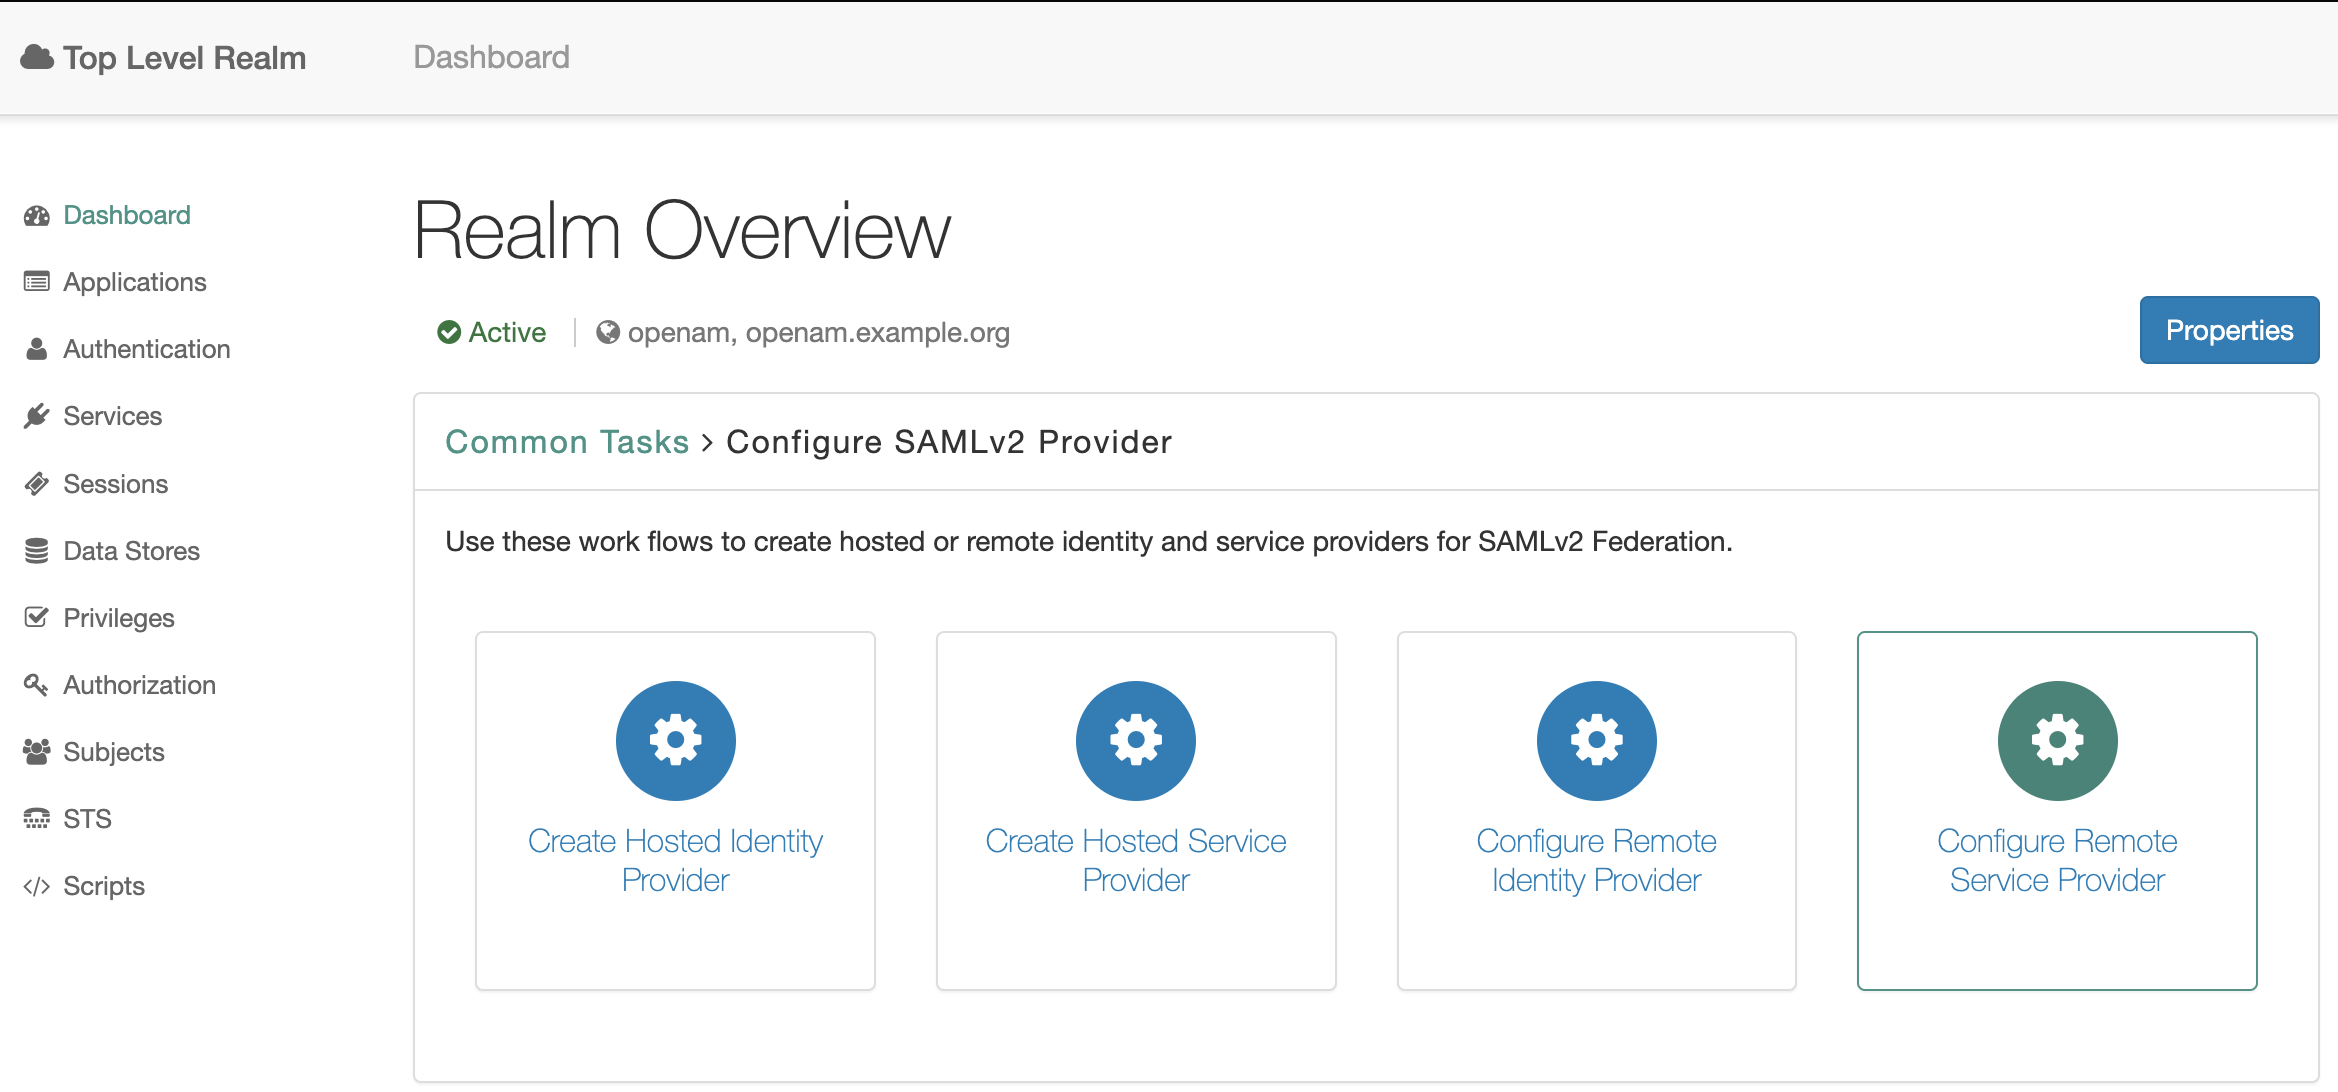
Fill out the Remote Service Provider settings as shown in the screenshot. The metadata URL should be as in the SAMLv2 WordPress plugin configuration step: `http://wordpress.example.org:80/?option=mosaml_metadata`.
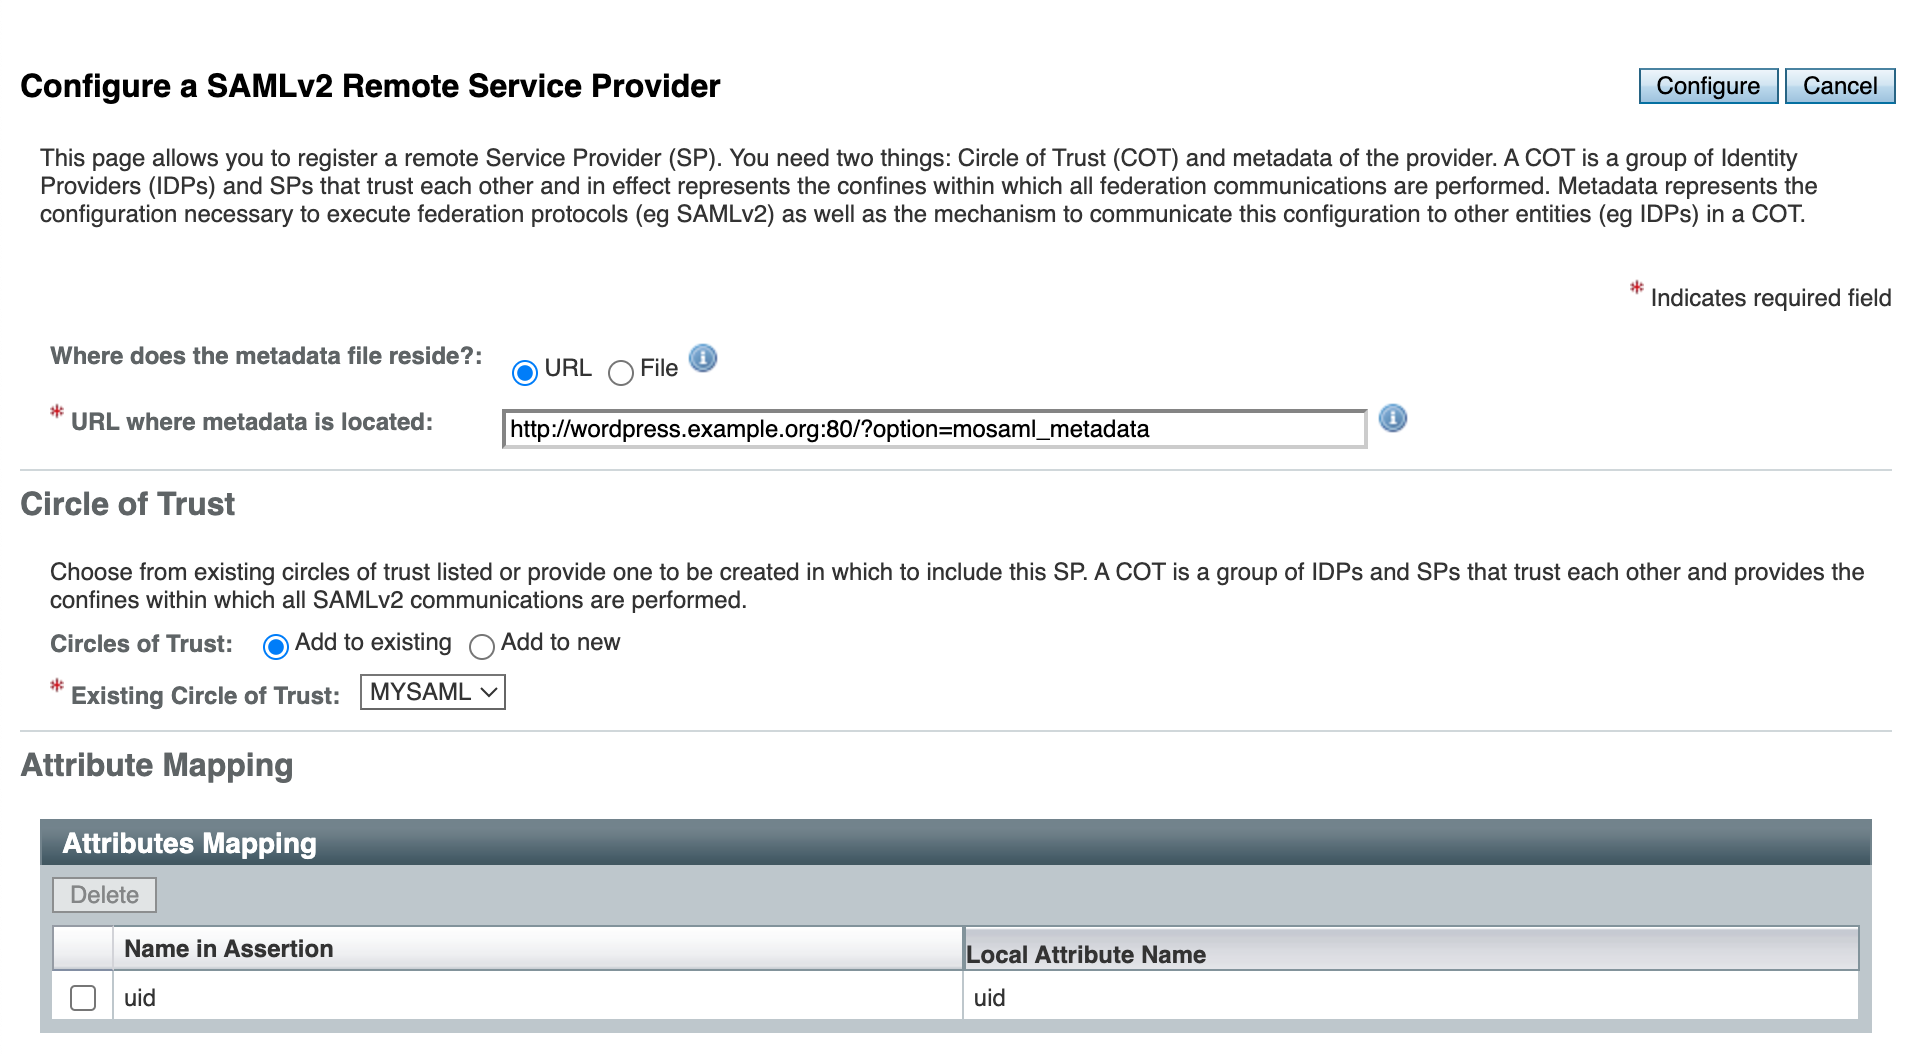
In the `Configure Service Provider` section, click the `Upload IDP Metadata` tab.
Fill in the fields as shown in the screenshot below. The SAML metadata URL for OpenAM will be:`http://openam.example.org:8080/openam/saml2/jsp/exportmetadata.jsp`
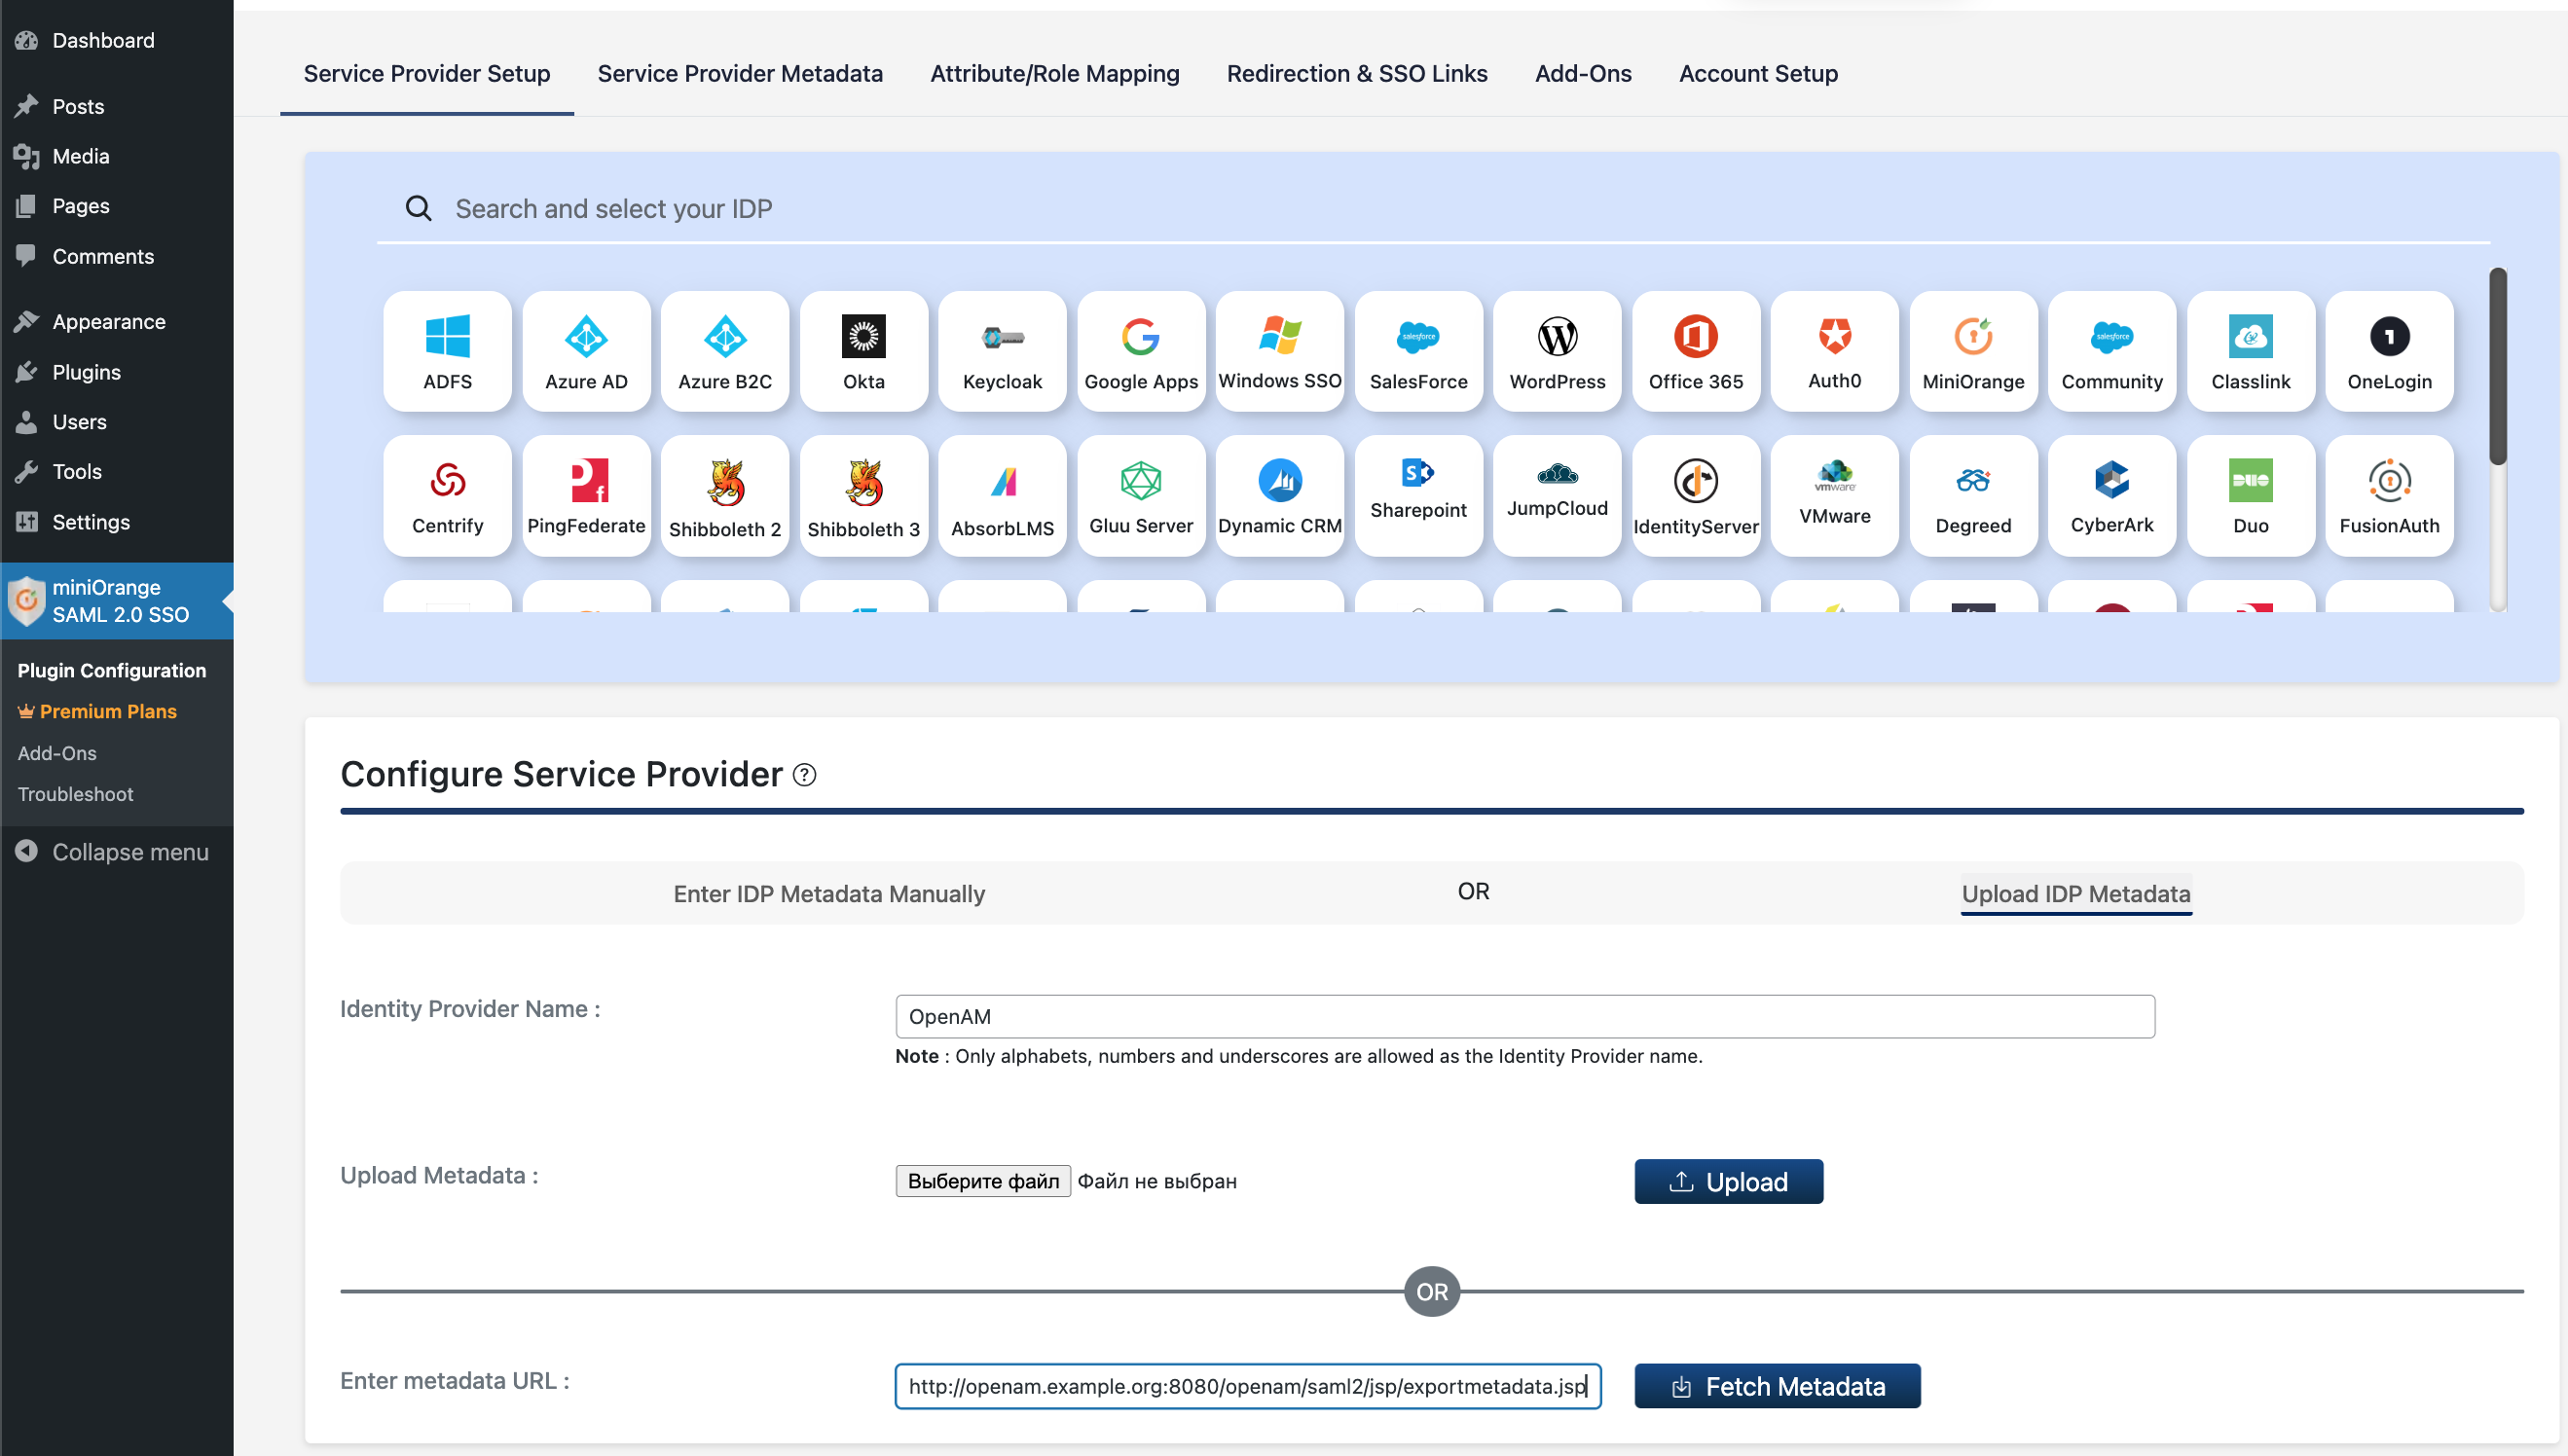
Press the `Fetch Metadata` button.
The configuration is now complete.
## Test the Solution
Now let's test the solution. Log out of the WordPress administration console, OpenAM administration console or open a browser window in Incognito mode. Open the [http://wordpress.example.org:8081/wp-admin/](http://wordpress.example.org:8081/wp-admin/) link. The OpenAM login button will appear in the WordPress login window.
Click this button. You will be redirected to OpenAM authentication. Enter the user name `demo` and password `changeit`. The `demo` user is created during the initial installation of OpenAM. In a production environment, you should delete this user or change it's the default password.
**[Test the Solution](https://doc.openidentityplatform.org/openam/how-to/saml-authentication-in-wordpress-via-openam#saml-authentication-in-wordpress-via-openam-test-the-solution)**
This file contains hidden or bidirectional Unicode text that may be interpreted or compiled differently than what appears below. To review, open the file in an editor that reveals hidden Unicode characters.
Learn more about bidirectional Unicode characters
This article has moved to the Open Identity Platform documentation site:
To configure SAML authentication, there are the following prerequisites:
[SAML Authentication in Yandex Cloud via OpenAM](https://doc.openidentityplatform.org/openam/how-to/saml-authentication-in-yandex-cloud-via-openam).
1. Docker platform installed and running Docker Engine
2. Locally running OpenAM instance. To launch OpenAM, run the following command.
Please use the documentation site for the current version.
```bash
docker run -h openam.example.org -p 8080:8080 --name openam openidentityplatform/openam
```
<aname="getting-started"></a>
Detailed description of the installation and initial configuration of OpenAM at [this link](https://github.com/OpenIdentityPlatform/OpenAM/wiki/Quick-Start-Guide)
## Create and Configure Identity Provider in OpenAM
**[Setting up Federation in OpenAM](https://doc.openidentityplatform.org/openam/how-to/saml-authentication-in-yandex-cloud-via-openam#saml-authentication-in-yandex-cloud-via-openam-setting-up-federation-in-openam)**
1. Open the administration console
2. Goto desired realm
3. Select **Configure SAMLv2 Provider** in the Common Tasks section
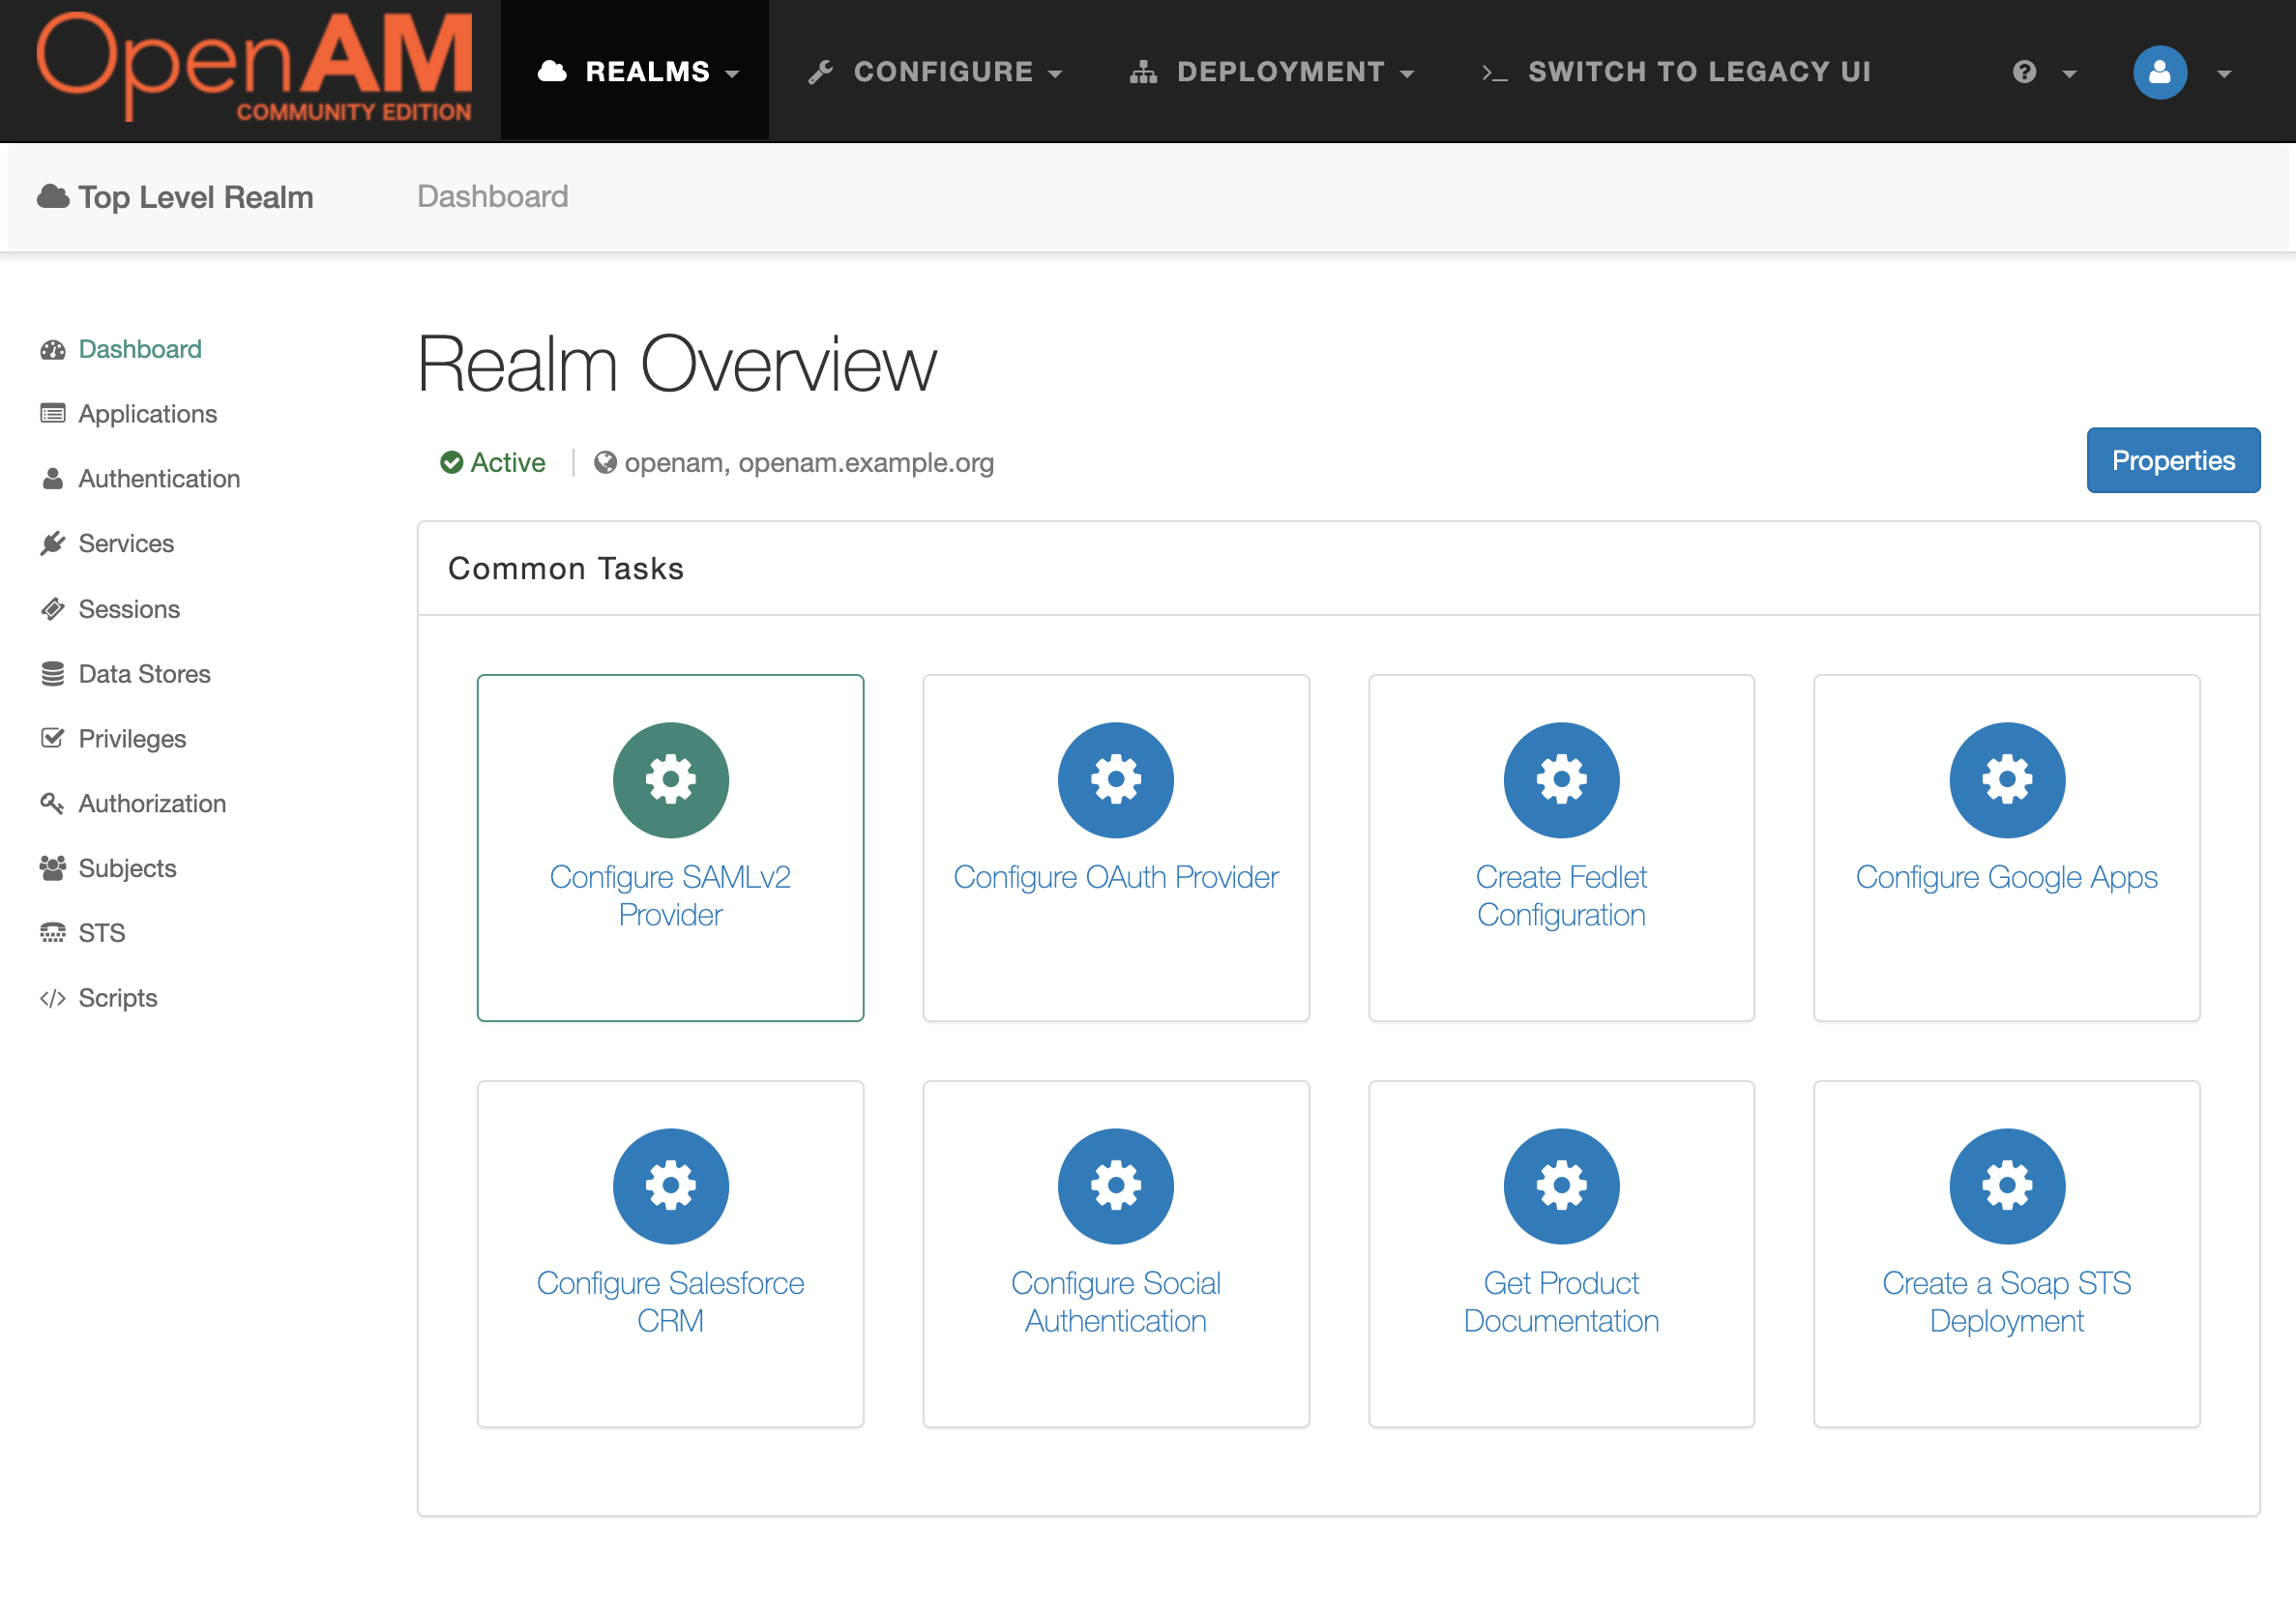
**[Create and Configure Identity Provider in OpenAM](https://doc.openidentityplatform.org/openam/how-to/saml-authentication-in-yandex-cloud-via-openam#saml-authentication-in-yandex-cloud-via-openam-create-and-configure-identity-provider-in-openam)**
**[Setting up the User Mapping in OpenAM](https://doc.openidentityplatform.org/openam/how-to/saml-authentication-in-yandex-cloud-via-openam#saml-authentication-in-yandex-cloud-via-openam-setting-up-the-user-mapping-in-openam)**
5. Select a Signing Key (for demonstration purposes we will use **test**), enter the Circle of Trust name, and then map user's attributes to OpenAM. For demonstration users will be mapped by email.
**[Creating and Setting up a Federation in Yandex Cloud Organization](https://doc.openidentityplatform.org/openam/how-to/saml-authentication-in-yandex-cloud-via-openam#saml-authentication-in-yandex-cloud-via-openam-creating-and-setting-up-a-federation-in-yandex-cloud-organization)**
1. Open the administration console
2. Goto desired realm
3. From the menu on the left, select the Applications section and navigate to SAML 2.0
4. In the Entity Providers list select `http://openam.example.org:8080/openam`
5. On the Assertion Content tab, under **NameID Format** in the **NameID Value Map** list, add the element `urn:oasis:names:tc:SAML:1.1:nameid-format:unspecified=mail`
6. Press the Save button
<aname="create-a-federation"></a>
## Creating OpenAM Users
**[Create a Federation](https://doc.openidentityplatform.org/openam/how-to/saml-authentication-in-yandex-cloud-via-openam#saml-authentication-in-yandex-cloud-via-openam-create-a-federation)**
1. Open the administration console
2. Goto desired realm
3. Create a new user and fill the Email Address attribute
<aname="add-certificates"></a>
# Creating and Setting up a Federation in Yandex Cloud Organization
2. On the left panel choose [Federations](https://org.cloud.yandex.ru/federations) .
3. Click the **Create Federation** button.
4. Give your federation a name. It must be unique within the folder.
5. You can also add a description, if required.
6. In the Cookie lifetime field, specify the time before the browser asks the user to re-authenticate.
7. In the **IdP Issuer** field, enter a link to the OpenAM: `http://openam.example.org:8080/openam`
8. In the Link to the **IdP login page** field, enter a link: `http://openam.example.org:8080/openam/SSORedirect/metaAlias/idp`
11. Click the **Create federation** button.
**[Creating a Remote Service Provider в OpenAM](https://doc.openidentityplatform.org/openam/how-to/saml-authentication-in-yandex-cloud-via-openam#saml-authentication-in-yandex-cloud-via-openam-creating-a-remote-service-provider-в-openam)**
## Add Certificates
<aname="creating-a-metadata-file-for-openam"></a>
While authenticating, the Cloud Organization service should be able to verify the IdP server certificate. To enable this, add the certificate to the federation:
**[Creating a Metadata file for OpenAM](https://doc.openidentityplatform.org/openam/how-to/saml-authentication-in-yandex-cloud-via-openam#saml-authentication-in-yandex-cloud-via-openam-creating-a-metadata-file-for-openam)**
1. Open the OpenAM link `http://openam.example.org:8080/openam/saml2/jsp/exportmetadata.jsp` and copy the `ds:X509Certificate` tag value
2. Save the certificate in a text file with a `.cer` extension in the following format:
**[Creating a Service Provider in OpenAM](https://doc.openidentityplatform.org/openam/how-to/saml-authentication-in-yandex-cloud-via-openam#saml-authentication-in-yandex-cloud-via-openam-creating-a-service-provider-in-openam)**
1. In the left panel, select [Federations](https://org.cloud.yandex.ru/federations).
2. Click the the federation for which you want to add the certificate.
3. At the bottom of the page, click **Adding a certificate**.
4. Enter the certificate name and description.
5. Click **Choose a file** and specify the path to the certificate file.
**[Adding Users to Yandex Cloud Organization](https://doc.openidentityplatform.org/openam/how-to/saml-authentication-in-yandex-cloud-via-openam#saml-authentication-in-yandex-cloud-via-openam-adding-users-to-yandex-cloud-organization)**
## Creating a Metadata file for OpenAM
<aname="testing-authentication"></a>
1. Create a `metadata.xml` file with the following contents where federation_ID - is a federation identifier in [Yandex Cloud Organization](https://org.cloud.yandex.ru), [Federations](https://org.cloud.yandex.ru/federations) section
3. Choose **Configure SAMLv2 Provider** in the Common Tasks section
4. Then click **Configure Remote Service Provider**
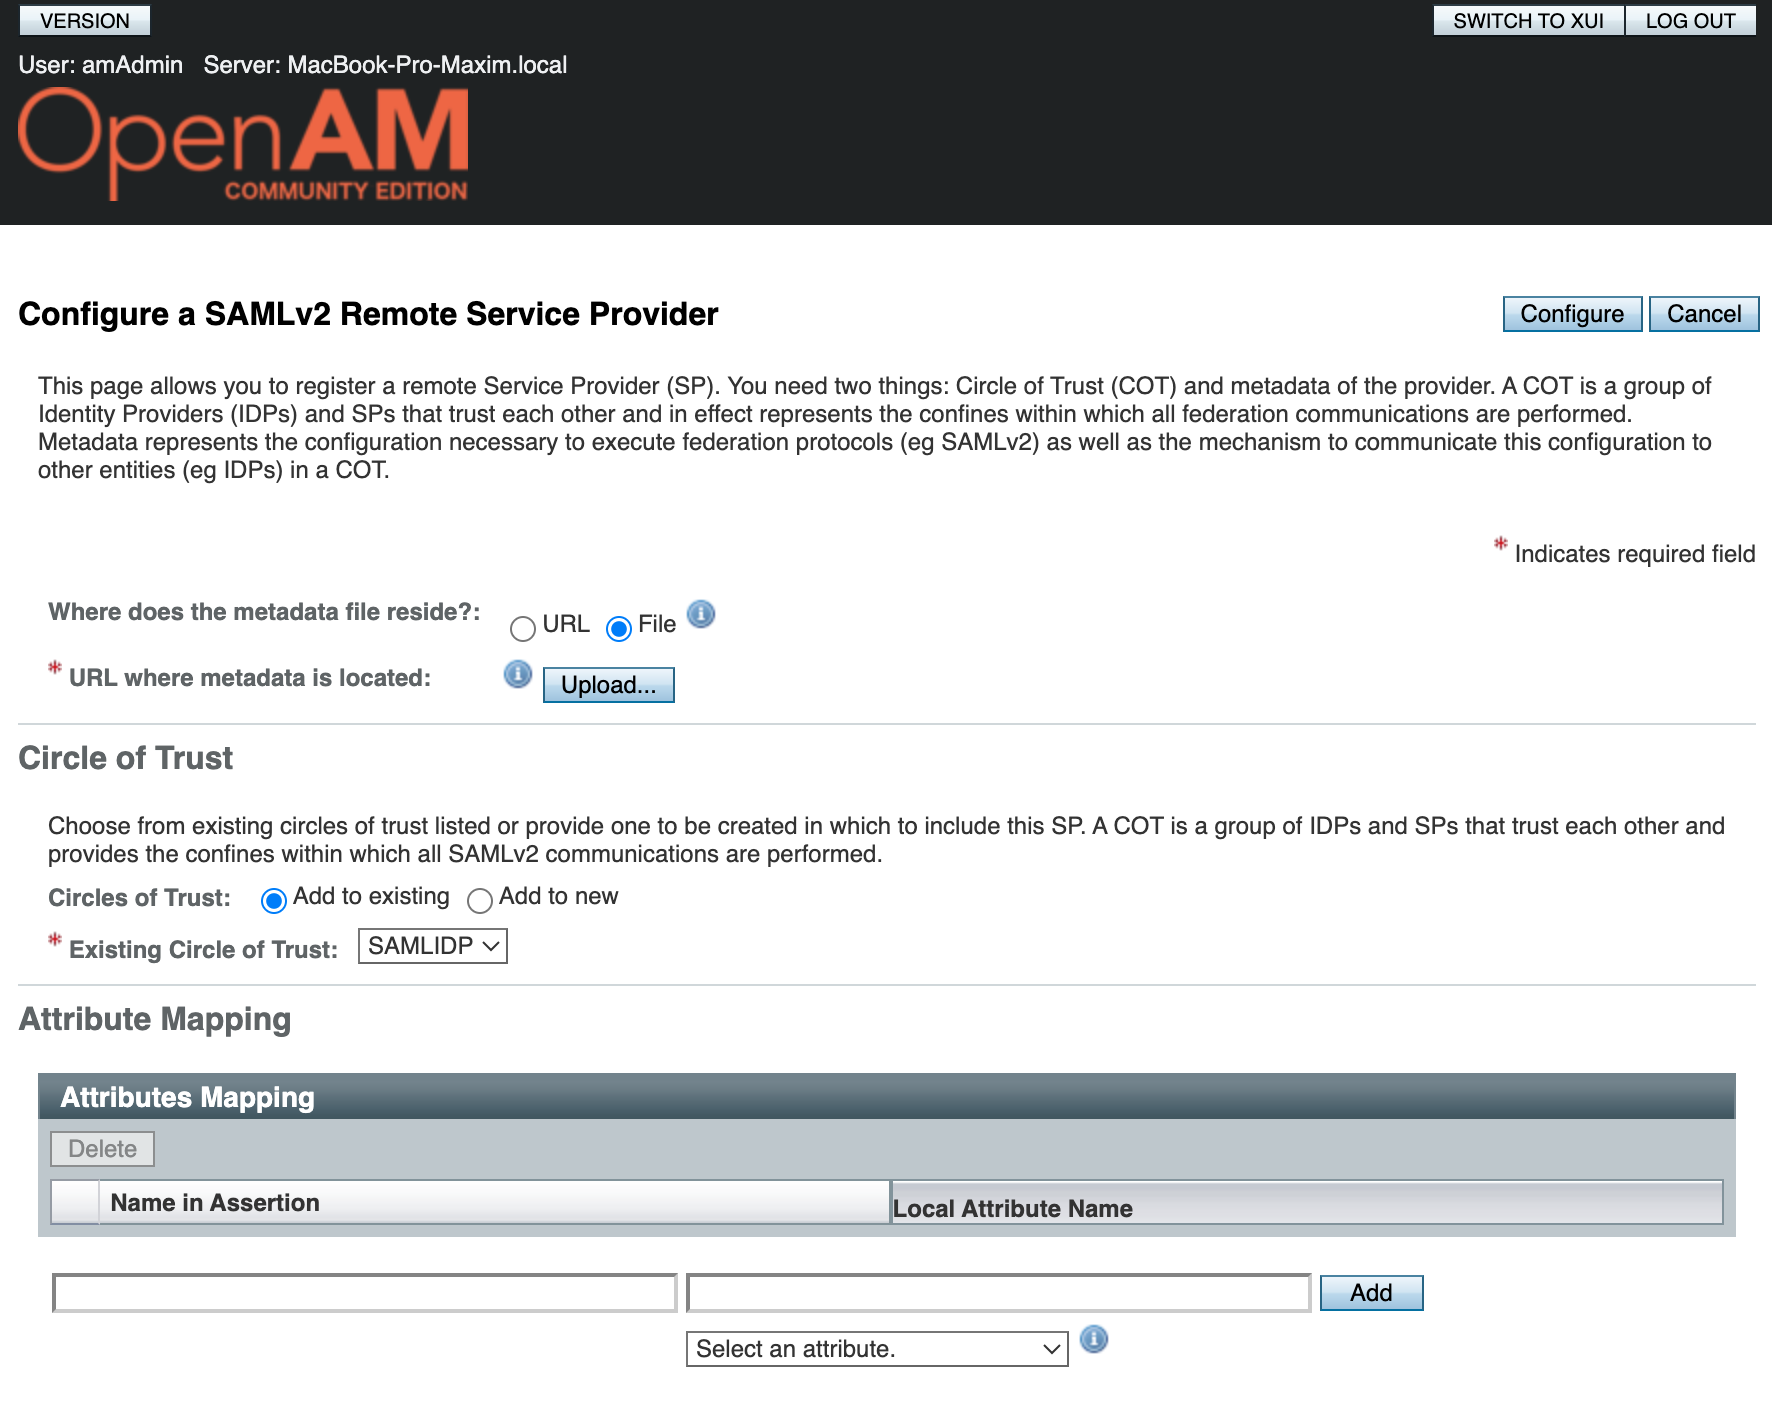
1. Load the `metadata.xml` file created in the previous step as metadata.
2. Select the existing Circle Of Trust, created on the **Create and Configure Identity Provider in OpenAM** stage
3. Нажмите Configure
# Adding Users to Yandex Cloud Organization
If the **Automatically create users** option is enabled, a federation will only add users logging in to a cloud for the first time. You can only add a federated user again manually after deleting them from a federation.
1.[Login to account](https://passport.yandex.ru/) that belongs to an organization administrator or owner.
On successful authentication, the IdP server will redirect you to URL `https://console.cloud.yandex.ru/federations/<federation_ID>`, which you have set in the `metadata.xml` file for the Service Provider in the OpenAM settings and then to the [management console](https://console.cloud.yandex.ru/) home page. In the top-right corner, you will be able to see you are logged in to the console as a federated user.
This file contains hidden or bidirectional Unicode text that may be interpreted or compiled differently than what appears below. To review, open the file in an editor that reveals hidden Unicode characters.
Learn more about bidirectional Unicode characters
This article has moved to the Open Identity Platform documentation site:
The SAML 2.0 protocol is the standard for Single Sign-On (SSO) in enterprise environments. In this guide, we will show you how to use OpenIG as a proxy and serviceprovider to easily add SAML authentication to any of your applications without changing its code.
[SSO Configuration: OpenIG as SAML Service Provider for OpenAM](https://doc.openidentityplatform.org/openam/how-to/sso-configuration-openig-as-saml-service-provider-for-openam).
## Preparation
Please use the documentation site for the current version.
1. To simplify service deployment, we will use OpenAM and OpenIG's Docker images. Therefore, you must have Docker installed.
2. Enter the host names for OpenAM and OpenIG in the `hosts` file. On Windows systems, the hosts file is located in the `C:\Windows/System32/drivers/etc/hosts` directory, and on Linux or Mac OS, it is located in `/etc/hosts`.
1. Access the administrator console via the link [http://openam.example.org:8080/openam](http://openam.example.org:8080/openam). Use the login `amadmin` and password `passw0rd`.
2. Select Top Level Realm
3. Go to **Create SAMLv2 Providers** → **Create Hosted Identity Provider**
4. Set Metadata Name: `openam`
5. In the Signing Key setting, select `test`
6. Enter the name of the Circle of Trust, for example, `cot`
7. In the Attribute Mapping section, add the mapping uid → uid, mail → mail
4. Enter the fedlet name in the Name field, for example, openig.
5. Set the **Destination URL of the Service Provider which will include the Fedlet** to the URL that points to OpenIG: `http://openig.example.org:8081/saml`
6. In the Attribute Mapping section, add the mapping uid → uid, mail → mail
7. Click **Create**
The Fedlet settings will be saved in the container in the directory `/usr/openam/config/myfedlets/openig/Fedlet.zip`.
Copy the settings to the host machine using the command:
4. In the list of accounts, open the `demo` account
5. In the Email Address field, enter `demo@example.org` or another valid email
6. Click **Save**
<aname="preparing-a-test-user"></a>
## OpenIG Setup
**[Preparing a test user](https://doc.openidentityplatform.org/openam/how-to/sso-configuration-openig-as-saml-service-provider-for-openam#sso-configuration-openig-as-saml-service-provider-for-openam-preparing-a-test-user)**
### Preparing OpenIG Configuration Files
<aname="openig-setup"></a>
1. Create a directory for OpenIG configuration files `openig-saml`
2. Add a directory `config` to it
3. In the `config` directory, create the files `admin.json` and `config.json`:
`admin.json`:
```json
{
"prefix":"openig",
"mode": "PRODUCTION"
}
```
`config.json`:
```json
{
"heap": [
{
"name": "JwtSession",
"type": "JwtSession"
},
{
"name": "capture",
"type": "CaptureDecorator",
"config": {
"captureEntity": true,
"_captureContext": true
}
}
],
"handler": {
"type": "Chain",
"config": {
"filters": [],
"handler": {
"type": "Router",
"name": "_router",
"capture": "all"
}
}
}
}
```
4. Add a directory for routes named `routes` to the `config` directory.
5. Add the default route `99-default.json` to the `routes` directory. OpenIG will serve static content on this route and will not require authentication:
```json
{
"handler": {
"type": "DispatchHandler",
"config": {
"bindings": [
{
"handler": {
"type": "StaticResponseHandler",
"config": {
"status": 200,
"reason": "OK",
"entity":
"<!doctype html>
<html>
<head>
<title>Home</title>
<meta charset='UTF-8'>
</head>
<body>
<h1><a href='/app'>Login</a></h1>
</body>
</html>"
}
}
}
]
}
},
"session": "JwtSession"
}
```
6. Start the OpenIG Docker container with the command. Note the mounted directory `/app-saml`.
```bash
docker run -h openig.example.org -p 8081:8080 --name openig \
**[Configuring SAML Fedlet in OpenIG](https://doc.openidentityplatform.org/openam/how-to/sso-configuration-openig-as-saml-service-provider-for-openam#sso-configuration-openig-as-saml-service-provider-for-openam-configuring-saml-fedlet-in-openig)**
4. Create a route forthe application requiring SAML authentication `05-app.json`:
**[Test the Solution](https://doc.openidentityplatform.org/openam/how-to/sso-configuration-openig-as-saml-service-provider-for-openam#sso-configuration-openig-as-saml-service-provider-for-openam-test-the-solution)**
5. Start the OpenIG container:
```bash
docker run -h openig.example.org -p 8081:8080 --name openig \
We have successfully configured OpenIG as a Service Provider and implemented SAML 2.0 authentication via OpenAM. You can now use this approach to secure any applications in your infrastructure. The next step could be to configure Log Out.
For more details on configuring OpenAM and OpenIG, please refer to the documentation:
This file contains hidden or bidirectional Unicode text that may be interpreted or compiled differently than what appears below. To review, open the file in an editor that reveals hidden Unicode characters.
Learn more about bidirectional Unicode characters
Download the OpenTelemetry agent file opentelemetry-javaagent.jar by link [https://github.com/open-telemetry/opentelemetry-java-instrumentation/releases/latest](https://github.com/open-telemetry/opentelemetry-java-instrumentation/releases/latest) each OpenAM и OpenIG host
If Jaeger is not installed it can be run as a Docker container:
```bash
docker run -d --name jaeger \
-e COLLECTOR_ZIPKIN_HOST_PORT=:9411 \
-e COLLECTOR_OTLP_ENABLED=true \
-p 6831:6831/udp \
-p 6832:6832/udp \
-p 5778:5778 \
-p 16686:16686 \
-p 4317:4317 \
-p 4318:4318 \
-p 14250:14250 \
-p 14268:14268 \
-p 14269:14269 \
-p 9411:9411 \
jaegertracing/all-in-one:1.43
```
# OpenAM
Set environment variables
Variable | Example | Description
-- | -- | --
OTEL_TRACES_EXPORTER | jaeger | An exporter of traces
OTEL_SERVICE_NAME |openam | Service name for monitoring
OTEL_EXPORTER_JAEGER_TIMEOUT | 10000 | Jaeger connection timeout in milliseconds
This file contains hidden or bidirectional Unicode text that may be interpreted or compiled differently than what appears below. To review, open the file in an editor that reveals hidden Unicode characters.
Learn more about bidirectional Unicode characters
Authentication is a process that exists in almost every application to Identify the application client whether it is a user or another application. While authentication client sends credentials to the application. The application ensures that credentials are correct, generates an authentication token, and sends it back to the client. To access the application as an identified client, the client uses the received authentication token.
Authentication tokens could be Stateless and Stateful.
## Stateful Authentication
After successful authentication, the application generates a random token to send back to the client and then creates a client authenticated session in memory or an internal database. When a client tries to access the application with a given token, the application tries to retrieve session data from session storage, checks if the session valid, and then decides whether the client has access to the desired resource or not.
## Stateless Authentication
After successful authentication, the application generates a token with all necessary data, signs it with a public key, and sends it back to a client. There is a standard for token generation, it is JWT (JSON Web Token). The process is described in OpenID Connect (OIDC) specification. When a client tries to access the application with a token, the application verifies the token sign with a private key, checks if the token is expired, retrieves all session data from the token, and makes a decision if a client has access to the desired resource.
||Stateful|Stateless|
|-|-|-|
|Session information could be stolen|✅ It is impossible to steal session information from the session identifier because it is just an identifier associated with the session|⛔Session identifier contains all authentication information and it is possible to steal sensitive information, it is not encrypted.|
|Resource consuming|⛔When retrieving session information, the service always gets access to session storage which causes additional resource consumption.|✅The session identifier contains all session information.|
|Easy to implement|⛔When session information is stored in an external database, there is a need to implement session database persistence.|✅Session identifier contains all session information, there is no need to implement additional functionality|
|Easy to scale|⛔While adding new instances, there is a need to implement additional scale to session storage as well|✅ Adding new service instances does not require additional effort|
|Possibility to compromise session data.|✅Only the authentication system is able to retrieve session information from an authentication token, so there are no more vulnerabilities.|⛔To decrypt session information from a token, all parts of the system should share the same key. And, if at least one system is compromised, all parts of the system are under the threat.|
|Authentication token size|✅An authentication token is just an identifier, so session data does not affect its size.|⛔If an authentication session contains a large amount of data, the authentication token also becomes large, which can cause additional load on a network.|
|Restrict access among different parts of an application|✅It is possible to configure the system so different parts of the system will only have access to the data necessary for their work|⛔All parts of the system have access to all session data|
|Possibility to revoke session|✅It is possible to revoke a session at any time|⛔Since the session token contains an expiration date, it is impossible to revoke the authentication session|
|Possibility to modify session data|✅It is possible to modify any session data in session data storage.|⛔Since the session token contains all session data, it is not possible to modify it|
|SSO implementation|✅The integration of different parts of the system is possible without modification of the source code, session information can come through the authentication system gateway.|⛔Changes must be made to each part of the system to retrieve data from an authentication token|
## Conclusion
Both approaches make sense, both have their advantages and disadvantages. Stateless authentication is easier to implement and scale, but stateful authentication is more secure and easier to manage.
This article has moved to the Open Identity Platform documentation site:
[Stateful vs Stateless Authentication](https://doc.openidentityplatform.org/openam/how-to/stateful-vs-stateless-authentication).
Please use the documentation site for the current version.
This file contains hidden or bidirectional Unicode text that may be interpreted or compiled differently than what appears below. To review, open the file in an editor that reveals hidden Unicode characters.
Learn more about bidirectional Unicode characters
Create `openam-config.properties` file with the following contents:
```properties
# General Settings
SERVER_URL=http://localhost:8080
DEPLOYMENT_URI=/openam
BASE_DIR=/usr/openam/config
locale=en_US
PLATFORM_LOCALE=en_US
AM_ENC_KEY=
ADMIN_PWD=amadmin_password
AMLDAPUSERPASSWD=admin_password
COOKIE_DOMAIN=localhost
ACCEPT_LICENSES=true
# Data Store (OpenDJ)
DATA_STORE=dirServer
DIRECTORY_SSL=SIMPLE
DIRECTORY_SERVER=opendj
DIRECTORY_PORT=1389
DIRECTORY_ADMIN_PORT=4444
DIRECTORY_JMX_PORT=1636
ROOT_SUFFIX=dc=example,dc=com
DS_DIRMGRDN=cn=Directory Manager
DS_DIRMGRPASSWD=admin_password
# User Store (OpenDJ)
USERSTORE_TYPE=LDAPv3ForOpenDS
USERSTORE_SSL=SIMPLE
USERSTORE_HOST=opendj
USERSTORE_PORT=1389
USERSTORE_SUFFIX=dc=example,dc=com
USERSTORE_MGRDN=cn=Directory Manager
USERSTORE_PASSWD=admin_password
```
Create `openam-init.sh` file. This script waits for OpenDJ, then for OpenAM to start, and if OpenAM is not configured runs `openam-configurator-tool` with `openam-config.properties` file.
```bash
#!/bin/bash
until cat < /dev/null > /dev/tcp/opendj/1389;do
echo"Waiting for OpenDJ..."
sleep 5
done
/usr/local/tomcat/bin/catalina.sh run &
SERVER_PID=$!
# Wait for OpenAM to respond to isAlive.jsp
until curl -f -s -o /dev/null http://localhost:8080/openam/isAlive.jsp;do
Thanks to [@Lewiscowles1986](https://github.com/Lewiscowles1986). See [#817](https://github.com/OpenIdentityPlatform/OpenAM/discussions/817#discussioncomment-11440465)
Please use the documentation site for the current version.
This file contains hidden or bidirectional Unicode text that may be interpreted or compiled differently than what appears below. To review, open the file in an editor that reveals hidden Unicode characters.
Learn more about bidirectional Unicode characters
This file contains hidden or bidirectional Unicode text that may be interpreted or compiled differently than what appears below. To review, open the file in an editor that reveals hidden Unicode characters.
Learn more about bidirectional Unicode characters
Sometimes it is necessary to append a new system property to existing CATALINA_OTPS environment variable, for example -DXUI.enable=false
This article has moved to the Open Identity Platform documentation site:
You could do this with the following command:
[How to Pass Additional System Property to CATALINA_OPTS to OpenAM Docker Container](https://doc.openidentityplatform.org/openam/how-to/how-to-pass-additional-system-property-to-catalina-opts-to-openam-docker-container).
This file contains hidden or bidirectional Unicode text that may be interpreted or compiled differently than what appears below. To review, open the file in an editor that reveals hidden Unicode characters.
Learn more about bidirectional Unicode characters
Docker containers are stateless. So, if you want persist the OpenAM's configuration data, you need to specify a volume that maps `/usr/openam/config` container directory to a local directory.
Example with `docker-compose.yaml`
This article has moved to the Open Identity Platform documentation site:
```yaml
services:
openam:
image: openidentityplatform/openam:latest
ports:
- 8080:8080
- 8085:8085
volumes:
- ./openam-data:/usr/openam/config
[How to Persist OpenAM Docker Container Data Between Restarts](https://doc.openidentityplatform.org/openam/how-to/how-to-persist-openam-docker-container-data-between-restarts).
```
With `docker run` command:
```
docker run -v ./openam-data:/usr/openam/config \
-h openam.example.org \
-p 8080:8080 \
--name openam \
openidentityplatform/openam
```
If you are facing permisson issues in Lunux, use a named volume
```
docker volume create openam-data
```
```
docker run -v openam-data:/usr/openam/config \
-h openam.example.org \
-p 8080:8080 \
--name openam \
openidentityplatform/openam
```
Please use the documentation site for the current version.
This file contains hidden or bidirectional Unicode text that may be interpreted or compiled differently than what appears below. To review, open the file in an editor that reveals hidden Unicode characters.
Learn more about bidirectional Unicode characters
Let OpenAM hostname is `openam.example.org` Before starting, add the hostname and IP address to the `hosts` file, for example `127.0.0.0.1 openam.example.org`.
This article has moved to the Open Identity Platform documentation site:
On Windows systems, the `hosts` file is located at `C:\Windows/System32/drivers/etc/hosts` , on Linux and Mac it is located at `/etc/hosts`.
[Quick OpenAM Docker Configuration From a Command Line](https://doc.openidentityplatform.org/openam/how-to/quick-openam-docker-configuration-from-a-command-line).
Next, start the OpenAM Docker container. Run the following command:
```bash
docker run -h openam.example.org -p 8080:8080 --name openam openidentityplatform/openam
```
There is no need to configure OpenAM manually via UI. The following command helps to automate the process:
This file contains hidden or bidirectional Unicode text that may be interpreted or compiled differently than what appears below. To review, open the file in an editor that reveals hidden Unicode characters.
Learn more about bidirectional Unicode characters
This article has moved to the Open Identity Platform documentation site:
This article is intended for technical specialists or security system architects who want to implement two-factor authentication (2FA) in an access control system to enhance the security of user accounts.
[Using Google Authenticator with OpenAM](https://doc.openidentityplatform.org/openam/how-to/using-google-authenticator-with-openam).
Adding a second factor makes it significantly more difficult for attackers to compromise accounts.
Please use the documentation site for the current version.
## Stack Used
<aname="stack-used"></a>
**OpenAM** is an open-source access management system. It is designed for centralized management of authentication, authorization, and user accounts.
**Google Authenticator** is a mobile application designed to be used as an additional authentication factor. It supports one-time passwords (TOTP), and biometric authentication.
<aname="installing-openam"></a>
In this article, we will deploy OpenAM, configure modules and authentication chains for use with Google Authenticator, and show you how to add a second factor authentication for a user.
We will use authentication with one-time passwords generated using the TOTP (time-based one-time password) protocol. Such passwords do not need to be sent to the client device via SMS or PUSH notifications. These passwords are generated using a specific cryptographic algorithm directly on the device.
If you do not have OpenAM installed yet, you can deploy a Docker container as described in the[OpenAM wiki article](https://github.com/OpenIdentityPlatform/OpenAM/wiki/TIP%3A-Quick-OpenAM-Docker-Configuration-From-a-Command-Line)
**[Configuring the TOTP Authentication Module](https://doc.openidentityplatform.org/openam/how-to/using-google-authenticator-with-openam#using-google-authenticator-with-openam-configuring-the-totp-authentication-module)**
We will configure the module and authentication chain.
The authentication module in OpenAM is responsible for a specific authentication method. This can be authentication with a username and password, via the Kerberos protocol, or using biometrics.
Modules can be organized into chains. This allows you to build chains of modules to authenticate users in multiple stages or using different methods. For example, if seamless authentication via the Kerberos protocol fails, you can ask the user for their login and password.
**[Configuring the Device Registration Chain](https://doc.openidentityplatform.org/openam/how-to/using-google-authenticator-with-openam#using-google-authenticator-with-openam-configuring-the-device-registration-chain)**
### **Configuring the TOTP Authentication Module**
Open the administrator console at [http://openam.example.org:8080/openam/console](http://openam.example.org:8080/openam/console)
**[Configuring the Authentication Chain](https://doc.openidentityplatform.org/openam/how-to/using-google-authenticator-with-openam#using-google-authenticator-with-openam-configuring-the-authentication-chain)**
In the login field, enter `amadmin`. In the password field, enter the administrator password specified during installation.
<aname="setting-up-google-authenticator"></a>
Open the root realm, select Authentication → Modules in the left menu, and click the `Add Module` button. In the form that appears, enter the module name, for example `totp`, and the module type - `Authenticator (OATH)`. Click the `Create` button.
**[Setting up Google Authenticator.](https://doc.openidentityplatform.org/openam/how-to/using-google-authenticator-with-openam#using-google-authenticator-with-openam-setting-up-google-authenticator)**
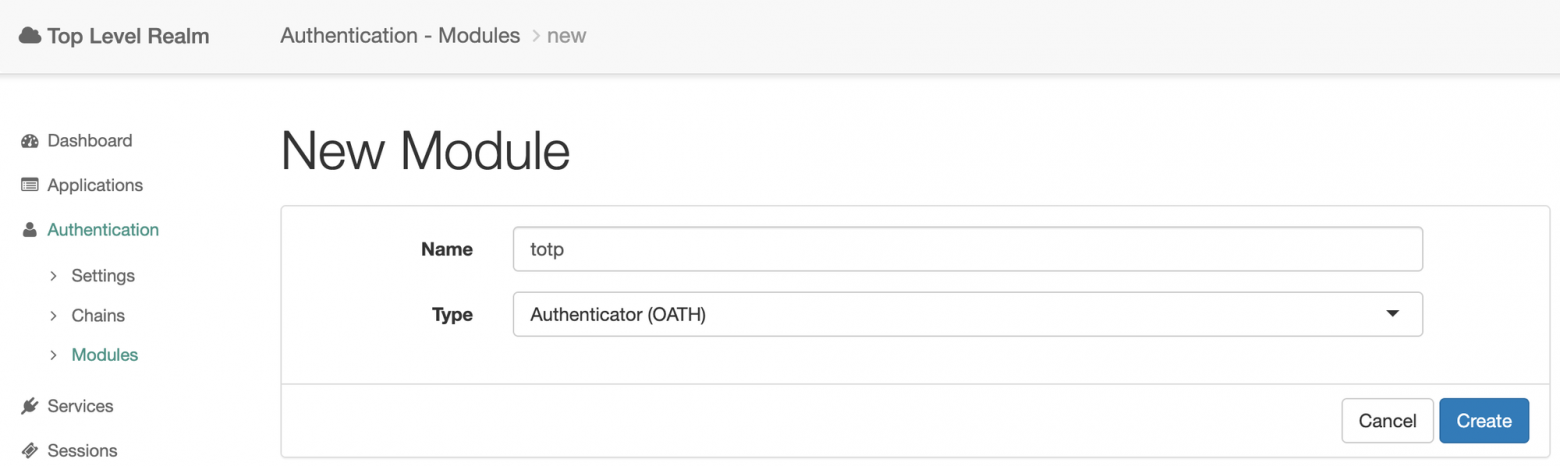
<aname="registering-a-device"></a>
Set the `OATH Algorithm to Use` setting to `TOTP`, enter any non-empty value in the `Name of the Issuer` field, for example `OpenAM`, and click `Save Changes`.
**[Registering a Device](https://doc.openidentityplatform.org/openam/how-to/using-google-authenticator-with-openam#using-google-authenticator-with-openam-registering-a-device)**
The registration chain is required so that authenticated users can add a second authentication factor using Google Authenticator.
In the administrator console, in the realm settings in the left menu, select Authentication → Chains and click the `Add Chain` button in the list that opens.
Enter the chain name `totp-register` and click the `Create` button.
In the chain settings, click the `Add a Module` button and add the created `totp` authentication module as shown in the figure. Click the `OK` button and then `Save Changes`.
In this chain, we will configure authentication so that after authenticating with a username and password, the user is required to enter a one-time password from the Google Authenticator mobile app.
In the administrator console, in the realm settings in the left menu, select Authentication → Chains and click the `Add Chain` button in the list that opens.
Enter the chain name `totp-login` and click the `Create` button. First, add the `DataStore` login and password authentication module. Then add the `totp` one-time code authentication module.
Download the Google Authenticator app from the appropriate app store for your device.
### Registering a Device
Sign in to the console with a test user account. To do this, either sign out of the administrator console or open your browser in incognito mode. Go to the URL [http://openam.example.org:8080/openam/XUI/#login/](http://openam.example.org:8080/openam/XUI/#login/) and log in to OpenAM with the `demo` account. The default password is `changeit`.
After successful authentication, open the device registration chain link in your browser: [http://openam.example.org:8080/openam/XUI/#login&service=totp-register](http://openam.example.org:8080/openam/XUI/#login&service=totp-register).
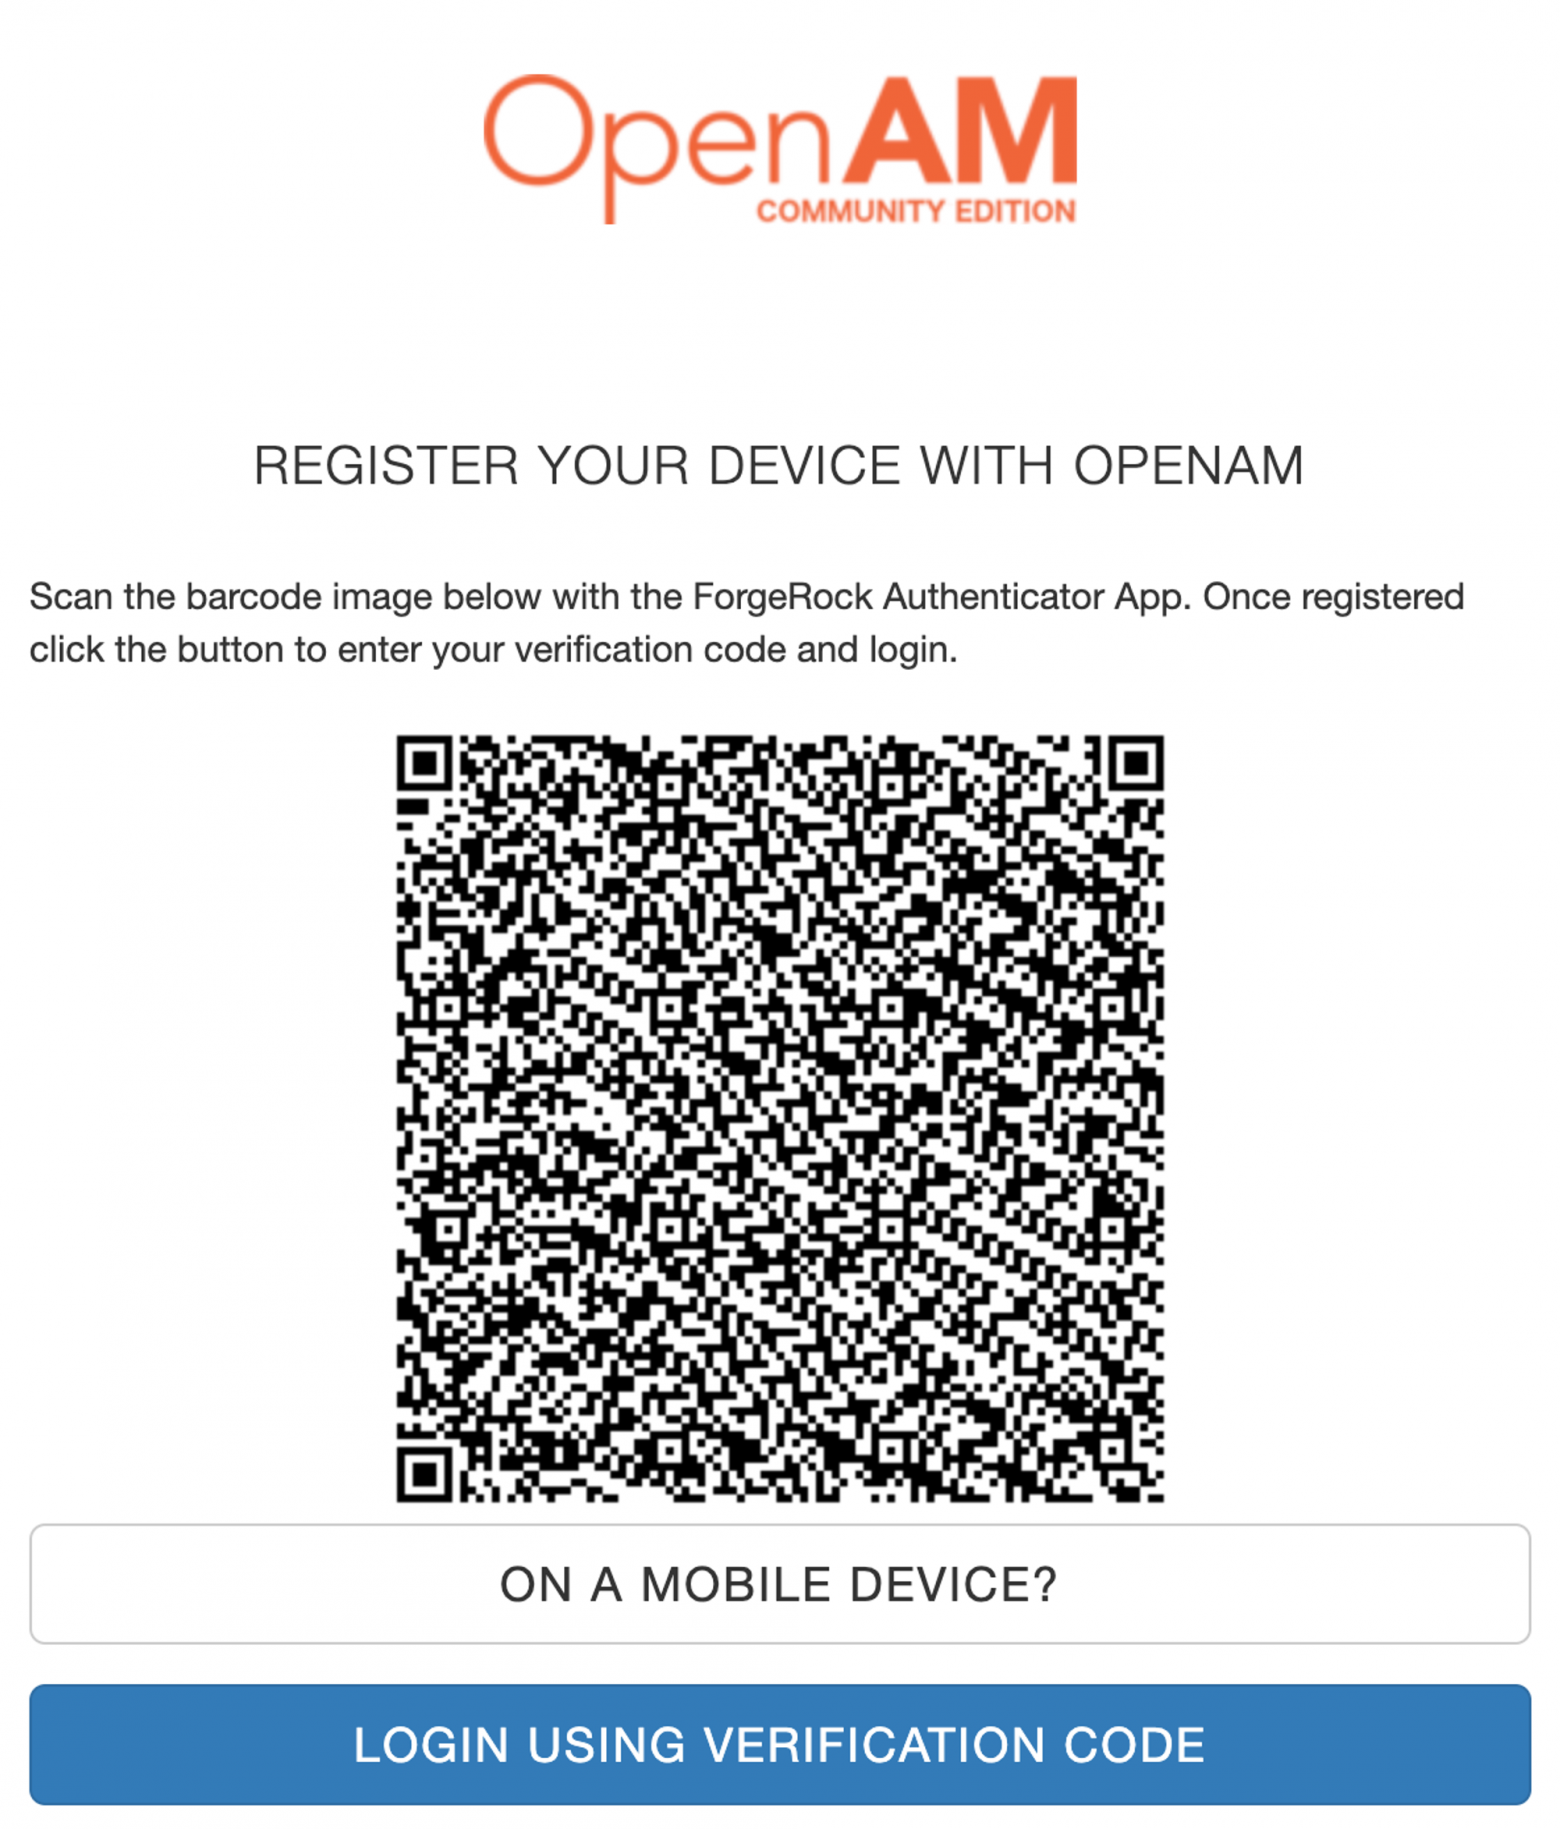
Open the Goole Authenticator app and tap the `Add code` button.
You will be prompted to scan a QR code. Scan the QR code displayed in the OpenAM browser window. After scanning, the OpenAM account will be added to the Google Authenticator app.
Locate the newly added account. A one-time password will be displayed.
In your browser, click the `Login Using Verification Code` button.
Enter the one-time password from the mobile app and click the `Submit` button.
### Authentication with One-Time Password
Exit the OpenAM console or open your browser in incognito mode. Follow the link [http://openam.example.org:8080/openam/XUI/#login&service=totp-login](http://openam.example.org:8080/openam/XUI/#login&service=totp-login).
Enter the username and password for the `demo` account. After entering the username and password, OpenAM will request a one-time password from the mobile app. Open the mobile app, select the `demo` user account. Enter the one-time password from the mobile app in the browser, and click the `Submit` button. If the one-time password is correct, you will be authenticated successfully.
**[Authentication with One-Time Password](https://doc.openidentityplatform.org/openam/how-to/using-google-authenticator-with-openam#using-google-authenticator-with-openam-authentication-with-one-time-password)**
This file contains hidden or bidirectional Unicode text that may be interpreted or compiled differently than what appears below. To review, open the file in an editor that reveals hidden Unicode characters.
Learn more about bidirectional Unicode characters
This article has moved to the Open Identity Platform documentation site:
This article is intended for technical specialists or security system architects who want to implement two-factor authentication (2FA) in an access control system to enhance the security of user accounts.
[Using Microsoft Authenticator with OpenAM](https://doc.openidentityplatform.org/openam/how-to/using-microsoft-authenticator-with-openam).
Adding a second factor makes it significantly more difficult for attackers to compromise accounts.
Please use the documentation site for the current version.
## Stack Used
<aname="stack-used"></a>
**OpenAM** is an open-source access management system. It is designed for centralized management of authentication, authorization, and user accounts.
**Microsoft Authenticator** is a mobile application designed to be used as an additional authentication factor. It supports push notifications, one-time passwords (TOTP), and biometric authentication.
<aname="installing-openam"></a>
In this article, we will deploy OpenAM, configure modules and authentication chains for use with Microsoft Authenticator, and show you how to add a second factor authentication for a user.
We will use authentication with one-time passwords generated using the TOTP (time-based one-time password) protocol. Such passwords do not need to be sent to the client device via SMS or PUSH notifications. These passwords are generated using a specific cryptographic algorithm directly on the device.
If you do not have OpenAM installed yet, you can deploy a Docker container as described in the[OpenAM wiki article](https://github.com/OpenIdentityPlatform/OpenAM/wiki/TIP%3A-Quick-OpenAM-Docker-Configuration-From-a-Command-Line)
**[Configuring the TOTP Authentication Module](https://doc.openidentityplatform.org/openam/how-to/using-microsoft-authenticator-with-openam#using-microsoft-authenticator-with-openam-configuring-the-totp-authentication-module)**
We will configure the module and authentication chain.
The authentication module in OpenAM is responsible for a specific authentication method. This can be authentication with a username and password, via the Kerberos protocol, or using biometrics.
Modules can be organized into chains. This allows you to build chains of modules to authenticate users in multiple stages or using different methods. For example, if seamless authentication via the Kerberos protocol fails, you can ask the user for their login and password.
**[Configuring the Device Registration Chain](https://doc.openidentityplatform.org/openam/how-to/using-microsoft-authenticator-with-openam#using-microsoft-authenticator-with-openam-configuring-the-device-registration-chain)**
### **Configuring the TOTP Authentication Module**
Open the administrator console at [http://openam.example.org:8080/openam/console](http://openam.example.org:8080/openam/console)
**[Configuring the Authentication Chain](https://doc.openidentityplatform.org/openam/how-to/using-microsoft-authenticator-with-openam#using-microsoft-authenticator-with-openam-configuring-the-authentication-chain)**
In the login field, enter `amadmin`. In the password field, enter the administrator password specified during installation.
<aname="setting-up-microsoft-authenticator"></a>
Open the root realm, select Authentication → Modules in the left menu, and click the `Add Module` button. In the form that appears, enter the module name, for example `totp`, and the module type - `Authenticator (OATH)`. Click the `Create` button.
**[Setting up Microsoft Authenticator.](https://doc.openidentityplatform.org/openam/how-to/using-microsoft-authenticator-with-openam#using-microsoft-authenticator-with-openam-setting-up-microsoft-authenticator)**

<aname="registering-a-device"></a>
Set the `OATH Algorithm to Use` setting to `TOTP`, enter any non-empty value in the `Name of the Issuer` field, for example `OpenAM`, and click `Save Changes`.
**[Registering a Device](https://doc.openidentityplatform.org/openam/how-to/using-microsoft-authenticator-with-openam#using-microsoft-authenticator-with-openam-registering-a-device)**
The registration chain is required so that authenticated users can add a second authentication factor using Microsoft Authenticator.
In the administrator console, in the realm settings in the left menu, select Authentication → Chains and click the `Add Chain` button in the list that opens.
Enter the chain name `totp-register` and click the `Create` button.
In the chain settings, click the `Add a Module` button and add the created `totp` authentication module as shown in the figure. Click the `OK` button and then `Save Changes`.
In this chain, we will configure authentication so that after authenticating with a username and password, the user is required to enter a one-time password from the Microsoft Authenticator mobile app.
In the administrator console, in the realm settings in the left menu, select Authentication → Chains and click the `Add Chain` button in the list that opens.
Enter the chain name `totp-login` and click the `Create` button. First, add the `DataStore` login and password authentication module. Then add the `totp` one-time code authentication module.
Download the [Microsoft Authenticator](https://www.microsoft.com/en/security/mobile-authenticator-app) app from the appropriate app store for your device.
### Registering a Device
Sign in to the console with a test user account. To do this, either sign out of the administrator console or open your browser in incognito mode. Go to the URL [http://openam.example.org:8080/openam/XUI/#login/](http://openam.example.org:8080/openam/XUI/#login/) and log in to OpenAM with the `demo` account. The default password is `changeit`.
After successful authentication, open the device registration chain link in your browser: [http://openam.example.org:8080/openam/XUI/#login&service=totp-register](http://openam.example.org:8080/openam/XUI/#login&service=totp-register).

Open the Microsoft Authenticator app and tap the `Add account` button.

You will be prompted to scan a QR code. Scan the QR code displayed in the OpenAM browser window. After scanning, the OpenAM account will be added to the Microsoft Authenticator app.
In your browser, click the `Login Using Verification Code` button.
Enter the one-time password from the mobile app and click the `Submit` button.
### Authentication with One-Time Password
Exit the OpenAM console or open your browser in incognito mode. Follow the link [http://openam.example.org:8080/openam/XUI/#login&service=totp-login](http://openam.example.org:8080/openam/XUI/#login&service=totp-login).
Enter the username and password for the `demo` account. After entering the username and password, OpenAM will request a one-time password from the mobile app. Open the mobile app, select the `demo` user account. Enter the one-time password from the mobile app in the browser, and click the `Submit` button. If the one-time password is correct, you will be authenticated successfully.
**[Authentication with One-Time Password](https://doc.openidentityplatform.org/openam/how-to/using-microsoft-authenticator-with-openam#using-microsoft-authenticator-with-openam-authentication-with-one-time-password)**
This file contains hidden or bidirectional Unicode text that may be interpreted or compiled differently than what appears below. To review, open the file in an editor that reveals hidden Unicode characters.
Learn more about bidirectional Unicode characters
This article has moved to the Open Identity Platform documentation site:
-[What is Single Sign-On](#what-is-single-sign-on)
-[How does Single Sign On Work](#how-does-single-sign-on-work)
[What is Single Sign On and How does it Work](https://doc.openidentityplatform.org/openam/how-to/what-is-single-sign-on-and-how-does-it-work).
## What is Single Sign-On
Single Sign-On (SSO) is a technology that allows users to authenticate into various systems using single credentials.
Please use the documentation site for the current version.
For example, Acme Corp uses various information systems and each system has its user database and its login processes. So, when Acme Corp hires a new employee, they should create an account for each system. To use each system, an employee should enter his credentials into each system as well. If the employee getting fired or promoted to a new position, all user accounts for the employee should also be changed. With an increasing number of employees and a number of information systems in the organization, user account management becomes more difficult and expensive.
<aname="what-is-single-sign-on"></a>
To simplify user account management, Acme Corp starts to use the SSO system. So, when an employee authenticates the operating system, he could use his operating system account to access all other information systems. If the employee got fired or promoted or just wants to change his password, only one user account should be modified. When Acme Corp stars using new software, they just set up it to use SSO for authentication and there’s no need to create user database in this software.
**[What is Single Sign-On](https://doc.openidentityplatform.org/openam/how-to/what-is-single-sign-on-and-how-does-it-work#what-is-single-sign-on-and-how-does-it-work-what-is-single-sign-on)**
<aname="how-does-single-sign-on-work"></a>
## How does Single Sign On Work
When an employee tries to login into an information system, SSO checks if he already logged in in SSO. If the employee is not logged in, SSO asks the employee for authentication. After authentication, SSO creates a session for the employee and redirects him to the desired system. If the employee is authenticated in SSO, SSO provides account information to the desired system, the employee tries to access.

**[How does Single Sign On Work](https://doc.openidentityplatform.org/openam/how-to/what-is-single-sign-on-and-how-does-it-work#what-is-single-sign-on-and-how-does-it-work-how-does-single-sign-on-work)**
This file contains hidden or bidirectional Unicode text that may be interpreted or compiled differently than what appears below. To review, open the file in an editor that reveals hidden Unicode characters.
Learn more about bidirectional Unicode characters
## Создание и настройка Identity Provider в OpenAM
**[Настройка федерации в OpenAM](https://doc.openidentityplatform.org/openam/how-to/saml-authentication-in-yandex-cloud-via-openam#saml-authentication-in-yandex-cloud-via-openam-setting-up-federation-in-openam)**
1. Откройте консоль администратора
2. Перейдите в нужный realm
3. Выберите в разделе Common Tasks **Configure SAMLv2 Provider**

**[Создание и настройка Identity Provider в OpenAM](https://doc.openidentityplatform.org/openam/how-to/saml-authentication-in-yandex-cloud-via-openam#saml-authentication-in-yandex-cloud-via-openam-create-and-configure-identity-provider-in-openam)**
**[Настройка связи пользователей OpenAM](https://doc.openidentityplatform.org/openam/how-to/saml-authentication-in-yandex-cloud-via-openam#saml-authentication-in-yandex-cloud-via-openam-setting-up-the-user-mapping-in-openam)**
5. Выберите ключ для подписи (для демонстрационных целей будем использовать **test**), введите имя круга доверия а так же свяжите атрибуты пользователей Yandex Cloud Organization c OpenAM. Для демонстрационных целей пользователи будут связаны по email.
**[Создание и настройка федерации в Yandex Cloud Organization](https://doc.openidentityplatform.org/openam/how-to/saml-authentication-in-yandex-cloud-via-openam#saml-authentication-in-yandex-cloud-via-openam-creating-and-setting-up-a-federation-in-yandex-cloud-organization)**
1. Откройте консоль администратора
2. Выберите требуемый realm
3. В меню слева выберите раздел Applications и перейдите в SAML 2.0
4. В списке Entity Providers выберите `http://openam.example.org:8080/openam`
5. На закладке Assertion Content в разделе **NameID Format** в список **NameID Value Map** добавьте элемент `urn:oasis:names:tc:SAML:1.1:nameid-format:unspecified=mail`
1. Перейдите в сервис [Yandex Cloud Organization](https://org.cloud.yandex.ru/).
2. На панели слева выберите раздел [Федерации](https://org.cloud.yandex.ru/federations) .
3. Нажмите кнопку **Создать федерацию**.
4. Задайте имя федерации. Имя должно быть уникальным в каталоге.
5. При необходимости добавьте описание.
6. В поле **Время жизни cookie** укажите время, в течение которого браузер не будет требовать у пользователя повторной аутентификации.
7. В поле **IdP Issuer** вставьте ссылку: `http://openam.example.org:8080/openam`
8. В поле **Ссылка на страницу для входа в IdP** вставьте ссылку: `http://openam.example.org:8080/openam/SSORedirect/metaAlias/idp`
11. Нажмите кнопку **Создать федерацию**.
**[Cоздание и настройка Service Provider в OpenAM](https://doc.openidentityplatform.org/openam/how-to/saml-authentication-in-yandex-cloud-via-openam#saml-authentication-in-yandex-cloud-via-openam-creating-a-remote-service-provider-в-openam)**
## ****Добавьте сертификаты****
<aname="создайте-файл-метаданных-для-openam"></a>
При аутентификации у сервиса Cloud Organization должна быть возможность проверить сертификат IdP-сервера. Для этого добавьте сертификат в федерацию:
**[Создайте файл метаданных для OpenAM](https://doc.openidentityplatform.org/openam/how-to/saml-authentication-in-yandex-cloud-via-openam#saml-authentication-in-yandex-cloud-via-openam-creating-a-metadata-file-for-openam)**
1. Откройте ссылку OpenAM `http://openam.example.org:8080/openam/saml2/jsp/exportmetadata.jsp` и скопируйте значение тега ds:X509Certificate
2. Сохраните сертификат в текстовом файле с расширением `.cer` в следующем формате:
<aname="создание-service-provider-в-openam"></a>
```bash
----BEGIN CERTIFICATE-----
<значение ds:X509Certificate>
----END CERTIFICATE-----
```
**[Создание Service Provider в OpenAM](https://doc.openidentityplatform.org/openam/how-to/saml-authentication-in-yandex-cloud-via-openam#saml-authentication-in-yandex-cloud-via-openam-creating-a-service-provider-in-openam)**
1. На панели слева выберите раздел [Федерации](https://org.cloud.yandex.ru/federations) .
2. Нажмите имя федерации, для которой нужно добавить сертификат.
**[Добавление пользователей в Yandex Cloud Organization](https://doc.openidentityplatform.org/openam/how-to/saml-authentication-in-yandex-cloud-via-openam#saml-authentication-in-yandex-cloud-via-openam-adding-users-to-yandex-cloud-organization)**
## Создайте файл метаданных для OpenAM
<aname="проверка-аутентификации"></a>
1. Создайте файл `metadata.xml`со следующим содержимым, где ID_федерации - идентификатор федерации из консоли [Yandex Cloud Organization](https://org.cloud.yandex.ru)s, раздела [Федерации](https://org.cloud.yandex.ru/federations)
3. Выберите в разделе Common Tasks **Configure SAMLv2 Provider**
4. Далее **Configure Remote Service Provider**

1. В качестве метаданных загрузите созданный на предыдущем этапе файл `metadata.xml`
2. Выберите существующий Circle Of Trust, созданный на этапе **Создание и настройка Identity Provider в OpenAM**
3. Нажмите Configure
# ****Добавление пользователей в Yandex Cloud Organization****
При включенной опции **Автоматически создавать пользователей** в федерацию будут добавляться только пользователи, впервые авторизующиеся в облаке. Повторное добавление федеративного пользователя после его удаления из федерации возможно только вручную.
1.[Войдите в аккаунт](https://passport.yandex.ru/) администратора или владельца организации.
2. Перейдите в сервис [Yandex Cloud Organization](https://org.cloud.yandex.ru/).
3. На панели слева выберите раздел [Пользователи](https://org.cloud.yandex.ru/users) .
4. В правом верхнем углу нажмите **Добавить федеративных пользователей**.
5. Выберите федерацию, из которой необходимо добавить пользователей.
6. Введите email адреса пользователей из OpenAM
7. Нажмите кнопку **Добавить**. Пользователи будут подключены к организации.
# **Проверка аутентификации**
Когда вы закончили настройку SSO, протестируйте, что все работает:
1. Откройте браузер в гостевом режиме или режиме инкогнито.
3. Введите данные для аутентификации и нажмите кнопку Login.
После успешной аутентификации IdP-сервер перенаправит вас по URL `https://console.cloud.yandex.ru/federations/<ID_федерации>`, который вы указали файле метаданных для Service Provider в настройках OpenAM, а после — на главную страницу [консоли управления](https://console.cloud.yandex.ru/). В правом верхнем углу вы сможете увидеть, что вошли в консоль от имени федеративного пользователя.