-
Notifications
You must be signed in to change notification settings - Fork 7
Tutorial
-
Download SlicerAstro following the instructions.
-
Download the WEIN069 datacube from the Astro Sample Data module:

-
Navigate to the Data module to inspect the 3DSlicer data structure and the WEIN069 FITS keywords.

-
Information regarding the navigation and GUI are given at the following link. For the various control key shortcuts see the pull down menus, e.g. ctrl+w for close scene, ctrl+s for save data etc.
-
Navigate to the AstroVolume module.
-
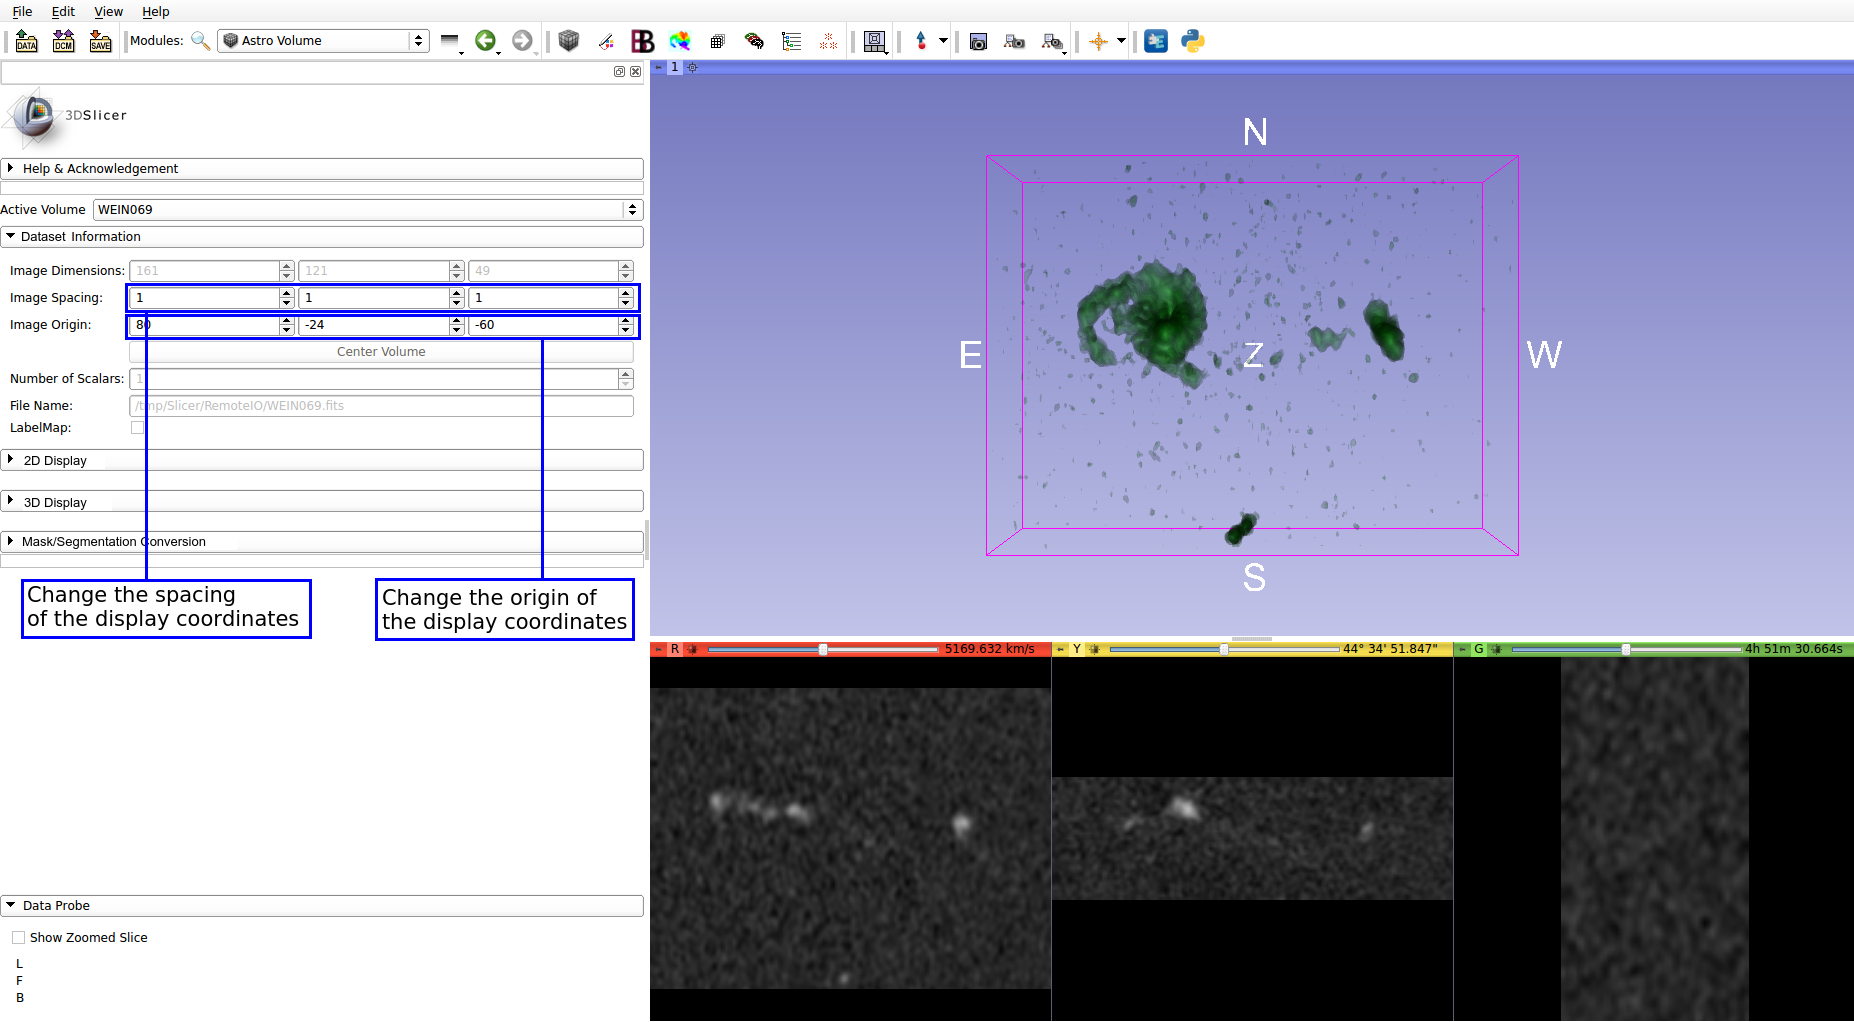
Change the display coordinate settings in the widget Dataset Information (opens when clicked).

-
Change the 2D color transfer function in the widget 2D Display . Navigate also through the 2D Views (info on shortcuts are available in the Welcome module and here).


-
Enable display of Astronomical World Coordinate coordinate axes in the 2D views

-
Change the 3D color transfer function in the widget 3D Display and navigate the 3D View.
 Here is a link to a video showing how to use multi-volume rendering: https://www.youtube.com/watch?v=gKok44BqC44
 -
Download the WEIN069 mask using the Astro Sample Data module.
-
Convert WEIN069 mask to segmentation objects in the AstroVolume module.

-
Navigate to the Segmentation Editor Module and modify the segmentations.


-
Navigate back to the AstroVolume and convert the modified Segmentation back to a labelMap Volume. Finally, save it as a FITS file (ctrl+S; ⌘ S).

-
Navigate to the AstroSmoothing Module and smooth the WEIN069 cube with the Intensity-Driven Gradient and default parameters.

-
Click on the eye to visualize the automated generated, 3 rms, selections provided by the smoothing algorithm:

-
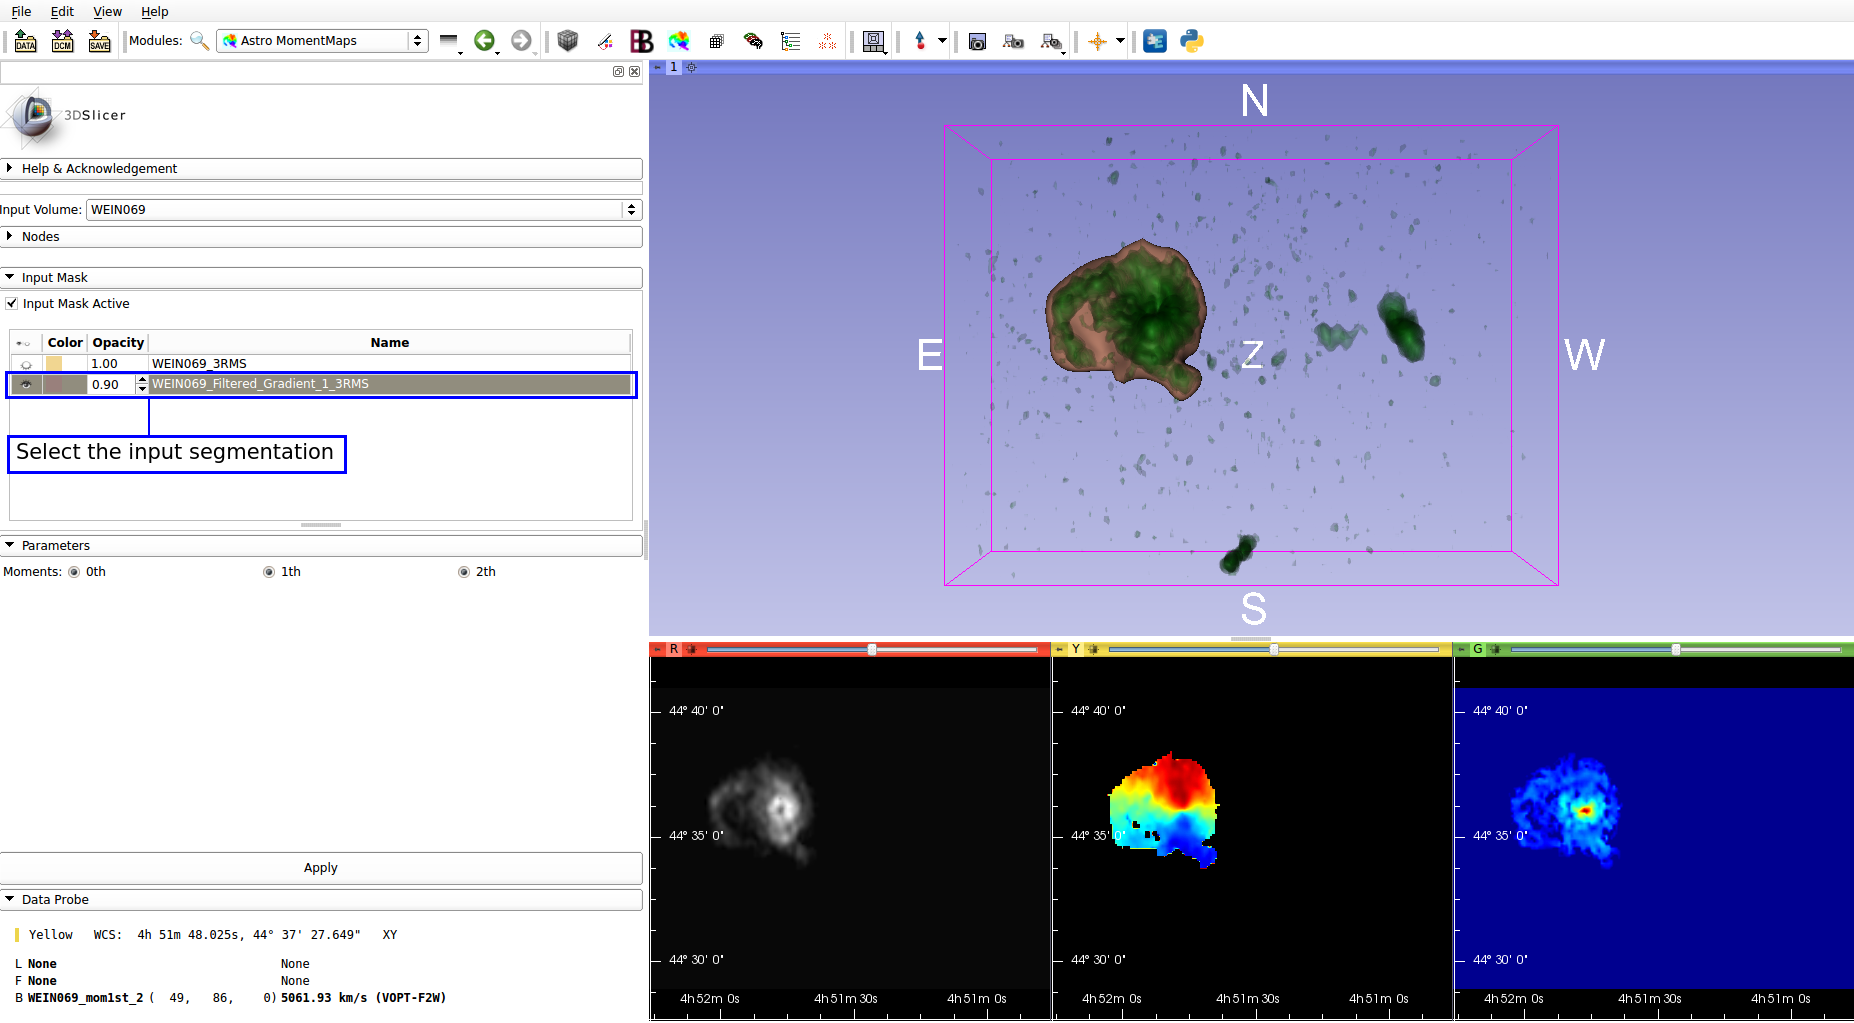
Navigate to the AstroMomentMaps Module and create the 0th, 1st and 2nd Moment Maps providing as input the segmentation generated by the smoothing module (in this tutorial, the segmentation WEIN069_Filtered_Gradient_1_3RMS has been refined by using the AstroCloudLasso selection tool in erase mode).

-
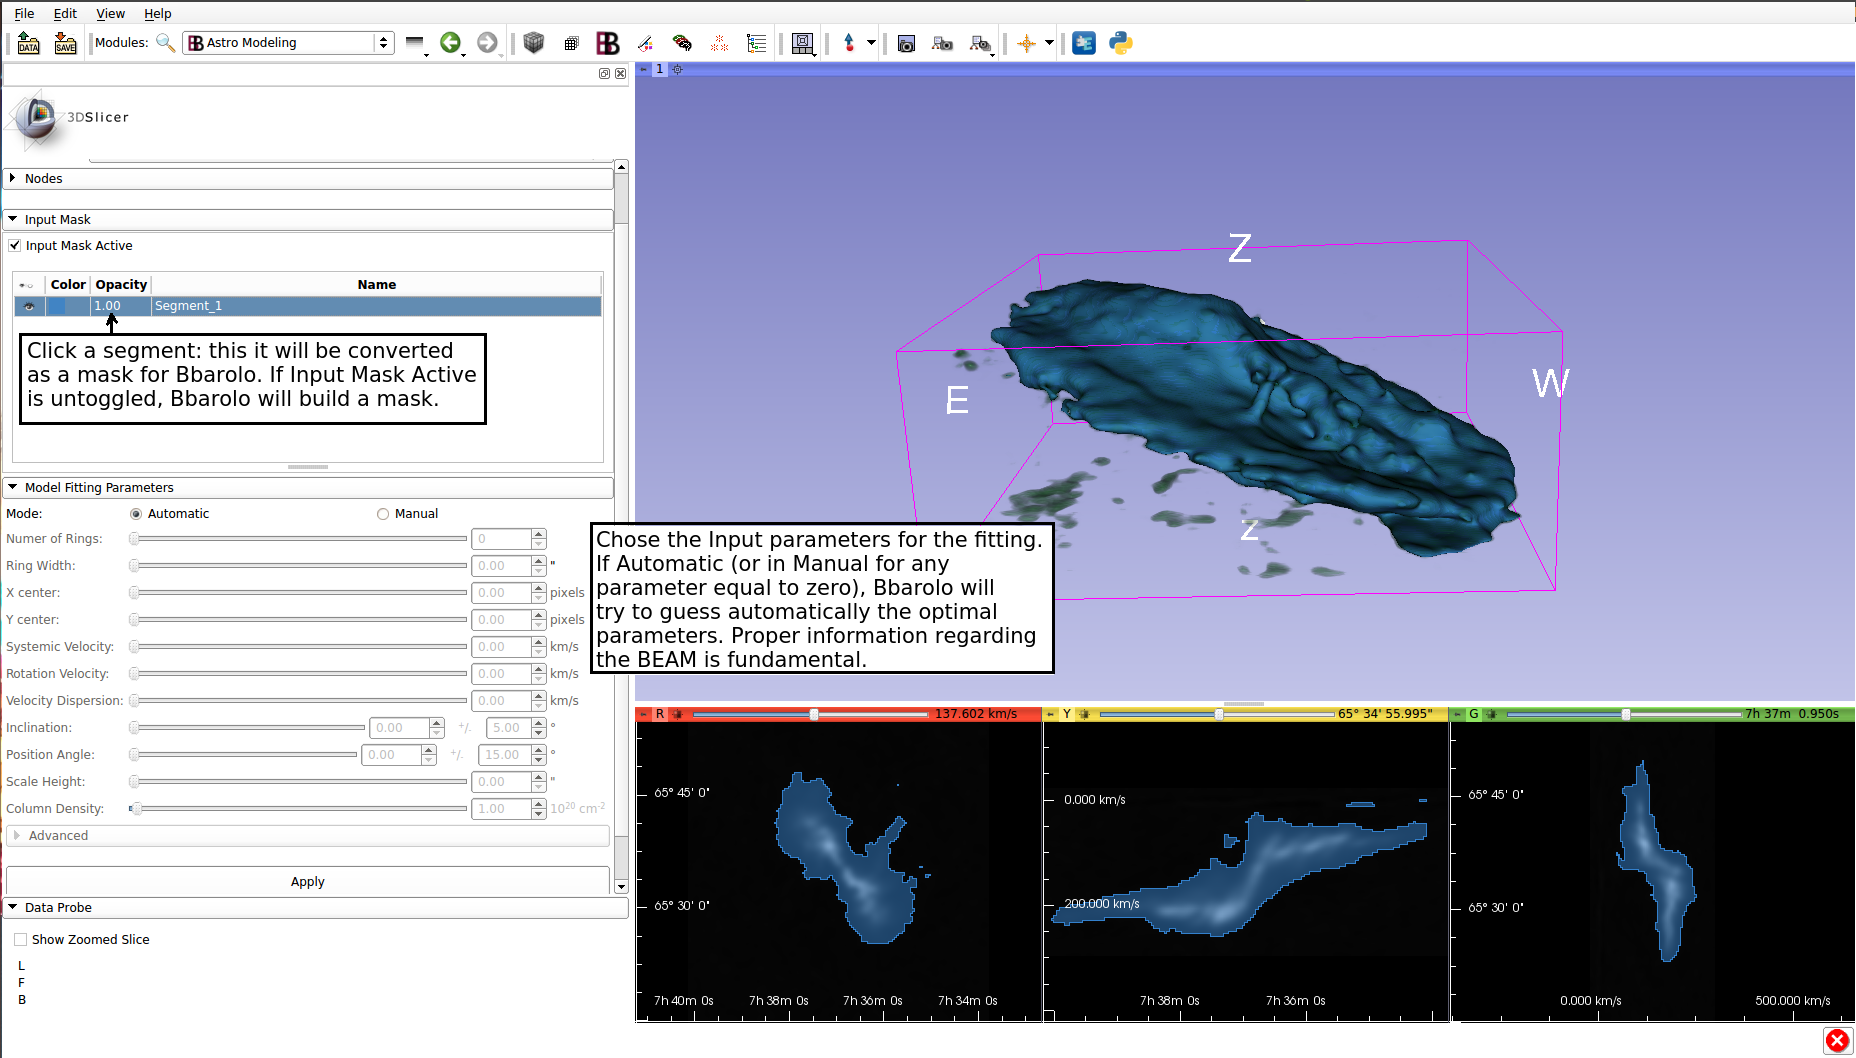
Navigate to the AstroModeling Module and create a model:
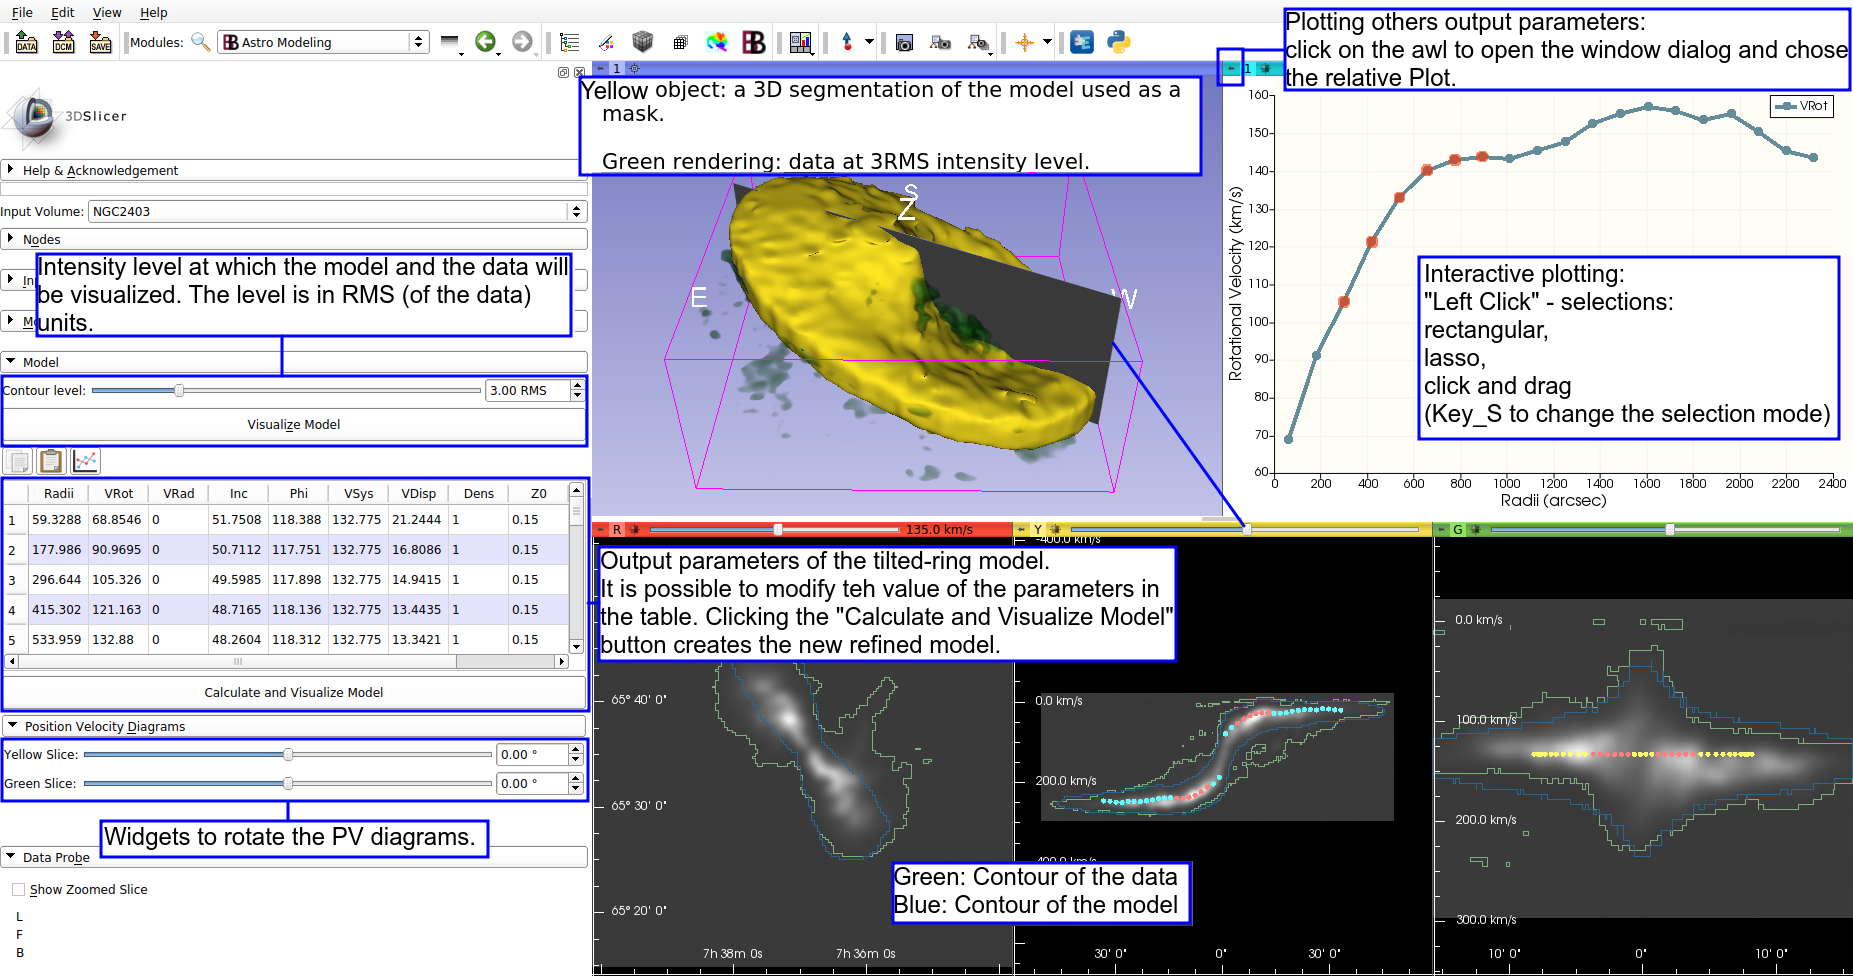
 and modify and visualize the model:

-
Save the scene:
-
Reload the scene. The full session (data, widgets, etc...) will be automatically restored exactly as it was saved before.
-
Navigate to the Screen Capture module and export a video:

-
Navigate to the Segmentations module and export a 3DModel (for 3Dprinting, 3Dpdf, etc...):


Quick Links: Home • Download • SlicerAstro Roadmap • Tutorial • 3DSlicer User Manual • SlicerAstro User Manual • Python Interactor • Developer Manual
![]()
