


Send cross platform native notifications using Node.js. Notification Center for macOS, notify-osd/libnotify-bin for Linux, Toasters for Windows 8/10, or taskbar Balloons for earlier Windows versions. If none of these requirements are met, Growl is used. Works well with electron.

Show a native notification on macOS, Windows, Linux:
const notifier = require('node-notifier');
// String
notifier.notify('Message');

// Object
notifier.notify({
  'title': 'My notification',
  'message': 'Hello, there!'
});- macOS: >= 10.8 or Growl if earlier.
- Linux:
notify-osdorlibnotify-bininstalled (Ubuntu should have this by default) - Windows: >= 8, task bar balloon for Windows < 8. Growl as fallback. Growl takes precedence over Windows balloons.
- General Fallback: Growl
See documentation and flow chart for reporter choice
npm install --save node-notifierStandard usage, with cross-platform fallbacks as defined in the reporter flow chart. All of the options below will work in a way or another on all platforms.
const notifier = require('node-notifier');
const path = require('path');

notifier.notify({
  title: 'My awesome title',
  message: 'Hello from node, Mr. User!',
  icon: path.join(__dirname, 'coulson.jpg'), // Absolute path (doesn't work on balloons)
  sound: true, // Only Notification Center or Windows Toasters
  wait: true // Wait with callback, until user action is taken against notification
}, function (err, response) {
  // Response is response from notification
});

notifier.on('click', function (notifierObject, options) {
  // Triggers if `wait: true` and user clicks notification
});

notifier.on('timeout', function (notifierObject, options) {
  // Triggers if `wait: true` and notification closes
});
You can also specify what reporter you want to use if you want to customize it or have more specific options per system. See documentation for each reporter below.
Example:
const NotificationCenter = require('node-notifier/notifiers/notificationcenter');
new NotificationCenter(options).notify();

const NotifySend = require('node-notifier/notifiers/notifysend');
new NotifySend(options).notify();

const WindowsToaster = require('node-notifier/notifiers/toaster');
new WindowsToaster(options).notify();

const Growl = require('node-notifier/notifiers/growl');
new Growl(options).notify();

const WindowsBalloon = require('node-notifier/notifiers/balloon');
new WindowsBalloon(options).notify();
Or if you are using several (or you are lazy): (note: technically, this takes longer to require)
const nn = require('node-notifier');

new nn.NotificationCenter(options).notify();
new nn.NotifySend(options).notify();
new nn.WindowsToaster(options).notify(options);
new nn.WindowsBalloon(options).notify(options);
new nn.Growl(options).notify(options);- Notification Center documentation
- Windows Toaster documentation
- Windows Balloon documentation
- Growl documentation
- Notify-send documentation
Same usage and parameter setup as terminal-notifier.
Native Notification Center requires macOS version 10.8 or higher. If you have an earlier version, Growl will be the fallback. If Growl isn't installed, an error will be returned in the callback.
Wrapping around terminal-notifier, you can
do all terminal-notifier can do through properties to the notify method. E.g.
if terminal-notifier says -message, you can do {message: 'Foo'}, or
if terminal-notifier says -list ALL, you can do {list: 'ALL'}. Notification
is the primary focus for this module, so listing and activating do work,
but isn't documented.
const NotificationCenter = require('node-notifier').NotificationCenter;

var notifier = new NotificationCenter({
  withFallback: false, // Use Growl Fallback if <= 10.8
  customPath: void 0 // Relative/Absolute path to binary if you want to use your own fork of terminal-notifier
});

notifier.notify({
  'title': void 0,
  'subtitle': void 0,
  'message': void 0,
  'sound': false, // Case Sensitive string for location of sound file, or use one of macOS' native sounds (see below)
  'icon': 'Terminal Icon', // Absolute Path to Triggering Icon
  'contentImage': void 0, // Absolute Path to Attached Image (Content Image)
  'open': void 0, // URL to open on Click
  'wait': false, // Wait for User Action against Notification or times out. Same as timeout = 5 seconds

  // New in latest version. See `example/macInput.js` for usage
  timeout: 5, // Takes precedence over wait if both are defined.
  closeLabel: void 0, // String. Label for cancel button
  actions: void 0, // String | Array<String>. Action label or list of labels in case of dropdown
  dropdownLabel: void 0, // String. Label to be used if multiple actions
  reply: false // Boolean. If notification should take input. Value passed as third argument in callback and event emitter.
}, function(error, response, metadata) {
  console.log(response, metadata);
});
Note: wait option is shorthand for timeout: 5 and doesn't make the notification sticky, but sets
timeout for 5 seconds. Without wait or timeout notifications are just fired and forgotten Without
given any response. To be able to listen for response (like activation/clicked), you have to define a timeout.
This is not true if you have defined reply. If using reply it's recommended to set a high timeout or no timeout at all.
For macOS notifications, icon and contentImage, and all forms of reply/actions requires macOS 10.9.
Sound can be one of these: Basso, Blow, Bottle, Frog, Funk, Glass,
Hero, Morse, Ping, Pop, Purr, Sosumi, Submarine, Tink.
If sound is simply true, Bottle is used.
See specific Notification Center example. Also, see input example.
Custom Path clarification
customPath takes a value of a relative or absolute path to the binary of your fork/custom version of terminal-notifier.
Example: ./vendor/terminal-notifier.app/Contents/MacOS/terminal-notifier
Note: There are some limitations for images in native Windows 8 notifications:
The image must be a PNG image, and cannot be over 1024x1024 px, or over over 200Kb.
You also need to specify the image by using an absolute path. These limitations are
due to the Toast notification system. A good tip is to use something like
path.join or path.delimiter to have cross-platform pathing.
Windows 10 Note: You might have to activate banner notification for the toast to show.
From mikaelbr/gulp-notify#90 (comment)
You can make it work by going to System > Notifications & Actions. The 'toast' app needs to have Banners enabled. (You can activate banners by clicking on the 'toast' app and setting the 'Show notification banners' to On)
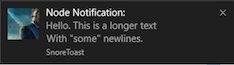
Snoretoast is used to get native Windows Toasts!
const WindowsToaster = require('node-notifier').WindowsToaster;

var notifier = new WindowsToaster({
  withFallback: false, // Fallback to Growl or Balloons?
  customPath: void 0 // Relative/Absolute path if you want to use your fork of SnoreToast.exe
});

notifier.notify({
  title: void 0, // String. Required
  message: void 0, // String. Required if remove is not defined
  icon: void 0, // String. Absolute path to Icon
  sound: false, // Bool | String (as defined by http://msdn.microsoft.com/en-us/library/windows/apps/hh761492.aspx)
  wait: false, // Bool. Wait for User Action against Notification or times out
  id: void 0, // Number. ID to use for closing notification.
  appID: void 0, // String. App.ID. Don't create a shortcut but use the provided app id.
  remove: void 0, // Number. Refer to previously created notification to close.
  install: void 0 // String (path, application, app id).  Creates a shortcut <path> in the start menu which point to the executable <application>, appID used for the notifications.
}, function(error, response) {
  console.log(response);
});const Growl = require('node-notifier').Growl;
var notifier = new Growl({
name: 'Growl Name Used', // Defaults as 'Node'
host: 'localhost',
port: 23053
});
notifier.notify({
title: 'Foo',
message: 'Hello World',
icon: fs.readFileSync(__dirname + '/coulson.jpg'),
wait: false, // Wait for User Action against Notification
// and other growl options like sticky etc.
sticky: false,
label: void 0,
priority: void 0
});See more information about using growly.
For earlier Windows versions, the taskbar balloons are used (unless fallback is activated and Growl is running). For balloons, a great project called notifu is used.
const WindowsBalloon = require('node-notifier').WindowsBalloon;

var notifier = new WindowsBalloon({
  withFallback: false, // Try Windows Toast and Growl first?
  customPath: void 0 // Relative/Absolute path if you want to use your fork of notifu
});

notifier.notify({
  title: void 0,
  message: void 0,
  sound: false, // true | false.
  time: 5000, // How long to show balloon in ms
  wait: false, // Wait for User Action against Notification
  type: 'info' // The notification type : info | warn | error
}, function(error, response) {
  console.log(response);
});
See full usage on the project homepage: notifu.
Note: notify-send doesn't support the wait flag.
const NotifySend = require('node-notifier').NotifySend;

var notifier = new NotifySend();

notifier.notify({
  title: 'Foo',
  message: 'Hello World',
  icon: __dirname + '/coulson.jpg',

  // .. and other notify-send flags:
  urgency: void 0,
  time: void 0,
  category: void 0,
  hint: void 0,
});
See flags and options on the man pages
CLI is moved to separate project: https://github.com/mikaelbr/node-notifier-cli
node-notifier is made possible through Open Source Software. A very special thanks to all the modules node-notifier uses.

When using node-notifier within a tmux session, it can cause a hang in the system. This can be solved by following the steps described in this comment: julienXX/terminal-notifier#115 (comment)
See more info here: mikaelbr#61 (comment)
Even if you define an icon in the configuration object for node-notifier, you will see a small Terminal icon in the notification (see the example at the top of this document). This is the way notifications on macOS work, it always show the parent icon of the application initiating the notification. For node-notifier, terminal-notifier is the initiator and has Terminal icon defined as its icon. To define your custom icon, you need to fork terminal-notifier and build your custom version with your icon. See this issue for more info: mikaelbr#71
If packaging your Electron app as an asar, you will find node-notifier will fail to load. Due to the way asar works, you cannot execute a binary from within an asar. As a simple solution, when packaging the app into an asar please make sure you --unpack the vendor folder of node-notifier, so the module still has access to the notification binaries. To do this, you can do so by using the following command:
asar pack . app.asar --unpack "./node_modules/node-notifier/vendor/**"When using node-notifier inside of webpack, you must add the following snippet to your webpack.config.js. The reason this is required, is because node-notifier loads the notifiers from a binary, and so a relative file path is needed. When webpack compiles the modules, it supresses file directories, causing node-notifier to error on certain platforms. To fix/workaround this, you must tell webpack to keep the relative file directories, by doing so, append the following code to your webpack.config.js
node: {
  __filename: true,
  __dirname: true
}