Networking Guide Official Skyminer

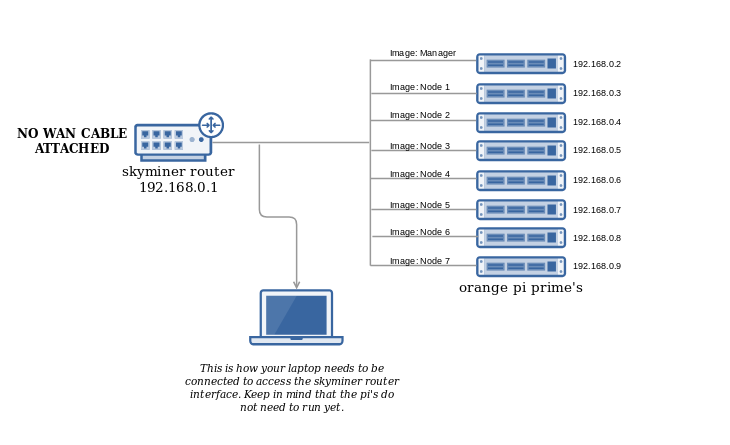
This guide assumes that you have read and understood the readme.md, downloaded the official images and do every step exactly the way it is described. Misconduct will lead to the inability to connect and to potential reflashing. It is very important that there is no IP collision with your existing home router subnet. The default settings of the official images, as well as the router of the Skyminer, are using the 192.168.0.0/24 subnet while deviating IP configurations may work.
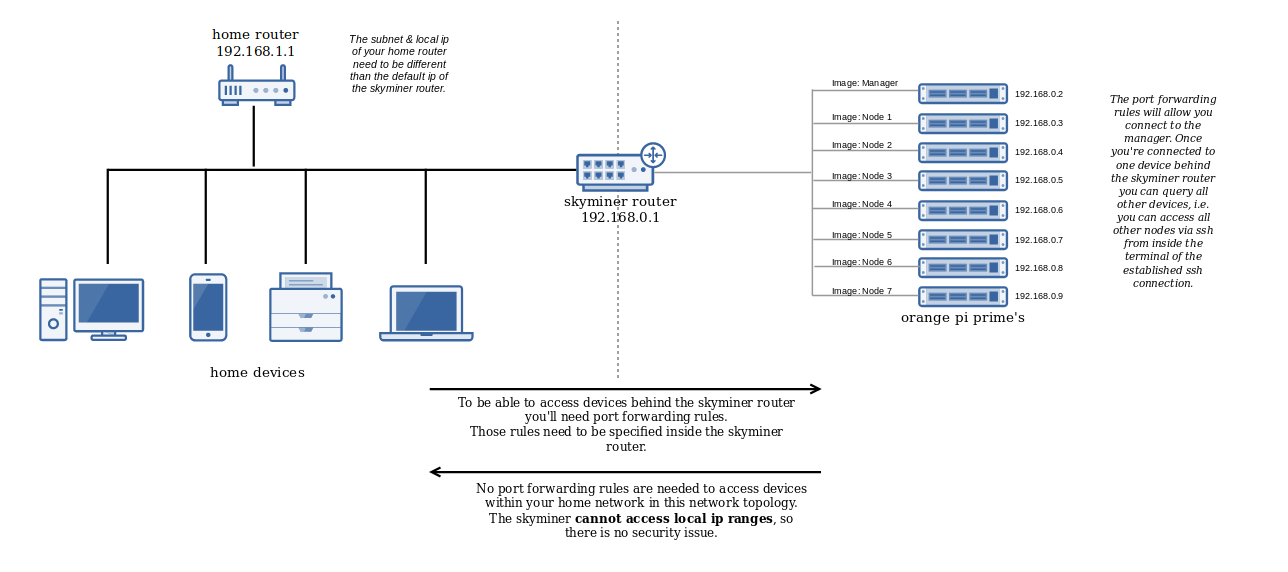
After finishing off all the steps in this guide you will be able to access the Hypervisor UI from within your home network and access the devices in the subnet of the Skyminer router via SSH.
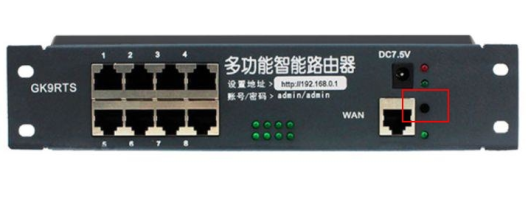
The Skyminer router has 8 LAN ports, so during this guide, you will need to unplug one from the router to gain access with your computer, later on, you will have to plug it back in. Before you're starting with this guide please turn off all pi's, none of them need to run until you are being told to turn them on.
- Official Skyminer router.
- Computer/laptop with LAN port
- LAN cable
Before you do the following steps make sure that there is no cable attached to the WAN port of the Skyminer router. Restart both the Skyminer router and your computer.
Connect your computer to a LAN port of the Skyminer router, it doesn't matter which one. Then open a browser window and type:
192.168.0.1
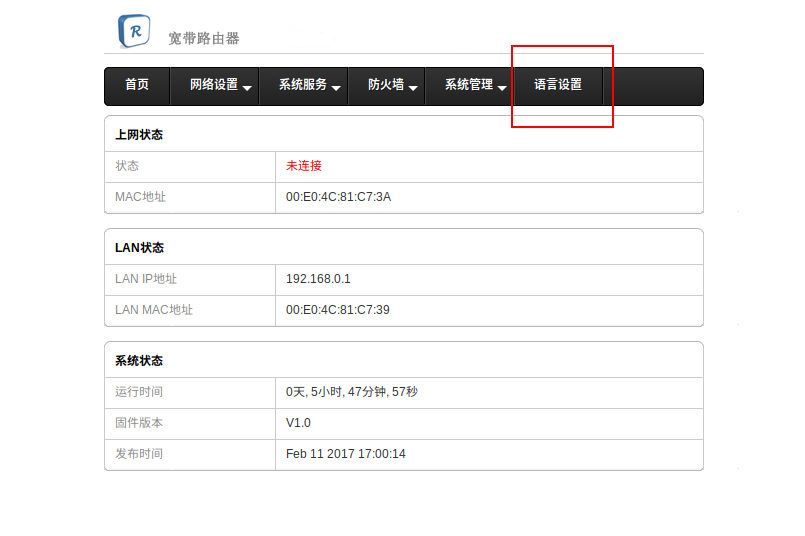
The router interface should come up, looking like this:

If you are queried to type in a password it is 'admin'.
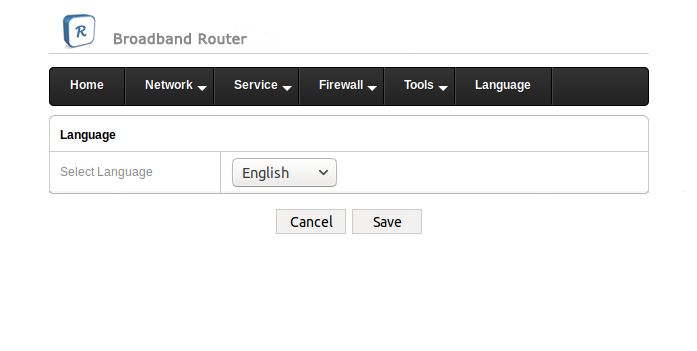
As you can see the default language is in Chinese, to proceed we need to change it to English. To accomplish this go the rightmost tab:
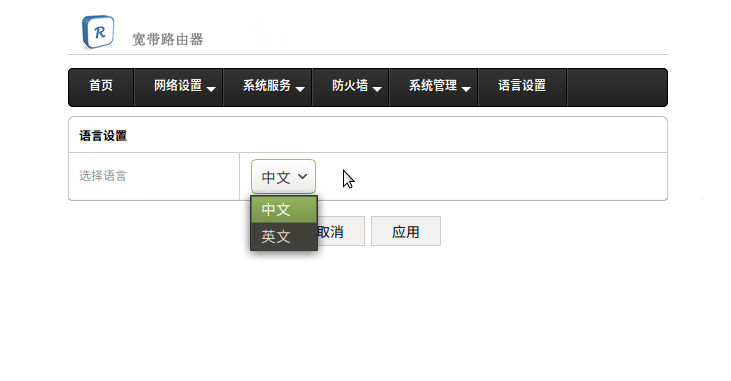
Choose the 2nd option in the drop-down menu and click on the right button.
After that refresh the page, it should look like this:
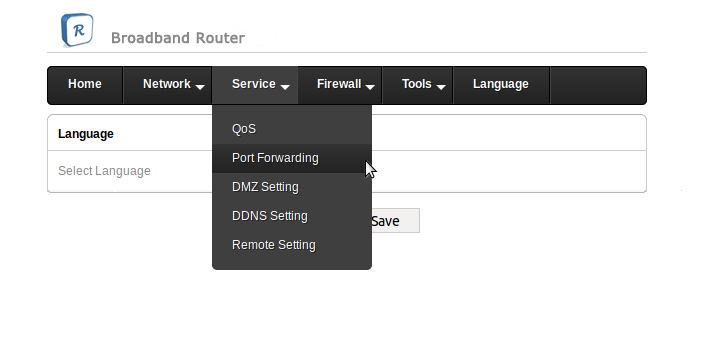
Now that the language is changed we can proceed and set up the necessary port forwarding rules to access the Skywire manager from outside the subnet of the Skyminer router (i.e. when you're not connected to one of its LAN ports).
Change to the port forwarding menu:
Turn Port Forwarding on:
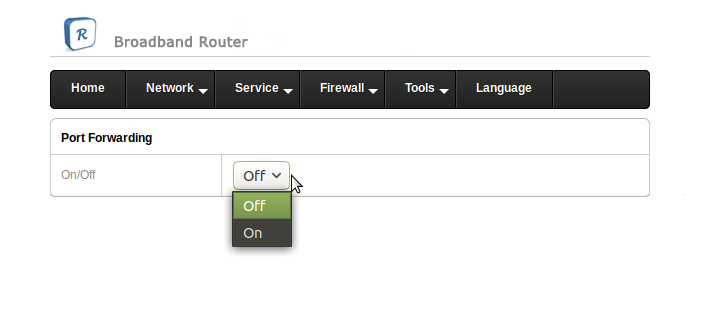
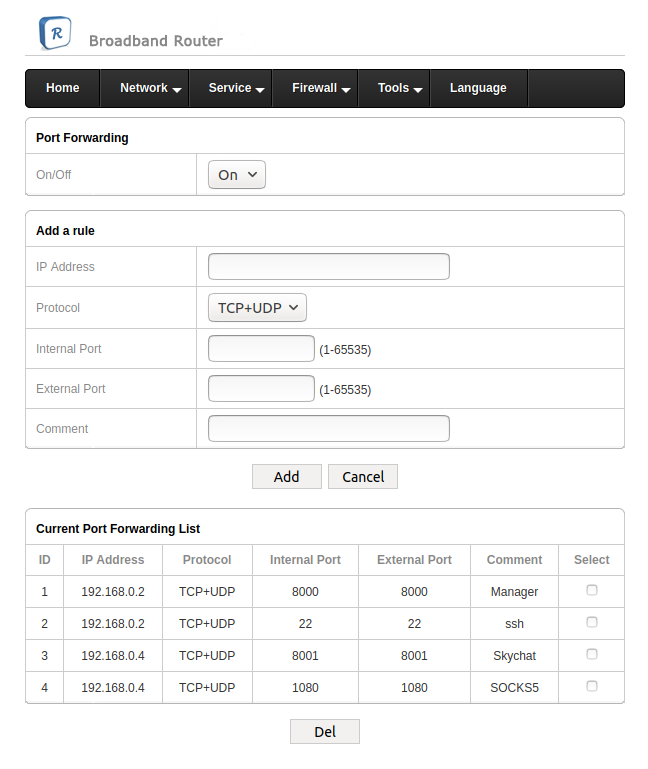
The screen you are now looking at looks like this:
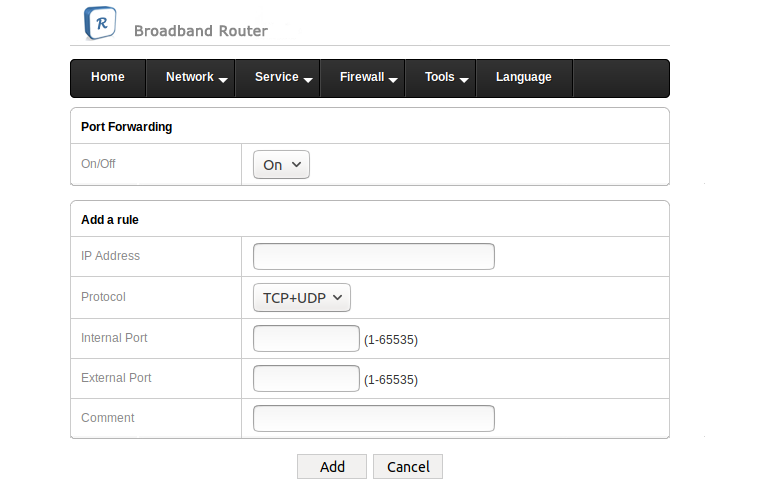
Now you need to add four port forwarding rules. Rule 1 will allow you to access the manager pi via ssh connection:
IP Address: 192.168.0.2
Protocol: TCP+UDP
Internal Port: 22
External Port: 22
Description: SSH
Click on 'Add', then proceed with rule 2.
Rule 2 will allow you to access the hypervisorUI:
IP Address: 192.168.0.2
Protocol: TCP+UDP
Internal Port: 8000
External Port: 8000
Description: Manager
Rule 3 and rule 4 will only allow access to the SOCKS5 proxy & Skychat app of the board with IP address 192.168.0.4
If you decide to use a board with a different IP address for using the SOCKS5 proxy or the Skychat app later on you must adjust these rules accordingly.
Click on 'Add' and proceed with rule 3.
Rule 3 will allow you to use the SOCKS5 proxy of the board with IP address 192.168.0.4 after establishing a connection within the Skywire network:
IP Address: 192.168.0.4
Protocol: TCP+UDP
Internal Port: 1080
External Port: 1080
Description: SOCKS5
Click on 'Add' and proceed with rule 4.
Rule 4 will allow you to use the Skychat app of the board with IP address 192.168.0.4 after establishing a connection within the Skywire network.
IP Address: 192.168.0.4
Protocol: TCP+UDP
Internal Port: 8001
External Port: 8001
Description: Skychat
Once all rules are added it should look like this:
This part is finished, disconnect your computer from the LAN port and plug the remaining pi back in. Now please turn off the Skyminer router.
Now that the configuration of the Skyminer router is finished you can specify a static IP for it inside your home router. This will add convenience once you want to view the manager and access the nodes during the testnet. To do this, you need to log into your home router (if you're not sure how to do this read this https://www.lifewire.com/how-to-find-your-default-gateway-ip-address-2626072).
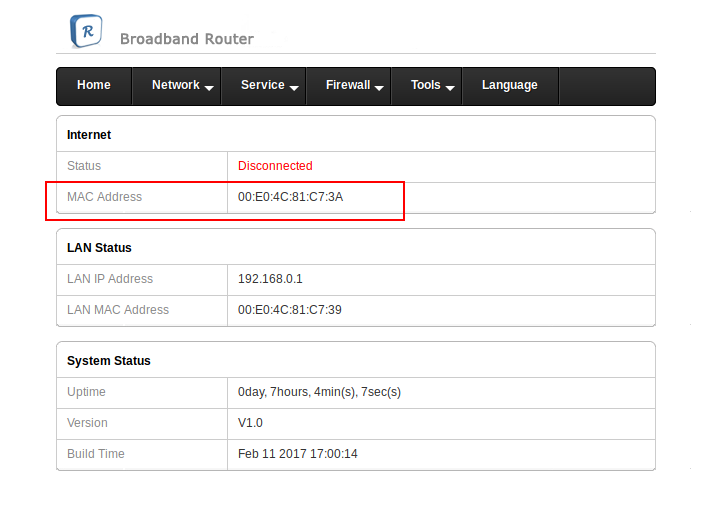
Once you're in you can go to static leases or a similar term (located somewhere in LAN settings; highly dependent on your router model, this is a very broad description. Please download the manual of your router to get a detailed guide how to accomplish this) and assign the static IP lease for the Skyminer router. You will need the MAC address of the Skyminer router for this, you can find it on the 'Home'-page of the router interface or in your home router's web interface:
Please refer to the
- Run HypervisorUI on local machine guide or
- Run HypervisorUI on manager board (official images)
dependent on where the hypervisorUI is running.
Now you need to plug in a cable into the WAN port of the Skyminer router going into a LAN port of your home router and turn on your Skyminer router.
To access the manager or any device within the subnet of the Skyminer router you need the IP that it got assigned by your home router. To obtain it you have 3 options (they increase in difficulty from one to three):
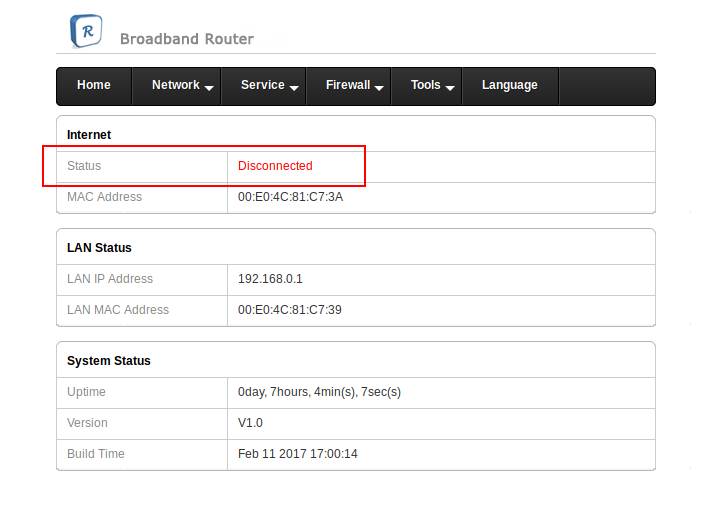
- Visit the Skyminer router interface and obtain the IP address from the 'Home'page. The IP is displayed under 'Internet -> Status', if you connected a LAN cable to the WAN port of the Skyminer router it will be displayed inside the red rectangle:
To do the following two steps you need to disconnect your computer from the Skyminer router and connect it to your home router.
- Login to your home router and go to 'Connected Devices', you'll see a device called 'myap', this is the Skyminer router.
- Use network scan software like for example nmap to scan the subnet of your home router. The following is an example for the 192.168.1.1/24 subnet
nmap -sP 192.168.1.1/24
Will give you all active devices within the subnet. If you aren't familiar with using the command line you can use the multi-platform tool Zenmap, which provides a UI for nmap.
Please note down the IP address, we'll need it to access the hypervisorUI.
Please refer to:
- this guide if you setup the hypervisor to be executed on one of the boards
- this guide if you setup the hypervisor to run locally on your own machine
Several different issues may require you to reset the router.
An example would be if the language doesn't change immediately don't panic, numerous people experienced this.
Try the following steps:
- Refresh the page
- Switch the language back and forth multiple times
- Clean your browser cache
- Try a different browser
- Reset the router with the factory reset button by pressing it for ~ 20 seconds