Skyimager User Guide
The Skyimager enables users to prepare Skybian images designed for the official Skyminer running the Skywire. It can generate an arbitrary number of images ready to be flashed. Users have the option of:
- running the manager UI (hypervisor) locally on your own machine
- running it on the manager board
This guide will outline the general usage of the Skyimager as well as the update procedure to register your new public keys in the Skywire Whitelisting System to continue receiving rewards for your Skyminer.
The login data for Skybian images is as follows:
- Orange Pi Prime & Orange Pi 3:
- username:
root - password:
skybian
- username:
- Raspberry Pi
- username:
pi - password:
skybian
- username:
Skyimager & Skybian currently support the following boards:
- Orange Pi Prime
- Orange Pi 3
- Raspberry Pi 1, 2, 3 and 4 (32-bit and 64-bit versions are provided)
Please make sure to select the respective Skybian base image during the image generating process.
To install Skyimager, go to the Skybian release page. On the release page you can download a binary for one of the three major operating systems by clicking on the link corresponding to your operating system. MacOS users should click on the link which contains the word "darwin". After downloading the archive, depending on your operating system, you can unzip the archive by:
- MacOS: double clicking on it
- Linux: unxz $PATH_TO_BINARY ;tar -xf $PATH_TO_BINARY
- Windows: using an unzipping tool such as 7zip
After unpacking, open the ./fyne-cross/bin/.../skyimager-gui binary. Now a Graphic User Interface should be opened automatically. If you do not see any UI, open http://127.0.0.1:8080/ within your browser.
For MacUsers, the system may display a security warning. If that is the case, open your system settings and go to security. There you should find the option to open the binary.
Note that the following pictures were created with the selection of a pre-release. You should always select the latest stable base image!

The UI will display a brief overview over the image generation process. Proceed by clicking Next.
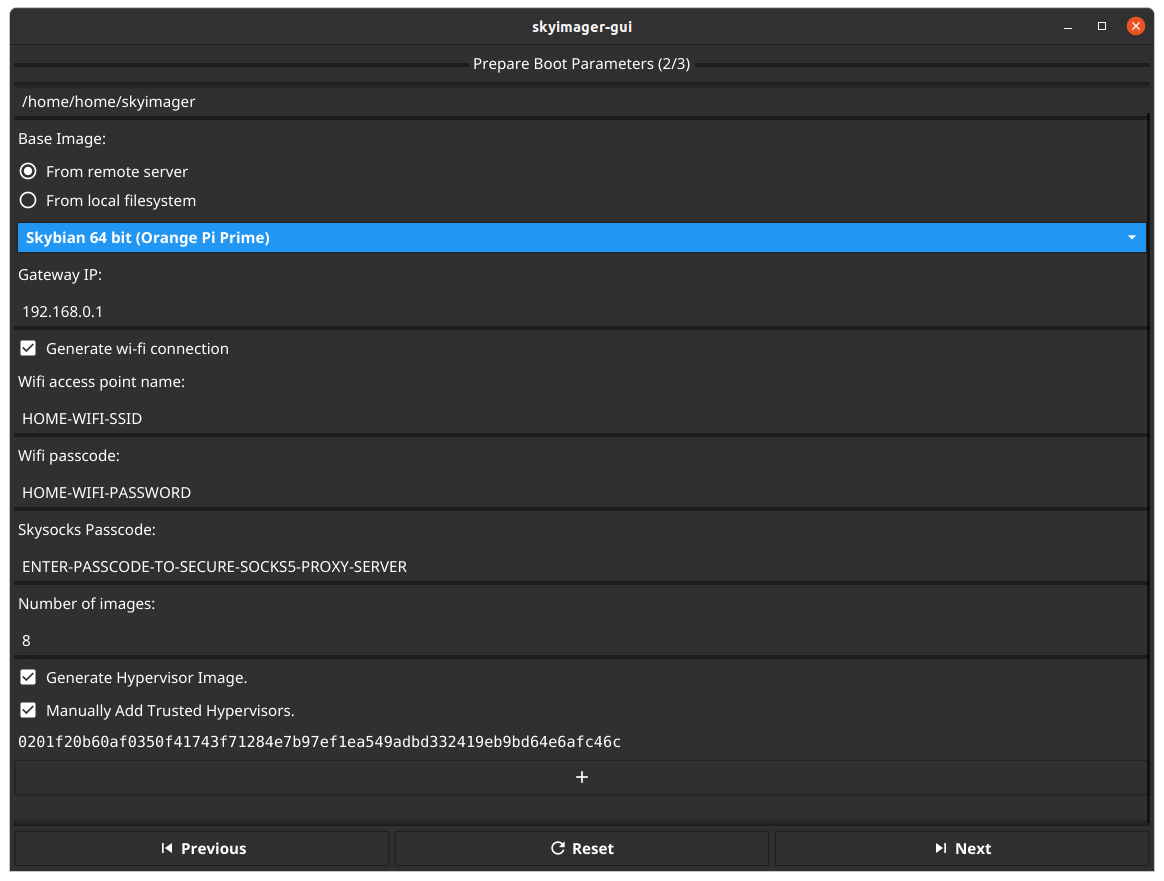
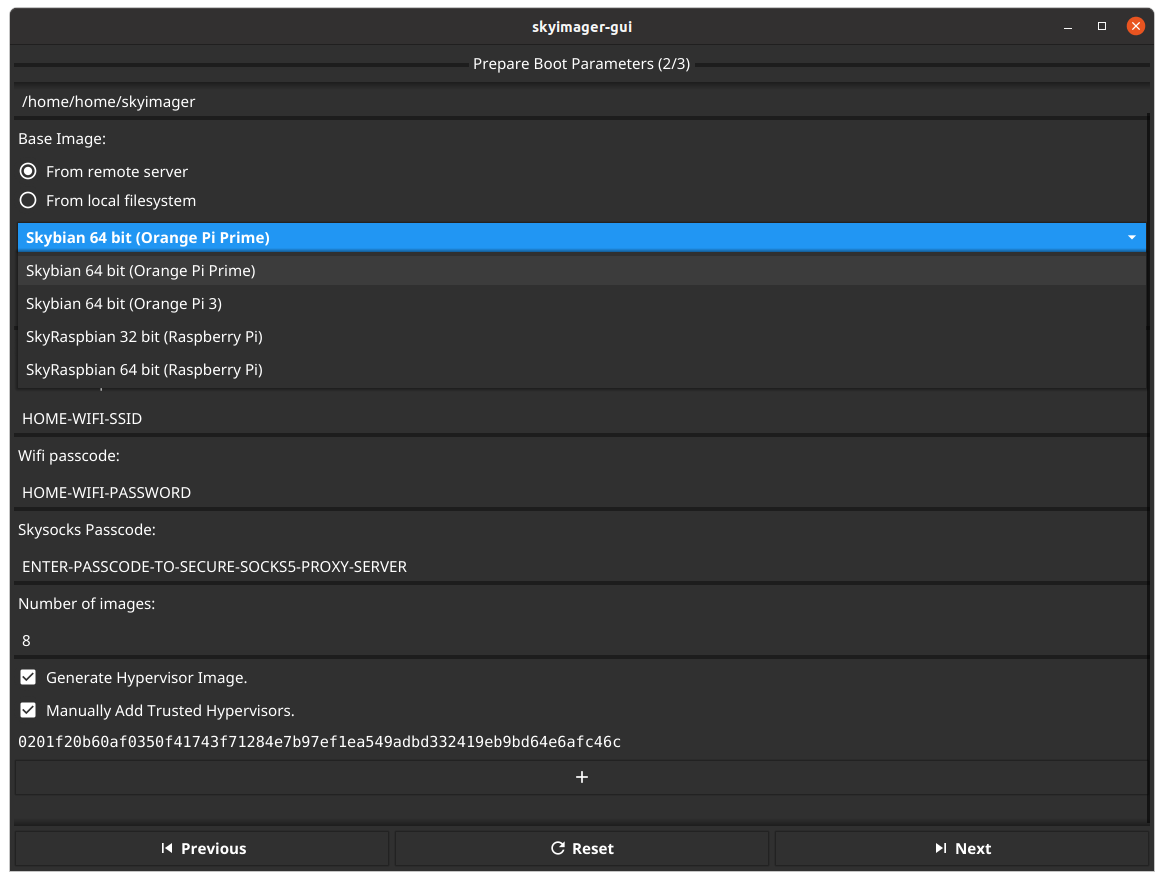
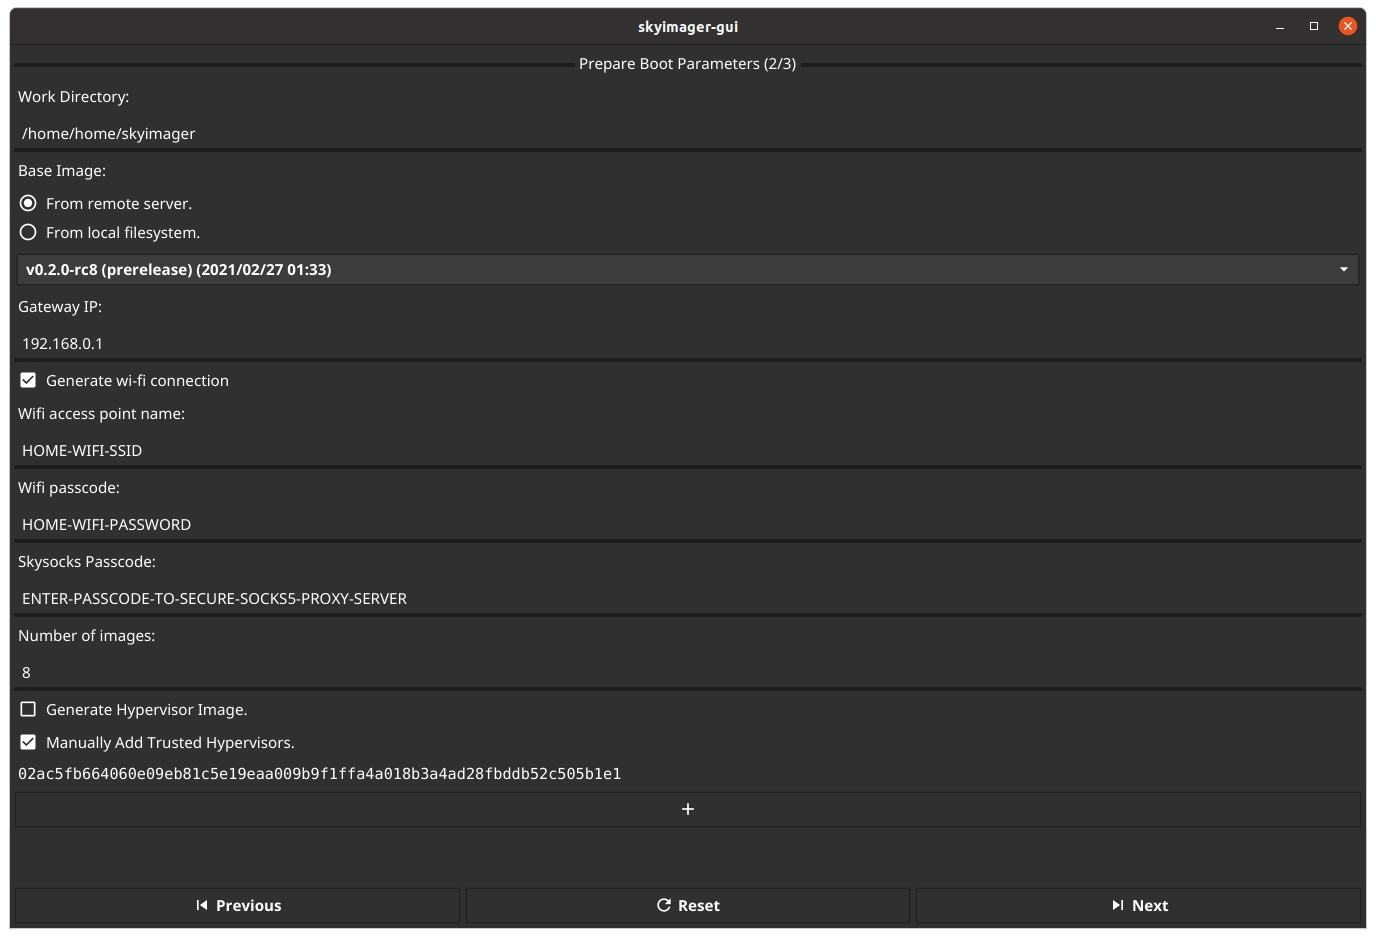
This next window will allow you to configure the image boot parameters. Start by chosing the latest stable base image for Skybian available, make sure to select the respective image for your boards with the dropdown menu!
You can make several adjustments to the images:
- you can change the
Gateway IPaddress that the boards will use. The gateway IP is the IP of the router to which the boards are connected to. - you can enable the images to use a local WIFI network. Note that you should disconnect LAN connections to the boards if you select & activate this option.
- you can select a passcode for the socks5 proxy server
- you can decide to set one of the images as hypervisor and/or add the public key of a hypervisor you run on a local machine. Please check the appendix for details & the advantages.
The number of images is including the hypervisor. All settings that you've made can be configured in the subsequent step 3 of the Skyimager.
Continue by clicking Next.
If a popup appears that states that the target directory exists already, click Yes:

This is the last and third page of the Skyimager process and it will display all the parameters for the number of images you are about to generate. Click Download and Build to start generating the images.
Note that you have the option to change individual settings like the IP addresses in this guide. Beware, use this feature with caution and only if you know what you're doing.
You are advised to copy the content of this step and save it as skyimager-settings.json file on your disk, preferrably encrypted but that's up to you.

Once the images have been generated you will need to flash the images to the Skyminer SD cards. If you do not have a tool for flashing SD cards installed, you can use for instance Balena Etcher for free. Download and install Etcher and start the programm.

Upon startup of Etcher, click the Select Image button and select the first image from the directory that you generated the images in. Then hit the Select Target button and select the SD card that you want to flash with the image.

After pressing Flash the programm will flash the image onto the SD card.

Proceed in the same fashion for all generated images. You can click on the Flash another button to get back to the initial window.
After you have flashed the images, proceed by plugging the flashed cards into the Skyminer nodes and start your nodes.
Close the Skyimager and Etcher.
Continue with the guide to access the hypervisorUI.
Updating the registered public keys in the Skywire Whitelisting System can be achieved very easily. You can either:
- preferred option: take the public keys from the hypervisorUI.
- copy the public keys displayed in the Skyimager on Step 3
Editing your registered public keys is explained in this section of the Skywire Whitelisting System User Guide
The hypervisorUI includes a list of all connected visors. You can use this list to copy each individual public key and update your registered public keys in the Skywire Whitelisting System.
The visor list might look as follows whereby the number of visible visors differs dependent on the number of visors you generated to be connected to the hypervisor:
- the public keys are marked by the blue rectangle
- the red rectangle marks the copy to clipboard function with one click

Make sure to perform the steps for all of your public keys to ensure that the registered public keys are up to date.
During Step 3 of the Skyimager 'Generating Images' procedure you'll see a list of the details of the to-be-generated images. You may use this list to obtain the public keys of your nodes to update the registered public keys in the Skywire Whitelisting System. Make sure to use the keys listed under "local_pk:
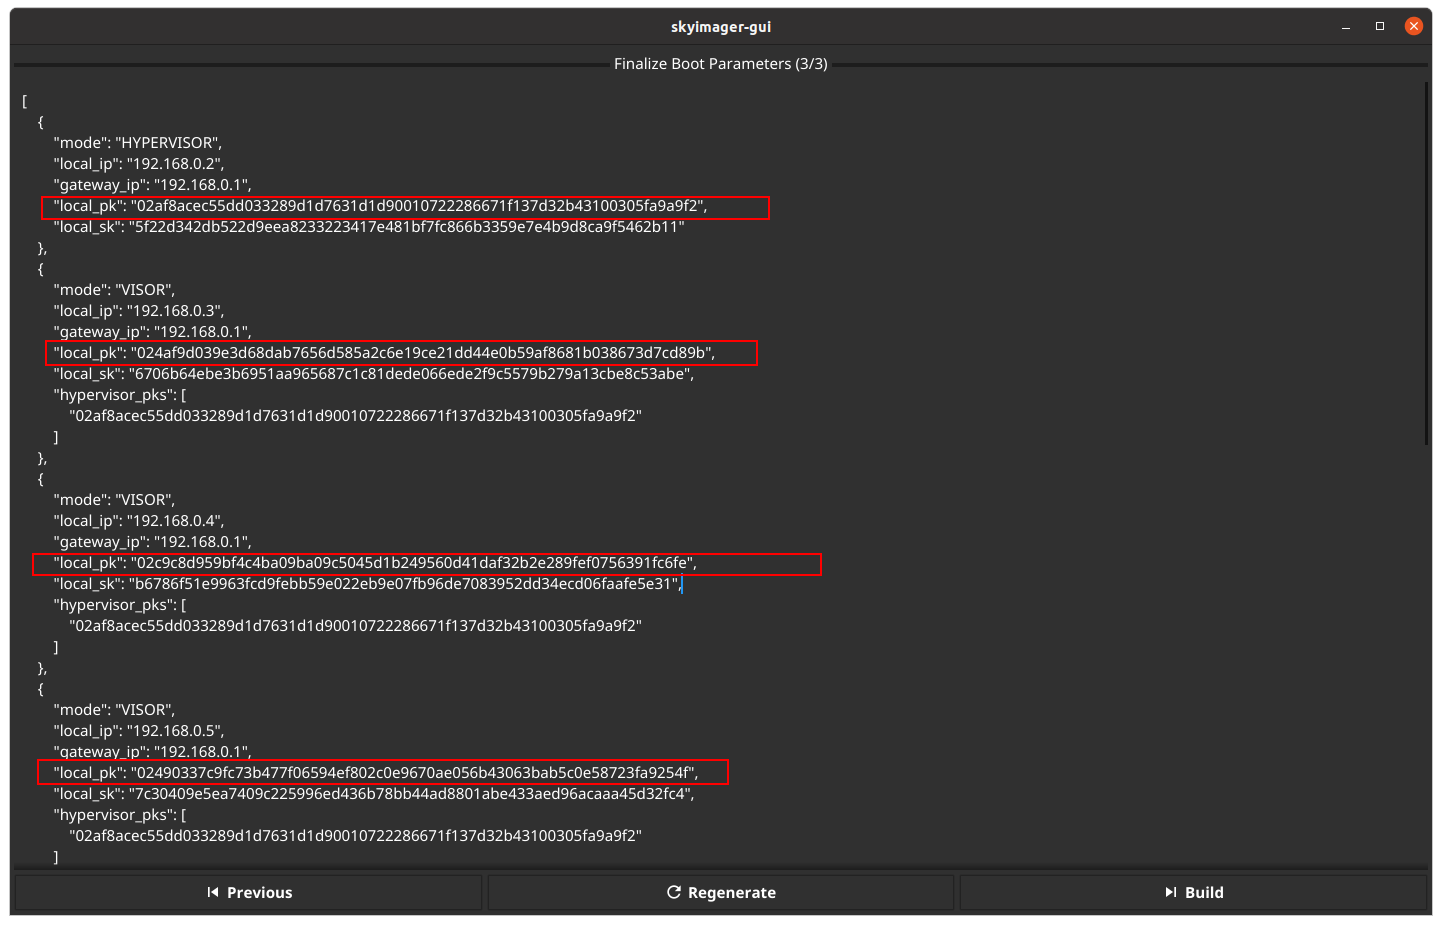
Make sure to perform the steps for all of your public keys to ensure that the registered public keys are up to date
Generally, this option should only be used by the rather advanced users.
Running the hypervisor and manager UI on your own machine will allow you to control your nodes remotely from your own machine anywhere. Note that the hypervisor functions as a use-when-needed policy, meaning that it must not be running at all times but can simply be started whenever you need to access it.
On the other hand, running the hypervisor locally requires you to setup Golang and Git on your machine. In case you do not want to run the hypervisor and Manager on your own machine, you can still manage and monitor your nodes, but you will only be able to do so from within the local network that the Skyminer is in.
You can add the hypervisor public key to the image config settings in step 2 of the Skyimager process.
Make sure to untoggle the Generate Hypervisor Image if you decide to run a local hypervisor.
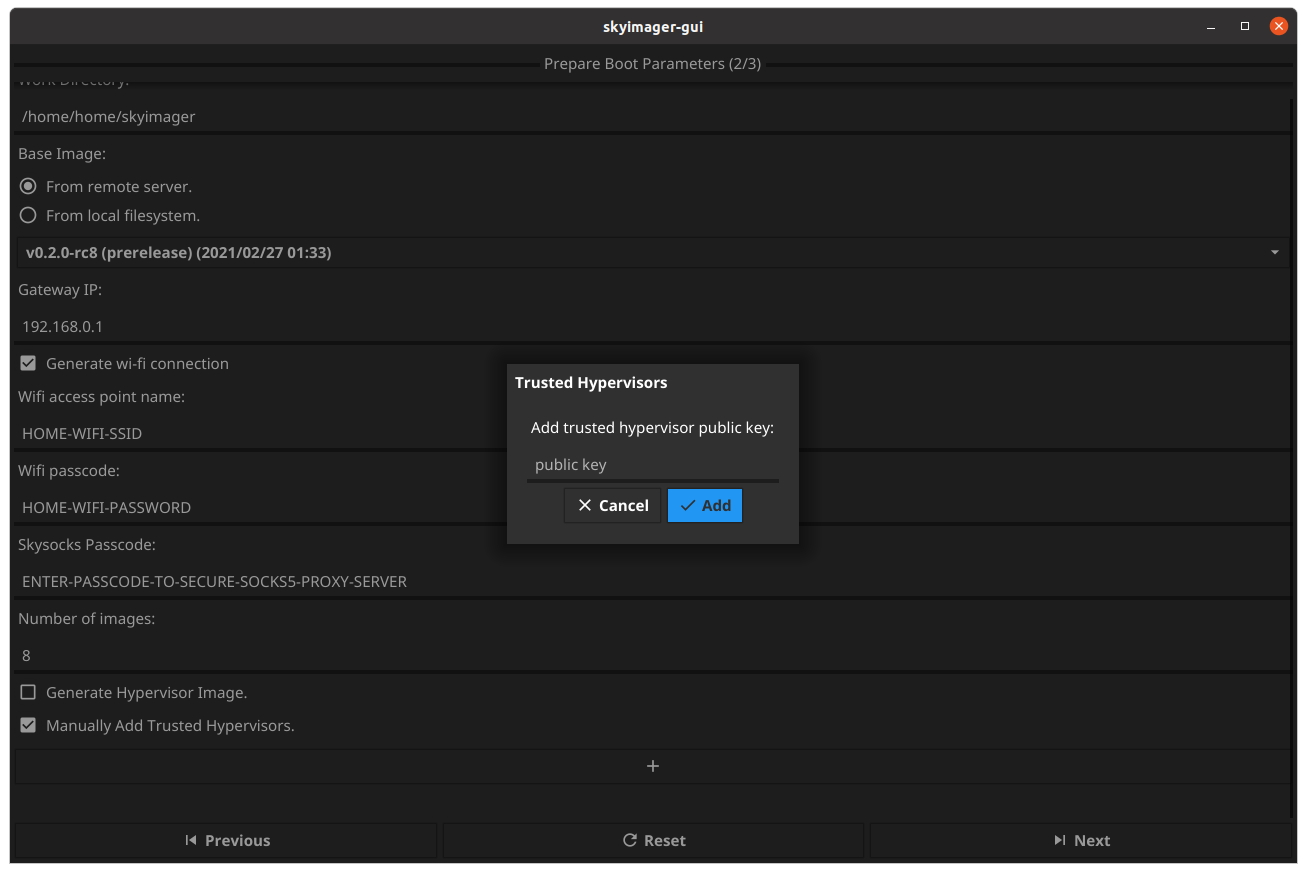
Please enter the public key of your hypervisor:
That's it, please continue with step 3 according the Generate Images section above.