Testing with Android Studio and XCode
Android Studio
The first step is to download AndroidStudio from the official website.
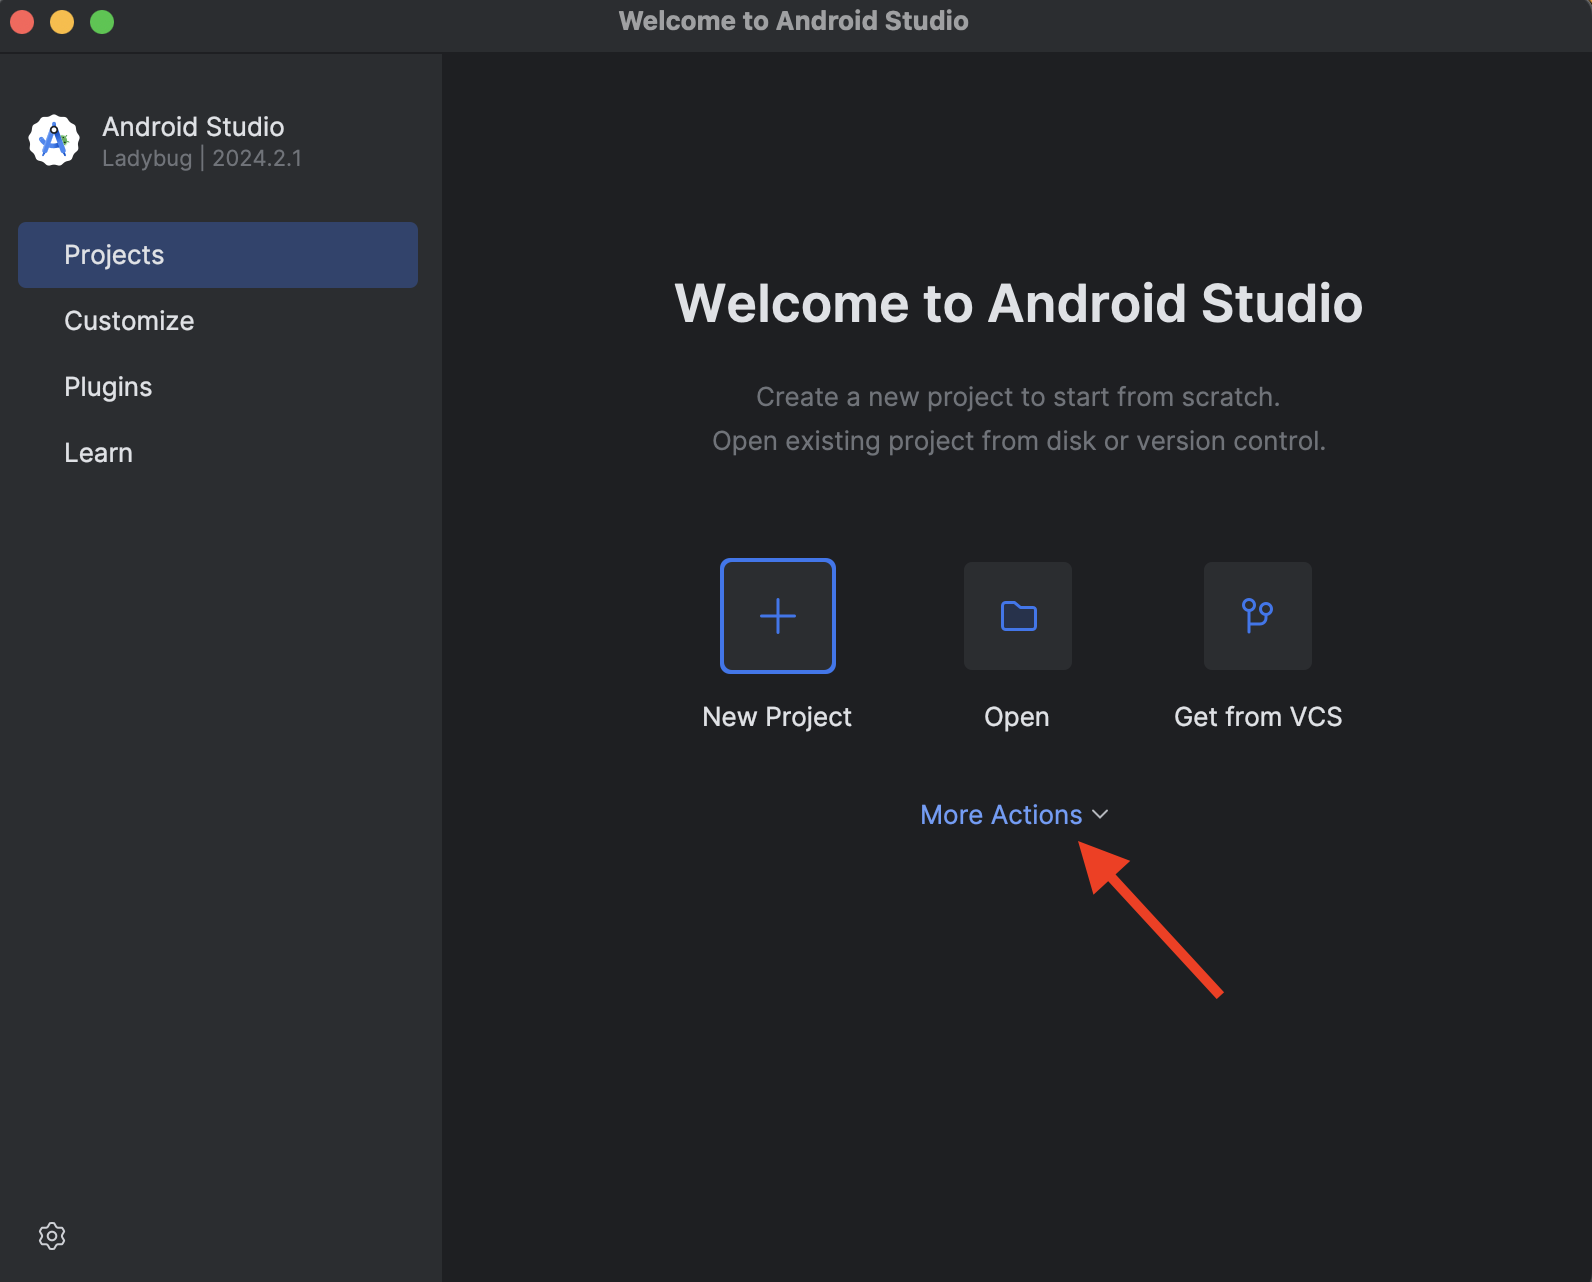
Install and launch the application.
Click
More Actions.
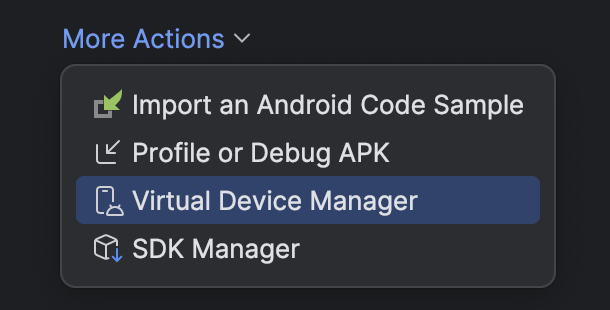
Click on
Virtual Device Manager.
To create a new device click
Create Virtual Device.
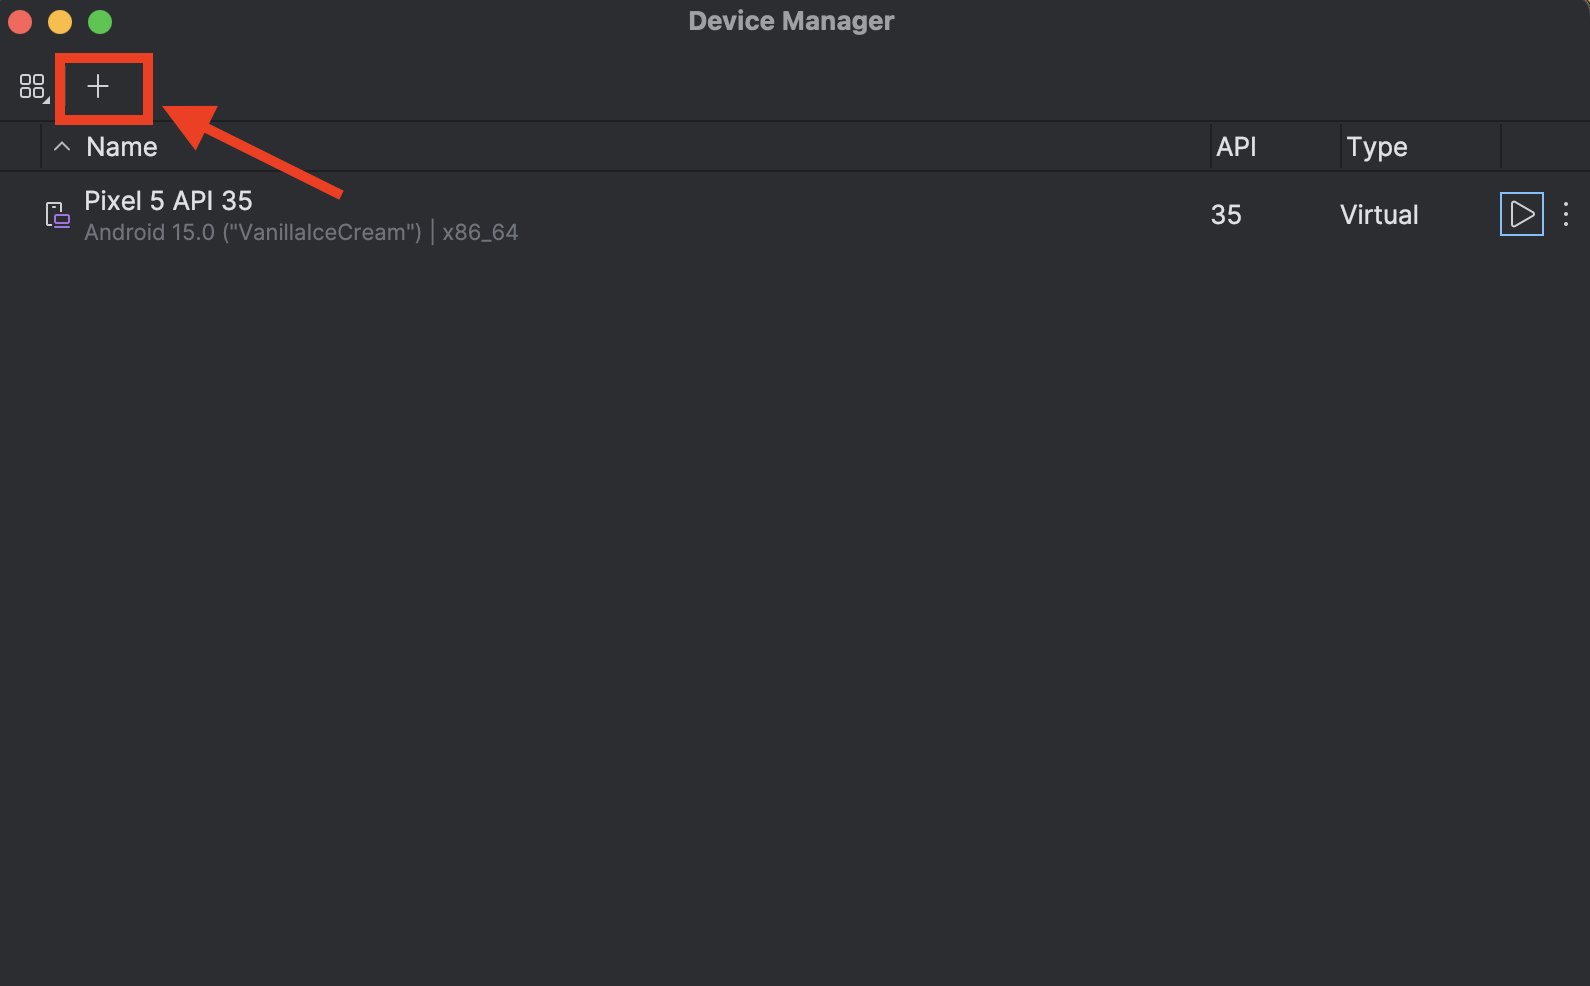
Choose the appropriate one from the list of all available devices and finish the process of setting up.
Launch the emulator.
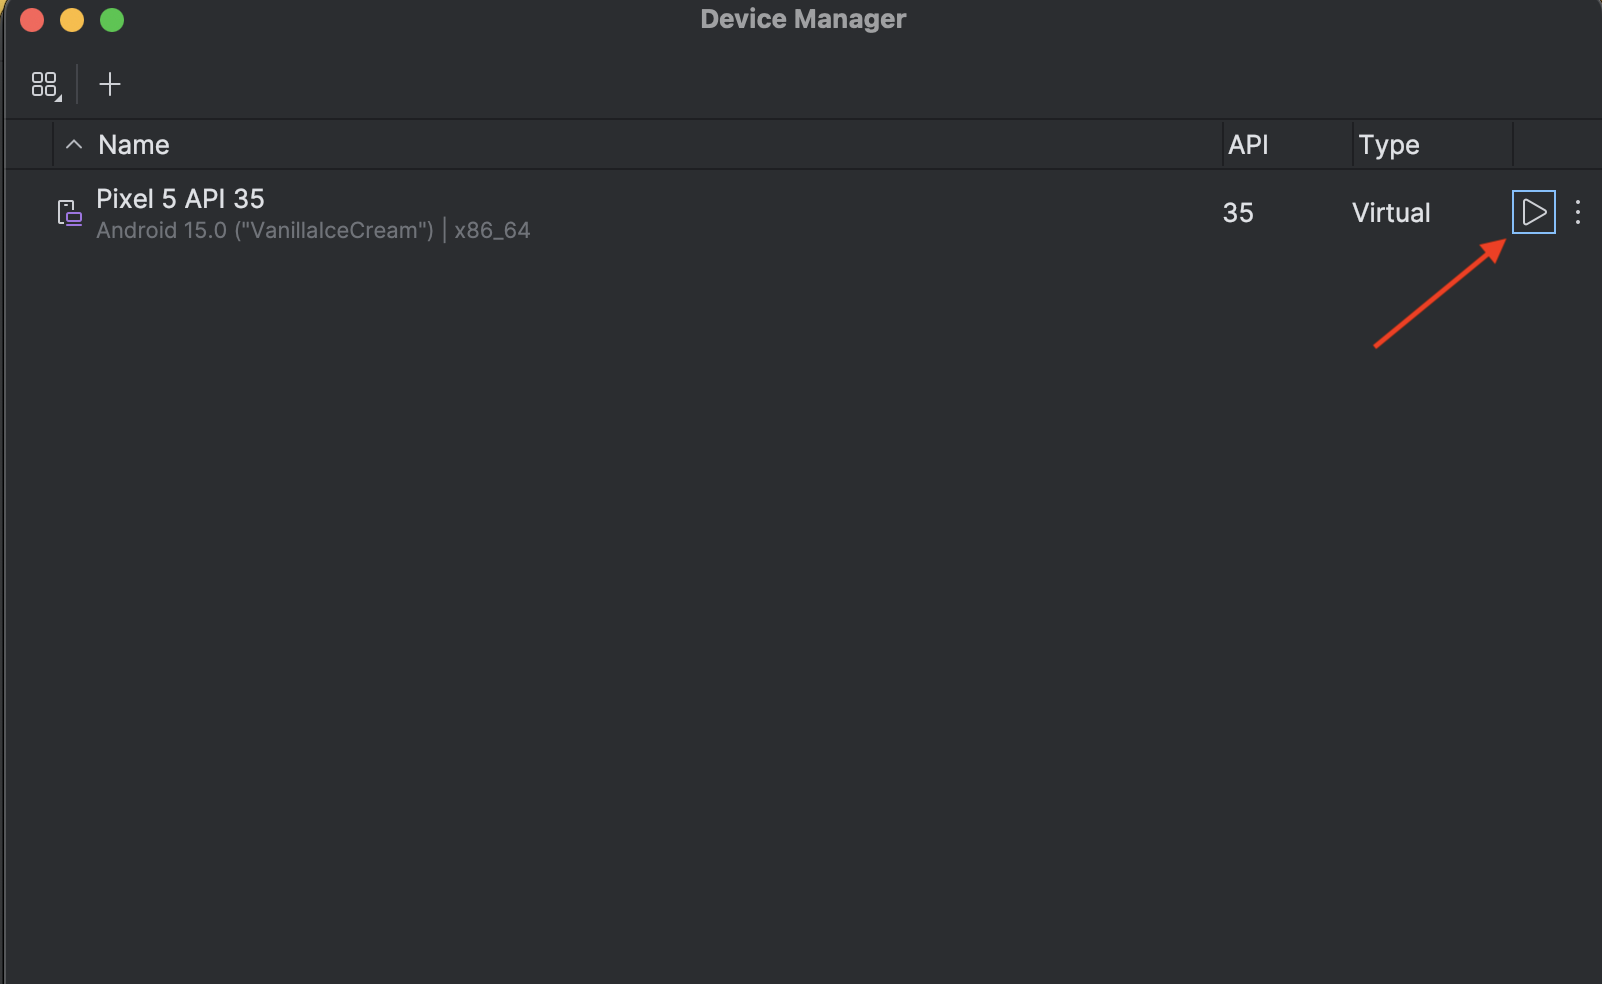
After Android installation emulator is ready to be used.
⚠️ Note: Additional steps fornativeapps:
Launch the emulator and download the application from the Play Market or download it from third-party resources.
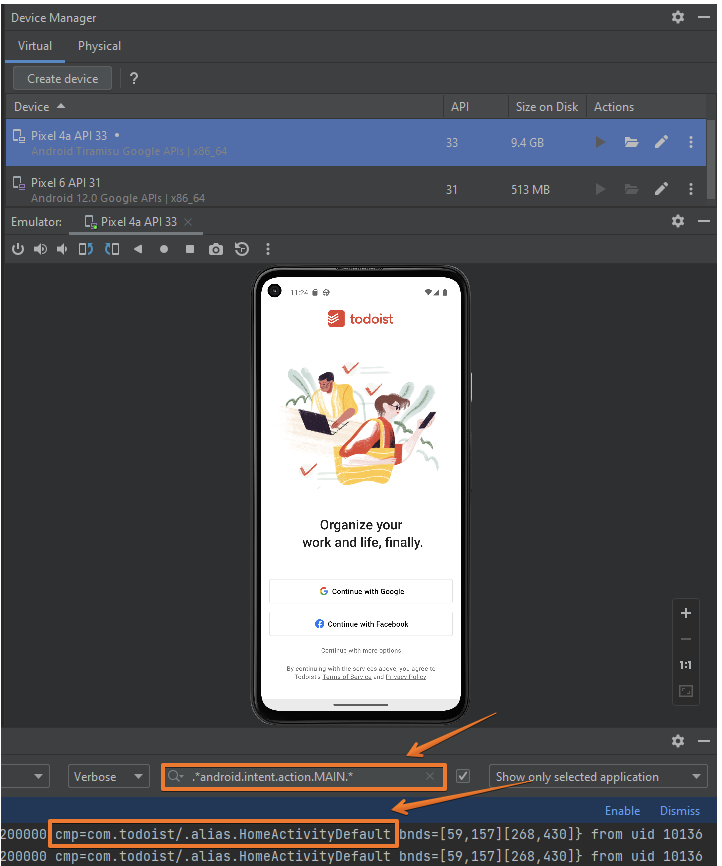
Run the downloaded application and open Logсat.
Clear logs on the left.
Enter the command in the search engine
.android.intent.action.MAIN.
Find in the logs the value
cmp=comWe need this value in the config file.
⚠️ About Mobile Browser Configuration
deviceName– field that represent the name of the emulator. It is setted up automatically by default as the name of the device and API version.platformVersion– version of the Android that is installed on the device.udid– Unique Device Identifier. Emulator-5554 is default UDID for an Android device.appPackage– app package name.appActivity– app activity that found in previous screenshot or if it does not work, then you can download the "apk info" application to the device and find an activity with the name MainActivity or HomeActivity.<deviceName>Pixel 5 API 31</deviceName> <platformVersion>15.0</platformVersion> <udid>emulator-5554</udid> <appPackage>com.todoist</appPackage> <appActivity>com.todoist/.alias.HomeActivityDefault</appActivity>
Launching iOS simulator
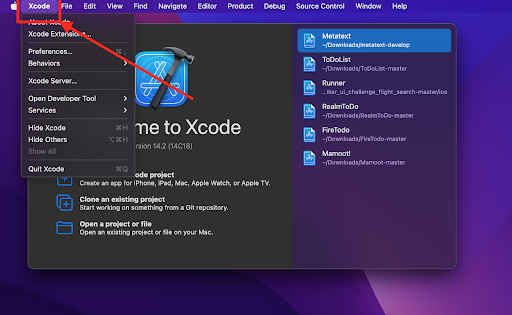
Download xcode.
Click on Xcode on toolbar.
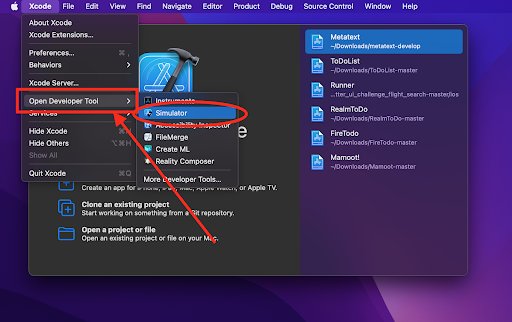
Click on
Open developer tooland there choose simulator.
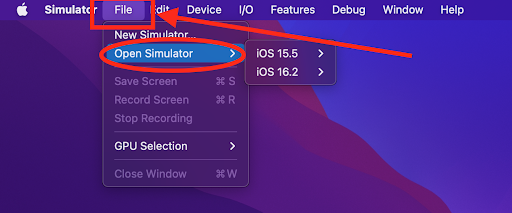
Click on
Fileand chooseOpen simulator. Choose iOS version and proper device. Click on that device.
After loading of the iOS simulator is ready to be used.
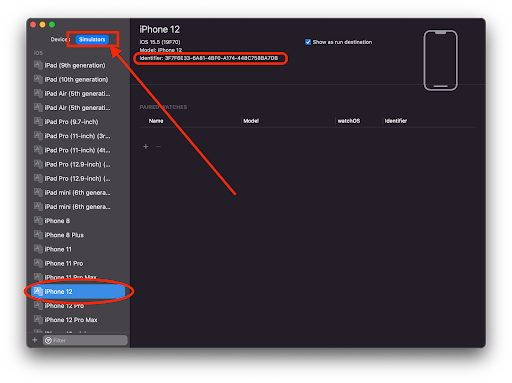
To get
UDIDof the iOS simulator you need to go back to Xcode. On the tool bar chooseWindowand choose theredevices and simulators.

Click on the
simulators, choose needed simulator and get itsUDID.
Simulator connection to Appium
Make sure that You have installed node. To connect Testlum to the simulator you need to download additional software – appium server.
After Appium installation install additional Appium driver
sudo appium driver install uiautomator2
And launch Appium with permission for chromedriver autodownload
appium --allow-insecure chromedriver_autodownload
Set up connecting in the config file in Testlum:
<connection>
   <appiumServer>
       <serverUrl>http://127.0.0.1:4723/</serverUrl>
   </appiumServer>
</connection>
After completing all the steps, you should see a similar result, which means you are ready to build tests for native applications.
appium --allow-insecure chromedriver_autodownload
[Appium] Welcome to Appium v2.15.0
[Appium] Non-default server args:
[Appium] {
  allowInsecure: [
    'chromedriver_autodownload'
  ]
}
[Appium] The autodetected Appium home path: /Users/bodyashah/.appium
[Appium] Attempting to load driver uiautomator2...
[Appium] Requiring driver at /Users/bodyashah/.appium/node_modules/appium-uiautomator2-driver/build/index.js
[Appium] AndroidUiautomator2Driver has been successfully loaded in 0.322s
[Appium] Appium REST http interface listener started on http://0.0.0.0:4723
[Appium] You can provide the following URLs in your client code to connect to this server:
	http://127.0.0.1:4723/ (only accessible from the same host)
	http://192.168.88.58:4723/
	http://192.168.64.1:4723/
[Appium] Available drivers:
[Appium]   - uiautomator2@3.10.0 (automationName 'UiAutomator2')
[Appium] No plugins have been installed. Use the "appium plugin" command to install the one(s) you want to use.
⚠️ For iOS testing, it is needed to download appium web driver agent.
- Choose the latest release download it and unzip it.
- Go to the Appium server. Right-click on it, choose “Show package content”.
- Open “Contents”.
- Open “Resources”.
- Open “App”.
- Open “Node modules”.
- Open “Appium”.
- Open “Node modules”.
- Here delete all old files in appium-webdriveragent and paste new ones from that folder which was downloaded in the first step.
To finish setting up just relaunch Appium server. Start Appium server, fill in the config and the iOS simulator is ready for the test. Type to search, ESC to discardType to search, ESC to discardType to search, ESC to discard.