Repository navigation
Quick Start Guide
Welcome to piBrick PocketCM5!
This guide walks you through the essential steps to prepare your hardware, assemble your device, boot Linux, and install the piBrick drivers.
If this is your first time using piBrick, follow the steps in order and check the safety notes before assembling or powering on your device.
Important: The Raspberry Pi Compute Module 5 (CM5), LiPo battery, and M.2 NVMe SSD are not included with the piBrick PocketCM5 kit. Check your package contents and prepare the required components before starting.
Before assembly, check that your package contains the expected parts:
- piBrick PocketCM5 Main Unit
- CM5 Heatsink + Fan, (thermal pads, screws, and spacers)
- Dual-band Wi-Fi antenna
- Supplied screw sets
- Hex tool and included 3D-printed parts
- JST connector cables and other supplied accessories
- Quick user manual
Package contents may vary by product version. Refer to your package documentation for the exact contents.
- Raspberry Pi Compute Module 5 (CM5) — choose a compatible model.
- 1S LiPo battery — a compatible single-cell battery with integrated PCM/BMS protection.
- M.2 NVMe SSD — optional if you plan to use another supported storage or boot configuration.
See 🧩 Required Components to Source Yourself for component specifications and compatibility information.
Read these precautions before handling the hardware.
- Disconnect all power before installing or removing the CM5.
- Use appropriate electrostatic discharge (ESD) precautions.
- Handle FPC cables and connectors carefully. Fully seat connectors without forcing or sharply bending the cables.
- Use only a suitable, high-quality 1S LiPo battery with integrated PCM/BMS protection.
- Never use a damaged or swollen battery, reverse its polarity, or short its terminals.
- Stop using the device immediately if the battery becomes excessively hot or you notice smoke or an unusual odor.
- Do not overtighten screws or force them into mounting points.
Battery warning: Verify battery voltage, connector orientation, and polarity against the board documentation before connecting it. Wire colors alone are not sufficient to establish polarity.
Follow these steps to install the main components.
- Open the enclosure. Follow the Case Opening Guide before disassembling your device.
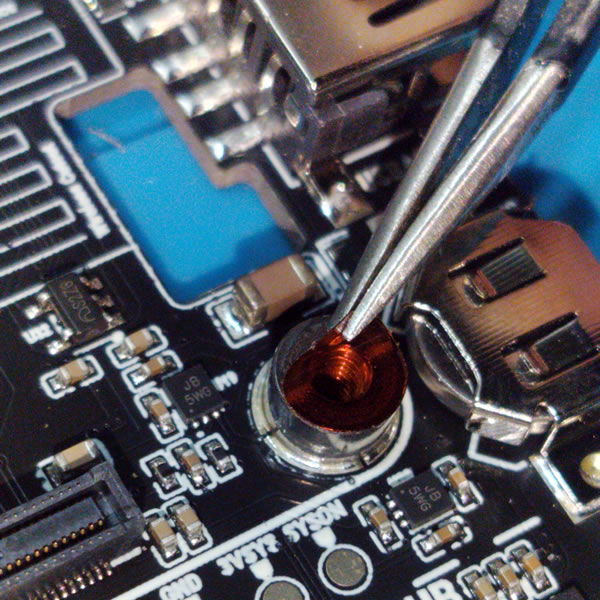
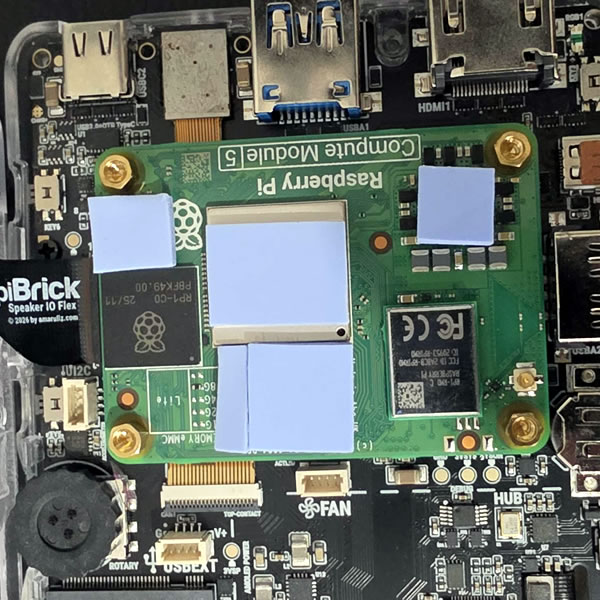
- Install the CM5. With power disconnected (don't forget to remove kapton tape - see Photo-1), carefully fit the Raspberry Pi Compute Module 5 onto the piBrick MainBoard.
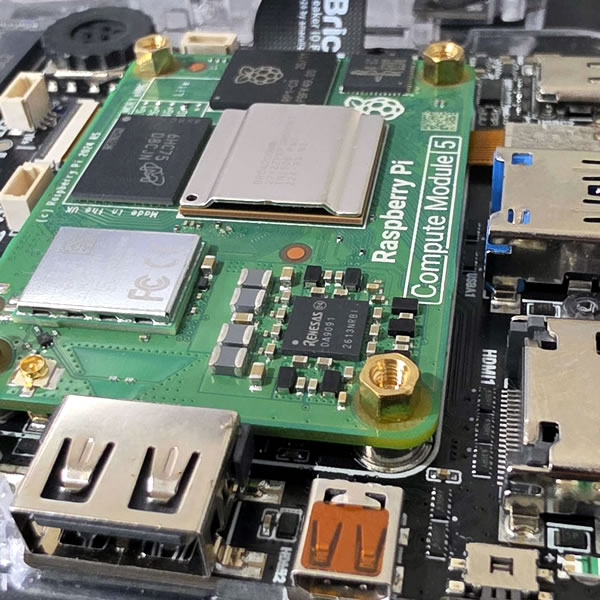
- Prepare the heatsink. Use the supplied hex tool to install the hex spacer from the heatsink.
- Install the thermal pads and heatsink. Position the thermal pads correctly and secure the heatsink using the screws supplied with it (Use short screws provided on heatsink box).
- Remove the battery holder. Unscrew and set it aside.
- Position the battery. Place a compatible battery in the battery compartment and reinstall the holder.
- Connect the battery. Connect the battery cable to the connector at the bottom-left of the piBrick MainBoard, after verifying the connector orientation and polarity.
- Close the enclosure. Ensure that cables are properly routed and not trapped or pinched before closing the case.
For detailed disassembly instructions, watch the Case Opening Guide.
| Remove Kapton Tape | CM5 Position |
 |
 |
| Brass Hex Spacer | - |
 |
The supplied quick-start procedure uses a microSD card for the initial operating system setup.
- Choose a Linux operating system image compatible with your Raspberry Pi CM5 configuration.
- Flash the image to a microSD card using an appropriate imaging tool.
- Insert the microSD card into your piBrick.
- Power on the device.
- Complete the operating system's initial setup.
Note: CM5 modules with built-in eMMC storage may require a different preparation or boot configuration. See 💽 Installing an Operating System on CM5 eMMC for additional instructions.
After booting Linux, install the piBrick drivers to enable the supported hardware features.
You can open a terminal directly on the device or connect remotely over SSH.
Run the following commands:
cd ~
git clone https://github.com/amarullz/pibrick-drivers.git
cd pibrick-drivers
bash install.sh
Follow the installer's prompts and restart your piBrick if requested.
If you cannot use the built-in display or keyboard yet, you can access the device through one of these methods, where supported:
- SSH
- An external display and keyboard connected through HDMI and USB
- Raspberry Pi Connect
If you don't have access to SSH, an HDMI display, or Raspberry Pi Connect, you can still access your piBrick terminal through its built-in USB-to-serial interface. See the 🖥️ USB Serial Console Guide for setup instructions. You can also use Online tools 🔌piBrick Serial Shell on https://serial.pibrick.net/ (Repository)
For driver source code and updates, visit the piBrick Drivers repository.
After installation and any requested restart, verify the basic functions of your piBrick.
- The system boots successfully.
- The display shows an image correctly.
- Touch input works as expected.
- The physical keyboard and trackpad respond.
- The battery and charging functions behave normally.
- Wi-Fi and other required connectivity features work.
- Audio and other installed peripherals work as expected.
Some functions may depend on your operating system, driver version, and installed hardware.
If something does not work, consult the Troubleshooting guide.
The PocketCM5 keyboard includes several useful shortcuts.
- Press SYM to access the symbol layer.
- Tap SYM for one-shot input.
- Hold SYM to keep the symbol layer active.
- Double-tap SYM to access Layer 2.
- Press SYM, then Right Shift, to access Layer 3.
- Tap and hold BACK to switch between modes.
- A blinking indicator means arrow mode.
- A steady indicator means mouse mode.
Use Vial to customize key mappings.
Keyboard firmware and the recovery keymap are available in the piBrick PocketCM5 Keyboard Firmware repository.
- 🔌 piBrick Serial Shell - Browser based piBrick Serial Shell (Repository)
- 🐙 piBrick GitHub Repository — Main project repository.
- ⚓ piBrick Linux Drivers — Display, touchscreen, power, and related drivers.
- ⌨️ Keyboard Firmware — Keyboard firmware and recovery resources.
- 🔬 OSHWLab PCB & Schematics — Mainboard PCB design and schematics.
- 🛟 piBrick Discord — Community help and project updates.
- 🛍️ piBrick Tindie Store — Available products and kits.
- 📺 YouTube — Demonstrations and project videos.
If you encounter problems during assembly or setup:
- Recheck the relevant assembly and installation steps.
- Verify that your components are compatible with your hardware revision.
- Review the Troubleshooting page.
- Ask for help in the piBrick Discord community.
This guide is based on the piBrick PocketCM5 Quick Start Guide and Package Guide & Safety documentation. Instructions and supported configurations may change as the hardware and software evolve.