-
Notifications
You must be signed in to change notification settings - Fork 16
Administration
Availability of this interface depends on config settings and authorisation method you've chosen.
- For AUTH_METHOD_CROWD and AUTH_METHOD_JIRA authorisation methods administration interface will be enabled for users in group 'gitosis-admin' by default. Name of the group may be changed in .include/Acl.php file:
uyga@greybox ~/dev/codeisok (master) $ grep 'const GITOSIS_ADMIN_GROUP' .include/Acl.php
    const GITOSIS_ADMIN_GROUP = 'gitosis-admin';
uyga@greybox ~/dev/codeisok (master) $
In few words: those who have 'gitosis-admin' group in JIRA are admins.
-
For AUTH_METHOD_CONFIG authorisation method administration interface will be enabled when configured user has 'admin' => true option value set in
\GitPHP_Config::CONFIG_AUTH_USERconstant in .config/gitphp.conf.php file. -
AUTH_METHOD_REDMINE authorisation method doesn't intend to have administration interface enabled yet. But all contributions are welcomed.
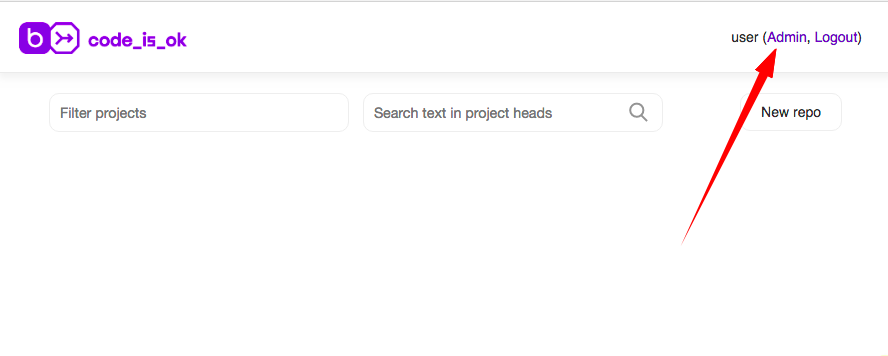
Users who have permissions to administer codeisok will have 'Admin' link in top menu next to username and Logout link.

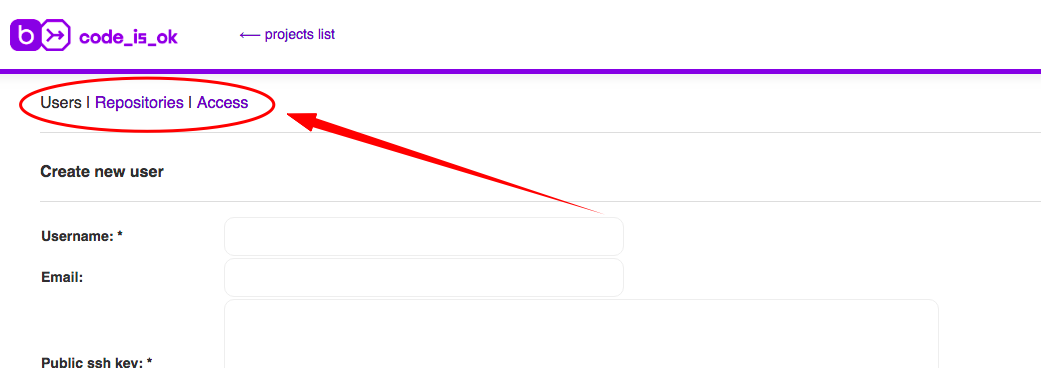
There are 3 things to configure trough administration interface: Users, Repositories and Access. In this sections administrators can add, edit and delete all corresponding objects in the system.

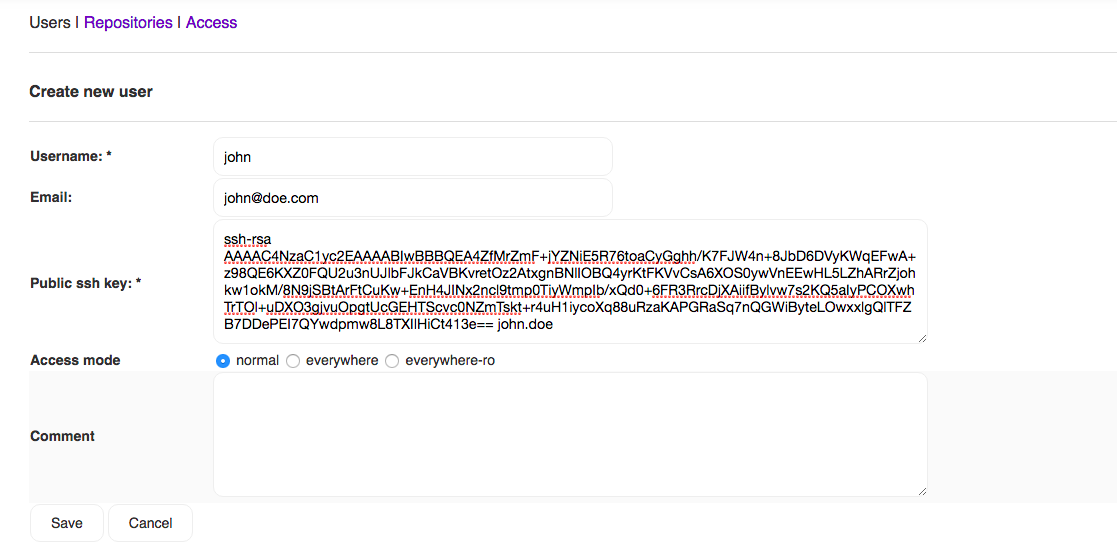
To be able to clone a repository and work with it administrator has to create a user and give them appropriate permissions.

Fields to be filled:
- Username - the name of user. Name doesn't need to be ssh compliant as for clone/pull/push/etc universal 'git' user will be used.
- Email - email of the user.
- Public ssh key - codeisok authorises users with their ssh public keys. Refer to user manual if you don't know what ssh keys are.
- Access mode - option to identify what is permitted for user. Modes are:
- Normal. When this mode is enabled for user permissions are based on "Access" settings in the interface. By default nothing is permitted and admin should manage access on user<->repository basis.
- Everywhere. Users who have this option set will have read/write access to all repositories in the system. Except repos with
Restricted access = Yessetting. - Everywhere-ro. The same as above but read-only access only.
To edit or delete an user in the system, you need to find that user in the list and choose appropriate action in "Actions" table column.

There are two ways to create a repository by default: by administrator or by users. If you'd like to disallow your users to create new repositories themselves, change in .config/gitphp.conf.php constant value into 'false':
uyga@greybox ~/dev/codeisok (master) $ git grep ALLOW_USER_CREATE_REPOS .config/gitphp.conf.php
.config/gitphp.conf.php:    \GitPHP_Config::ALLOW_USER_CREATE_REPOS => true,
uyga@greybox ~/dev/codeisok (master) $
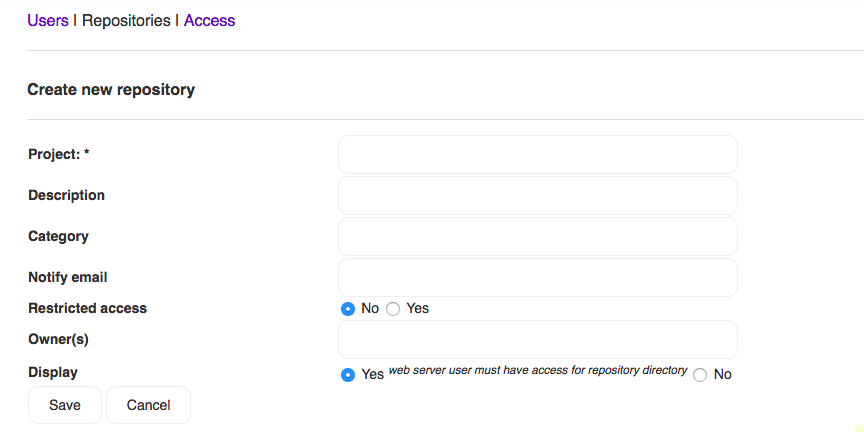
To create a repository one needs to fill appropriate fields and save changes.

Fields to be filled:
- Project - project name. You new repository will get .git name.
- Description - any text describing the repo. Text will be displayed in repos list for everyone.
- Category - repositories list supports grouping. Repos in one category will be grouped to one block in the list.
- Notify email - all changes made with repository as well as code reviews will be sent to this email address.
- Restricted access - option to set access mode for new repository. Values are:
- No. Permissions are based on "Normal" user mode and user<->repository access basis. Users with "Everywhere/Everywhere-ro" access mode will automatically have access to such repositories.
- Yes. Access is based on "Access" configuration settings based on user<->repository relations. Users with "Everywhere/Everywhere-ro" access mode will NOT have access to such repositories.
- Owner(s) - who is owner of the repo. By default owner is set as a current logged user.
- Display - should the tool display this repository in the list for everyone or not. Values are:
- Yes. Repository will be displayed in the list and accessible trough web-interface.
- No. Repository will be hidden in the web-interface.
To edit an repository, you need to find that repository in the list and choose appropriate action in "Actions" table column.

Imagine you already have a repo you would like to add into codeisok tool. It's easy, just follow these steps:
- Create new repo in codeisok interface. It's doesn't matter how to do this - via admin interface or from projects list. Newly created repo will be empty.
- Grant permissions for new repo for those who will work with it. If you are going to push all changes you already have, you'll require "write" permissions to do so.
- Go to your existing repo folder and change origin url (or add additional one).
- Push your repo history into new added remote url.
- Voila, all done. Repo is added.
uyga@greybox ~/dev  $ git clone https://github.com/badoo/soft-mocks.git
Cloning into 'soft-mocks'...
remote: Counting objects: 1224, done.
remote: Compressing objects: 100% (10/10), done.
remote: Total 1224 (delta 1), reused 4 (delta 1), pack-reused 1212
Receiving objects: 100% (1224/1224), 407.21 KiB | 0 bytes/s, done.
Resolving deltas: 100% (517/517), done.
Checking connectivity... done.
uyga@greybox ~/dev  $ cd soft-mocks/
uyga@greybox ~/dev/soft-mocks (master) $ git remote set-url origin git@localhost:soft-mocks.git
uyga@greybox ~/dev/soft-mocks (master) $ git push origin master
Counting objects: 1204, done.
Delta compression using up to 4 threads.
Compressing objects: 100% (587/587), done.
Writing objects: 100% (1204/1204), 377.42 KiB | 0 bytes/s, done.
Total 1204 (delta 511), reused 1204 (delta 511)
To git@localhost:sm.git
 * [new branch]      master -> master
uyga@greybox ~/dev/soft-mocks (master) $
Access management in codeisok is based on simple things:
- Rules apply to users with "Access mode = Normal" setting.
- By default noone has access to repository. Unless repository has "Restricted access = No" setting enabled.
- User can have read or write permission to repository.
Access management can be displayed in 2 modes:
-
By user. It this more the list is a users list with options available to set. Administrator can choose repository (multiple selection is supported) and grant or restrict access to that repo.

-
By repository. In this mode the list is a repositories list with options to set. Administrator can choose user (multiple selection is supported) and grant or restrict access to that user.
